


Wood Siding Pumpkin
Make a pumpkin wall hanger using old wood siding or similar scrap wood from your wood pile. My fall decor has been created from a variety of old and recycled materials. I like the fact that I am keeping something out of the landfill and giving something old a new purpose. Besides, I think natural or rustic elements pull the harvest season together. This project is pretty much a freebie. You probably have most of the materials and supplies needed, but if you do need to buy something it will most likely only cost you pennies.
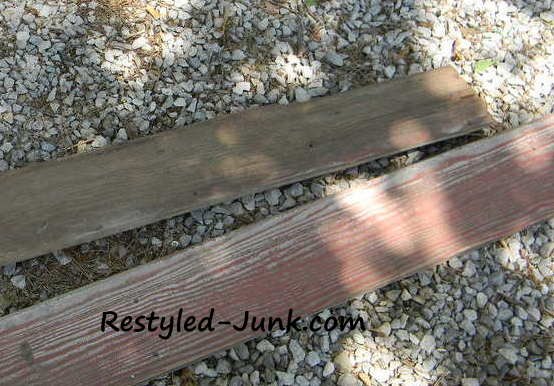
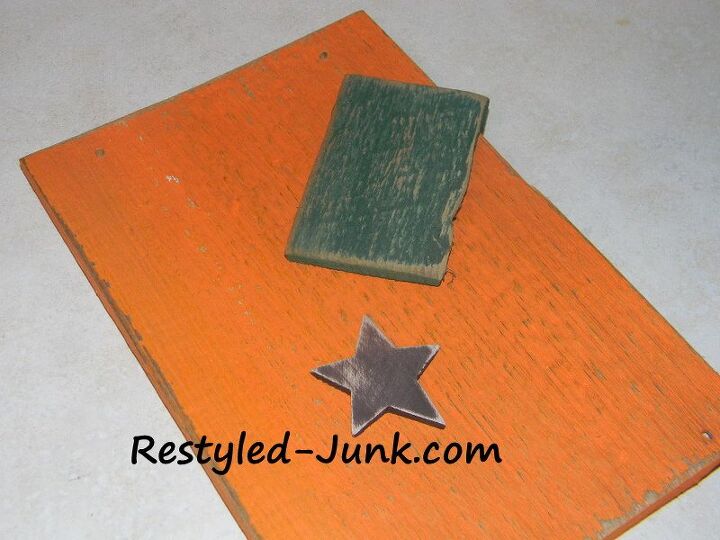
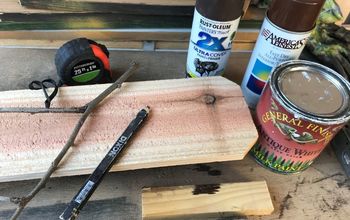
Cut an 8-inch length from old, weathered, wood siding using a jig saw or miter saw. My siding was 5 1/4-inches wide, but siding with broken edges can also be used. If siding is not available, thin paneling or old fence boards can be substituted. This will be your pumpkin's body. From the same type of wood or paneling, cut a 2-inch wide by 3-inch long rectangle for the stem using a jig saw.
Drill holes in the pumpkin body for the hanger 1/2" down and 1" in from one short edge.
Paint both sides of the pumpkin body using orange acrylic paint. I like to paint the back of items that may be hung on a fence, peg, chair or some other perch where the back may be visible. Paint both sides of the stem using green acrylic paint. Paint a 1 1/2" wood star using brown acrylic paint. Paint additional coats for complete coverage. Allow the paint to dry. Sand the pieces to distress.
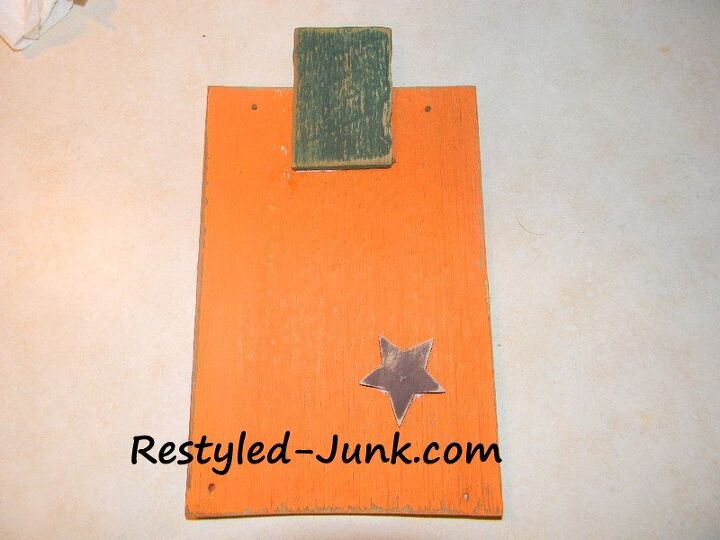
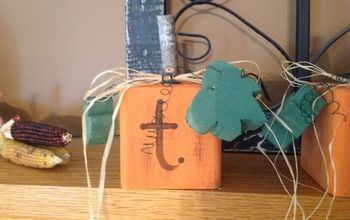
Lay the stem on your work surface with the back side facing up. Rotate the stem so that the short edges are at the top and bottom. Apply craft glue to the bottom 1 1/2 inches of the stem. Center the stem at the top center of the pumpkin, overlapping the end with the glue on the pumpkin's front. Allow the remaining portion of the stem to extend above the pumpkin.
Apply craft glue to the back of the star. Place it on the front of the pumpkin, a couple inches above the bottom and off center.
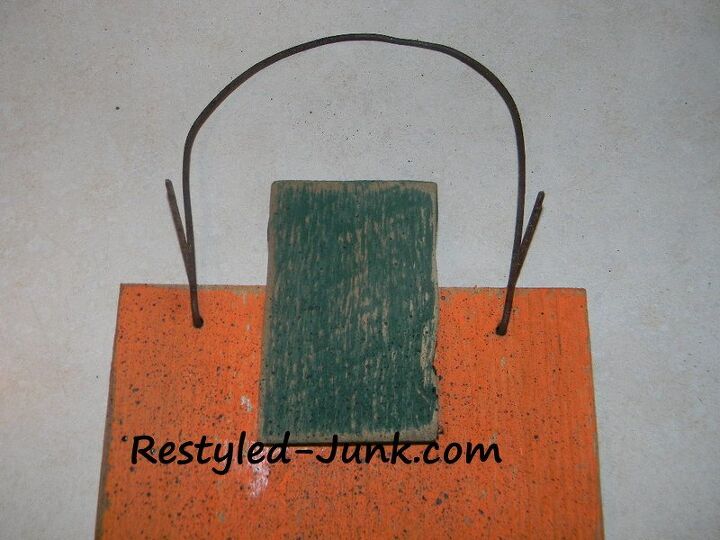
Cut a 15-inch length of rusty baling wire using wire cutters. Insert the ends of the wire through the drilled holes from the front of the pumpkin to the back. Pull the ends through approximately 2 inches. Bend the wire ends up and squeeze to secure using needle nose pliers.
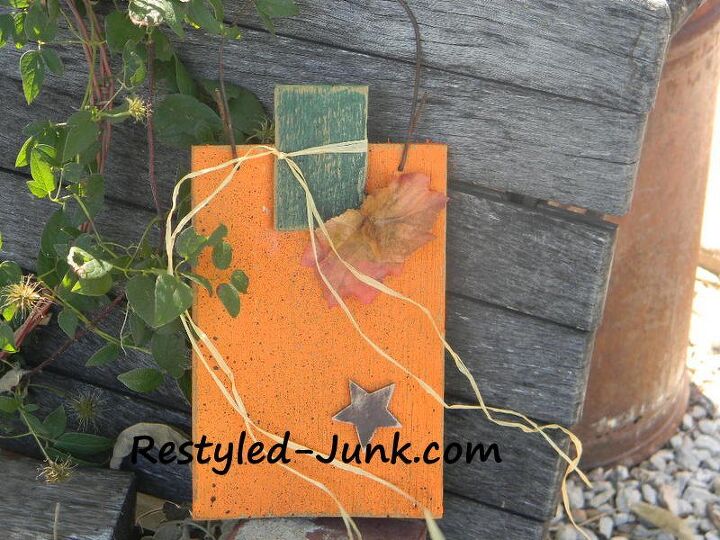
Pour a small amount of black acrylic paint on a paper plate. Dip an old toothbrush in the paint. With the paint brush facing down, hold it over your pumpkin. Run your thumbnail over the bristles to splatter the paint onto the pumpkin's surface. Repeat until the desired amount of splatter is reached. Allow the paint and glue to dry.
Add fall leaves and raffia tied around the stem for embellishments.


Frequently asked questions
Have a question about this project?