


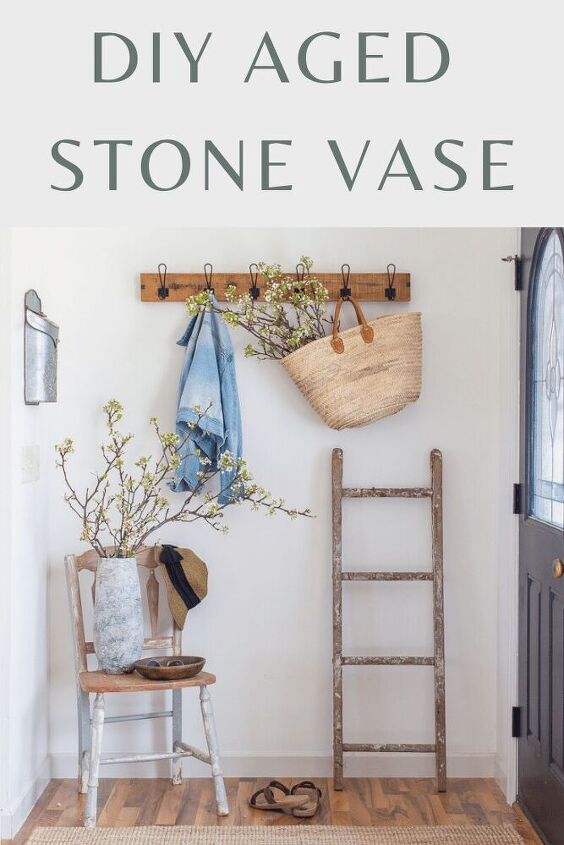
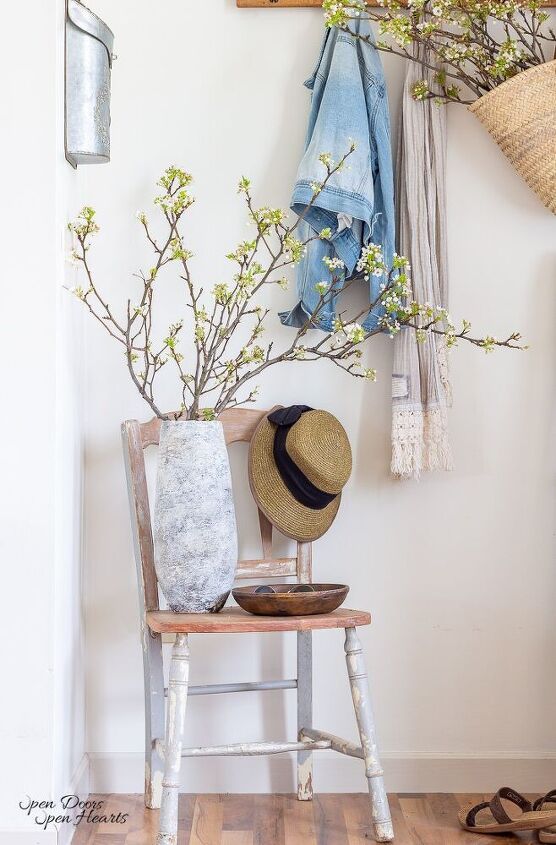
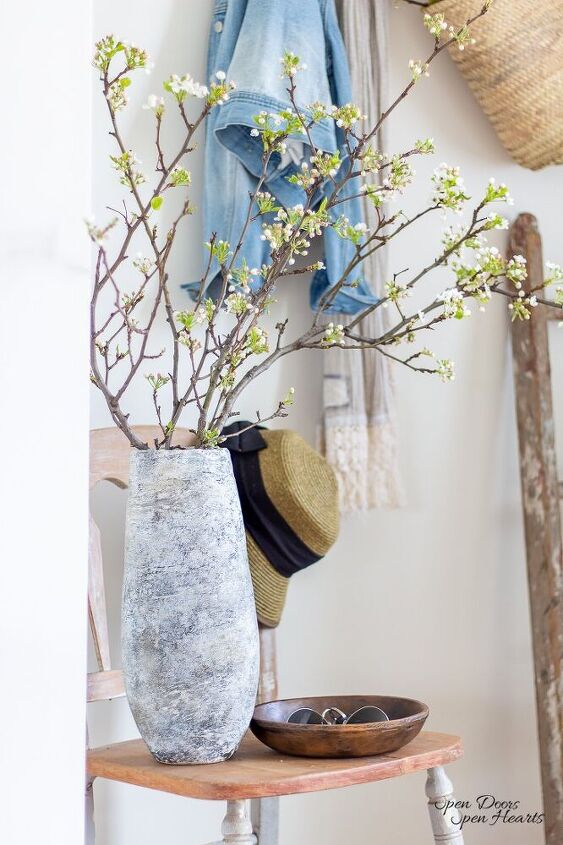
Aged Stone Vase | A Stunning and Easy DIY
Have you seen an aged stone vase recently? I feel like I see them everywhere these days, and I’m all about it! I love all things aged and vintage, and that includes vases.
Places I’ve Found Aged Stone Vases
The first one I found was at my favorite vintage shop in town.
I loved it! But it was $75!
Definitely worth every penny, but unfortunately it was beyond my budget for a vintage vase.
Then I discovered Pottery Barn has a gorgeous collection of weathered stone vases. But again I couldn’t justify spending that much money on a vase.
So I did some research and discovered I can turn a regular vase into an aged stone vase!
The Back Story
I’m gonna be honest, I tried this a couple of times before I got it to work. Mainly because I’m a klutz.
The First Vase
The first vase was FREE from Joann Fabrics.
It had a round body and a LONG skinny neck. I tried to cut the neck off using a glass cutter.
Long story short it cracked all over. It was like one of those “Pinterest Nailed It” memes, but before the project was even finished haha!
The Second Aged Stone Vase Attempt
Then one day while I was perusing the clearance rack at Kroger I found a vase in the EXACT shape of the first vase but without the neck.
It was only $2!
I felt like it was meant to be!
Well, I dropped it and it shattered before I ever got started!
No, I’m not making this up. This is all 100% my hot mess life haha!
Third Times a Charm
At this point, I was determined to do this DIY.
So I cleaned up my glass mess and walked straight to the back storage room and started looking at the vases I had down there.
All the way in the back of one of the shelves I saw 2 vases.
I bought them at Pier 1 a few years ago on clearance. But they were in the back of the shelf because no matter how hard I tried I just couldn’t make myself love them lately.
So I figured I had nothing to lose if I ruined these vases too.
With my current track record, my chances of breaking these vases was pretty high haha!
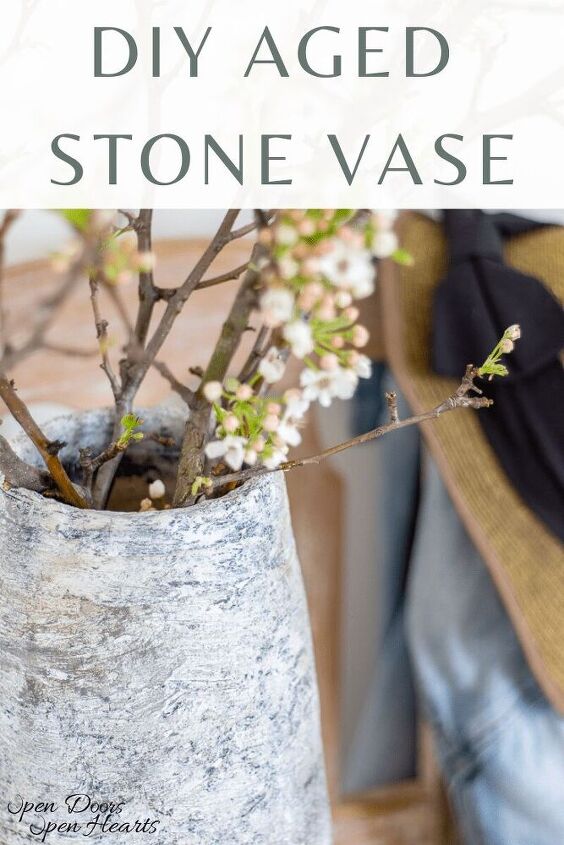
How Do You Add Texture to a Vase?
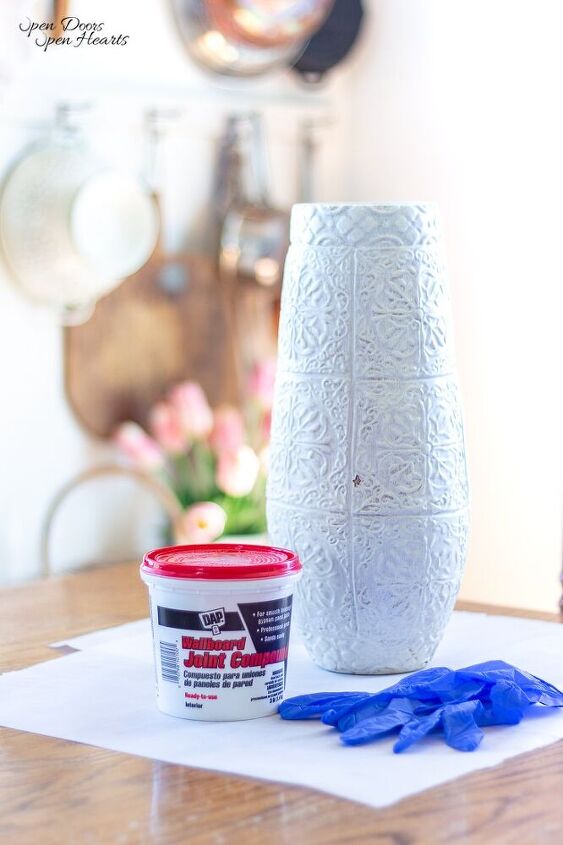
Joint Compound
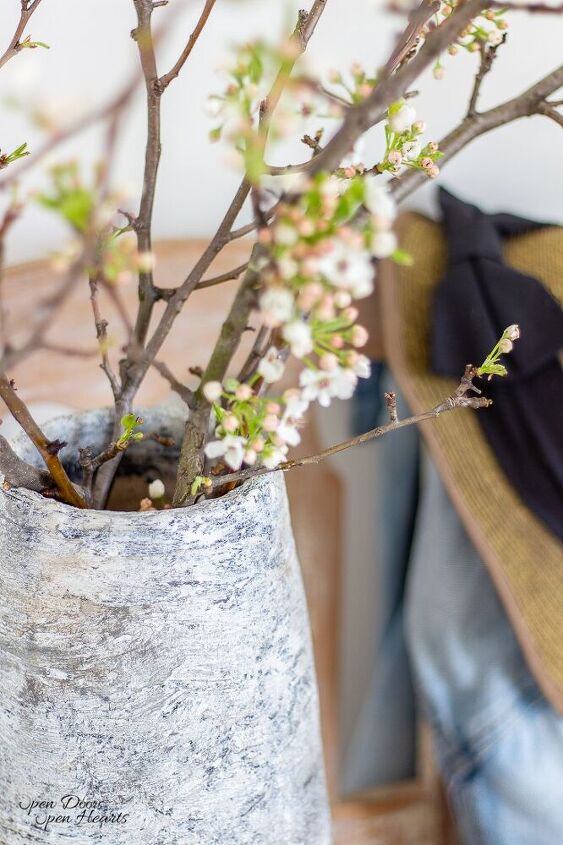
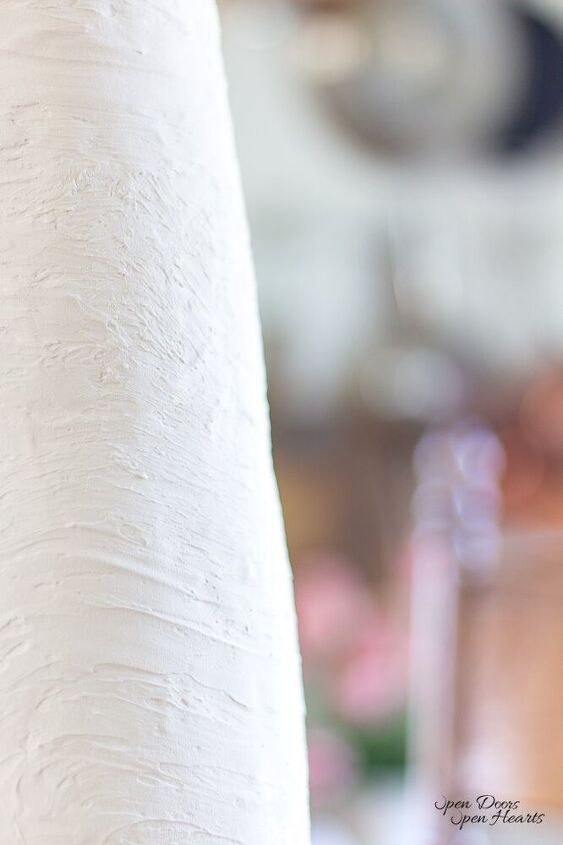
In this tutorial the way I added texture to my aged stone vase DIY was by using joint compound.
It is fairly thick and therefore when it dries it maintains it’s shape.
When I smeared the joint compound all over the vase I intentionally was very whimsical and left finger marks all over.
I didn’t want it to have a perfect finish. I wanted the vase to have texture with character and imperfections.
This is the foundation for making the vase look aged.
How Do You Make a Vase Look Old?
Dirt
Yup. You read that right.
I used dirt to help make the vase look old.
When things get older they will almost always be weathered and dirty to some degree. Depending on what I find when I go to the flea market/thrifting, I’ll often just give the piece a good wipe down.
It only took me ruining the patina on one treasure for me to learn what MUST be scrubbed clean and what just needs a wipe down.
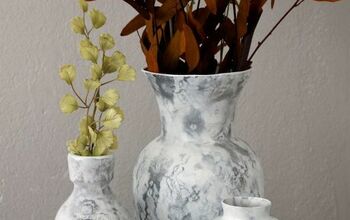
Sanding While Paint is Wet
Another technique I used to help make the vases look old and aged was grabbing sand paper and using it while the paint was still a little bit wet.
By doing that I was able to get that aged chipping effect. It took off larger sections of paint which I liked.
Supplies You’ll Need
- Vase
- Joint Compound/Vinyl Spackling
- Latex Gloves
- Parchment Paper
- Acrylic Paint (Color of your choosing)
- Sandpaper
- Dirt
Instructions
Step 1.
The first thing I did when I brought the vases upstairs was wipe them down.
They were a bit dusty, and I wanted to make sure I had a clean surface for the joint compound to adhere to.
I also gently rubbed one of the vases with 120 grit sandpaper.
The only reason I didn’t do both vases was because I forgot. If I had remembered in time I would have done it to both vases.
Step 2.
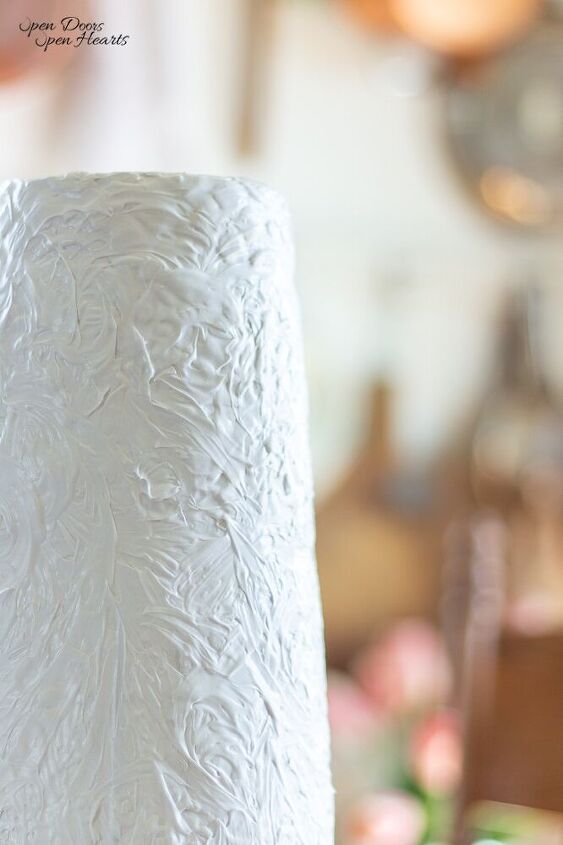
After the vases were ready for the joint compound I set them on some parchment paper and began smearing the joint compound all over them.
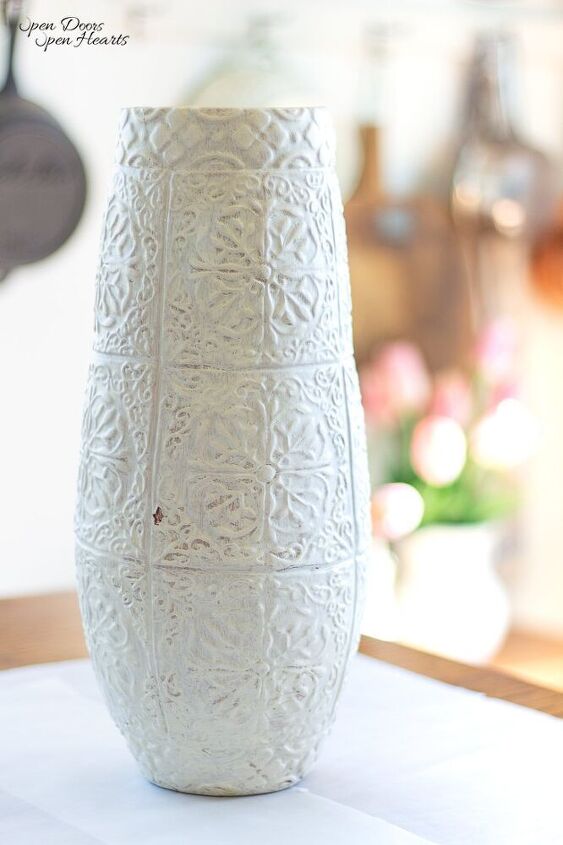
As you can tell these vases had a little textured detail on them. I wanted to cover this up and create a new texture.
To do this I ended up putting 3 coats of joint compound/vinyl spackling on the vases.
This is also why I switched to vinyl spackling. I used up all the joint compound we had haha!
If you were working with a smooth surface I assume you could get away with just 2 coats.
Also, while I was smearing this around I tried to make sure the final pass was always leaving horizontal finger marks on the vase.
I let it dry for 12 hours between each application.
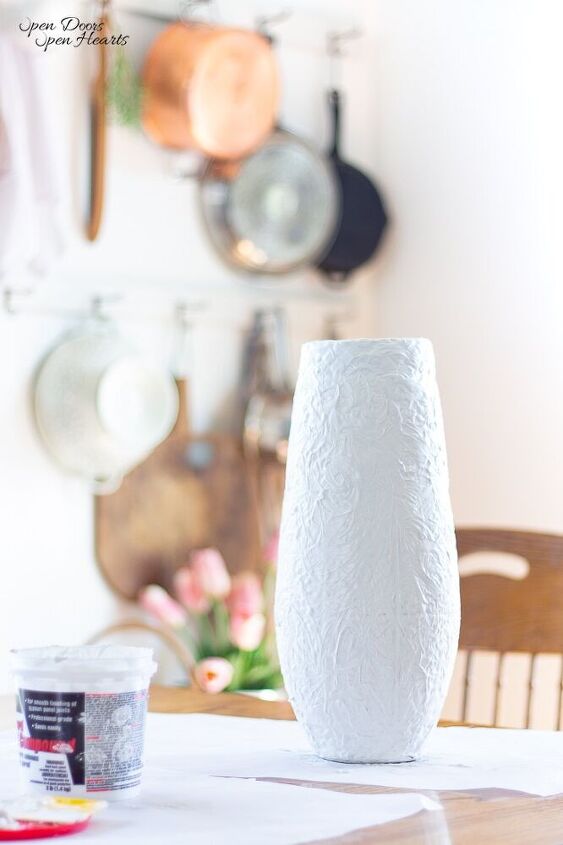
Step 3.
After the 3rd coat was dry I did another quick sanding to just knock off the jagged edges.
I didn’t want to sand it down too much because I really wanted the texture.
Like I mentioned before, the texture is the foundation for helping make the vase look aged.
Step 4.
Now it was time to paint.
First I completely covered the vases with black and a dark gray acrylic paint. Before the paint was dry I did some sanding.
For this sanding, I specifically focused on the bottom and the top where you’d find the most natural wear and tear on an authentic aged stone vase.
Then I began painting the vase with white and light brown paint. No real system or plan. I just started painting lightly. I didn’t want the black to get completely covered.
Step 5.
After the paint was dry, I took some dirt and began rubbing it all over the vase.
I recommend rubbing it on lightly. But I will also say you can easily wipe the dirt off if you feel like it went on too dark.
Simply grab a clean dry rag and begin wiping that section down.
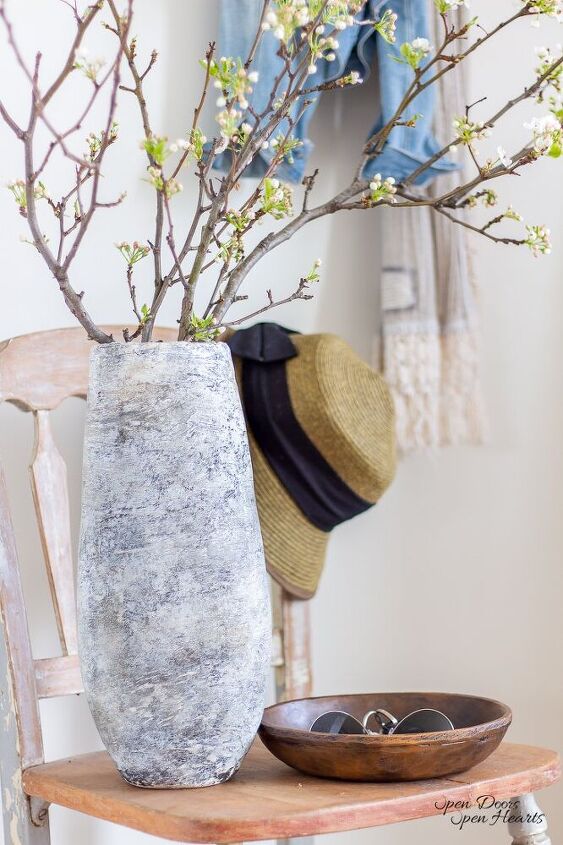
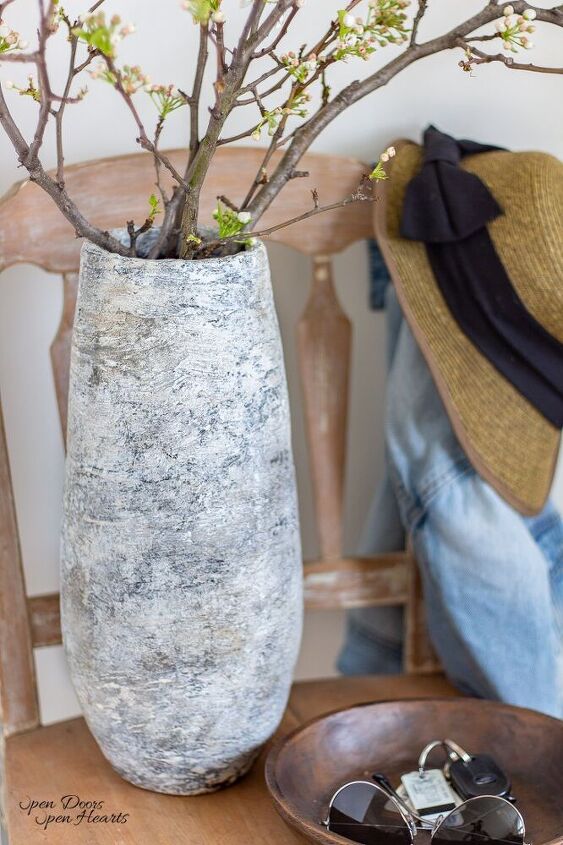
I did this final step until I the vases looked the way I wanted them to look!
That’s it!
This project took me a few days, but that was because of dry time. Actual worktime probably amounted to less than 1 hour!
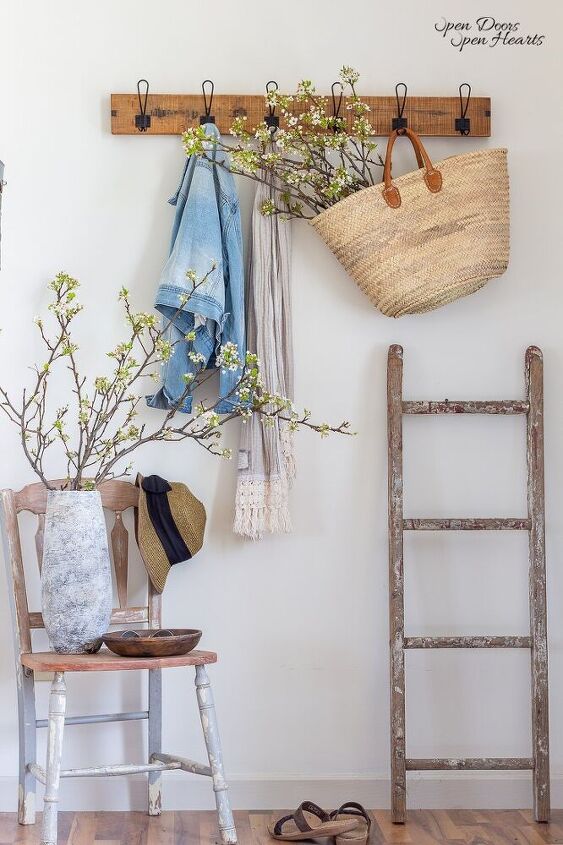
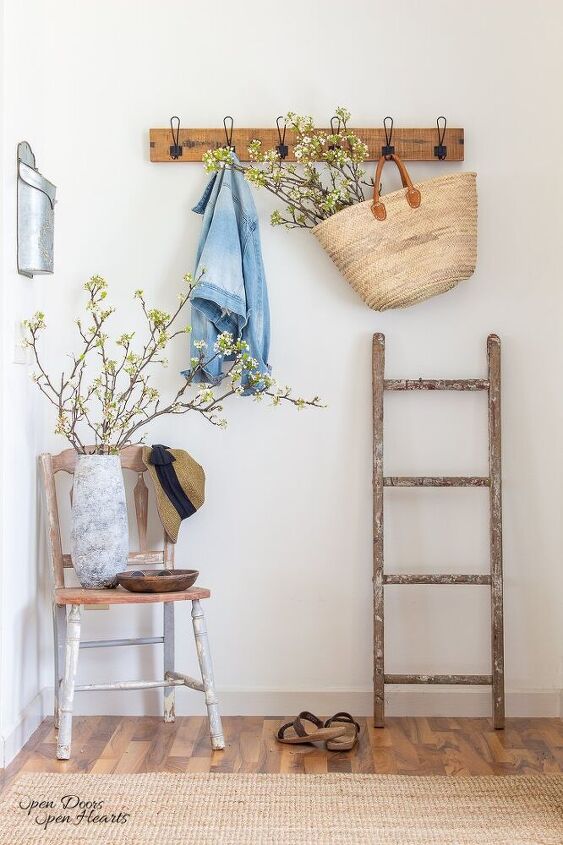
This is a super easy DIY that adds so much character and charm to the space you put it in!
AND
It’s a one of a kind!
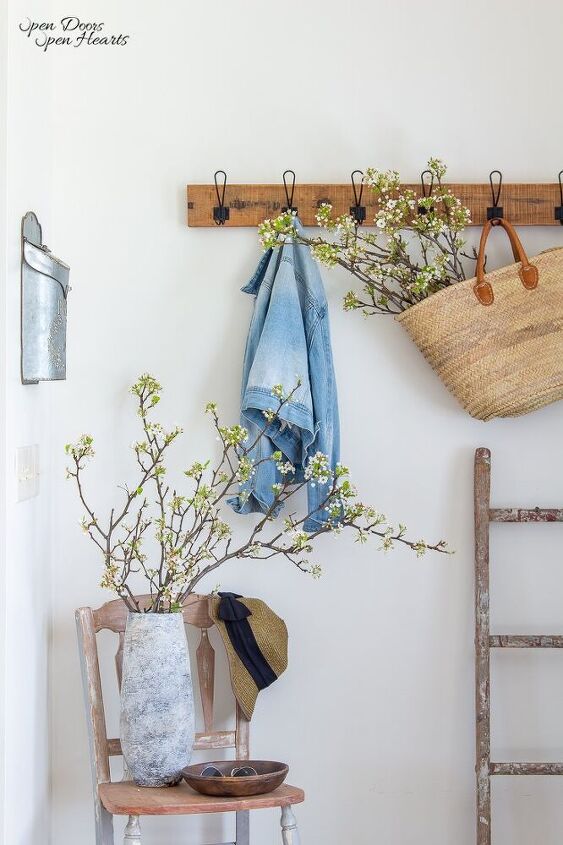
Pin for Later!
Thanks so much for stopping by! Don’t forget to follow along on Pinterest, Facebook, and Instagram! Also, sign up to be a part of our newsletter so you never miss a post! Have a great week! XoXo
If you're interested in more DIY projects head over to the blog and check out all the fun DIY's I've done!
Open Your Doors,
Aliya

Comments
Join the conversation
-
Wow, this is absolutely stunning!


Frequently asked questions
Have a question about this project?
I just want to let you know that "YOU" ARE NOT THE ONLY KLUTZ OUT HERE!! I BREAK THINGS ALL THE TIME. I DROP THINGS ALL THE TIME, I TRIP OVER THINGS ALL THE TIME. BUT I'M NOT AS BAD AS MY SISTER, BLESS HER HEART. SHE RUNS INTO WALLS!! THE SAD PART ABOUT IT, IS SHE ALWAYS HITS THE CORNER OF THE WALL AS SHE'S TURNING THE CORNER. SHE'LL HIT HER HEAD CAUSING A WOUND AND THEN A SCAR ON HER FOREHEAD. SADLY SHE'S BEEN DOING THIS SINCE SHE WAS A PRE-TEEN AND SHE IS 63 NOW. OH SHE ALSO WALKS INTO SLIDING GLASS DOORS! THANK GOODNESS THEY DON'T BREAK!!! THEY JUST LEAVE KNOTS! WHEN SHE GOT MARRIED SHE WOULD LEAVE STREAKS ON THE GLASS JUST SO SHE WOULDN'T DO IT ANYMORE. BUT SHE MARRIED A NAVAL OFFICER WHO OF COURSE WANTED PRISTINE CRYSTAL CLEAR GLASS. BLESS HER HEART. I JUST WANTED YOU NOT TO FEEL LIKE THE LONE RANGER. WHEN IT COMES TO OOPS's.... They happen to the best of us. As long as you don't stop trying, then you're good! People that give up when things go wrong those are the quitters. You are not a quitter. I give you kudos for all you went through. You kept trying until you produce this incredibly beautiful piece of art. My question is can I use glass?May I use a glass vase to start with and sand it???