


Because I Have a Brother That Loves Concerts (T-shirt Quilt)

One day my mother had a conversation with my baby brother (by baby I mean 40ish), and neglects to tell me about it (basically he asked if SHE could make a quilt for his fiancé out of all the concert t-shirts he had purchased for her. She adores my brother so of course she said YES! but at this time she was 78 yrs young, hadn't been sewing in years. Guess who she was really going to have make it?). Consequently, he shows up the next day with a large and small garbage bag. The conversation went something like this:
Me "what the heck are those?"
Bro "T-shirts. I told Mom. Didn't she tell you?"
Me "Um , no. And what the heck am I supposed to do with them?"
Bro "Make a quilt"
Me "I've never made a quilt...let alone out of t-shirts"
Bro "That's ok , I have faith in you, you are talented"
Me "MOM!!"
Ok so I can sew, I have been for a very long time. I am NOT a seamstress by any stretch of the imagination. I have a middle of the road sewing machine. I am also not what I would consider, an expert, AND I had never made a quilt. Next day finds me furiously perusing the internet to find instructions on how to make a t-shirt quilt. Turns out I found some really good ones and am VERY proud and happy at how this turned out.
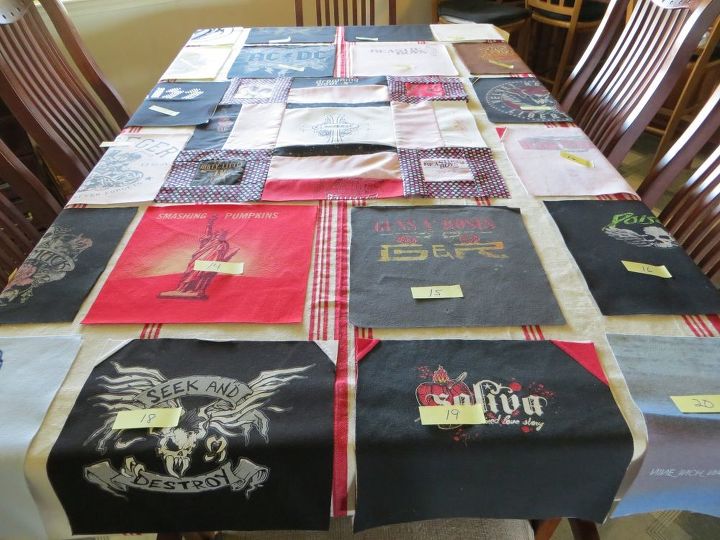
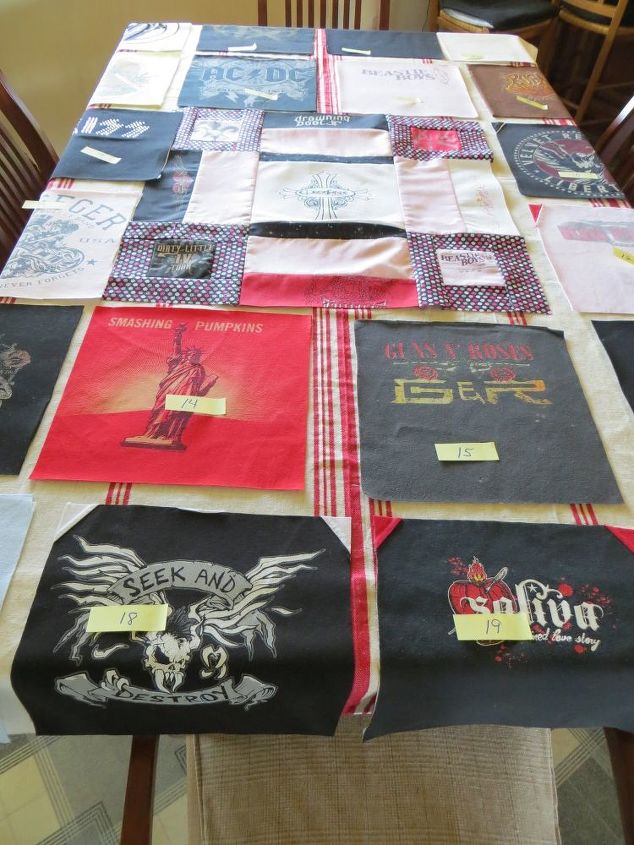
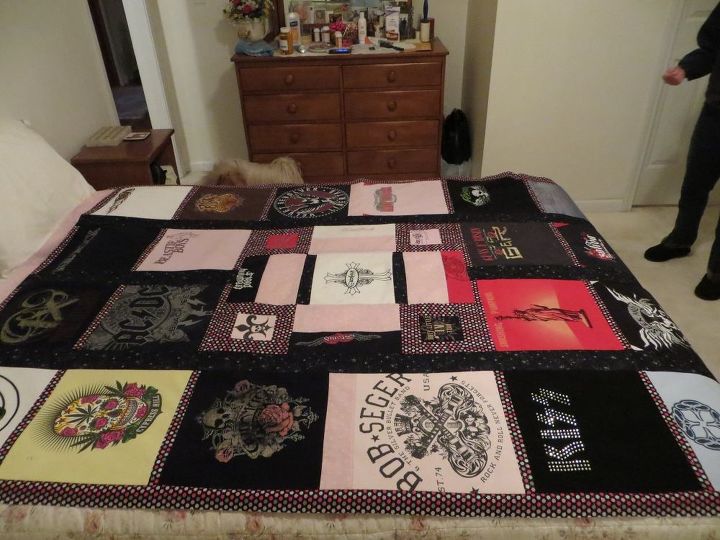
I wish I had more pictures of the process , but this was made way before I began cataloging my projects. This shows the size of square we chose, laid out in the pattern or order we wanted. These squares already have the backing on them. The center of the blanket was made from pieces (sayings or names on the backs) of the t-shirt and the centerpiece was one that he specified was 'special'. Of course it was, it was also way smaller than the others making my life more difficult, hence the 'center piece' conglomeration you see in the middle.
Basically here is what you need:
1. T-shirts
2. Mid weight fusible interfacing
3. If you want boarders, matching or contrasting material (we chose three different patterns)
4. Thread, Sewing machine and Iron
5. Cutting mat and rotary cutter are a real bonus, if you don't have one you can still cut them with regular scissors, but the cutter made it WAY easier.
6. Cut out (of heavy card board , or buy a plastic one from Joanns) of your chosen square size
7. Quilting/batting
8. Backing material
9. And hopefully someone nearby that can quilt it for you if you don't have the means.
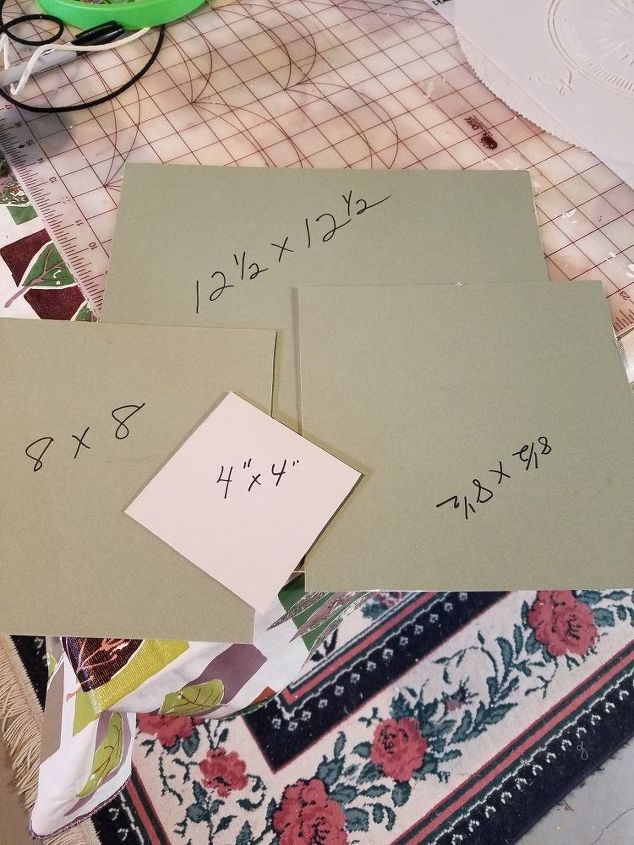
Here are the squares I used for the project. They are made out of heavy picture matt cardboard.
The Process:
1. Take a T-shirt, being mindful of the pattern , decide what part you want on the quilt (usually the front logo/saying). Cut it out liberally (leave space bigger than what you need).
2. Cut out the same amount of fusible interfacing. Fuse according to instructions on the interfacing.
3. Lay the fused t-shirt on the mat and use your cardboard square to square it up.
4. Do that for all pieces.
5. If you are doing a center piece like I did (would not recommend if this is your first one), cut the smaller pieces and fuse them as well. Make sure you plan the center with your surrounding material to be the same size as 4 finished squares would be.
6. Decide which material you want in between them and how wide and make your strips.
7. Beginning at the top, I worked in 'columns'. So it went , Material, t-shirt, material, t-shirt etc until I reached the end of that column, then I went to the next column in the layout.
The colors we had chosen were: Solid pink, pink/blk/silver polkadots, and black with white/grey design.
The polkadot went in-between the squares going across the columns, except at the center point where the pink was added.
The Black was used for the vertical attachment after the 'columns' were created and is one long piece on either side and two pieces in the center.
The polkadot was added along the outside edge.
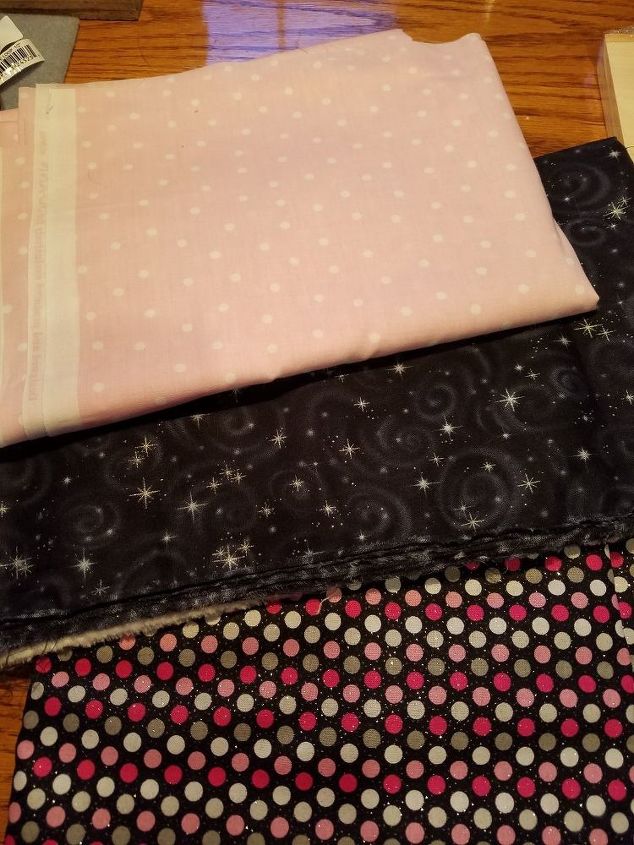
I had questions on the material used, so added this picture to show the three colors/patterns used in this blanket. They are all cotton poly blends. The back material was a solid black poly/cotton because it was the only material they had that was wide enough to cover the entire back without having to put in a seam.
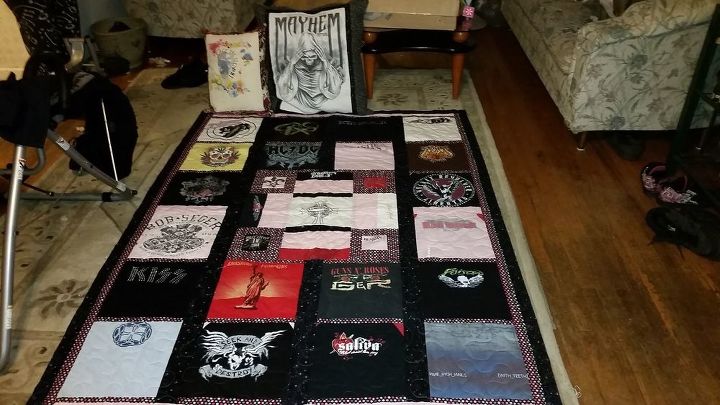
Here you can see it almost completed. The backing, quilting material are laying underneath it. At this point we rolled it up and took it to the quilters. This part I could not do on my own, just not a big enough machine for it.
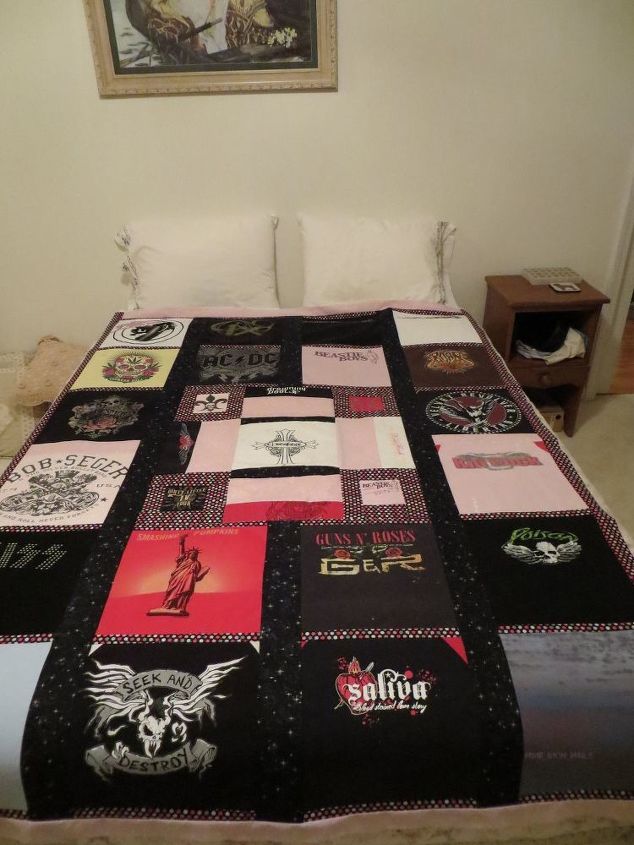
And here it is : ) After we got it back from the quilters, I added the black binding to cover the raw edges. As a bonus I also did one of my brothers T-shirts into a BIG pillow (also quilted, it's the Mayhem skull one in the pic) and a smaller T-shirt from his fiancé that we loved the pic on into another quilted pillow for her. This took me almost a year to complete (I do have a full time job : ) and horses and dogs, cats, a husband and mother that lives with me.......), but It was so beautiful when it was complete. Will I make another one?? Probably, but not for a long time!
Comments
Join the conversation
-
Good for you for taking a chance!! It turned out amazing! What a great sister you are :)
-
Family. Love it! It is so nice you have been raised in a thoughtful, caring family. A sister who would do this for a brother who was thoughtful enough to want to do this for his love . . . a gift in itself.


Frequently asked questions
Have a question about this project?