


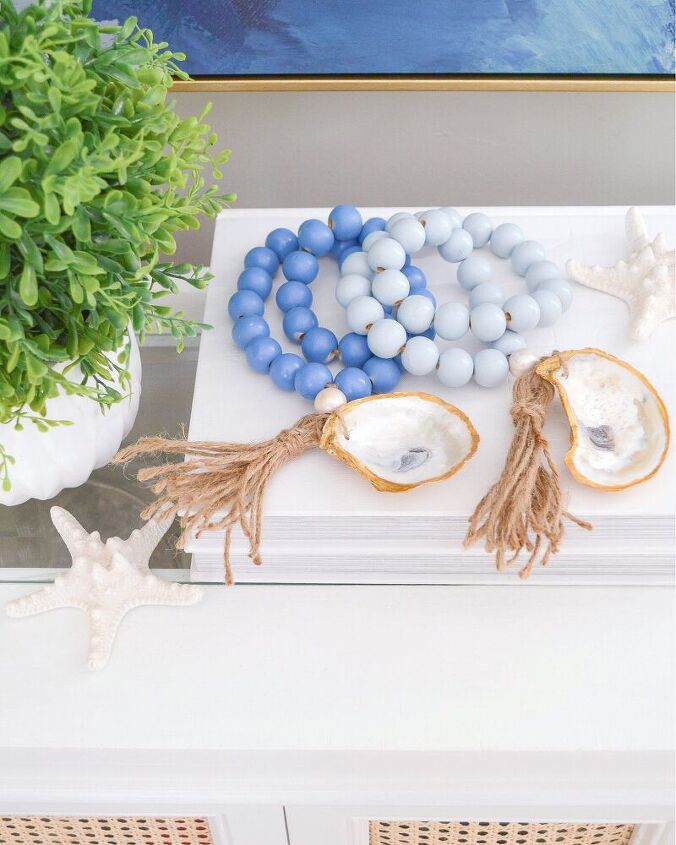
Coastal Decor Beads

Here is a quick and easy DIY that can be used as a coastal bead set, or leave the shell off and it can be used universally in all homes!
If you follow along on my Instagram, then you know that my love for the coastal decor is strong, so when I stumbled upon decor beads with Oyster shells attached I knew I had to have some.
So, naturally I decided to pull out my oyster shell collection and try to create my own, finding it was rather simple!
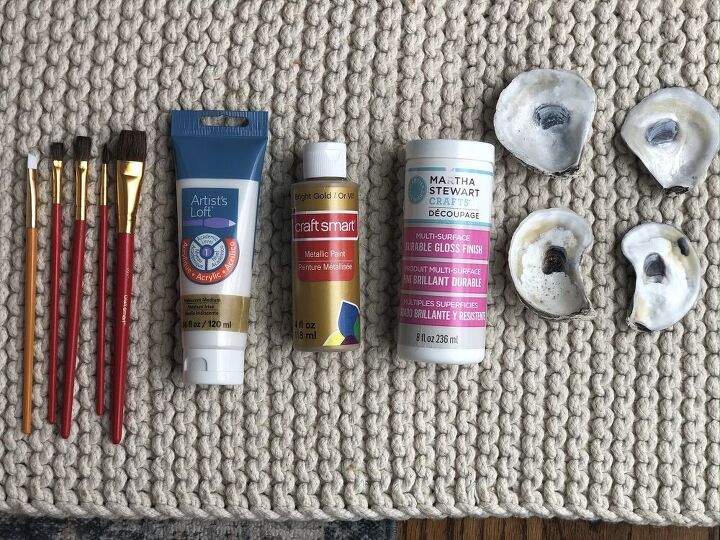
Here are the supplies you'll need for this DIY.
- Oyster Shells
- Bright Gold Metallic Paint
- Iridescent Medium Paint
- Finish Gloss
- Paint Brushes
- Twine
- Wood Beads
- Spray Paint of any color
To start, I added about 30 of the wood beads to a stretch of twine, making sure the twine was long enough to have all the beads, as well as tie the oyster shell on the end.
Once you have all the beads on the strand I then took the strand outside and sprayed it with some spray paint, I unfortunately did not document this, however I just held the beads up and sprayed them. Once they were all covered I hung them up to dry.
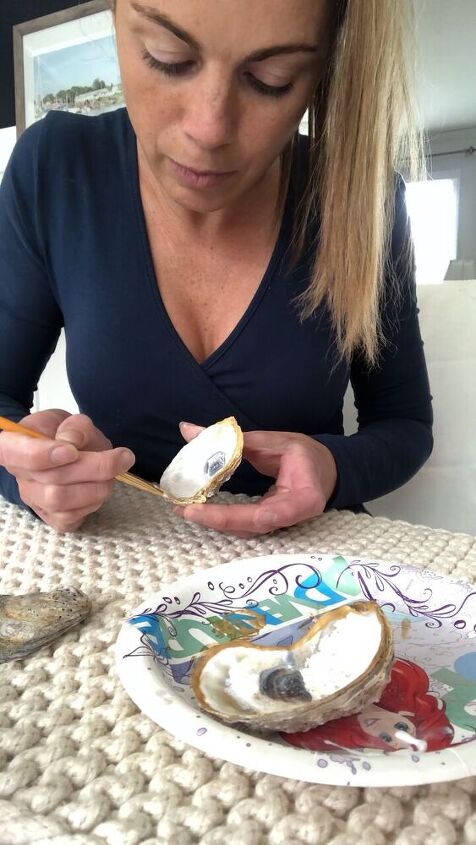
While the beads were drying I took to the oyster shells. I started out by panting the iridescent medium around the whole shell, this gives the whole shell a nice sheen and really makes the uniqueness of each stand out.
Once that had dried, I painted the edge of the shell with the metallic gold paint. Here you can see how I carefully went around the edge.
The final step for the beads is to add the final top coat, which is the gloss. This gives the a good seal to all the paint.
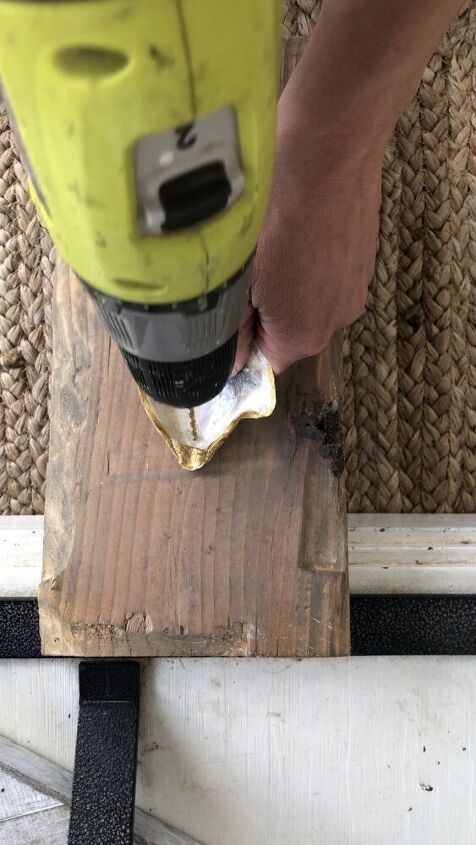
Now that the shell was painted and dried, I took out my drill and drill pit and drilled a small hole at the top of the shell, you can see how I achieved that here.
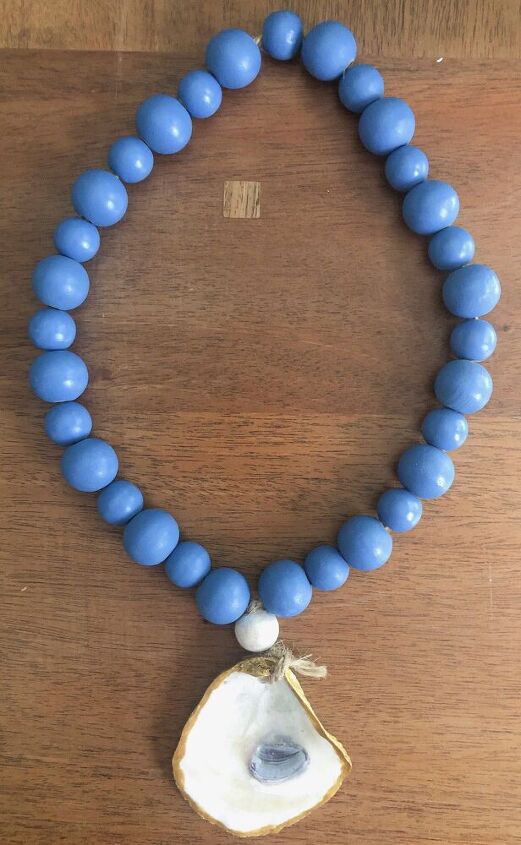
Now that the shell was complete, it was time to attach it to the bead strand. You need to thread the twine through the hole that was just drilled in the shell, once you have one side through then you can tie it to the other, creating a circle.
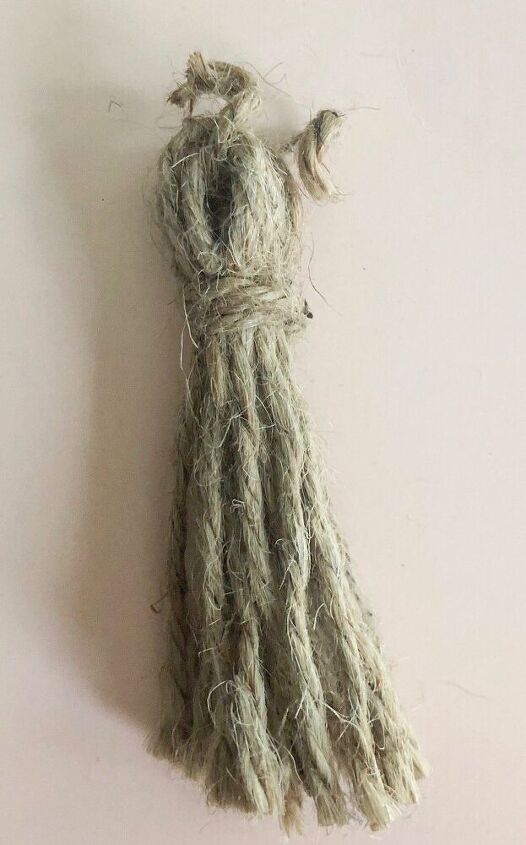
Next you will want to make the tassel. Unfortunately, I did not capture how I did this part. However, you need to wrap the twine around your palm several times, possibly 10-15, then pull it off your hand, pinch the top and tie it to create a loop. Here is a picture of the finished tassel.
To attach it to the strand, I simply put a piece of twine through the loop of the tassel and tied it to the space between the shell and the beads, and that was it! It turned out so cute and I was so happy to have a unique piece for my home!
Resources for this project:
See all materials


Comments
Join the conversation
-
Beautiful
-
lovely, the gold gives it a dash of elegance while the twine keeps it humble ( Right word? 🤔).


Frequently asked questions
Have a question about this project?
But what do you use it for?