


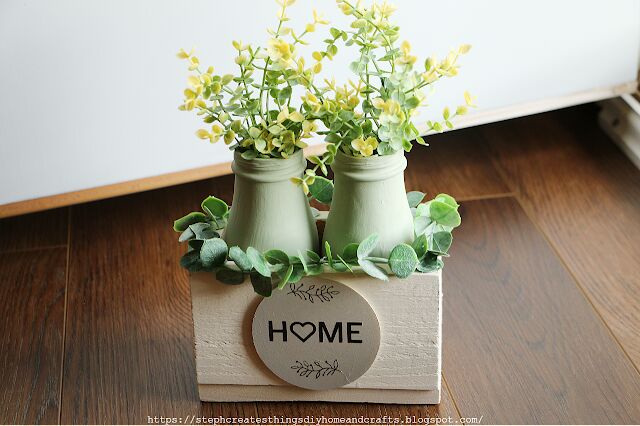
Decorative Centerpiece Wood Box With Glass Bottles

Hi everyone! I hope that you are all doing well. It has been pretty rainy these past few days. I'm actually enjoying the rainy weather compared to the really hot days we were getting before. Today we are working on building a wood box centerpiece. Instead of using the wood crate boxes from the Dollar Tree, I wanted to actually build my own box. For this project we're actually using a wood fence picket. I paid $1.48 for one picket, and you can actually create two boxes with just this one picket. I'm also going to reuse my glass Frappuccino bottles. I will provide a video tutorial as well.
Connect with me!
YouTube- Steph Creates-DIY Home & Crafts
Blog- https://stephcreatesthingsdiyhomeandcrafts.blogspot.com/
Instagram- https://www.instagram.com/stephcreatesdiyhomeandcrafts/
Pinterest- https://www.pinterest.com/Stephcreatesdiyhomeandcrafts/
Video tutorial
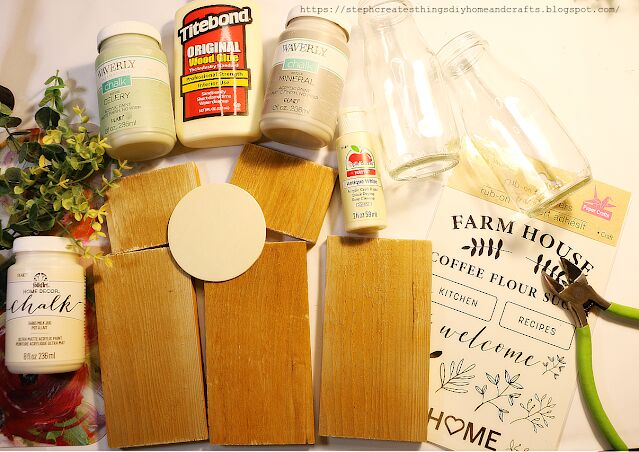
Materials
One wood fence picket- I purchased mine at my local Lowe's for $1.48
Two glass bottles-I am reusing my Starbucks glass bottles
Paint
Paint brush
Faux greenery
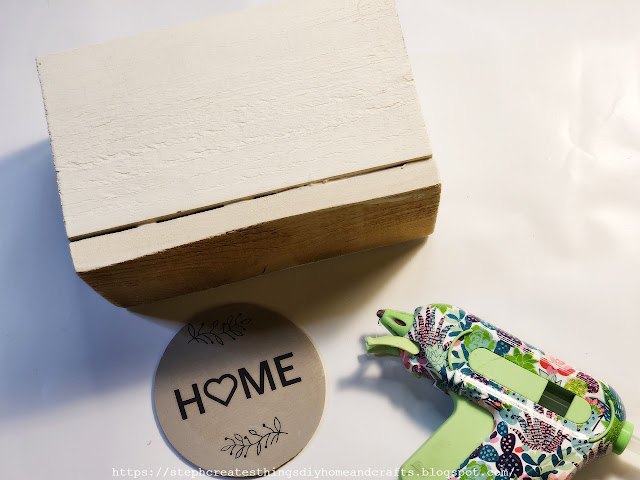
Rub-on transfers
Wood glue
Corner clamps
Hot glue
One round wood circle
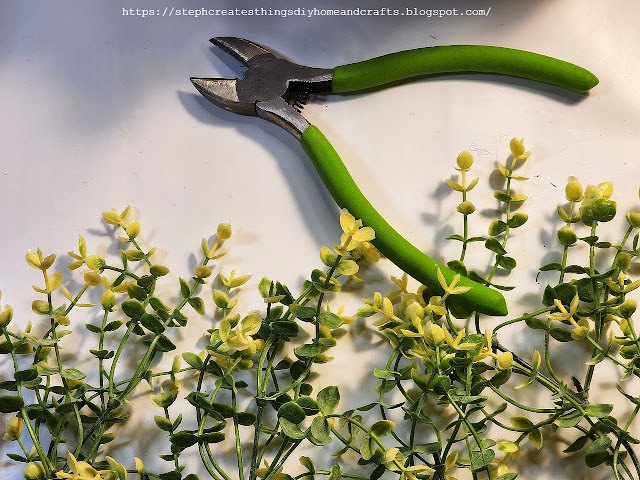
Floral snips
Scissors
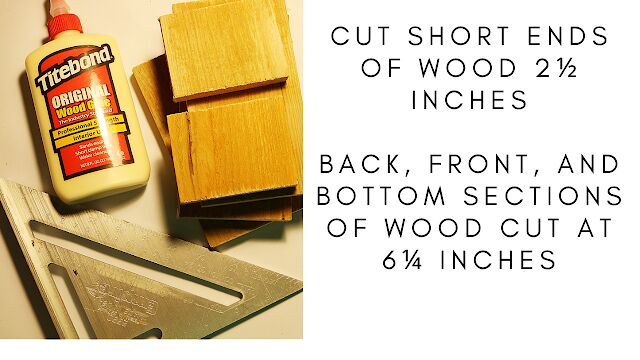
Begin by cutting your wood fence picket. Cut your short ends of your wood 2½ inches. Next, cut your front, back, and bottom of your wood 6¼ inches.
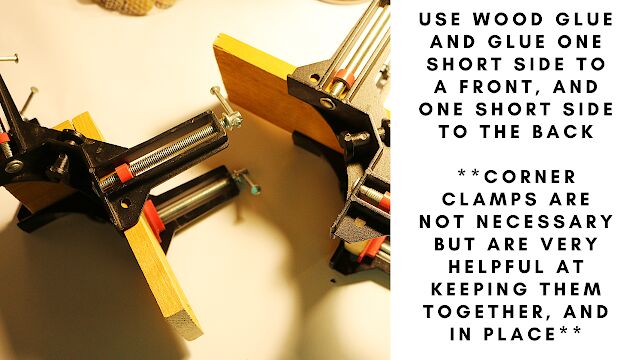
You are now ready to begin gluing your wood sections together. Take one short side, and glue that to the front side. Take your second short side, and glue that to the back side. If you have corner clamps you can use them to help to keep your wood sections together as they dry.
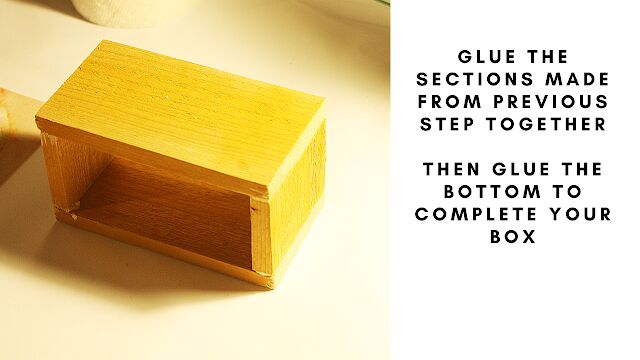
Repeat the steps from the previous step. Next, glue the bottom to complete your box.

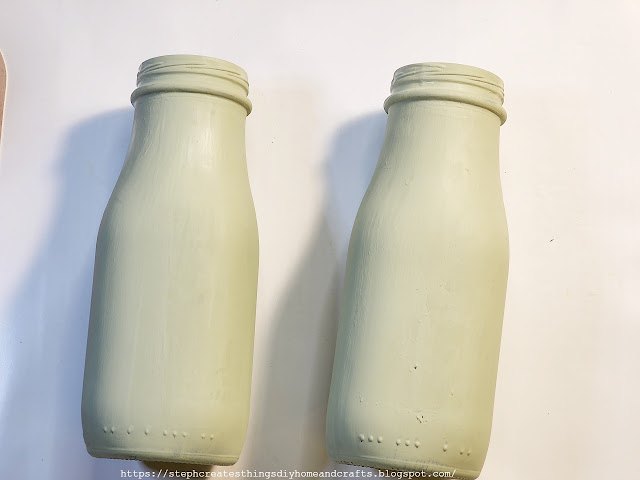
Next, take your paint brush, and begin to apply paint onto your glass bottles. In between coats of paint I used my blow dryer to dry my paint. I applied around three coats of my chalk paint onto each bottle.
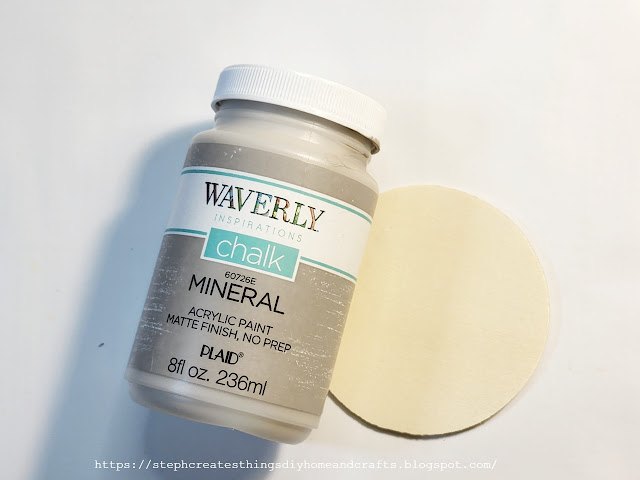
After, take your wood circle, and apply paint. Allow your wood circle to completely dry.
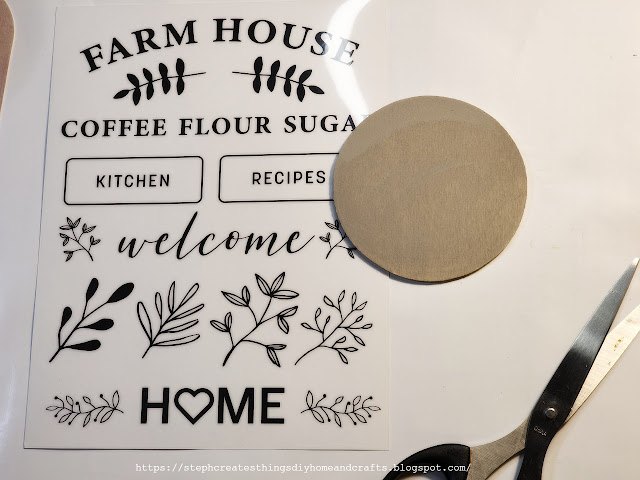
Next, take your rub-on transfers, and begin to add them onto your wood circle. I found that using the eraser on my pencil helped when rubbing on my transfers.
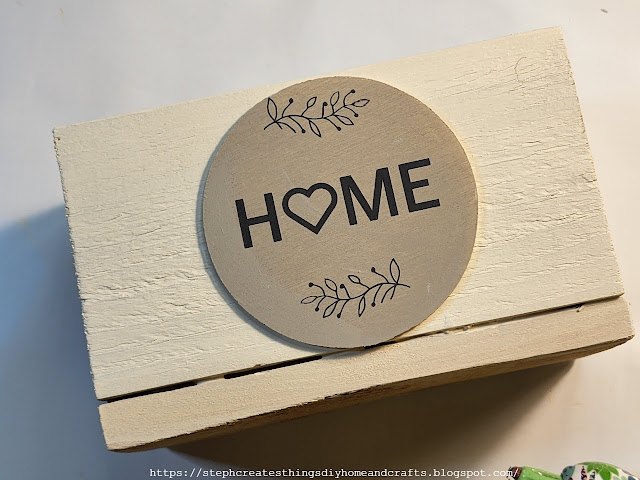
After adding on your rub-on transfer, take your wood circle, and glue it onto the front side of your box.
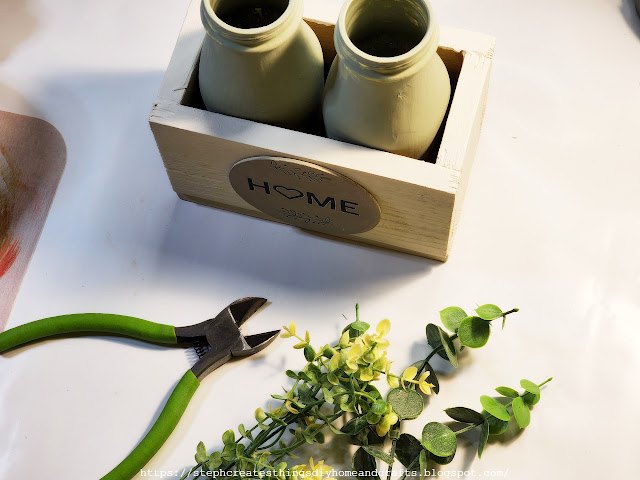
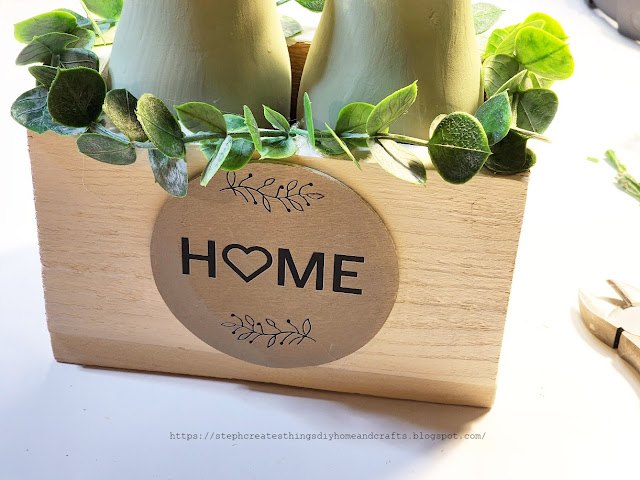
Next, take your painted glass bottles, and add them into your box. Using your floral snips, begin to cut your greenery. Once you have cut your greenery, add your greenery to the top section of your wood box.
After, take the rest of your floral/greenery, and begin to add them into your glass bottles.
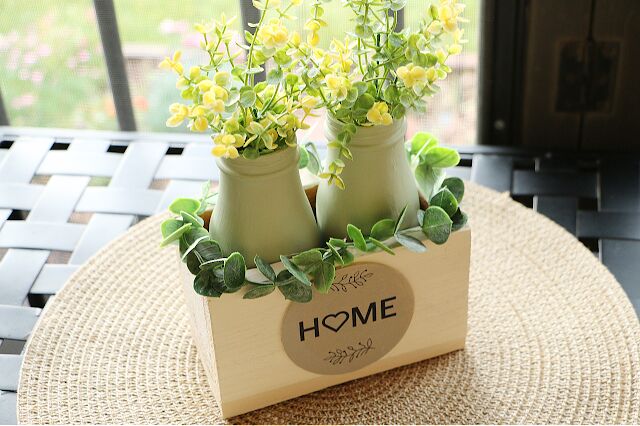
Your decorative centerpiece is now complete, and ready to be displayed. I hope that you enjoyed this hands on project. I think this makes the perfect centerpiece. Let me know if you decide to create your very own. Thank you so much for stopping by, and creating with me.
You might also like


Frequently asked questions
Have a question about this project?