


Decorative Plate With Pearls

by
Rembatb
6 Materials
$10
1 Hour
Easy
A silver decorative plate on sale was one reason for the inspiration of this project.
All of the materials that were needed in this project are shown in the picture below with one exception: the bowl or pan used to place the paint for use in painting the plate.
Please read through before embarking on this project yourself. This was my first time making this project and as a result I do feel like I could have done a better job which is why I implore you to read through what I wrote so that you might make an even better decorative plate.
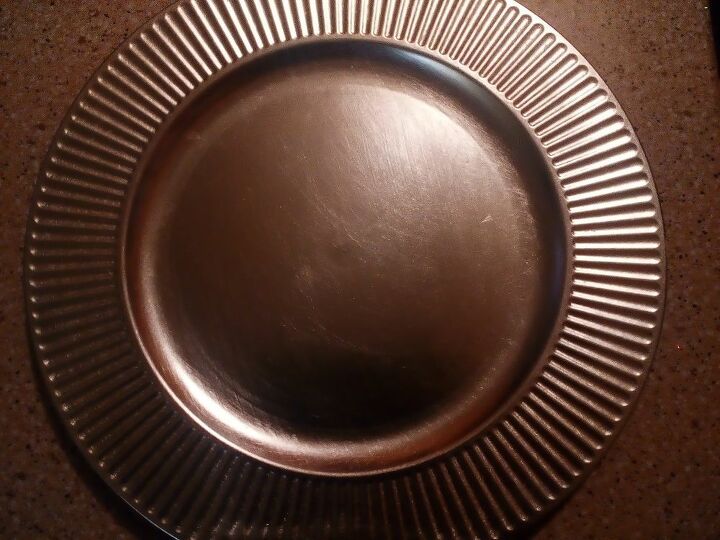
It started with this plate
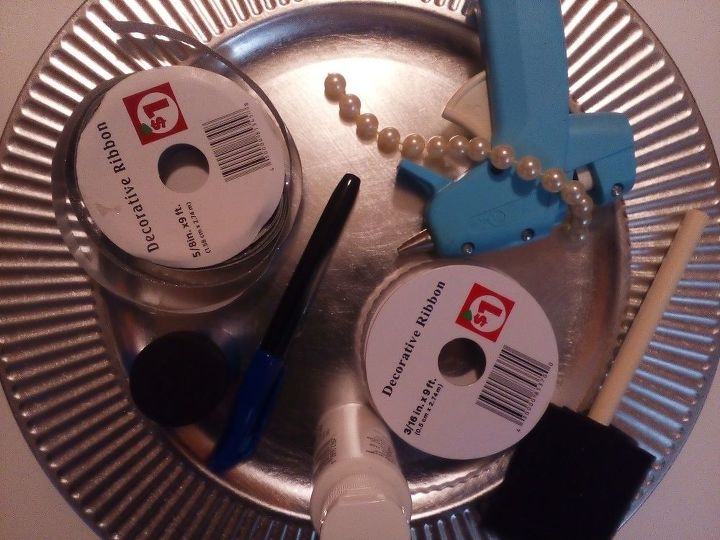
Everything you need except for the pallette
1. I began by mixing paints white and blue. I wanted to achieve a very light blue and a slightly darker hue of the same blue.
2. I chose a marker that was close in shade color to one of the two paint colors I had chosen to use. It doesn't have to be a permanent marker, it can be any marker that you choose including a highlighter.
3. Next in the middle of the plate from the inside rim to the exact opposite side of the plate I drew one line.
4. I turned the plate exactly one quarter turn and from there I drew another line from one side of the rim all the way to the other side of the rim.
I have created an "X" with the middle of the X being in the very middle of the plate and this essentially has turned the plate into four quarters.
See the photo down below for reference.
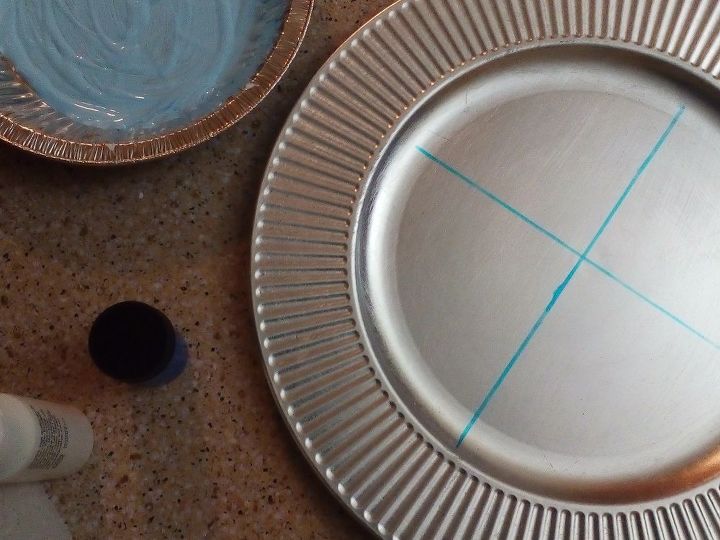
Marking my territory
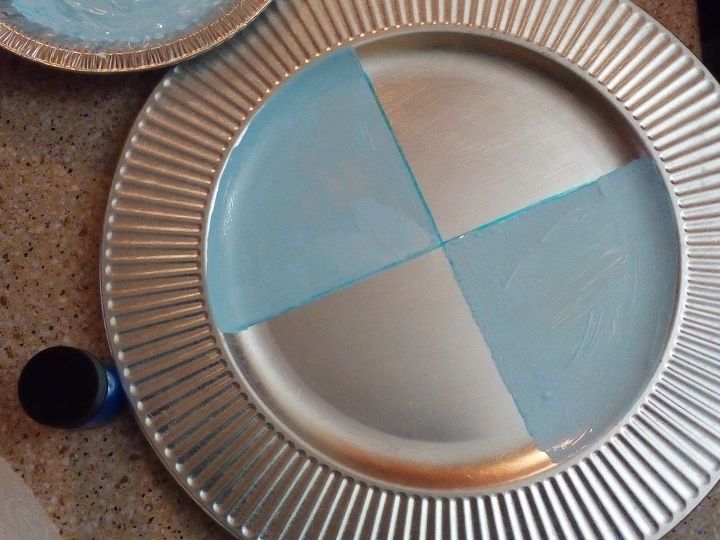
5. Next, I painted two opposing sides of the quarter pie the same color. I made sure to go around the inside of the rim very carefully and I kind of just wiped it left to right but as I got further down the pie (each quarter), I would use up-and-down strokes.
6. Now with the darker hue of the two paint colors, I did the last two quarters of the plate.
7. I let this dry for about 10 minutes and then proceeded with an extra coat. I did this twice so they have three coats of paint not including throughout the project sometimes I did some touching up.
** Another way of looking at how I painted this was to make an hourglass figure in one color few and then with the darker color can you make another hourglass figure. See the picture below for a better understanding.
* To be honest, I'm not sure if that was the right thing to do or if I should have just went over it again because it seems like it has parts where it looks like I just scratched it right up under the rim and I did not, it's just like the paint didn't cover it as well using the sideswipe versus the up-and-down motion.
The hourglass figure using the same hue blue
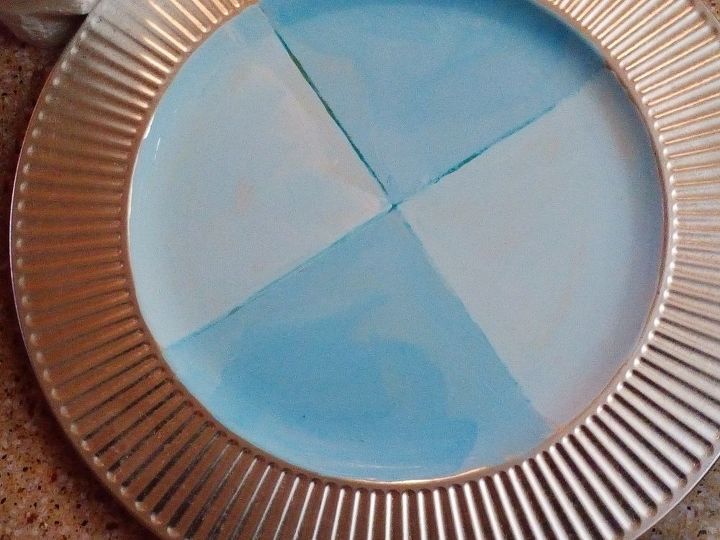
The four quarters painted into different hues
8. After the paint dried, I heated up the glue gun.
9.I then took some white ribbon which is rick rack and measured it out and cut to fit the "X" inside of the plate.
10. Once I settled on the look I wanted, I took my glue gun and began applying the rick rack to the plate.
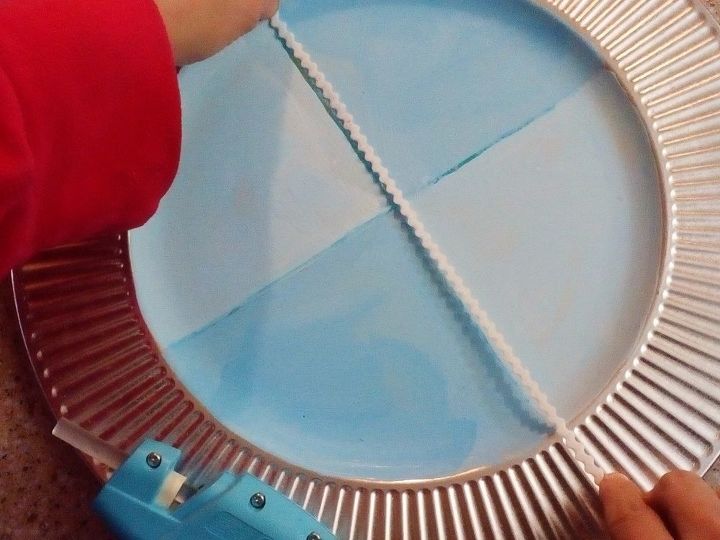
Adding the rick rack ribbon
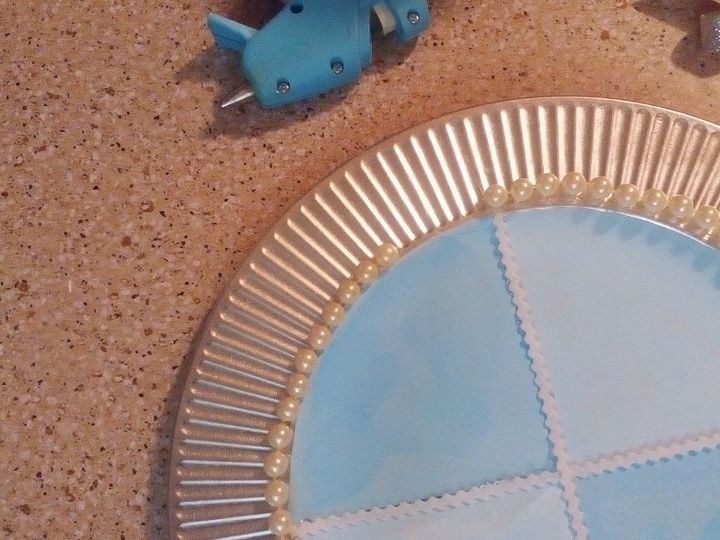
11. I took the pearls and tried various ways of aligning them on the plate to decide exactly how I wanted them to look on the plate. I would be leaving a gap for ribbon at the end.
12. Now that I settled on the look that I want to achieve with the pearls I began to glue them into place. Every third pearl, I would glue it down. I made sure that the pearls landed on the little space between the rim and where you see the indentions on the plate, this ensured that the pearls would adhere to the plate.
I want to make a note here that some of my pearls were not as close together as others due to how they were put on the string; so around that area I ended up not having to do every third Pearl I had to do where it would adhere best on the plate, so always use your own discretion whenever you're building your crafts. When we follow real closely to someone else's directions it doesn't really always apply to our exact situation and so always use your own discretion.
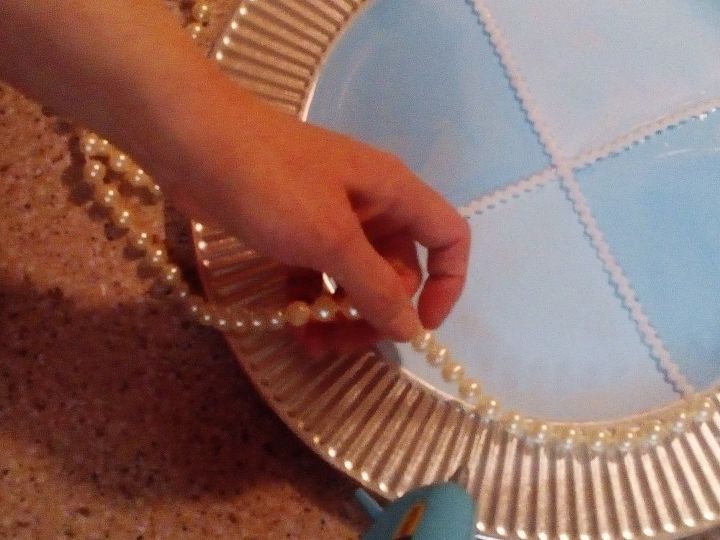
Applying the pearls
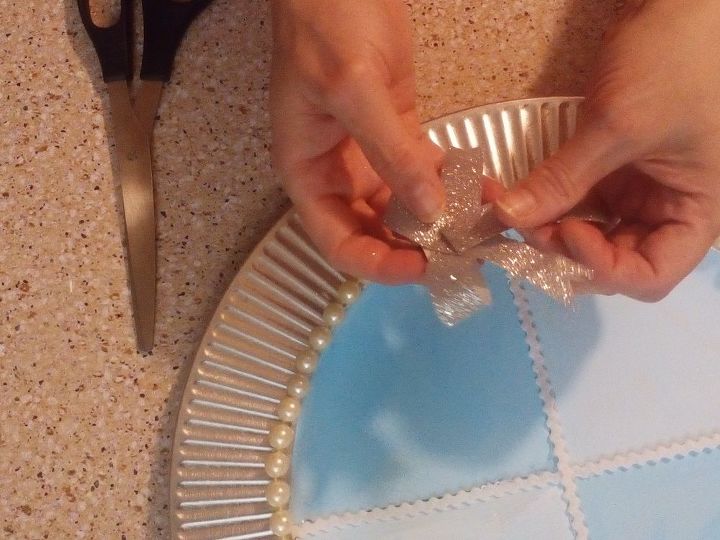
13. I made a bow out of silver ribbon and hot glued it where I had left just a little space without the pearls. I felt this enhanced the look.
14. Add hardware to hang if you are hanging the plate. I did not take a picture of me attaching my loop ribbon, so, sorry about that.
🔹 You could take simple ribbon and using a glue gun at hear the ribbon to the back of the plate in the loop format so that you could hang it on a tag or a nail or command strip.
🔹 You can also buy a picture hanging kit these are available at most any department store including your local grocery store. They usually contain these metal tiny frames that you super glue on to the back of the object that you desire to hang. They look similar to a tiny thin square with little teeth on it that's so that you can hang your picture frame on a nail etc...
15. You can always further embellish your plate by filling in the outer edges with more paint or maybe some jewels whatever you fancy.
Leaving a gap
Adding the ribbon
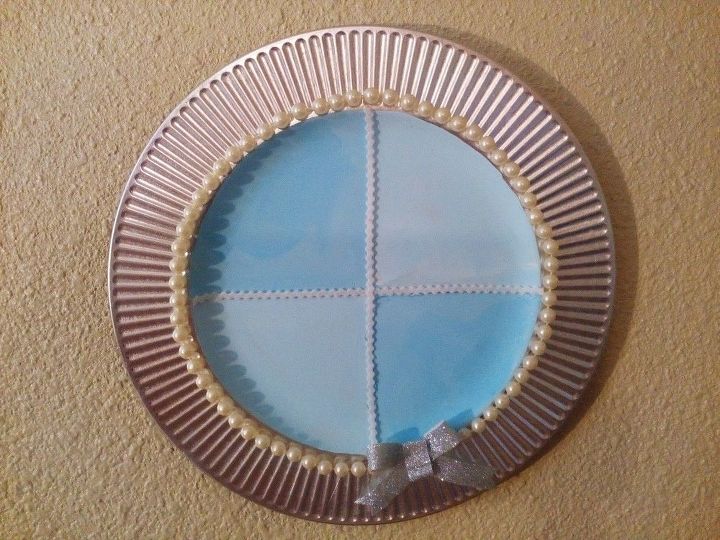
A beautiful plate
I did a lot of touching up of the paints; however, I still even now, see scratches throughout the paint. I'm beginning to think that perhaps I should have primed it first.
I was able to make this project for around $7 and not $10 as to some of the sales going on at Dollar General but I still use the $10 figure as a consider point.
I listed it to be an hour time. What I was really listing was the amount of time it took for drying between coats of paints because I really like my paint to be dry before I proceed as well as knowing that my glue is dry.
I used acrylic paint, it dries rather fast but I did use several coats.
Resources for this project:
See all materials


Any price and availability information displayed on [relevant Amazon Site(s), as applicable] at the time of purchase will apply to the purchase of this product.
Hometalk may collect a small share of sales from the links on this page.More info
Comments
Join the conversation
3 comments
-
Very elegant and pretty!
- See 1 previous
-
Thank you so much Wendy!


Frequently asked questions
Have a question about this project?