


DIY 3D Paper Cut Light Box
8 Materials
$15
4 Hours
Easy
When I saw the creations by the artists Hari and Deepti I was inspired to make a 3D paper cut light box.
It can be used as a unique home decor, or a beautiful wedding or birthday gift.
You can place it on a desk, or even mount it on a wall and enjoy its hypnotizing beauty.
This light box is made out of paper cut-outs layered on each other in a wooden box and protected with a glass panel.
LED lights are placed behind all the layers, which makes each layer glow. The layer in the front is the darkest, and the layer in the back is the brightest one because it is placed closest to the light, and this actually gives the three dimensional look of the box.
Here I’ll show you how I made this light box step by step.
{
"id": "4466262",
"alt": "",
"title": "",
"video_link": "https://www.youtube.com/embed/NPbtI39k_rs",
"youtube_video_id": "NPbtI39k_rs"
}
{
"width": 634,
"height": 357,
"showRelated": true
}
Be sure to watch the video for more details.
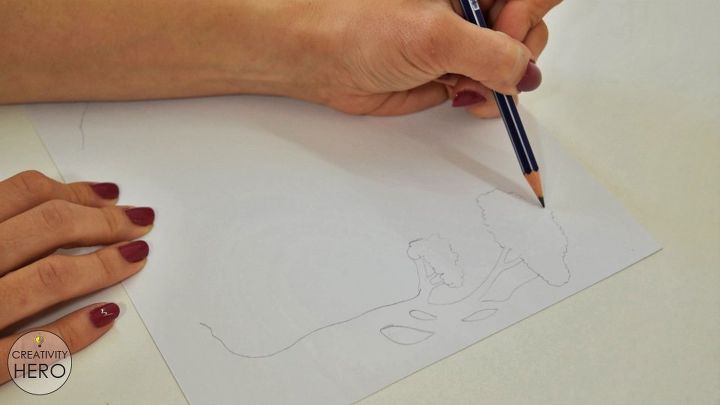
First, I created the design of the light box. Also, I made a template which you can download on my official website. The template is made for a 20 x 25 cm light box (or 8 x 10 inches), but you can adjust it depending on your needs. I recommend using 170 grams white card stock, as it is thin enough to let the light pass through all the layers, and at the same time it is stiff enough to stand up. So, I drew the first layer with a pencil and added a 1 cm border. The borders will help me glue the layers easier.
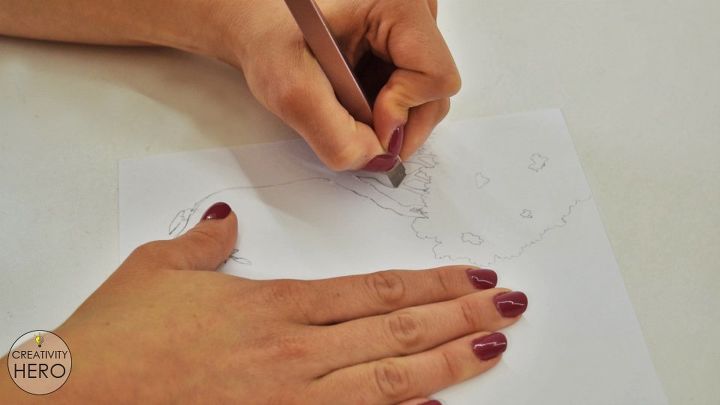
Once I'm done drawing the first layer, I need to cut it out with a utility knife or an X-Acto knife. I recommend cutting with an X-Acto knife to get accurate cuts. After that, I placed the first layer onto another piece of card stock, and drew the second layer. Then I cut it out. I repeated this process with all the layers.
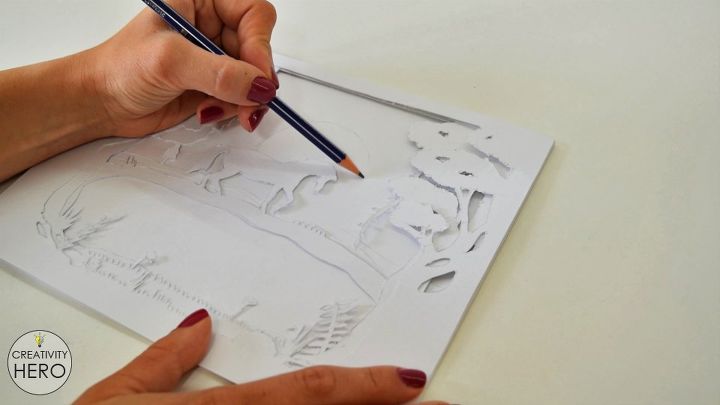
On the last layer I drew a large moon and stars. Actually, to make a moon I drew a circle and cut it out.
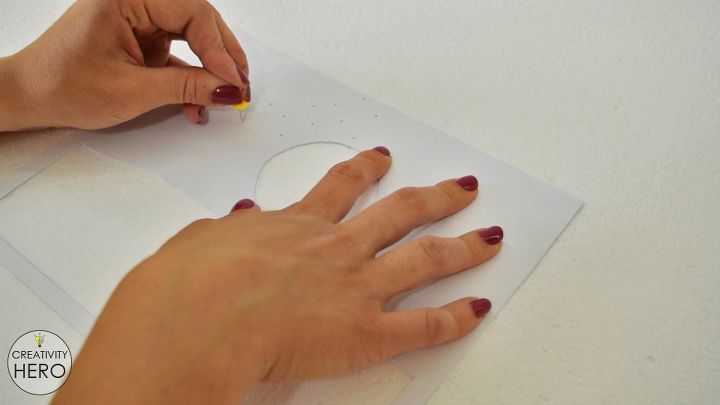
After that, I created the stars making small holes into the card stock with a pin. I placed the card stock onto a Styrofoam sheet to make the holes easier. This means that I'm done with all the layers.
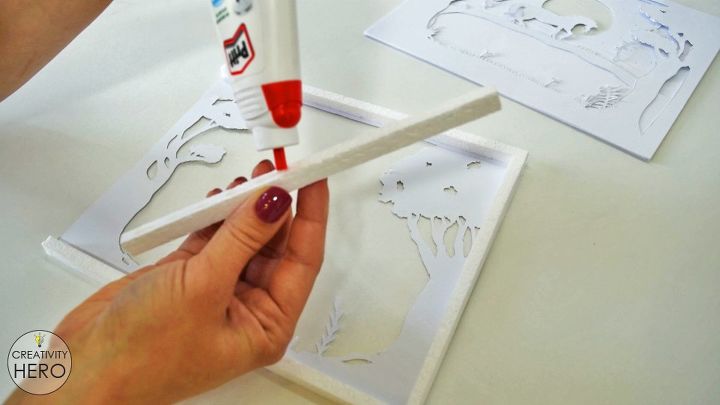
Now I need to glue the layers together. I reassembled the layers with 1 cm wide foam spacers in between each one. In fact, this way I created the 3D effect of the light box.
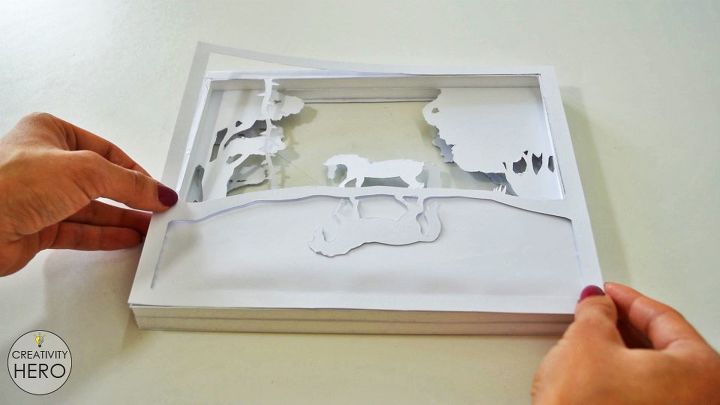
To get a water reflection effect I glued 3 layers in a raw without separating them with spacers. I placed the water layer behind the horse layer, and then I placed the upside down layer behind the water layer.
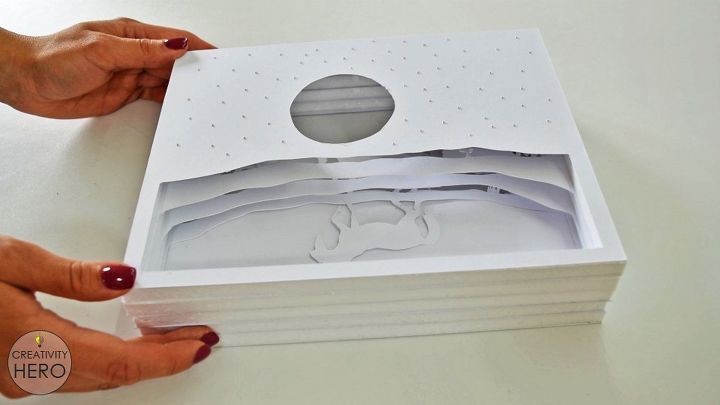
Now, I have all the layers. There are 8 layers in total which is quite enough. You can add more layers if you want.
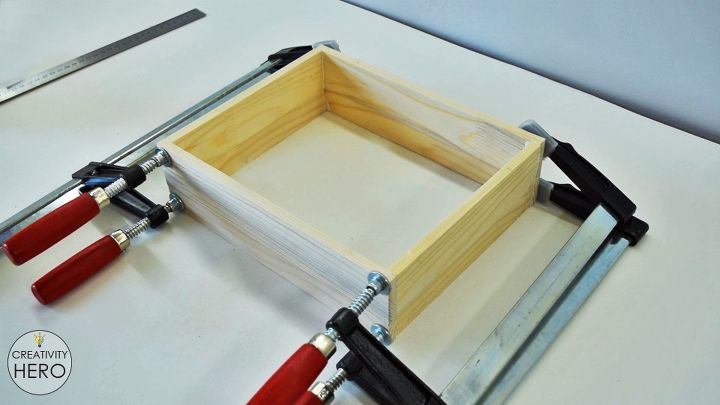
You can but pre-made box, or you can build it yourself. I decided to build it, because I love DIY projects. Here I need to determine the depth of the box. So, I measured the thickness of all the layers that are glued together and added 2 cm more for lights, frame and glass panel. The depth of my box is 8 cm and it is a tight fit. You can leave more space in the back if you want. The size of the box is 27 x 22 cm. Inside the box I added a frame to hold the glass panel in place. I glued all the wooden pieces together, clamped them down and waited for them to dry out.
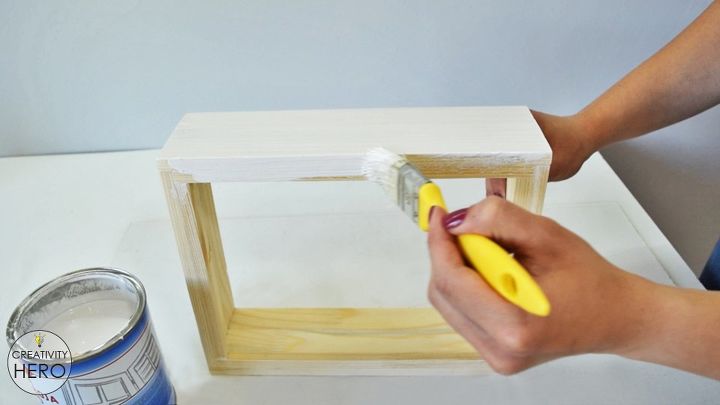
Once the frame was dry I painted it with a white oil-based paint You don't have to use paint, instead you could use wood stain, or transparent finish as well.
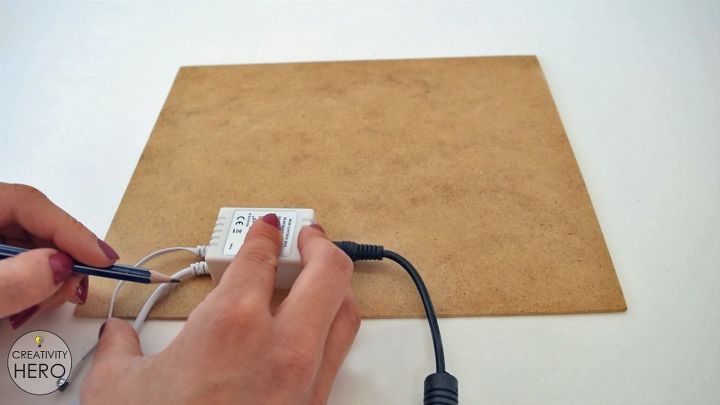
I made the back of the box out of 3 mm thick plywood and painted it white to match the color of the box. On the bottom of this piece I made a 5 x 15 mm hole for the lights power to pass through.

Once everything is dry, I cleaned the glass, put it into the box and pushed all the layers inside until they touch the glass.

Now it is time to put some lights inside the box. I attached a light strip all around the box. I highly recommend RGB LED lights because you can cut them to size, they're self-adhesive and you can easily change colors.
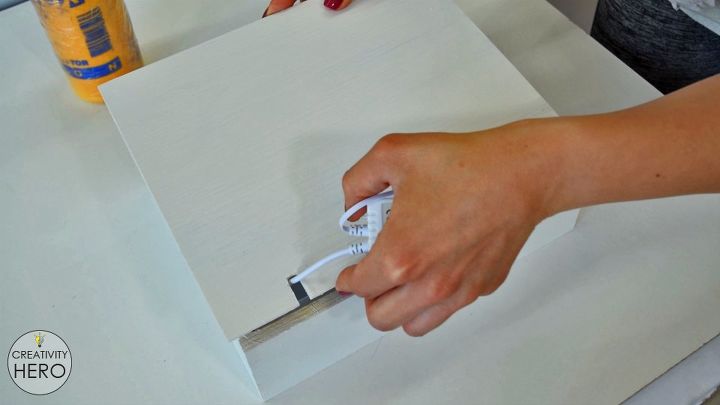
The final step is to thread the power cord through and glue the back down. This means that I'm done with this project.
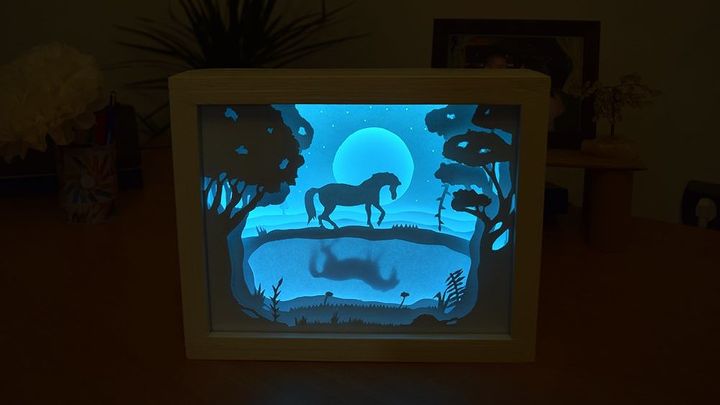
Now I can turn the light box on and enjoy the light! I hope you like this wonderful DIY project. For more info be sure to watch the video and subscribe to my YouTube channel for more fun projects.

Want more details about this and other DIY projects? Check out my blog post!
Comments
Join the conversation
2 comments
-
This is beautiful!


Frequently asked questions
Have a question about this project?