


DIY Bleach Dot Envelope Pillow Cover
5 Materials
$12
3 Hours
Medium
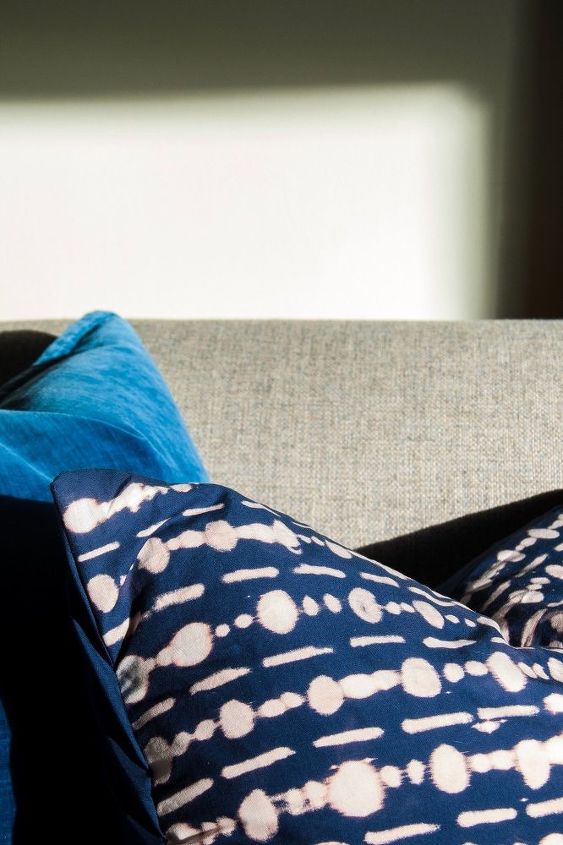
At the end of this tutorial - you will have a beautiful envelope pillow cover in the size of your choice. These bleach dot pillow covers a perfect way to unleash your creativity, as there is really no right or wrong way to do this. The pillow has a neat, vintage look to it in the end.
You should choose 100% cotton fabric, as other fabrics (like synthetic) do not bleach well and others may fall apart after bleaching. It's best to bleach a small test section of your particular fabric to see how it will hold up before proceeding with the entire project.
It’s also important to mention to be really careful when working with bleach. It’s best to do this project outdoors where this is good ventilation. Make sure you are fully protected with eye wear, safety mask and gloves and that your clothes are covered. You also want something underneath your fabric as you’re bleaching. I used several plastic bags but even cardboard would work. We wouldn’t want to stain whatever we are working on. 🙂
- Cut the fabric pieces measuring the exact envelope pillow cover you are making. Since I was making a cover sized 16×24 – I cut these two pieces:
- 1 piece for the front was cut at 16 inches long x 24 inches wide (I like my pillow covers full and tight so I make them the same size as the insert.)
- For the back piece, I cut one piece of fabric at 24 inches long X 24 inches wide. Then I cut this piece in half. (How did I get 24 inches long? Since my pillow is 16 inches in length, I added 8 inches for total seam allowance and to make sure it overlaps well. The width is the same as the pillow size you are making.
- You should now have THREE pieces of fabric.
- The front piece is what we are bleaching. I kept my back pieces plain so we can set those aside for now.
6. Pour a little bleach into your container and dip in your q-tip. Or just use a bleach pen!
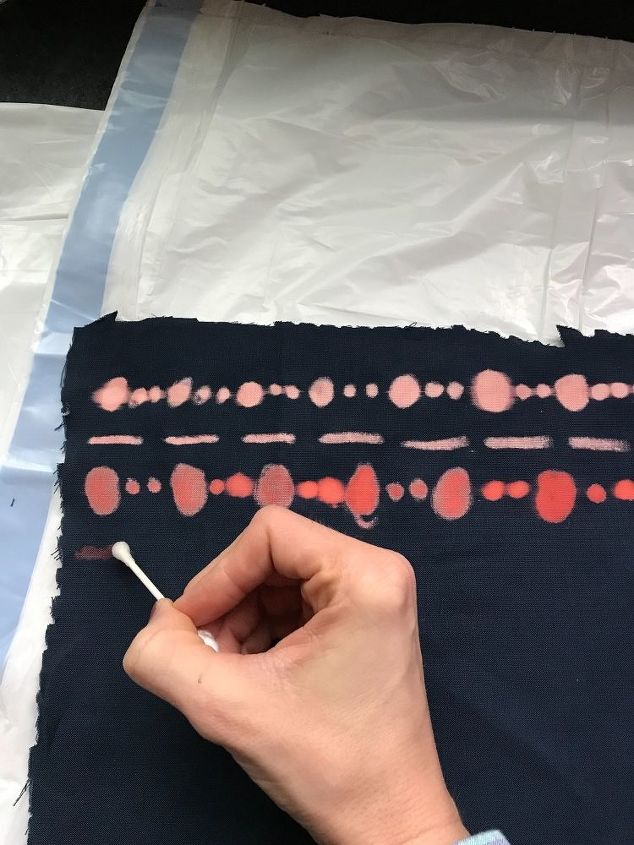
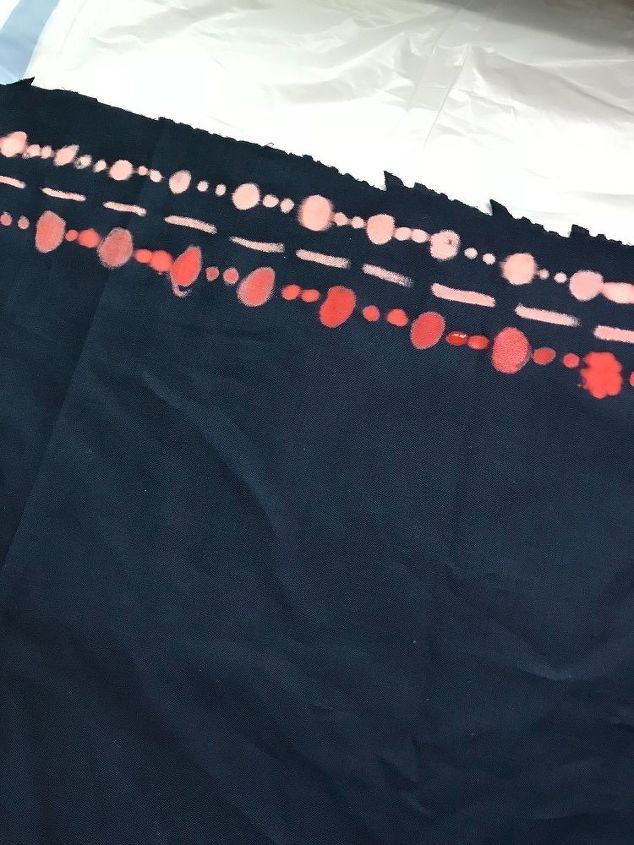
Start bleaching your fabric. I used a pattern of dots and lines, but there is no right or wrong way to do this. Try searching online for inspiration. I wanted mine to have a somewhat messy vintage look to it.
- Continue bleaching the whole front piece of fabric and re-dip your q-tip as necessary.
- TIP : The bleach will spread a bit so use a light hand if you want a neater appearance or go heavy if you want them to run into one another a bit.
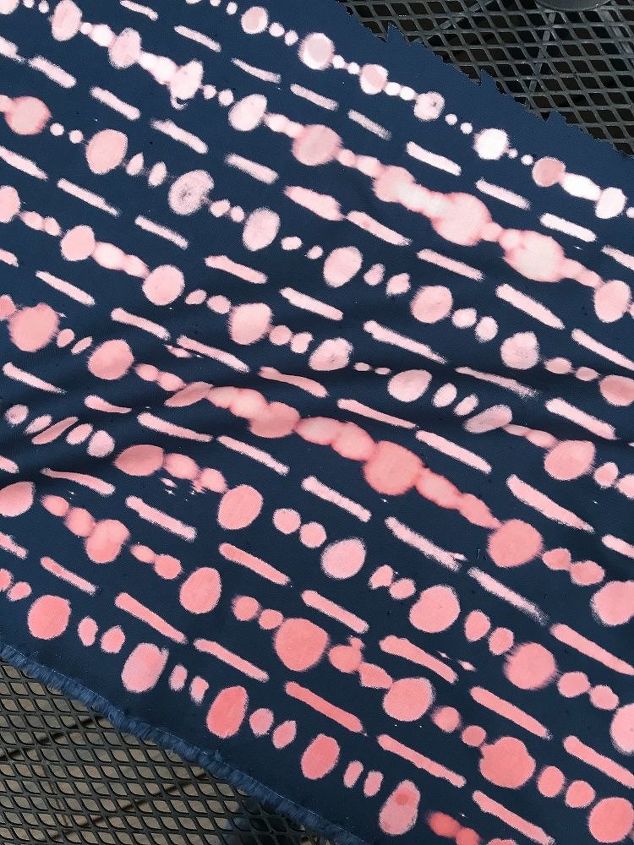
Once finished, properly dispose of your bleach and leave your bleached fabric to dry. The longer it dries, the more white it will turn. It starts out red, then pink, then white. This was mine as it was drying – the top area is already turning white!
- I left mine dry for about an hour and a half. There is still some pink there but I kind of like that.
- Rinse your bleached fabric with cold water.
Wash in a delicate cycle with a mild detergent and tumble dry low.
then iron and sew your pieces together! Flip it right side out when finished.
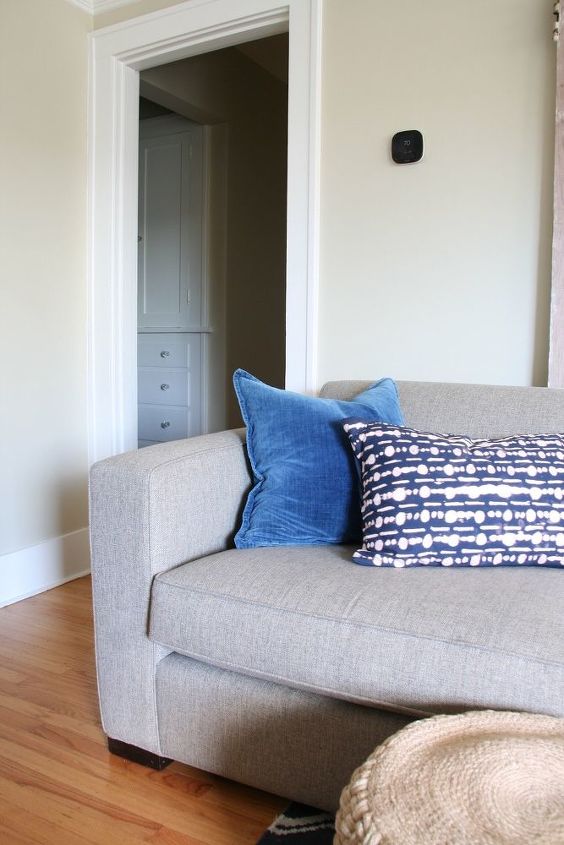
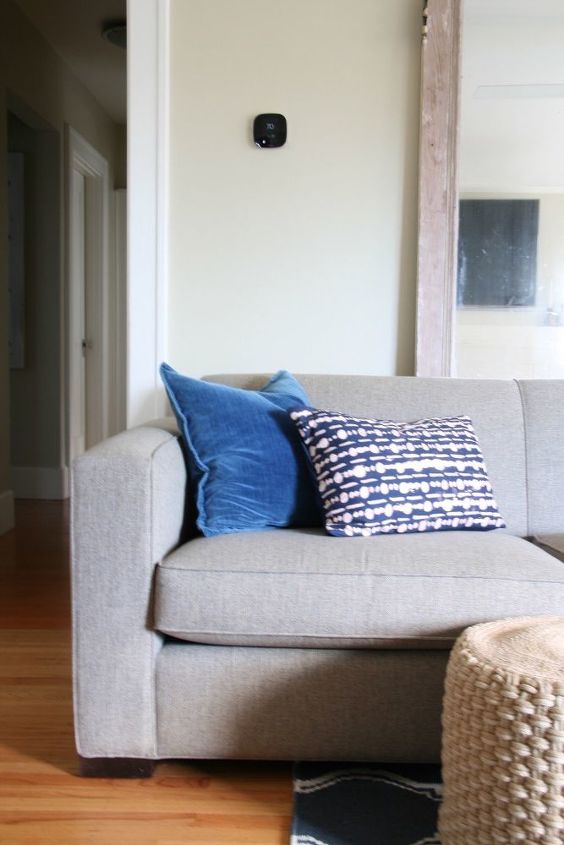
Insert your pillow form into the cover. Done! Enjoy your beautiful new and unique pillow.
Resources for this project:
See all materials


Any price and availability information displayed on [relevant Amazon Site(s), as applicable] at the time of purchase will apply to the purchase of this product.
Hometalk may collect a small share of sales from the links on this page.More info

Want more details about this and other DIY projects? Check out my blog post!


Frequently asked questions
Have a question about this project?