


DIY Butcher Block Cutting Board
In December, we shared a diy wood tray project that we made from an old desk. We used every part of this desk and made three separate projects. This month we are showing you how we used the scrap pieces to make a Butcher Block cutting board. Our purpose in sharing these projects is to hopefully spark your creativity and help you see how you can upcycle, repurpose or create new things from broken, damaged or unusable furniture. You can extend the life of these pieces.
Before we jump in, we wanted to let you know that we were gifted this desk and we did not have to purchase any lumber, tools or materials for this project. We had them all on hand left over from other projects. All it cost us was time and effort. These are my favorite projects the ones where I get creative and use what I have laying around.
Let’s talk materials!
What you’ll need:
•scrap pieces of wood
•wood glue
•sand paper (220 & 320 grit)
•odorless mineral spirits
•Starbond medium thick, black glue with accelerator
•Odies Oil (or another food safe oil)
The tools we used:
•table saw
•wood planer
•clamps
•orbital sander
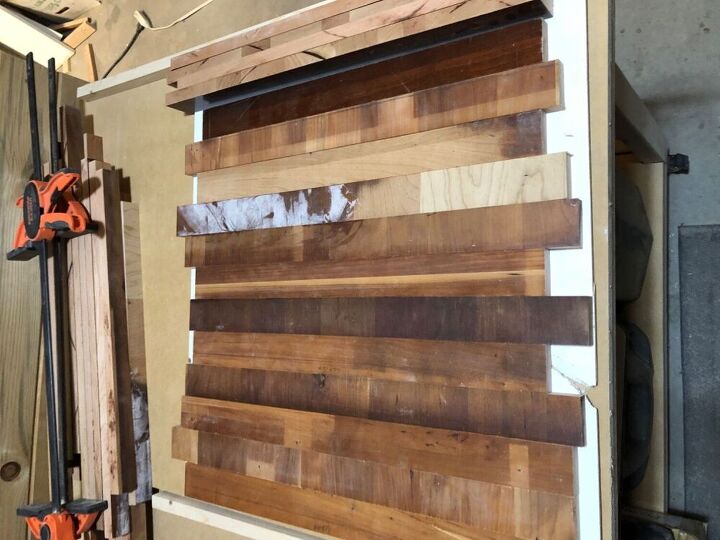
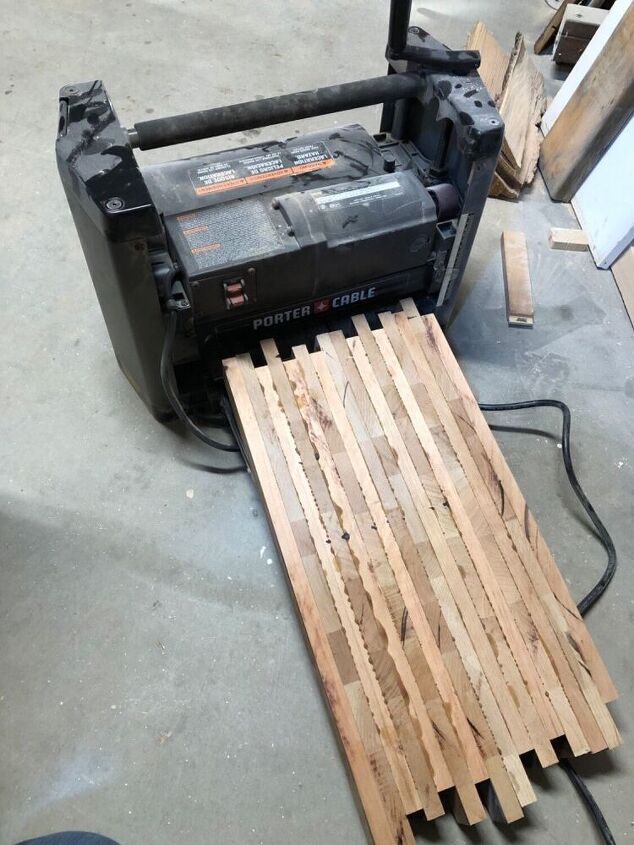
Because these were scrap pieces left over from a previous project, their lengths and widths varied. We wanted the board to be about 19” long. The scrap pieces ranged from 20” to 23” which gave us a little wiggle room.
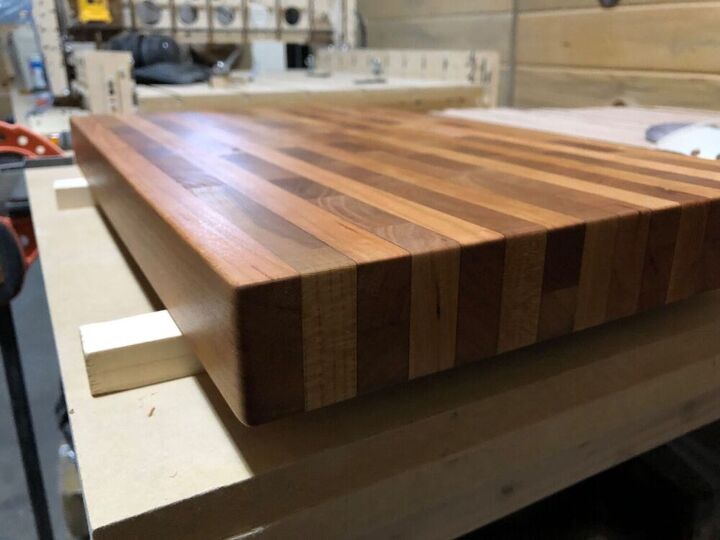
We started with the width of each board- trimming them down to 1 3/4” wide, using the table saw. This will be a thick board. Then we arranged the boards to allow for the 19” in length. In the photo you’ll notice they are not perfectly lined up on the ends.
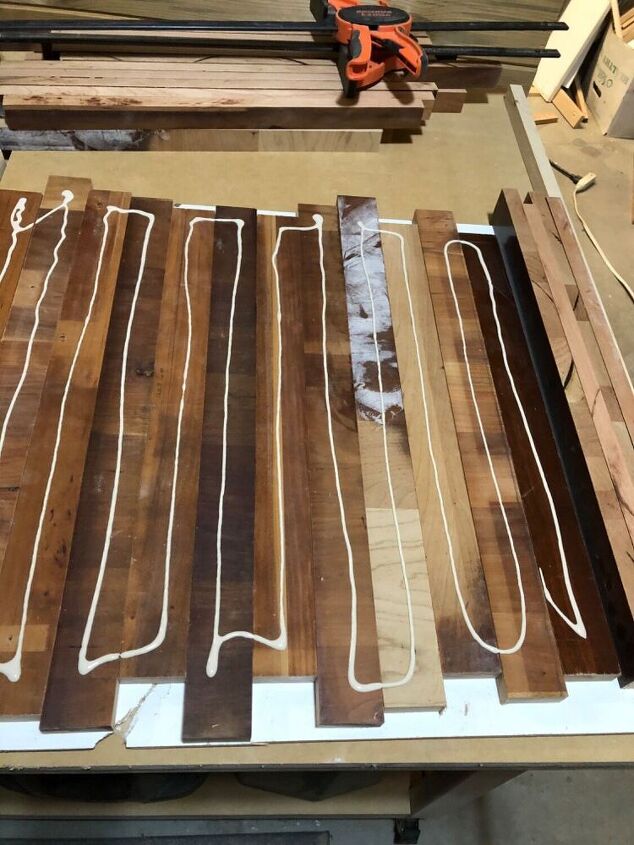
Since these boards were reclaimed from the old desk top, some pieces were end grain while others were edge grain giving them different textures. We laid them out alternately edge/end grain on our work table. Using wood glue, we spread the glue out to cover the entire surface of the sides being glued together.

Once all the boards were glued together, we added several clamps. Clamping them tightly together. Next we added two small pieces of wood underneath to lift the board off the work table. This would keep the extra glue that was being squeezed out from sticking the board to the work table. Let the glue dry for 24 hours.
After removing the clamps, we sent it through the wood planer. This step was to remove the excess glue and give a smooth surface between all the boards.
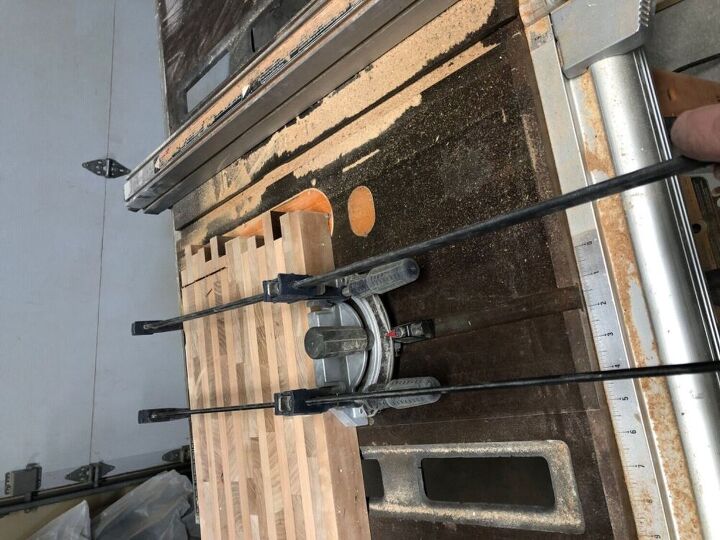
Using the table saw, trim the uneven edges off. We were left with 19 1/4” length. You can make your board as long as you like.
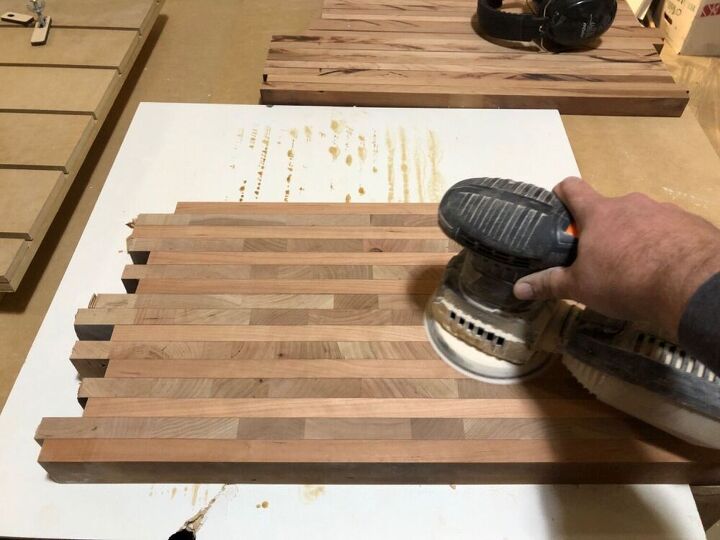
Then using the orbital sander and 220 grit sandpaper, sand all sides and edges. (We sanded the top and bottom sides before we cut the edges- we suggesting cutting the edges first and then sanding everything at the same time.) We used the sander to round the edges and corners then switched to 320 grit sandpaper and repeated the process.
Once the board is sanded, we cleaned it with odorless mineral spirits. We found a few seams that had not gotten quite enough glue and there were a few knots. We applied Starbond, medium thick, black glue with the accelerator then sanded it smooth to seal the open seams.
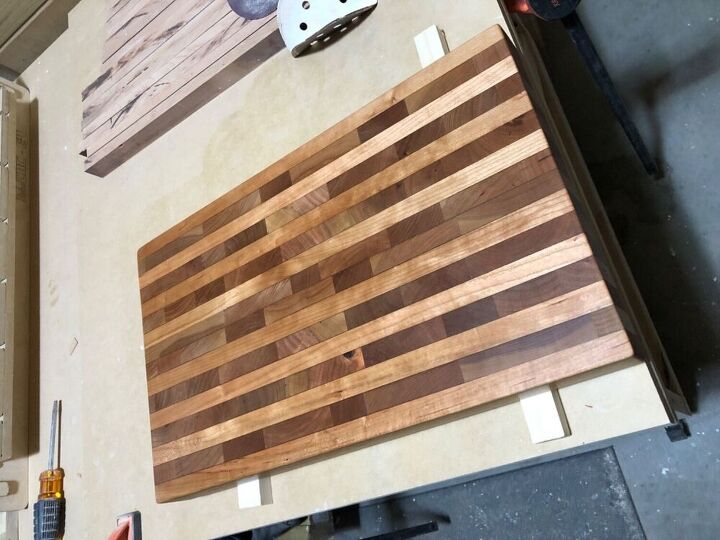
Cleaning the board one more time with mineral spirits (this keeps the grain from raising in the wood). We then applied Odies Oil as the finish. Wait about one hour before buffing off the excess oil with a lint free cloth to complete the finish.
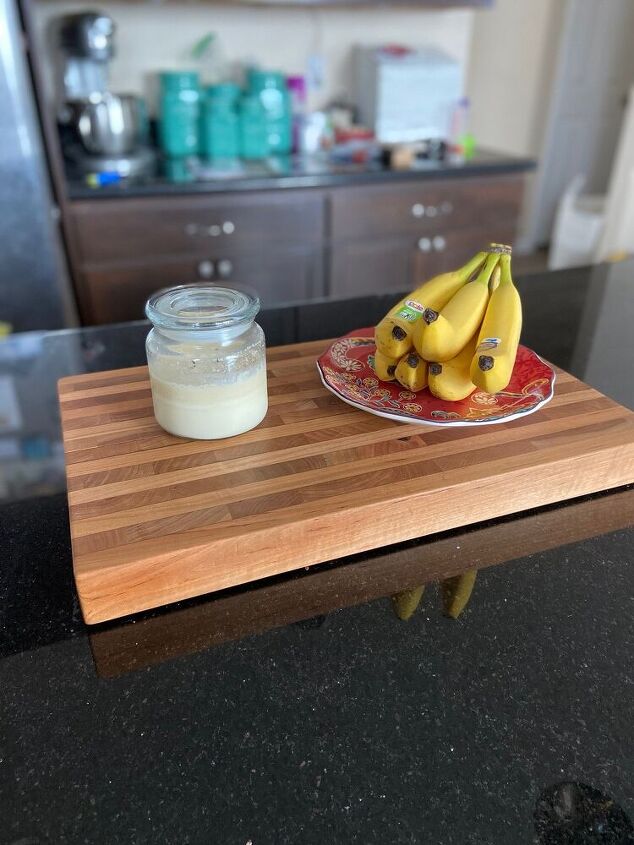
We added rubber feet to the bottom of the board as it will be sitting on different surfaces in our kitchen.
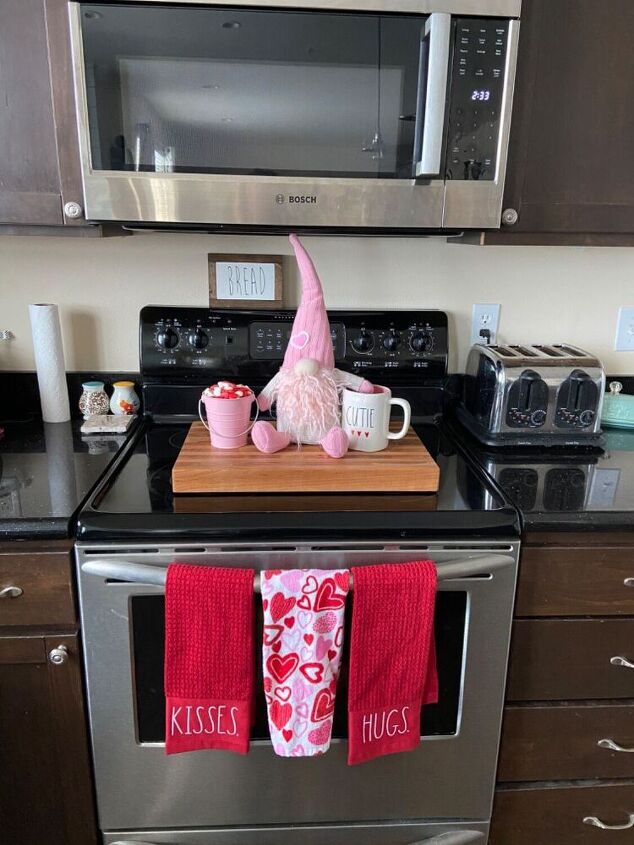
It adds character to our kitchen. I love decorating it for the holidays, using it on Sunday’s as our snack tray or weekdays as our breakfast board. The possibilities are endless. You can check out more of our projects, refinished furniture and home styling on Instagram @therefininghome
Read this guide on how to clean a wood cutting board for useful tips on keeping your new board clean!
Resources for this project:
See all materials


Comments
Join the conversation
-
Great looking board. You did mention using it as a serving tray. Not knowing the species of wood best not to use it as a cutting board. Some species of wood are toxic. Looks amazing though
-
Thank you. Great advice for beginners. This is a hard wood, cherry wood- so it’s okay to cut on it. Yes there are species of wood that are toxic or not best to cut on. Cutting boards and serving trays are trending in home decor right now mostly as decorative pieces. I always like to know what ones are good for cutting on and those that are just for looking pretty. 😍


Frequently asked questions
Have a question about this project?