


DIY Dollar Tree Metal Hanging Butterfly Decoration With Gems

Hello everyone! Today, I will guide you through the process of decorating a metal butterfly. This is a hands-on craft that involves the use of gems, which can make the project take a bit longer. It took me about 30 minutes to complete this craft, and I already had most of the materials on hand, except for the butterfly and Mod Podge, which I had to purchase. As we go along, I will take you step-by-step through the process. Don't forget to check out my video tutorial for additional guidance.
Video tutorial
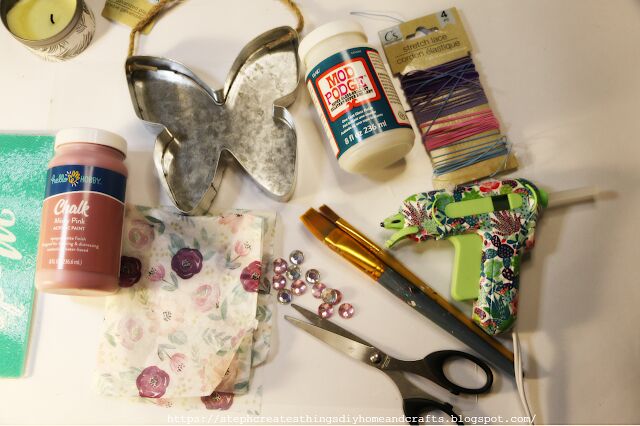
Materials
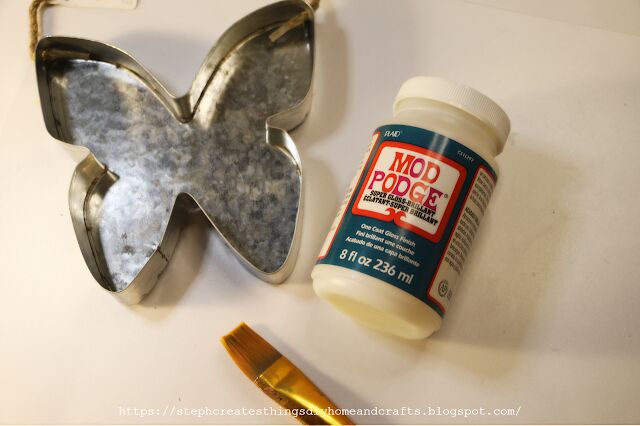
I bought a metal butterfly from my local Dollar Tree and you can find something similar in any craft store.
For this project, I'll be using :
Mod Podge Super Gloss finish
Chalk paint in the color Misty Pink
Two paintbrushes
Hot glue tissue paper
And craft gems
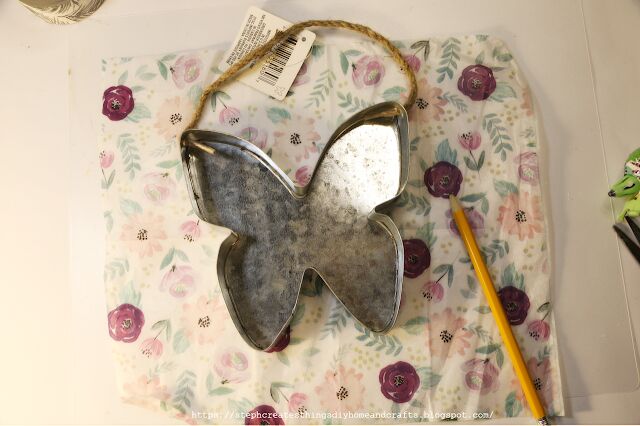
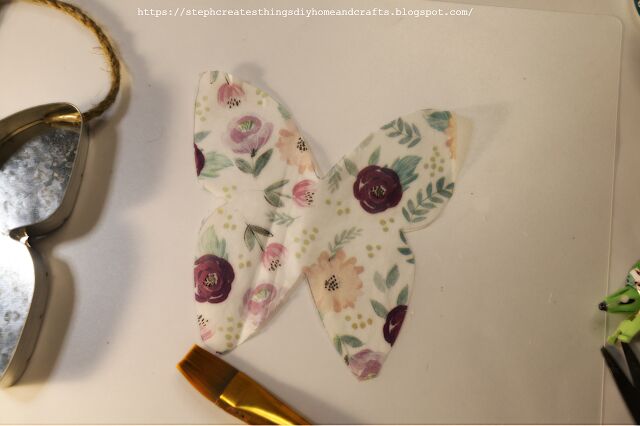
Step 1: Tracing out the metal butterfly onto the gift tissue paper
To begin, grab the metal butterfly and some tissue paper. Unfold the tissue paper and place the butterfly on top of it. Use a pencil to trace the outline of the butterfly onto the tissue paper. Once you've traced the entire outline, use a pair of scissors to carefully cut out the butterfly shape from the tissue paper.

Step 2: Applying Mod Podge and tissue paper
First, apply a thin layer of Mod Podge on the inside of your butterfly. Once you have applied a thin layer, place your cut-out shape on top of the Mod Podge. Make sure that the tissue paper is evenly spread and remove any lines or wrinkles that may appear. Don't worry if you can't get all the wrinkles out. After adding your tissue paper, apply a thin layer of Mod Podge on top of the tissue paper. You can use a heat gun to assist with drying.
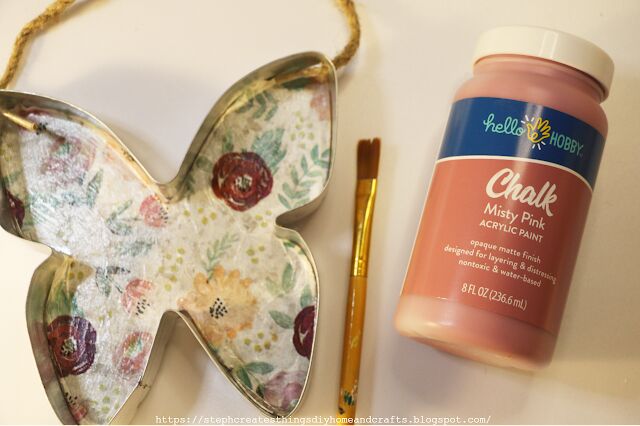

Step 3: Applying paint to metal butterfly
Now you are ready to paint the outer surface of your butterfly. With chalk paint, two coats provided complete coverage.
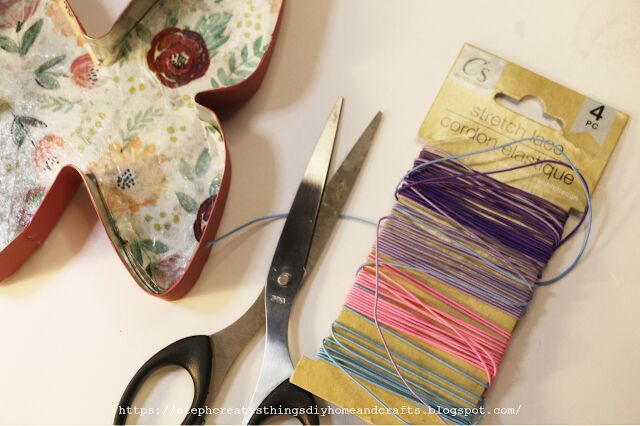
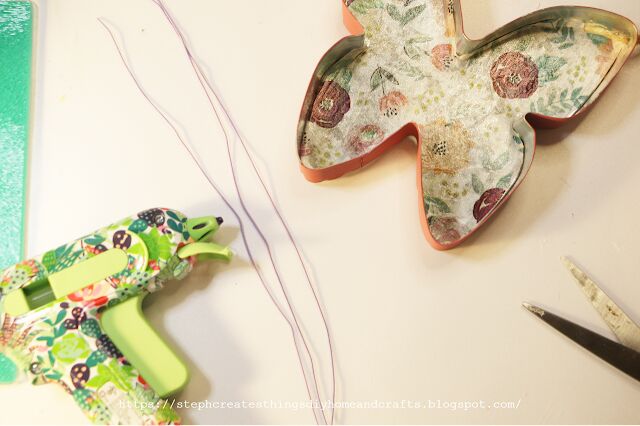
Step 4: Cutting and attaching the stretch cord
Next, take your stretch cord, and begin to cut three strands. Your strands can be any length that you choose. Whether you want them to be long when hanging from your butterfly, or if you decide that you want them to be a little shorter, it is completely up to you. I went with a medium length for my stretch cord.
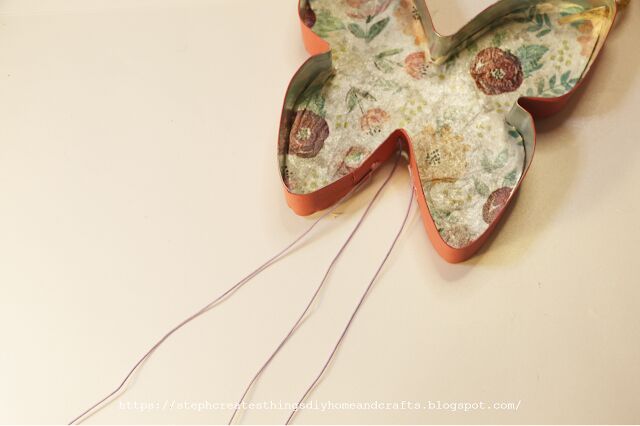
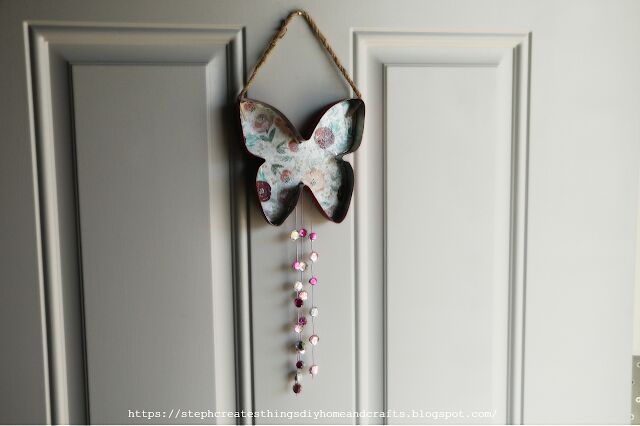
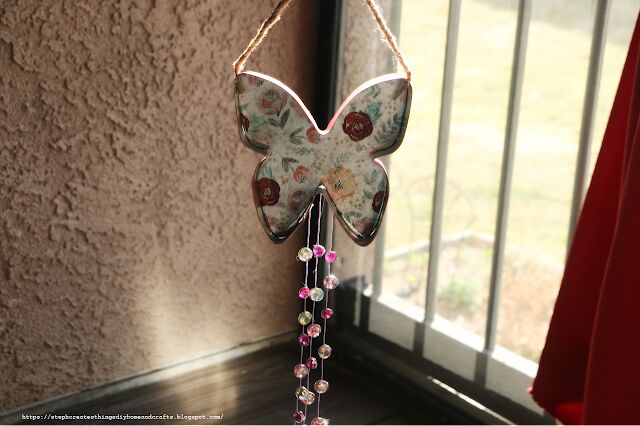
After you have cut your stretch cord, use your hot glue, and glue your stretch cord to the bottom section of your butterfly. Glue them onto the inner right, left, and center of the butterfly.
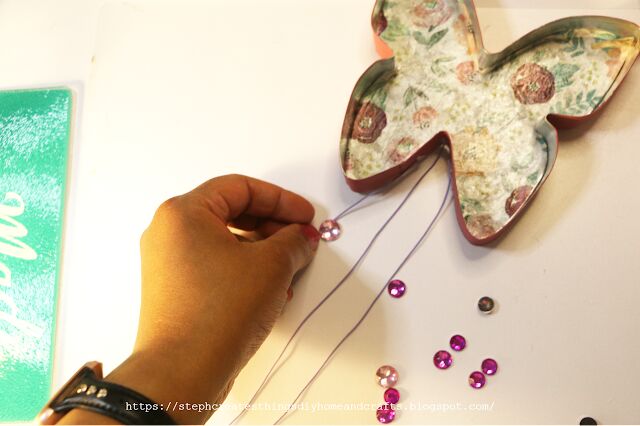
Step 5: Attaching craft gems to the stretch cord
You are now prepared to add your craft gems to your project. Begin by selecting two craft gems that are the same size. Apply hot glue onto one of the gems. Take the stretch cord and place it on the glued gem. Then, press the second gem onto the opposite side of the stretch cord. This will ensure that the stretch cord sits in the middle of the two gems.
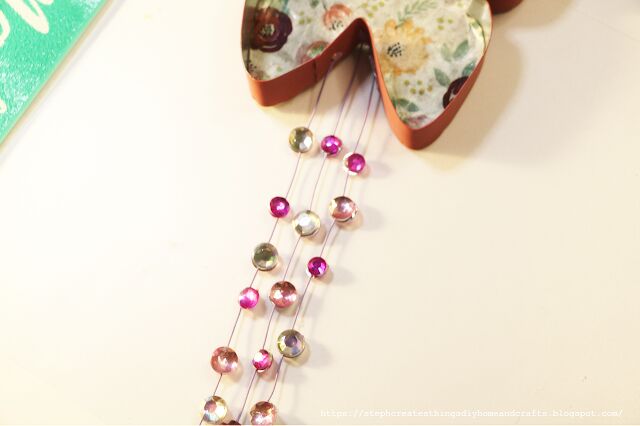
Repeat this step until you have filled your stretch cord with the desired amount of crafts gems.
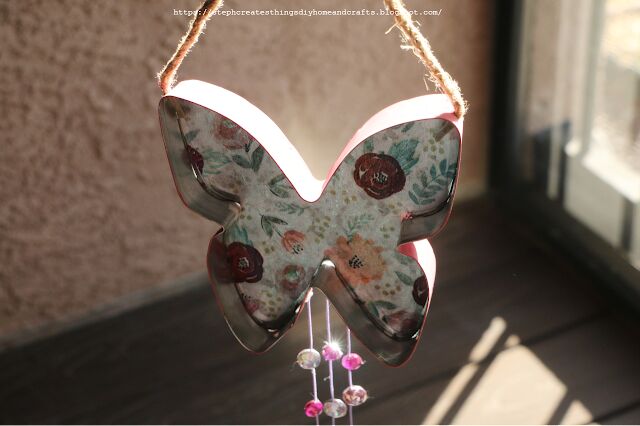
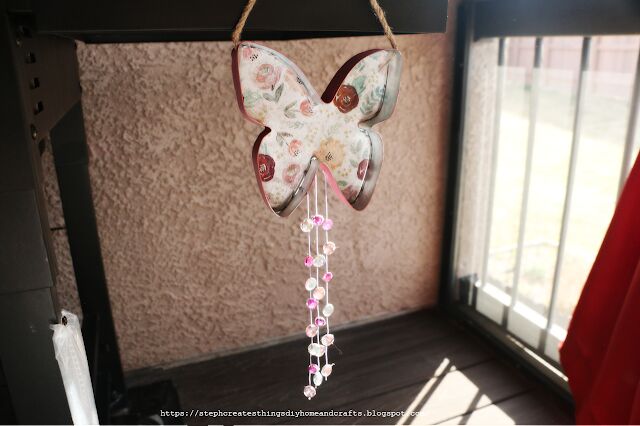
Your hanging butterfly decoration is now complete! I love how it turned out, and it looks beautiful when the sunshine hits it. I hope you enjoyed this DIY craft project. Please let me know in the comments below if you decide to create your own. See you soon!

Pin/Save/Share
You might also enjoy other Mod Podge crafts
Quick and easy repurposed cheese board decoration
Two Decorating Ideas For Plastic Plates


Frequently asked questions
Have a question about this project?