


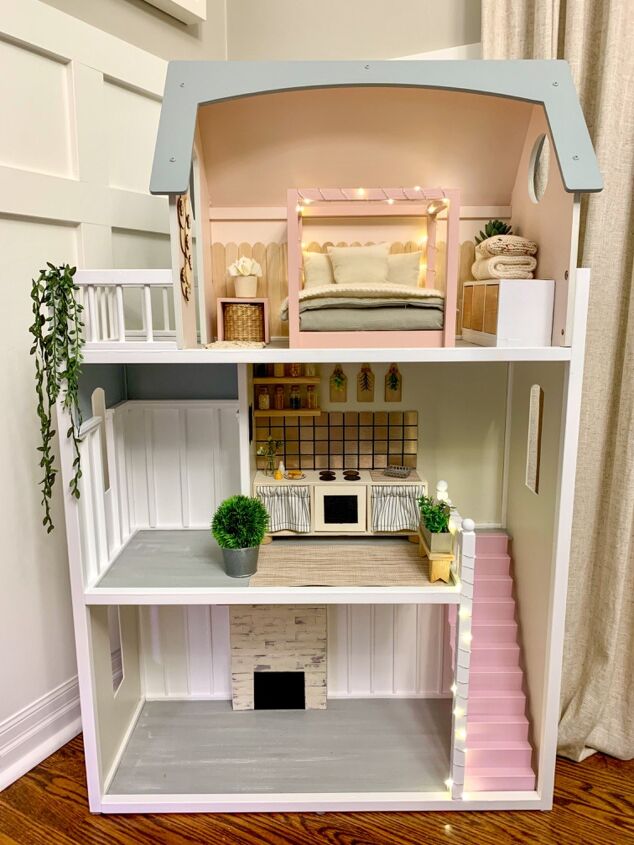
DIY Dollhouse Kitchen

I have been having so much fun renovating this dollhouse, and if you have been following along you know that I already transformed the entire interior and exterior of the house as well as the bedroom.
My next challenge was to build a miniature kitchen. I had no idea what I was going to use, and what direction I wanted to go in. After several different ideas, I decided to keep things very simple and minimal to allow for lots of room to play. My daughter is still quite young so for her, this set up works perfectly! She has plenty of room for imaginative play and it’s not too overwhelming for her to tidy up when she is done.
Read below to find out how I built this mini kitchen with only a few store bought items from the dollar store and plenty of repurposed materials I already had on hand!
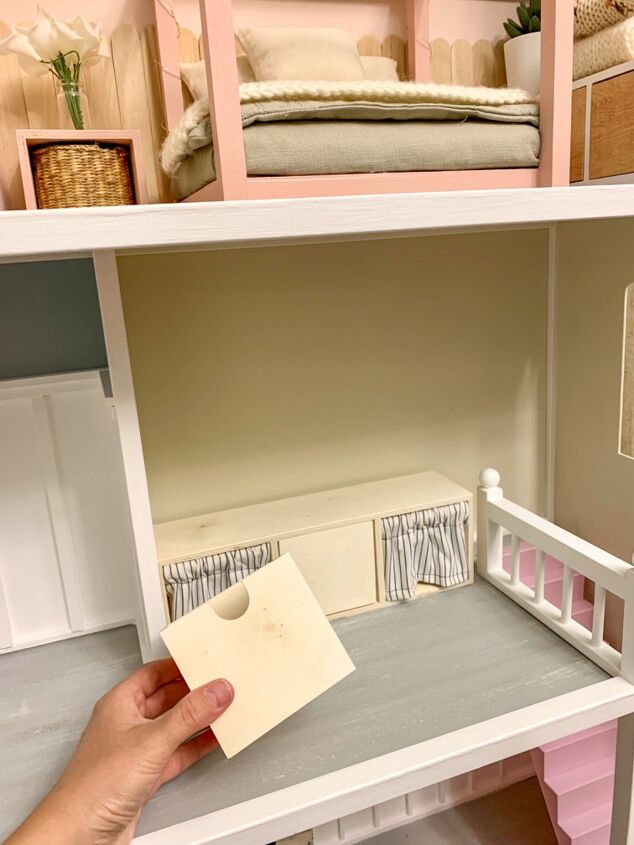
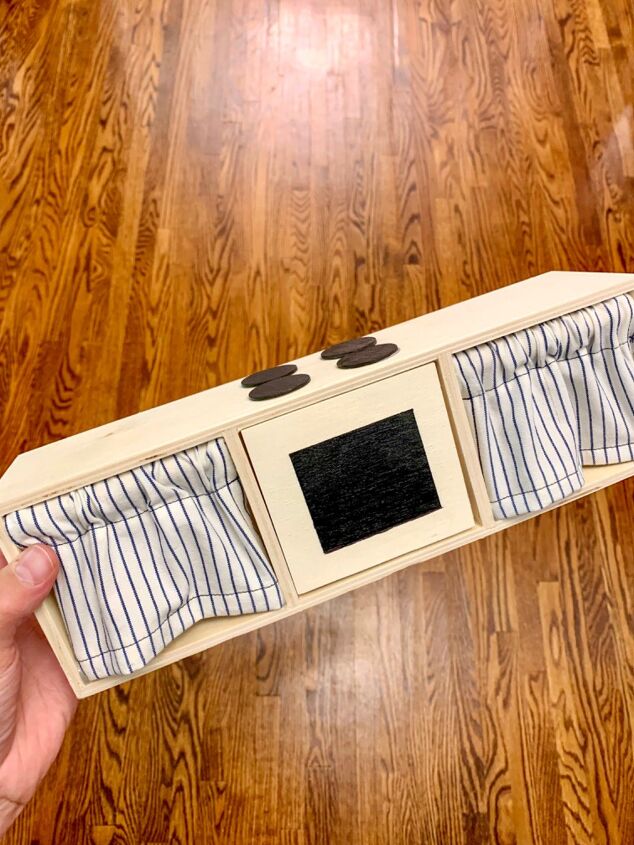
I found this little wooden drawer set at the dollar store and I thought it would be perfect to use as lower kitchen cabinets. I wasn’t sure how to make the drawers look like cabinets so I removed the two drawers from each end, and sewed little curtains to cover up the opening. The middle drawer I turned backwards and you will see my plans for that shortly.
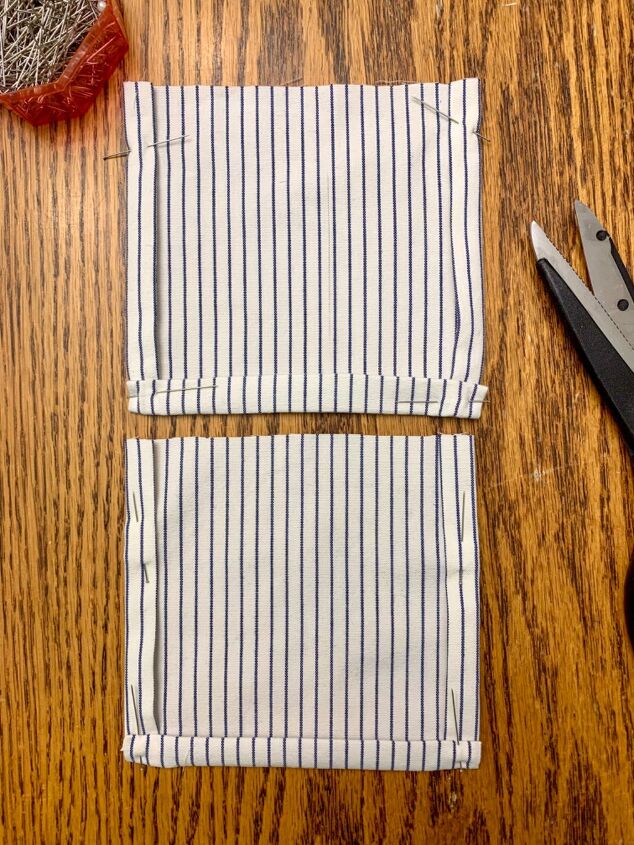
I used a scrap piece of fabric to make the little curtains for the cabinets. Fold over the edges and press with an iron before sewing for a neat and tidy appearance.
For the top portion of the curtains fold over and leave a pocket big enough to insert a wooden dowel (similar to the opening for a regular curtain).
Once the curtains were on the wooden dowel, I glued them in place using hot glue.
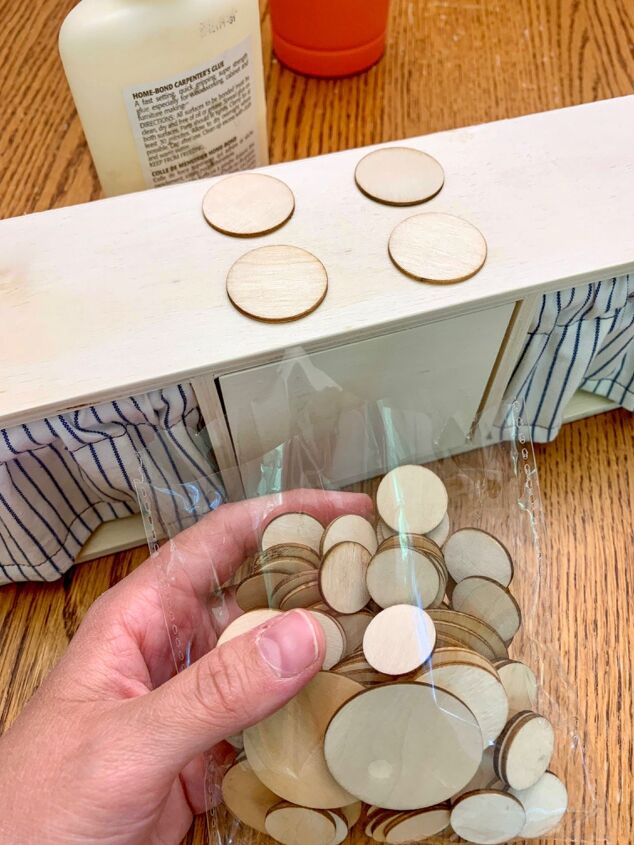
I decide to use the middle drawer as an oven. I had these little wooden circles and thought they would make the perfect burners for the stove.
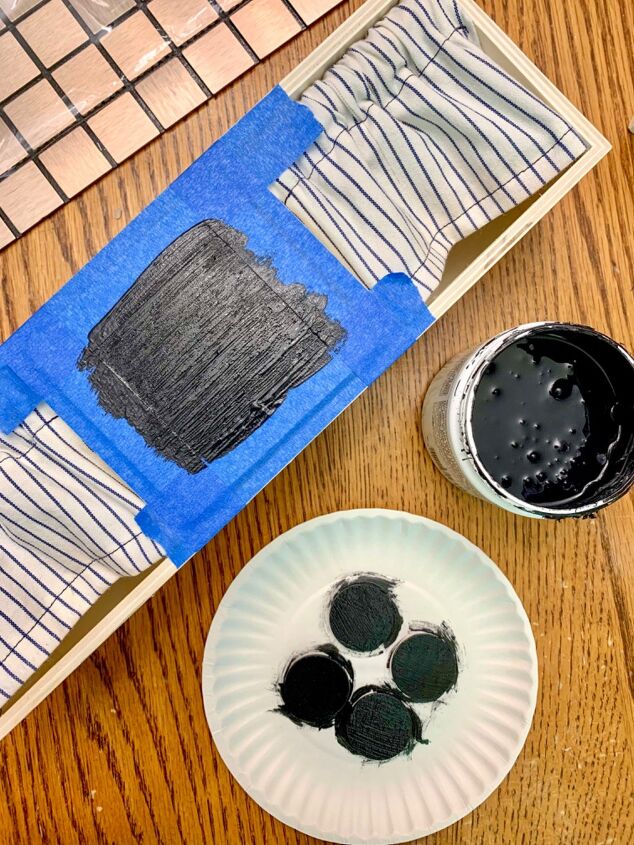
I painted the wooden circles black, as well as a square on the back of the middle drawer to create the look of an oven door.
And there we have a little mini kitchen!
I think it turned out so cute!
I did end up going back and gluing on some feet to the bottom to raise the cabinets a little bit.
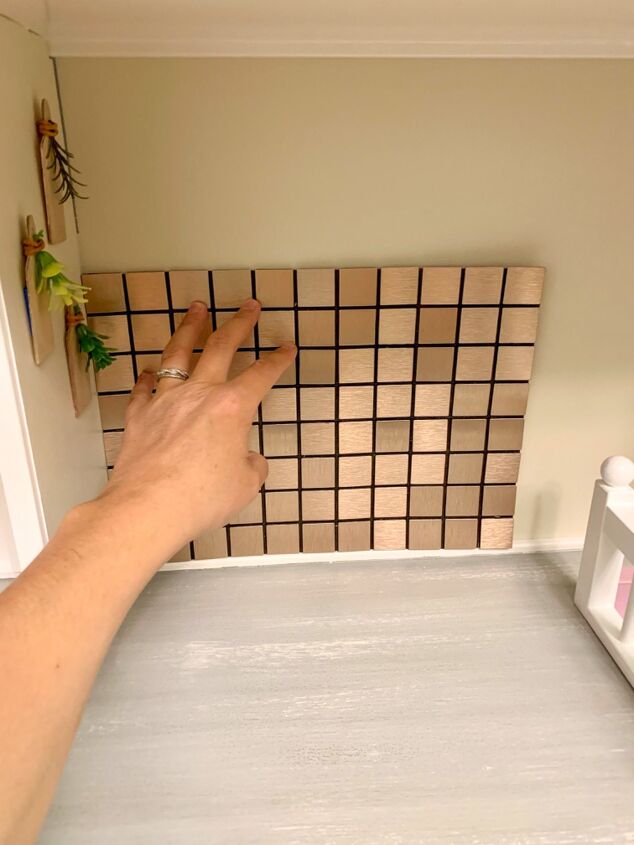
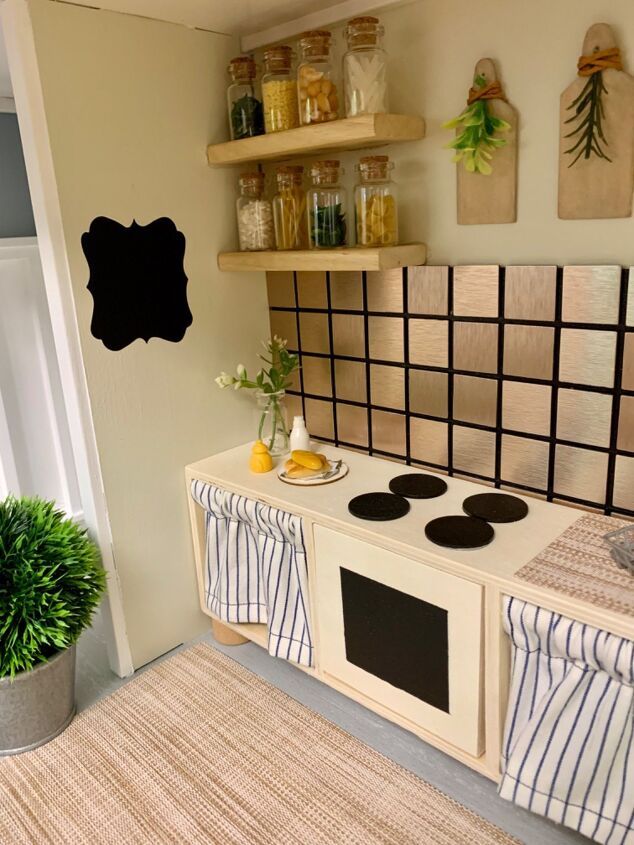
Before putting the kitchen cabinets in place I added in a pretty backsplash to the kitchen. I found this peel and stick metal tile at the dollar store and it was the perfect size and colour for this project.
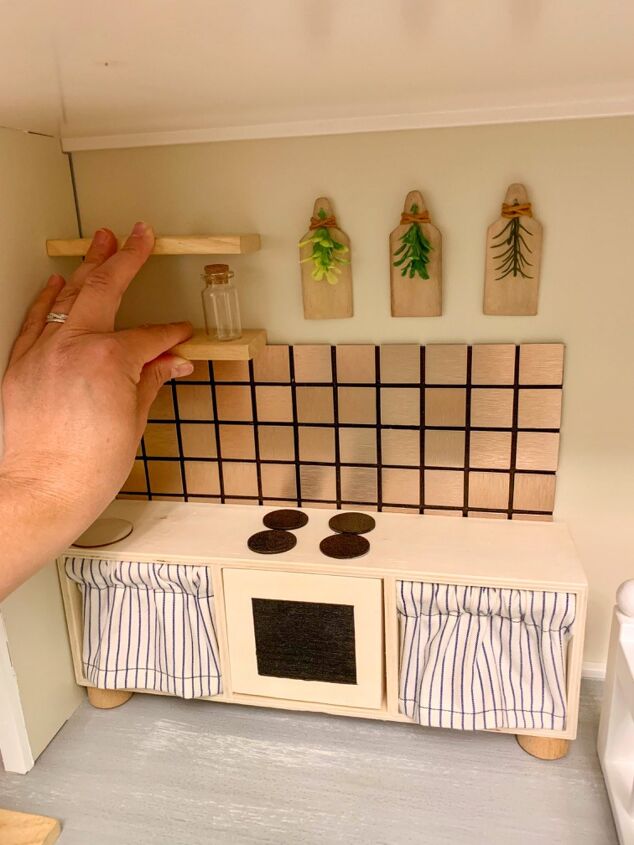
I played around with the placement of a few objects before permanently securing them with hot glue. I used a few wooden blocks from an old toy to create open shelving in the kitchen.
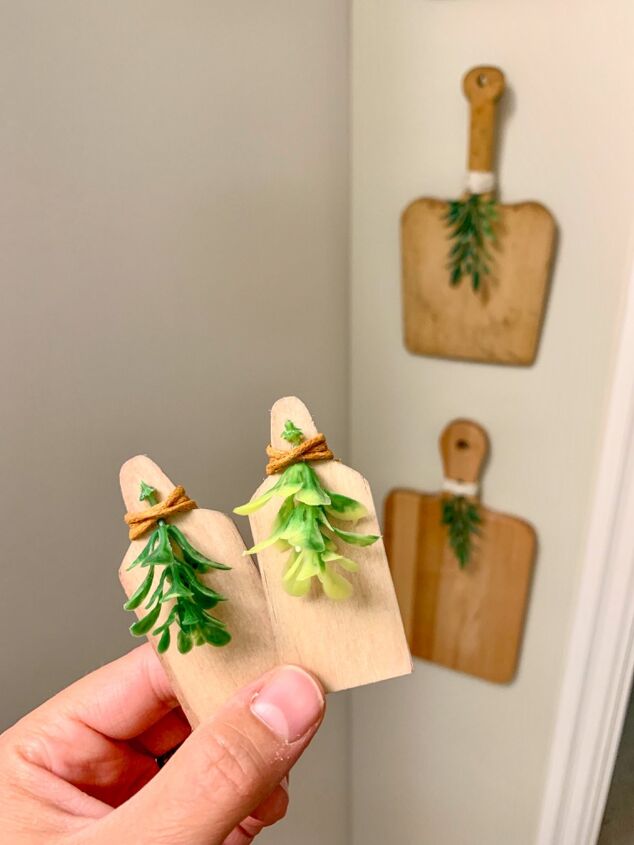
And now for the fun decorating part of the kitchen! I made these little cutting boards (similar to ones I have in my own home) by cutting up a jumbo popsicle stick. I “stained” them using some brown water colour paint.
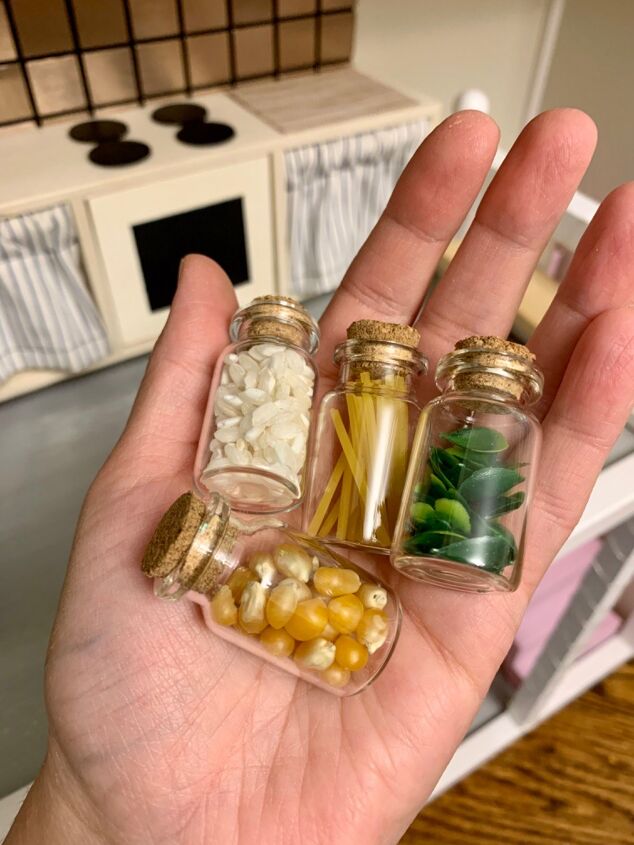
My daughter helped me to fill these mini jars with some pantry essentials. This has to be my favorite parts of this whole kitchen, and she had a lot of fun picking out the ingredients.
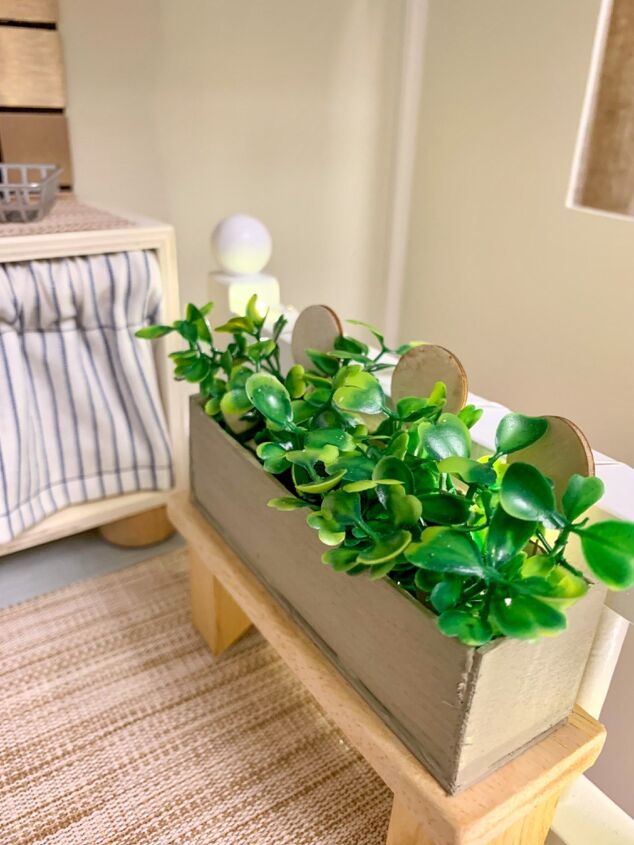
The area in the kitchen wasn’t quite big enough for a dining set but I felt It needed a little something to fill the empty space. I decided to make a little “herb garden” planter box using some old blocks, Popsicle sticks and faux greenery.
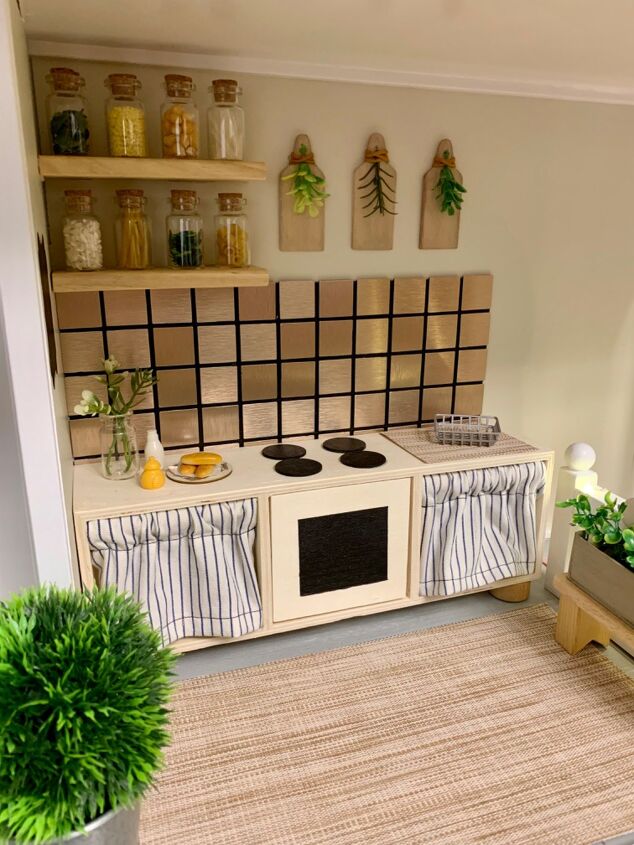
And here is the complete kitchen! I think it turned out so cute! The only thing I might go back and add in is a sink if I find something suitable, but overall I think everything came together so nicely.
I love all of the little elements that make the kitchen feel realistic.

I added a little rug made from a placement I cut to size.
Stay tuned for the bathroom and living room makeovers!
A little closer look of the mini kitchen.
Comments
Join the conversation
-
I love mini's, all of it. The upcycling the most though I think. It's so interesting the ideas that one comes up with. This kitchen is beautiful and your simple ideas are brilliant and so cute too. I look forward to more and I'll be sure to check out your blog!


Frequently asked questions
Have a question about this project?