


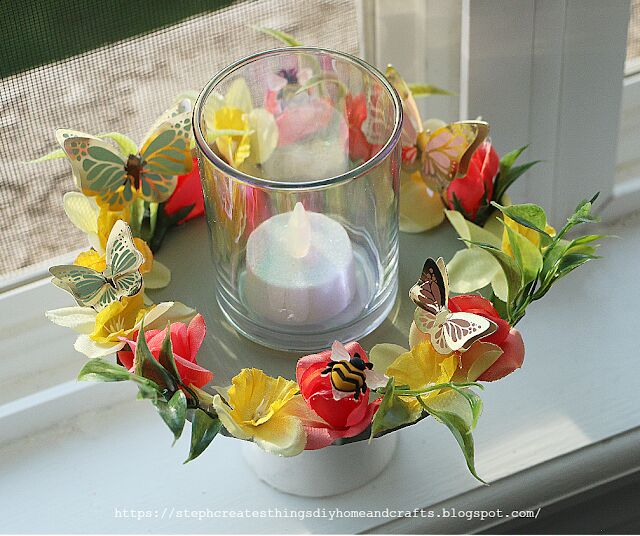
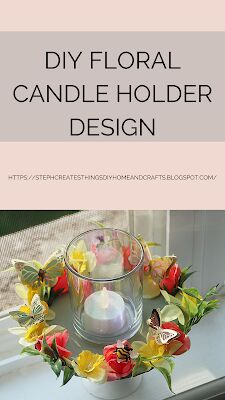
DIY Floral Candle Holder Design

Hello! I hope you're doing well. Today, I want to show you how to make a beautiful DIY floral candle holder that will add a touch of spring to your home decor. It's an easy project that you can do with materials you probably already have. The only things you'll need to purchase are a glass candle holder and a round galvanized metal cap, both of which you can find at Dollar Tree. I created a succulent centerpiece a while ago and loved how it turned out, so I'm excited to share this new project with you. Let's get started!
DIY floral candle holder design
video tutorial
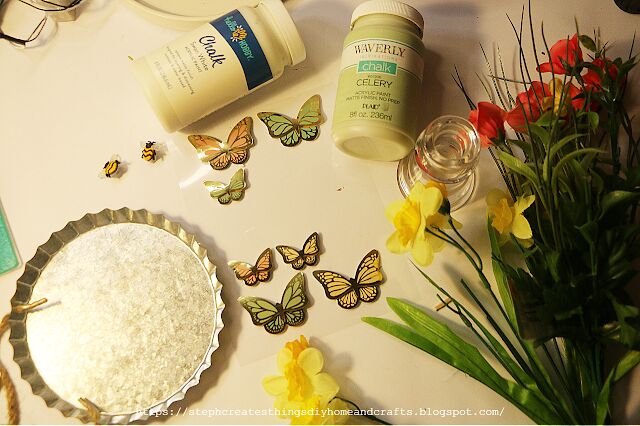
Materials needed
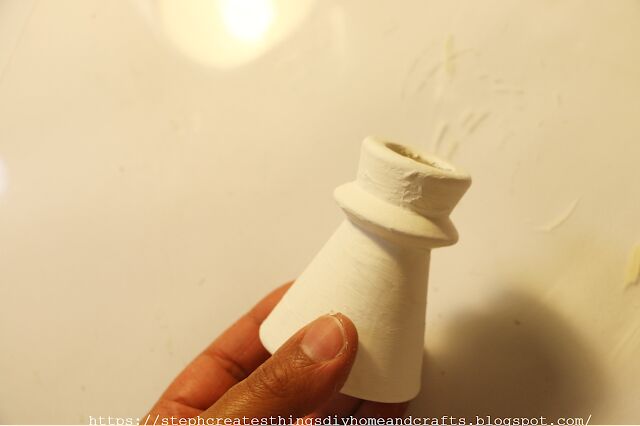
One glass candle holder-purchased at Dollar Tree
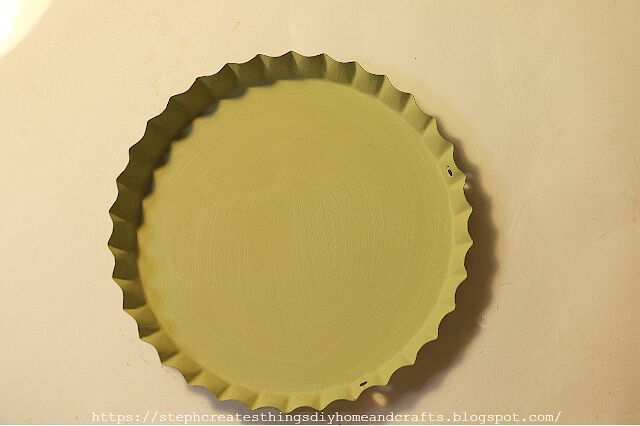
One round galvanized metal cap-purchased at Dollar Tree
Chalk paint- Any color of your choice. I'm using white and celery
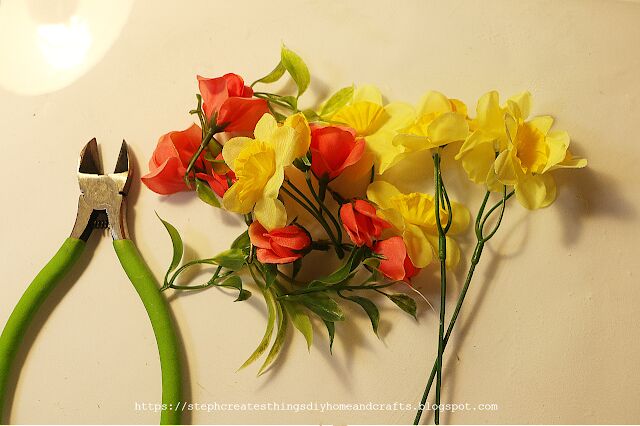
Faux floral-purchased at Dollar Tree
Hot glue or E6000 adhesive
Floral snips
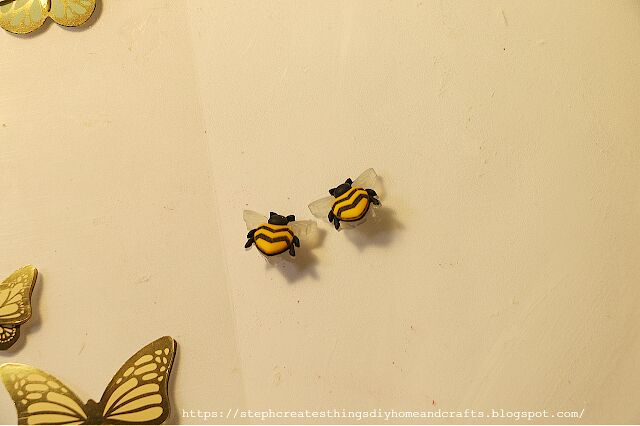
Optional-bumblebee buttons- I purchased mine at Joann's
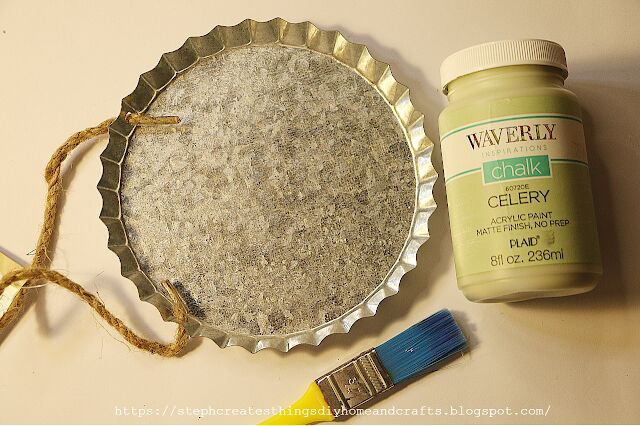
Step 1: Applying acrylic paint to the galvanized cap
Start by taking your galvanized metal cap, and removing the twine rope. Using your paint brush apply your first layer of chalk paint to it. I used my heat gun to dry it between each coat of paint. I applied around two coats of paint.
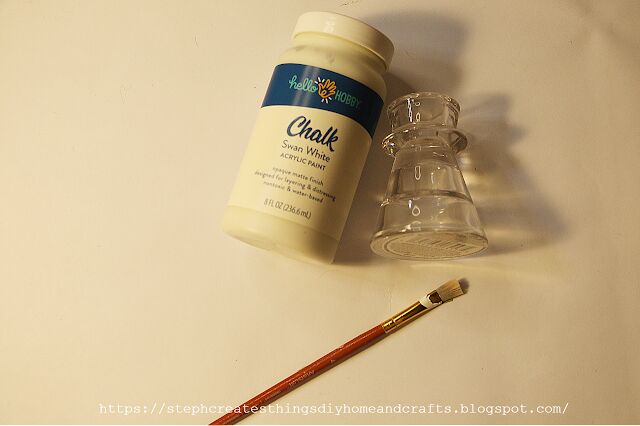
Step 2: Adding acrylic paint to the candleholder
Next, take your glass candle holder, and apply chalk paint to it. I also used my heat gun to help with drying. I applied around three coats of paint.
Step 3: Attaching the candleholder to the galvanized cap
After you have applied your paint to both the metal cap, and glass candle holder, take your adhesive and apply some on the top surface of your candle holder. I did notice when I used hot glue, it eventually came apart. To prevent this from happening I suggest using a heavy-duty adhesive like E6000, or gorilla glue.
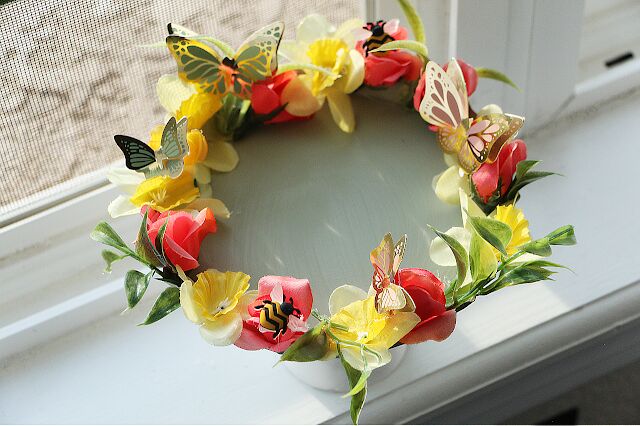
Step 4: Cutting and attaching the flowers
Next, take your floral snips, and begin to cut your flowers to size. I cut the stems off and left the flowers. Also, be sure to cut any of the greenery, and leaves off to use.
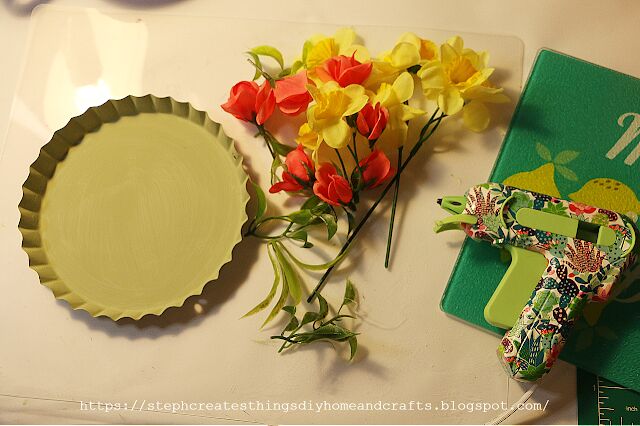
Begin to glue your floral around the top inner section of your metal cap. Add your flowers and leaves.
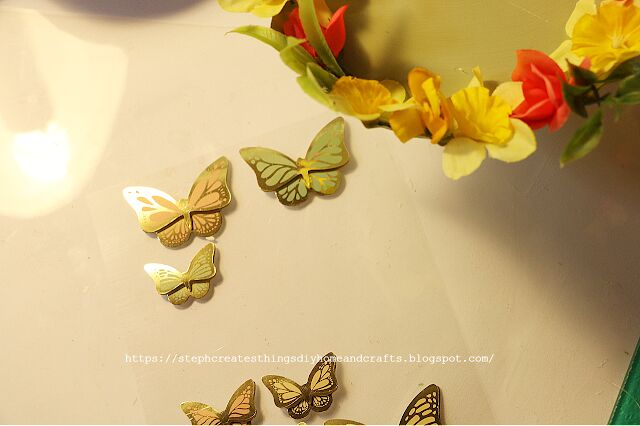
Step 5: Adding butterfly stickers and embellishments
After adding on your floral, take your butterflies, and add them onto your flowers. You can add your bumblebee buttons as well. Remember that it is completely optional.
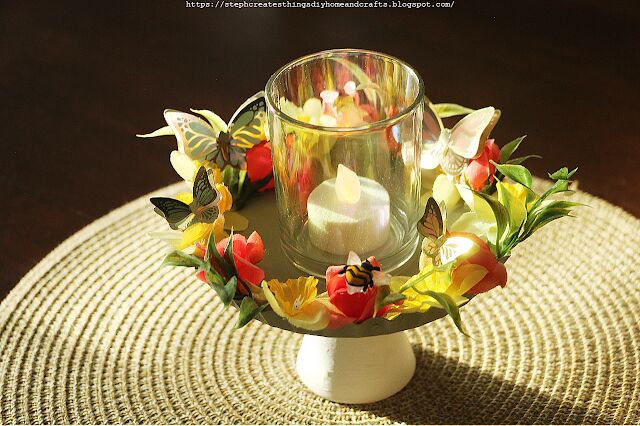
The last step is to take either a battery-powered candle, or a candle jar, and add it to your design. I love how this turned out, and I love that it was so simple to create.
I hope that you enjoyed this simple DIY. Be sure to let me know if you decide to create your very own. I'll see you soon!
Pin/Save/Share


Frequently asked questions
Have a question about this project?