


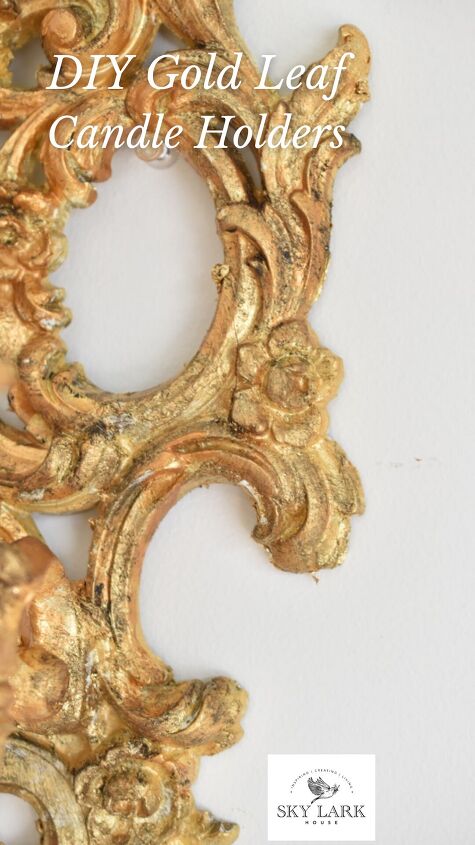
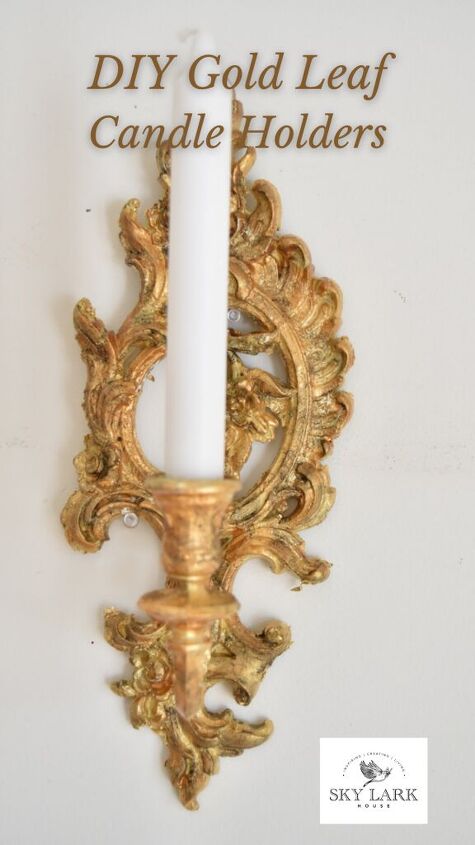
DIY Gold Leaf Candle Holders

Do you want to learn how to DIY some gold leaf candle holders? Here are the steps to create some authentic gilded looking candle holders.
A quick note that this post includes affiliate links and I will receive a commission but at no additional cost to you. I am presenting you with my own opinion and honest review of the information provided. If you want to read the entire disclosure statement, please click HERE.
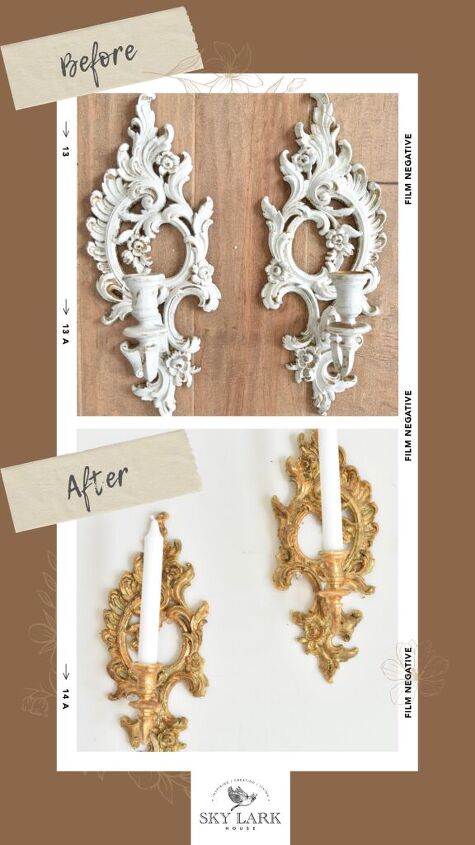
I was out and about looking for vintage items when I stumbled across a pair of vintage wall sconces (AKA wall mounted candle holders). At one point, someone had half heartedly tried to paint them white. They looked a little sad and because of that – they were extremely affordable. (As in $5 for the pair).
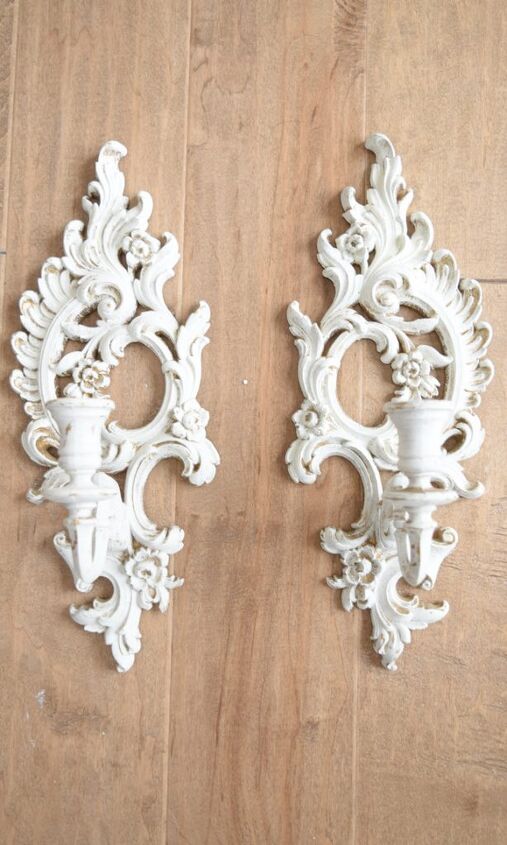
In spite of their current condition, I thought they had some hidden potential. You can see that originally, these wall candle holders, were a gold color. I thought it would be nice to return them to the original color but adding a bit more sparkle and depth. So with that – let’s jump in. I will walk you through the steps for these DIY gold leaf candle holders.
The first requirement for any project is to gather your supplies.
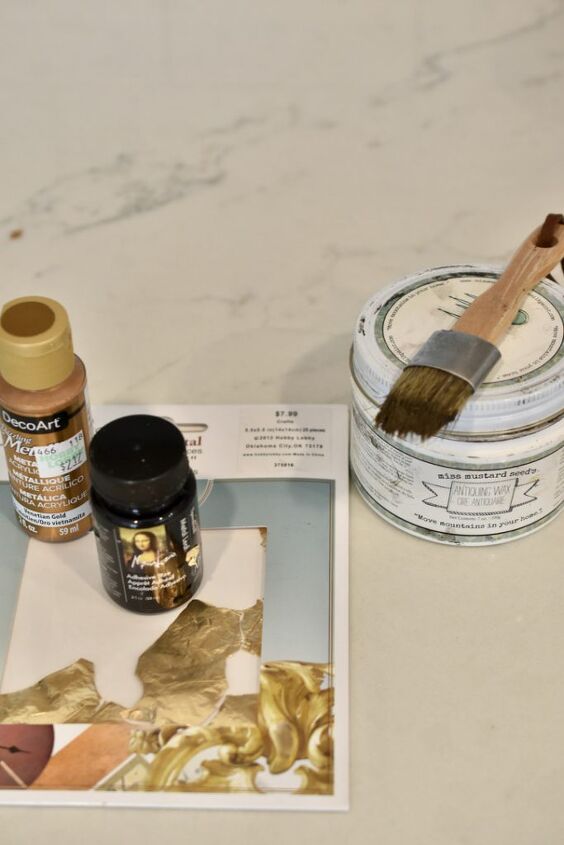
- Gold leaf foil
- Sizing to attach the gold leaf foil to the candle holder. Sizing is a specific type of glue.
- Two types of metallic gold paint – one a lighter yellow gold and the other a darker amber gold
- Several small paint brushes
- Antiquing Wax – I used MMS Milk Paint Antiquing Wax
- A small wax brush to apply the wax
- Some paper towels or cardboard to protect your work surface
- A small soft rag
I linked most of these supplies below – at the end of this post.
Cleaning is a very simply process. Simply clean and scrub your existing candle holders with a degreaser (Ex: Mr. Clean, Dawn dish soap, Krud Kutter) to ensure any existing dirt, grime, dust, candle wax or grease has been removed. I used a toothbrush to scrub the nooks and crevices of the candle holders. Then I dried them well using a clean fluffy towel.
If you have ever worked with gold leaf before, you know that the foil is very thin and the slightest breeze can make it a challenge to apply. So, try to work in an area that is away from any vents, fans or drafts.
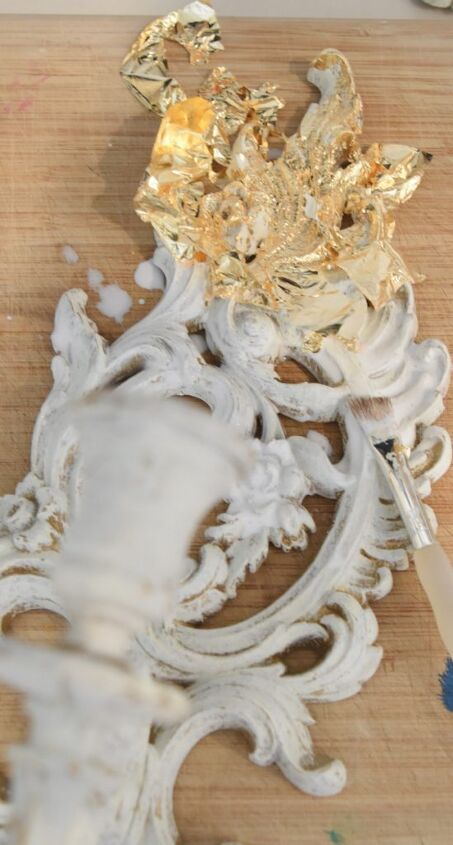
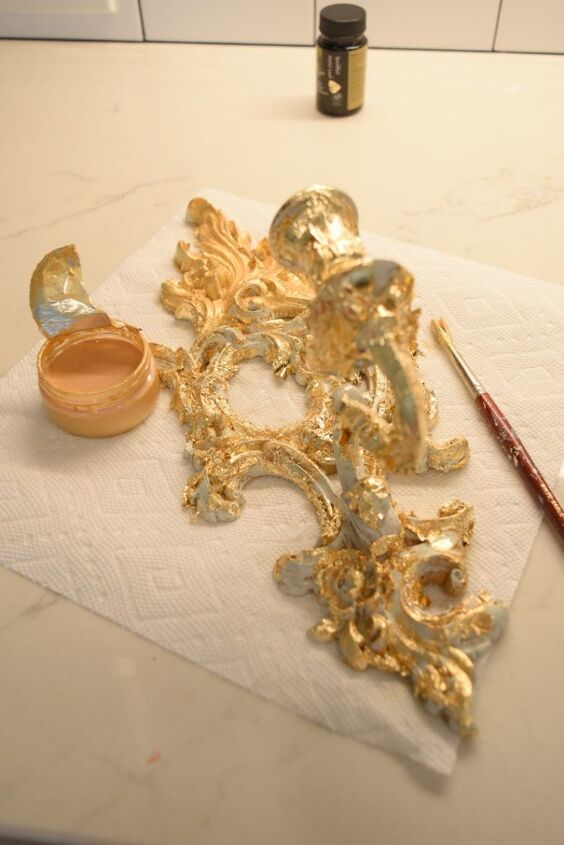
Working in a small area, brush on the sizing to the candle holder. Make sure you get the sizing into the smaller nooks and crevices. As you can see in the photo above, I applied sizing to the first 1/3 of the candle holder and then applied the gold leaf. I laid the foil on top of an area brushed with sizing and then used a separate dry paint brush to tap it down.
I repeated this process until the entire candle holder was covered with gold leaf. When you are done, the gold leaf will look rough and there will be areas where the gold leaf did not adhere to your candle holder. This is absolutely OK. Don’t worry about it.
Once your gold leaf has been applied and has dried a bit, you are ready for the next step. Use a paint brush to lightly brush on the lighter of the metallic gold paints. The secret to this project working well is layering. Shh – I Just gave you the biggest secret of this whole project.
The photo above shows you how the candle holder looked as I was applying the lighter color metallic gold paint. Notice, towards the bottom of the sconce, that the gold leaf is missing from small areas. This is ok.
The metallic paint is applied over the gold leaf foil. I used a small paint brush so I could access all the corners and crevices.
Once you have painted your candle holder, set it aside to dry to the touch. I let my paint dry for about 45 minutes.
You will simply repeat the process above but this time using the darker colored metallic paint.
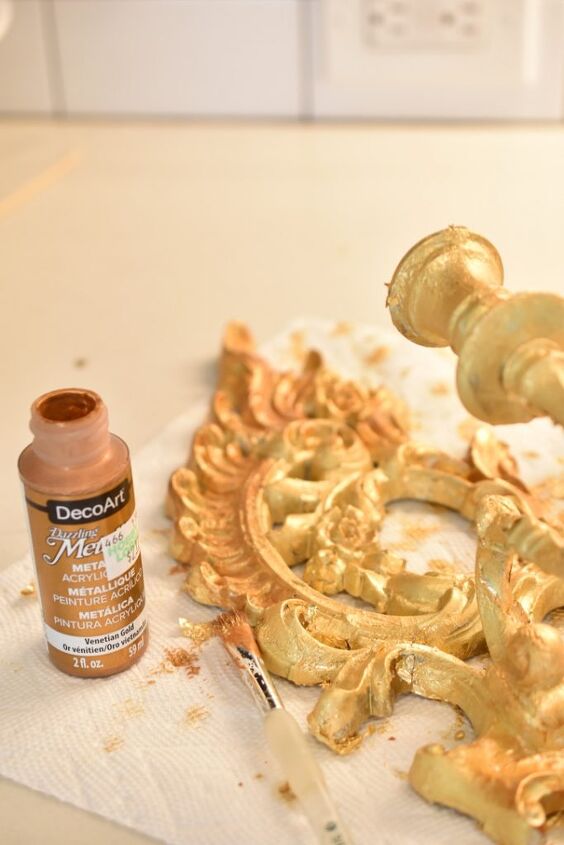
You can see in the photo above, that you just generally apply the paint to the candle holder. You don’t need complete coverage. I would aim for about 60-70 % coverage over the existing paint. As I was working, if I felt the paint was too thick in certain areas, I used a damp paper towel to lightly wipe it off. The goal here is to be able to see the different layers of gold on the candle holder.
Once you have applied the darker metallic gold paint, let the candle holder dry for another 45 minutes or so.
By now, your candle holders should be looking pretty good with multiple layers of paint and gold leaf visible. The final step is to gently and lightly apply an antique wax. I used MMS Milk Paint’s antiquing wax.
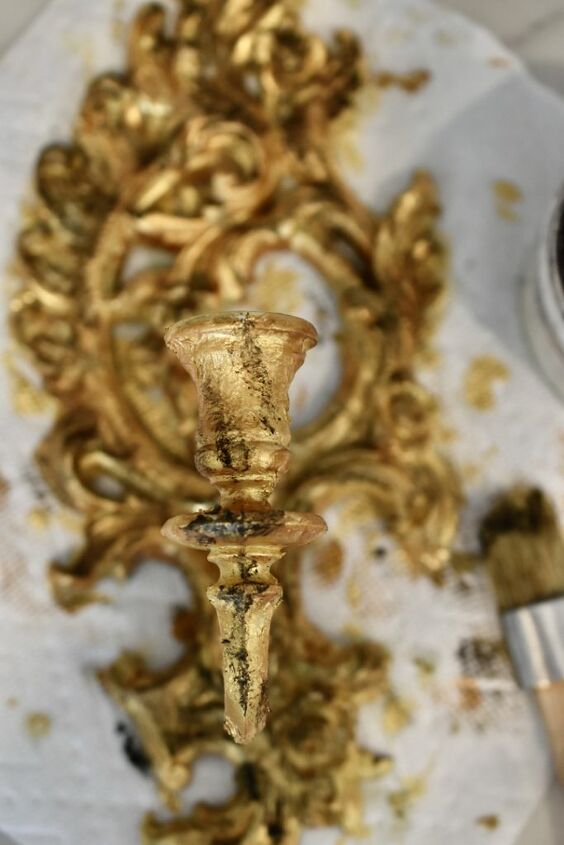
Again, I lightly tapped the antiquing wax over the top of the candle holder. Then I used a soft cotton rag to gently wipe off any extra. I really wanted the wax to get into the areas where dust would naturally collect, such as the nooks and crevices. The photo above shows wax being applied but not yet wiped off.
Once you are happy with the way the candle holders look, let them dry for a bit.
Let me tell you, waiting for these candle holders to fully dry is the most challenging part of this project. I am naturally impatient and it just about kills me to have to wait for things to dry. However, I have learned my lessons the hard way. If I don’t wait for paint to fully dry – then it will inevitably come off or be removed inadvertently. So while my sconces were laying flat to fully dry, I took the dogs for a walk.
Then I came home and I hung them up.
Pin the image below to your Pinterest account if you want to remember how to make these candle holders in the future.
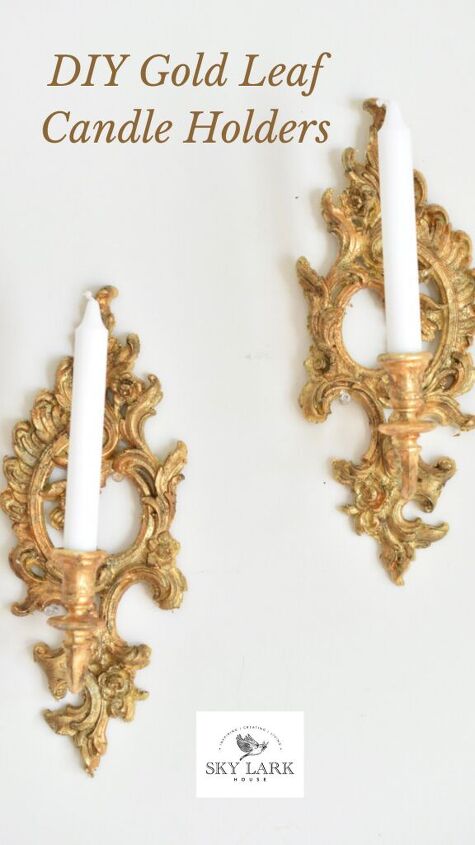
This is much better than the “Before” version of these candle holders- right?
Here are a few more photos.
I think the wax settled nicely into the grooves and crevices.

Here is one final photo so you can see a close up of how the various layers of paint look.
If you liked this project, here are some links to some other DIY projects. These projects are all fairly easy to make and require only basic supplies.
- DIY Garden Tool Rack
- Tissue Paper Flowers
- DIY Moss Wreath
- Painting a Plaster Statute
Thank you for stopping by the blog today. I hope you found some inspiration in using a DIY gold leaf process. You can use this process for a variety of projects including mirror frames, gold leaf boxes, picture frames and more. It’s a rewarding way to bring life to a vintage item that you purchased for a song.
Join our mailing list to receive the latest news and updates from our team.
- Collecting Codd Bottles
- DIY Gold Leaf Candle Holders
- Easy Moss Wreath
- Easy Tissue Paper Flowers
- The Small Antique Blue Table


Frequently asked questions
Have a question about this project?