


DIY Heirloom Document Decor
5 Materials
Easy
We probably all have at least one - a document that we hold onto because it's so special to us. But we usually tend to tuck them away in a folder or drawer for safe keeping. How about bringing them out and enjoying them instead? This simple project for displaying your special papers is perfectly customizable to your own decor and style, and can be completed in less than an afternoon.
Quite a few years ago, at one of our family gatherings, my mom prepared a simple dessert that blew us all away! My family loved it, my sister's family loved it, and before long, it became the "staple" dessert at our gatherings. My kids began to request it at home for birthdays and any time we had dessert, so I asked my mom to share the recipe and she wrote it out for me on a piece of simple notepad paper.
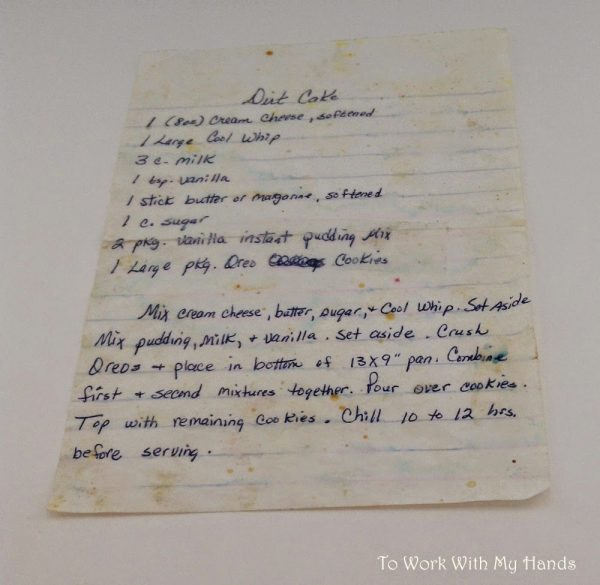
I folded it in half and stuck it in an envelope, pulling it out each time the special dessert was requested. Eventually my kids learned to make it, and would get it out themselves. Through the years it collected splatters and stains, and even began to tear along the fold. When my mom passed away 6 years ago, that handwritten recipe - stains and all - became a priceless possession to me, and I wanted to enjoy it every day as a reminder of her and the special times our family had shared around that simple dessert.
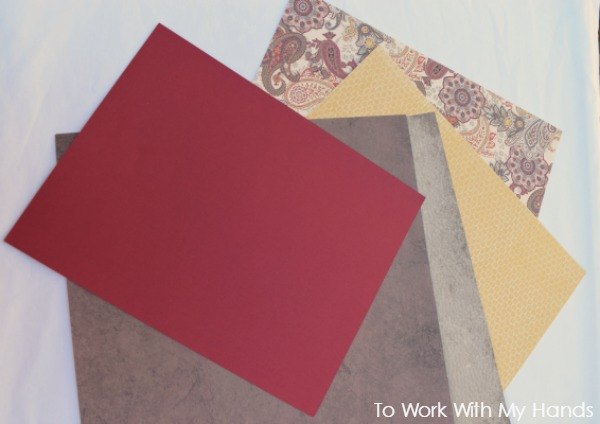
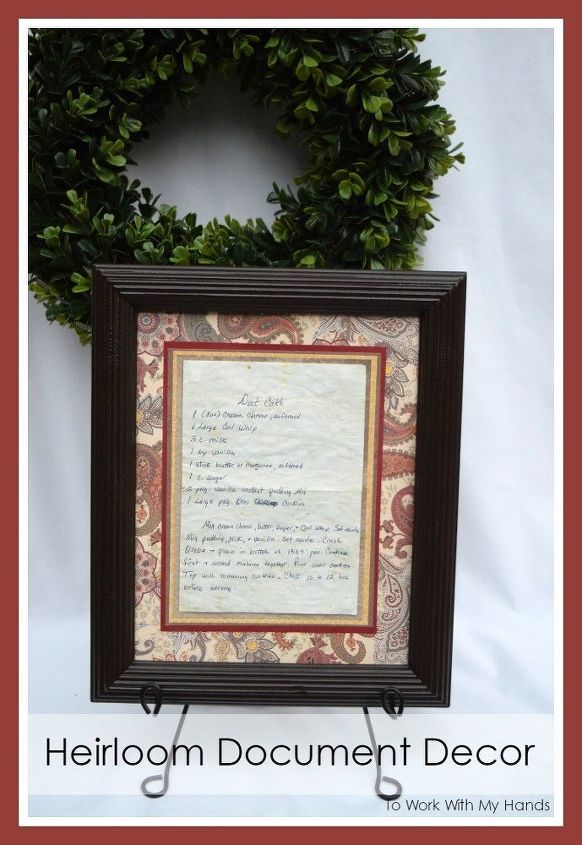
If you have a special document that you're ready to get out of the drawer and into your life each day, I think you'll love the idea for this simple project. All you need is an empty photo frame, optional paint, scrapbook papers, adhesive, and your document. I started by visiting Hobby Lobby for 4 or 5 coordinating scrapbook papers that matched my decor. These are very reasonably priced, but are often on sale for 50% off (like when I bought these!) Big win. :)
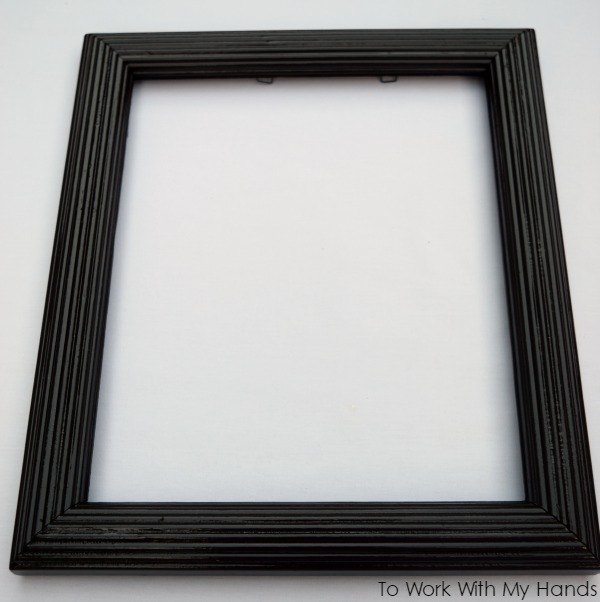
Next, I gave my frame a new coat of paint. I still had some Rust-Oleum Espresso left over from another project, and since I've fallen in love with this color, I chose to use it for this project too. If you're happy with your frame and don't want to paint it, you can skip this step and have your document framed in less than half an hour.
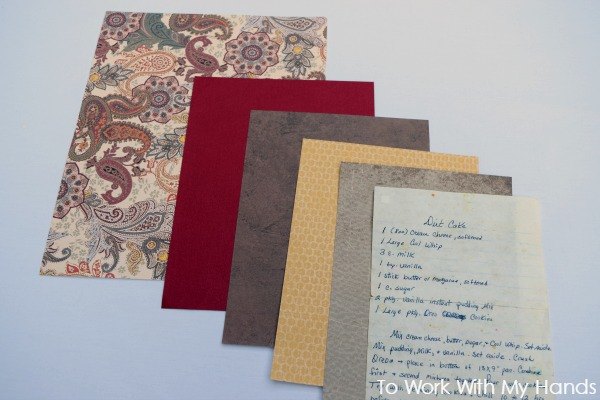
While the paint dried, I decided on the layout I wanted and cut my papers. Visit the blog for my favorite tool to get perfectly straight and smooth cuts in seconds. I love layers, so chose a simple and basic layout by cutting each sheet 1/2" larger than the previous one and stacking them. For the final sheet, I cut it to fit the 8 x 10" frame.
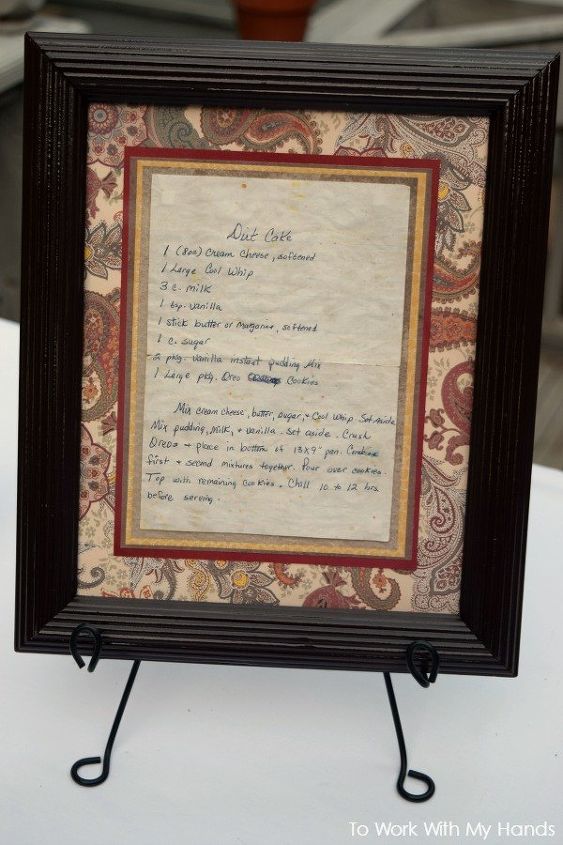
To assemble, I simply swiped glue on each layer (I used an Elmer's glue stick), stacked them, and mounted it all in the frame behind the glass. This is actually the second version of this project. If you'd like a different layout option, visit the blog to see the first one I created a couple of years ago. I love having this sweet memory of my mom displayed so I can see it every single day! And even though I no longer need to recipe to make our special dessert, the memories tied up in this splattered piece of paper are priceless. What special document will you frame?

Want more details about this and other DIY projects? Check out my blog post!
Comments
Join the conversation
2 of 89 comments
-
I really love this idea and project and have tried to go to your blog for more details, but I ran into a little problem. It goes to a site about buy pools and installing them. HELP!!
Like I said, I really love this idea and would love to make one.
Thank you,
Glenda
-
I’m sorry, Glenda, but I decided to close my blog last year.


Frequently asked questions
Have a question about this project?