


DIY Home Decor Using Shells
Nothing says summer better than ice tea, flip flops, and the sound of the waves crashing onto the shore. The beach describes lazy summer days, surfing, snorkeling, paddle boarding, and walking the beach, shelling.
Shelling is my definition of Zen, walking along the shore, looking down at the sand, collecting the shells that catch my eye, and swooping them up before the wave rushes in to carry them back into the sea.
Shells are a great way to add decor to your home. If you don’t live close to the beach, shells can be found online or in specialty shops.
If you are using shells collected from the beach, make sure they are clean. A solution of half bleach and half water should do the trick. I let them soak for an hour or so and then give them a good rinse with soapy water and then clear water…allow drying time before starting your projects.
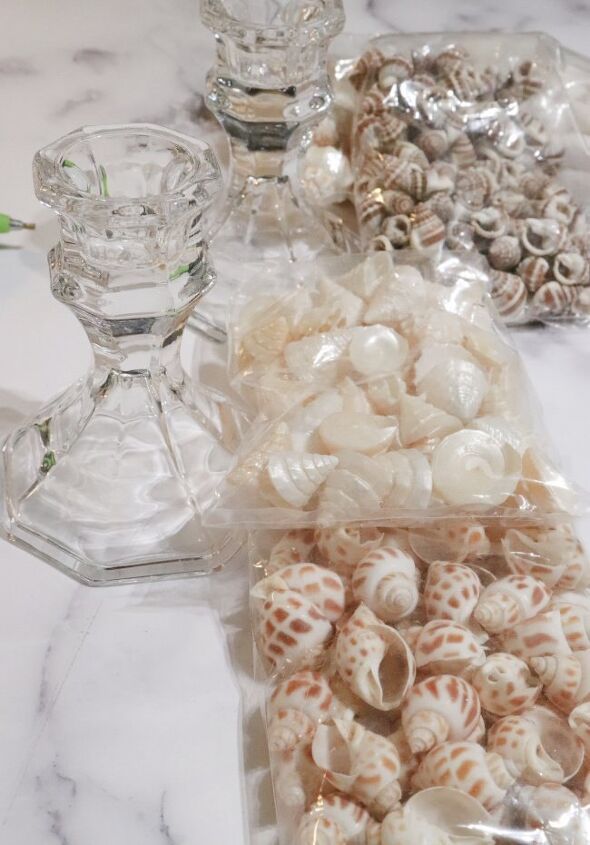
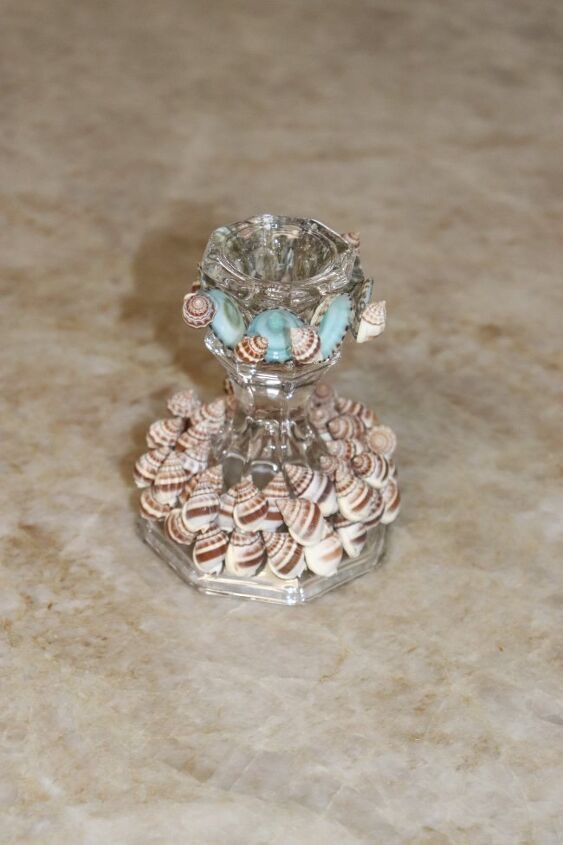
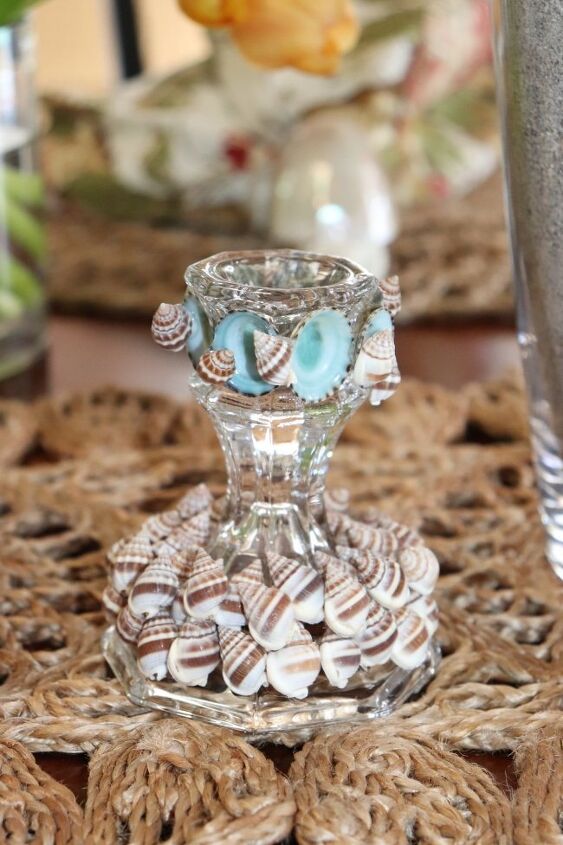
Candlestick Holder

Here are the supplies I used…
- Candle Stick Holder – This one is from the Dollar Store
- Hot Glue Gun
- Beacon 3 in 1 Glue
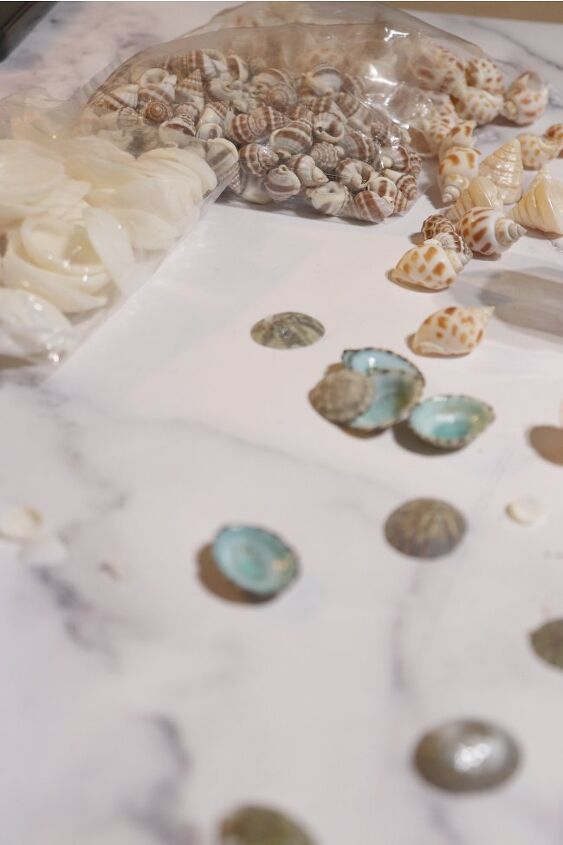
- Variety of Shells –
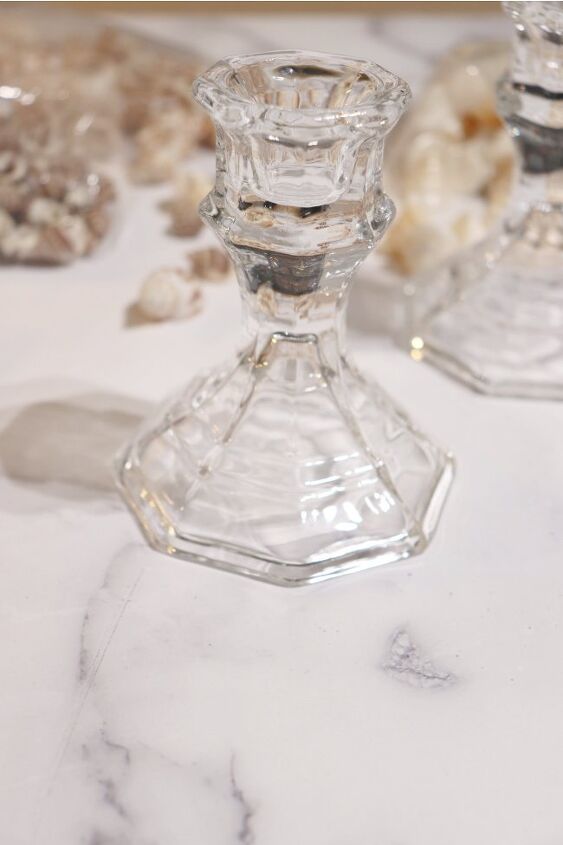
Glass candlestick from the Dollar Store.
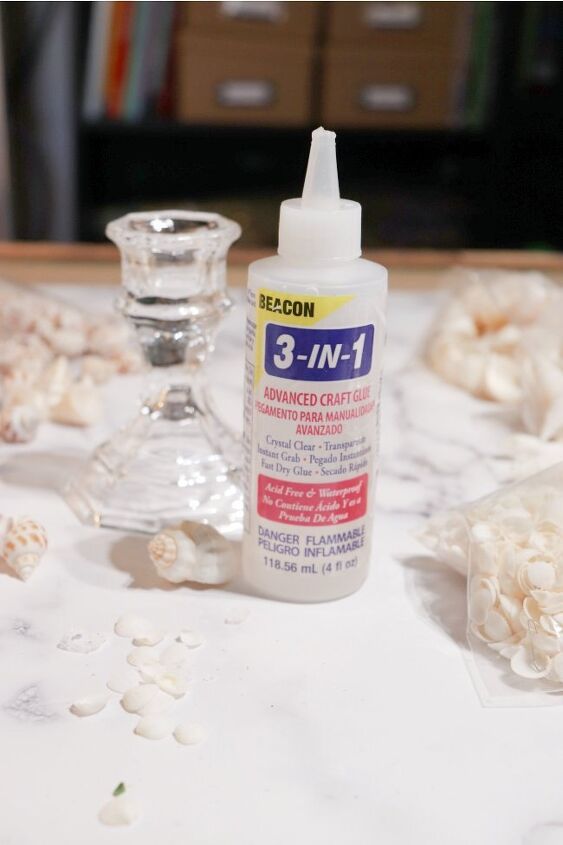
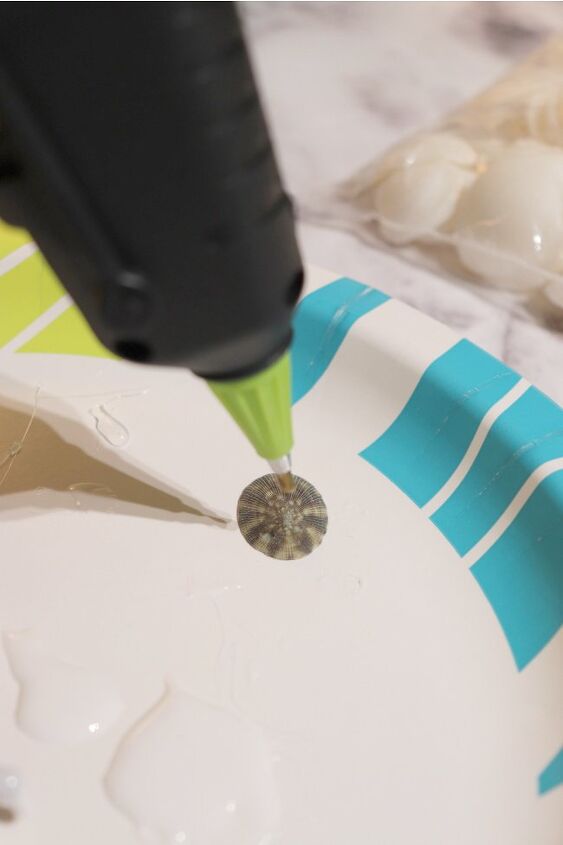
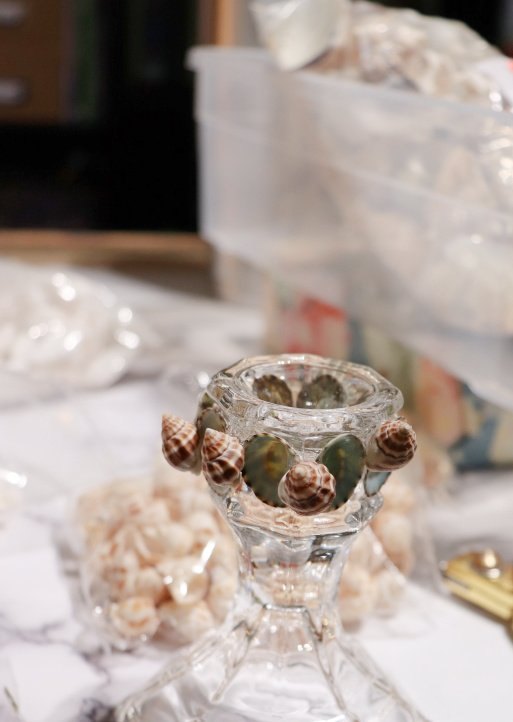
I found using both the hot glue and also adding the Beacon 3 in 1 glue gave the shells a solid grip and they adhered well to the glass.
This is a quick and impactful craft project. Glue the shells in a uniform pattern onto the candlestick.
I used the same small shells to create the bottom and added a different shell on the top for added dimension and color.
I like using glass as a crafting medium. One of my favorite projects using glass vases came out beautifully during the holidays. Here is the link to OLD VASES FOR AN ELEGANT DINING TABLE.
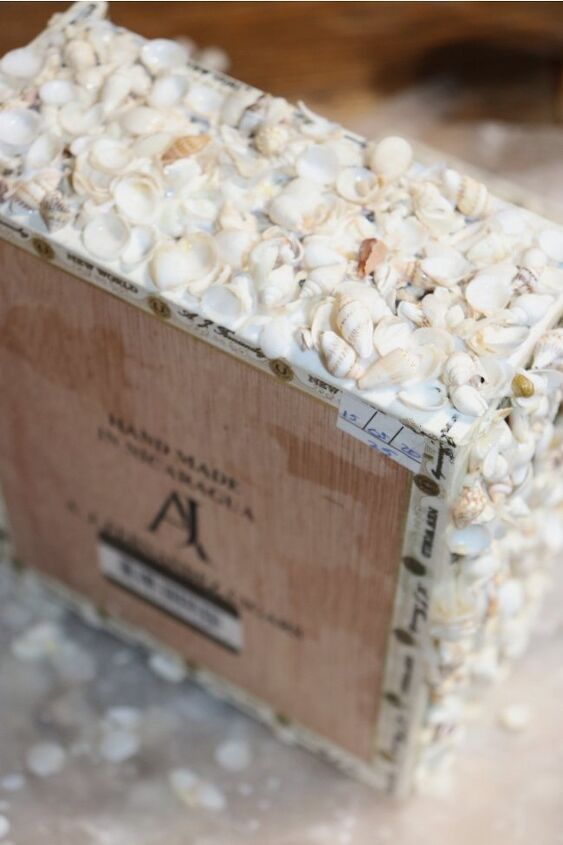
Cigar Box
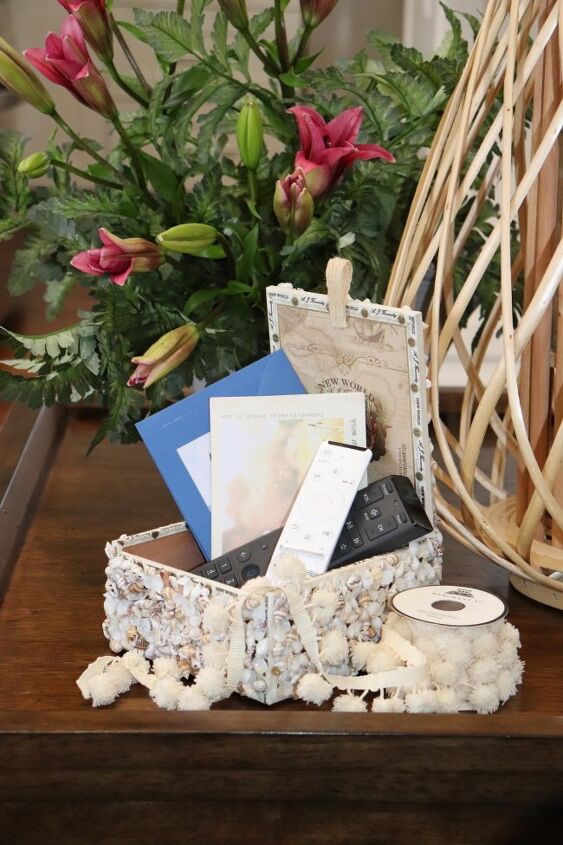
Here are the supplies I used:
- Cigar Box
- Small Shells
- Hot Glue
- Mod Podge
- Ribbon
- Clear Gloss or Matt Sealer and Protectant
Making this box was not hard, but it definitely challenged my patience. It is important to allow each side to dry completely before moving on; I would recommend allowing each side to dry overnight. This will save time and frustration because by not allowing it to completely dry, the shells will slide off, and the process starts over.
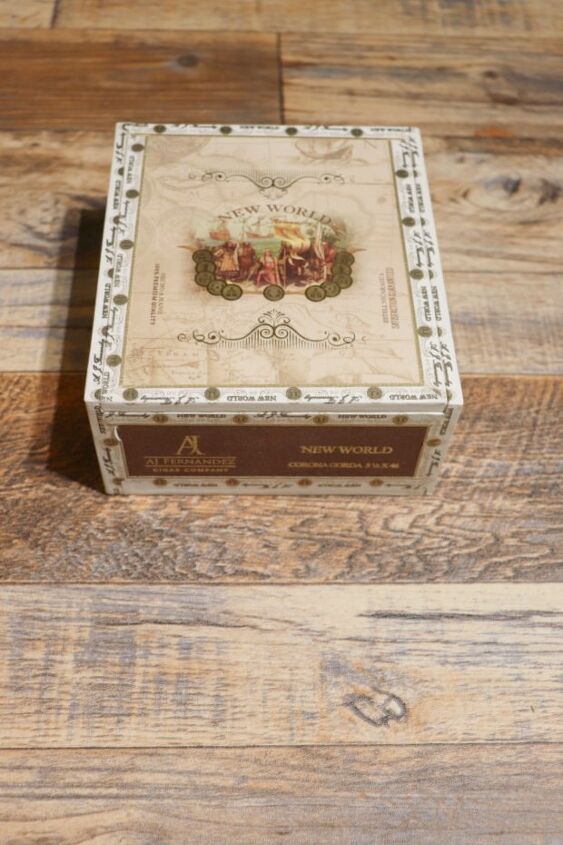
My husband enjoys a good cigar, so I easily have access to cigar boxes.
If you don’t have access, many cigar stores will gladly give away boxes if you ask them, and they are usually free.
I have always been intrigued by how well made and beautiful many of the cigar box designs are, which
prompted me to make it into a decorative piece.
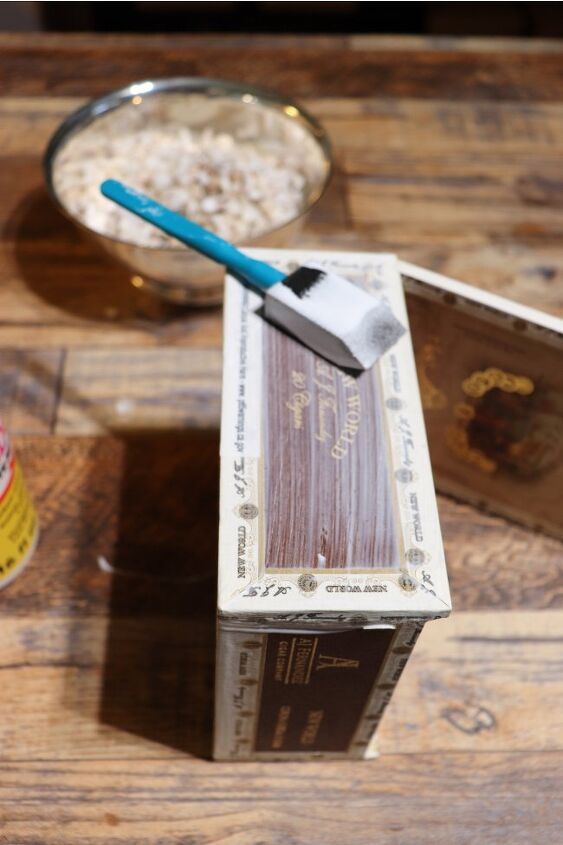
The first step is to apply Mod Podge to one of the sides.
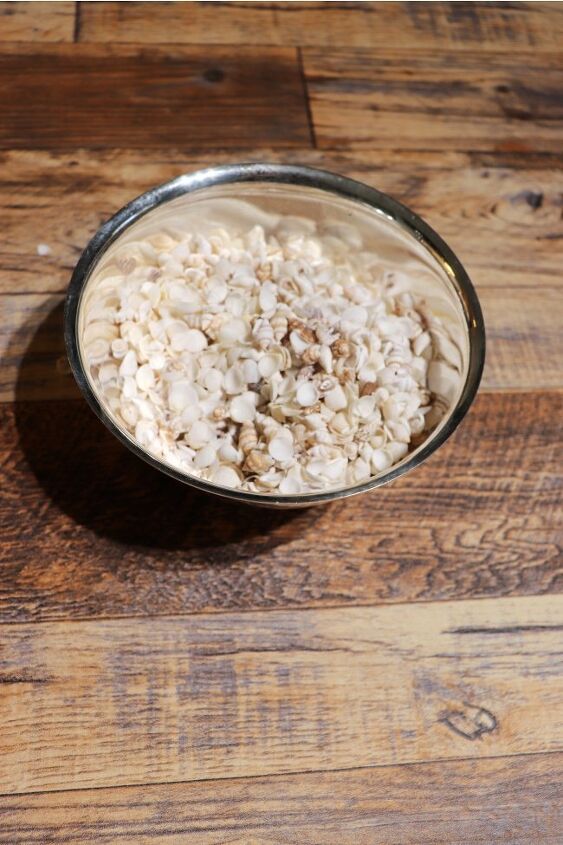
I mixed together a few different bags of small shells…
Apply a single layer of shells as close together as possible. Don’t worry about spaces without shells; these will be filled in later. Also, make sure not to glue shells on the top edge of the cigar box, as this will prevent it from closing.
Allow each side to completely dry. If you rush this step, the shells will slid off the box.
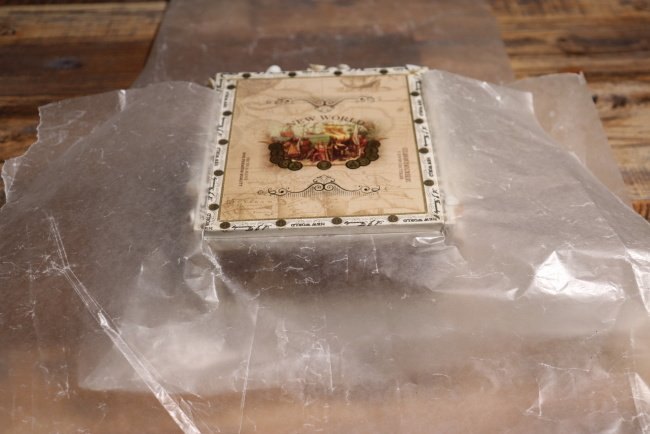
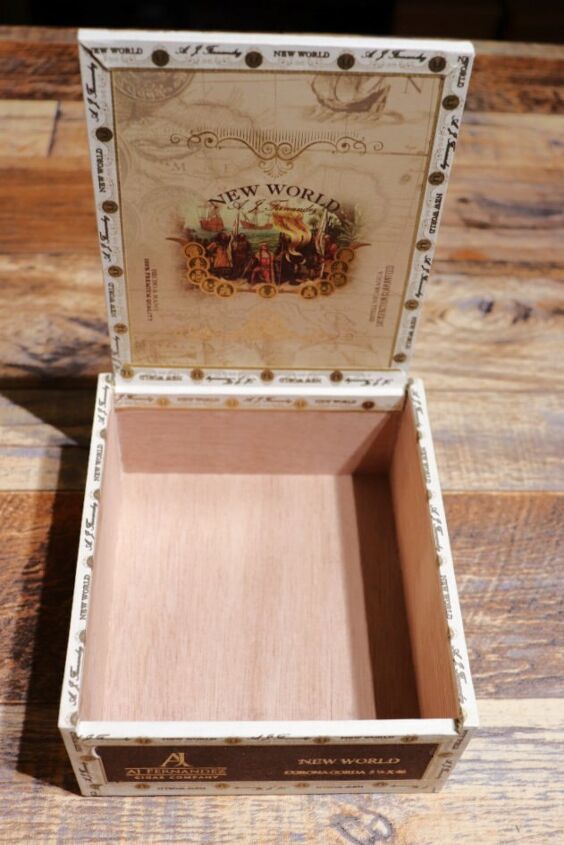
After all the sides are done and dried, place a piece of wax paper under the top, this will prevent the top from accidentally getting glued shut. It is also important not to glue shells on the box’s hinge, as this will impede opening the top.
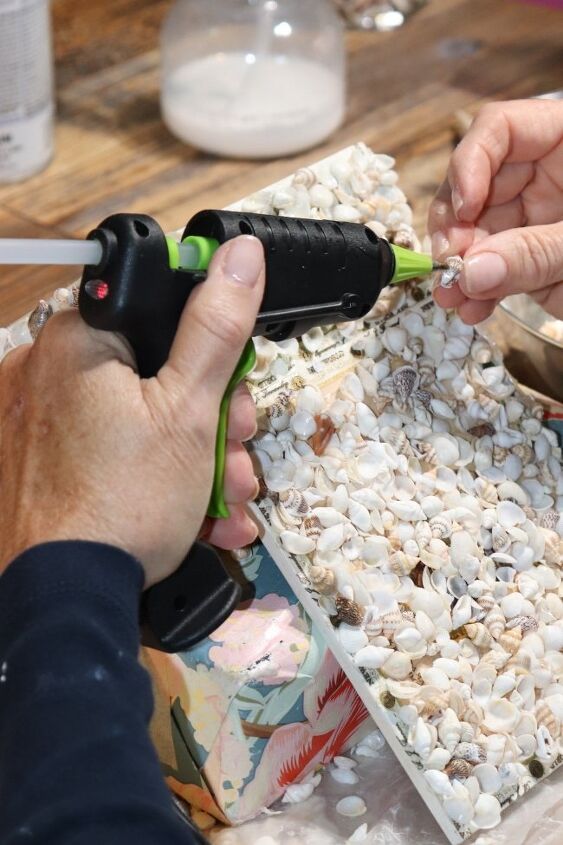
Next, I inspected the sides and top of the box and filled in places where the shells did not adhere or places I missed. I used hot glue for this part, and it worked well. Glue shells until you are satisfied with the way it looks.
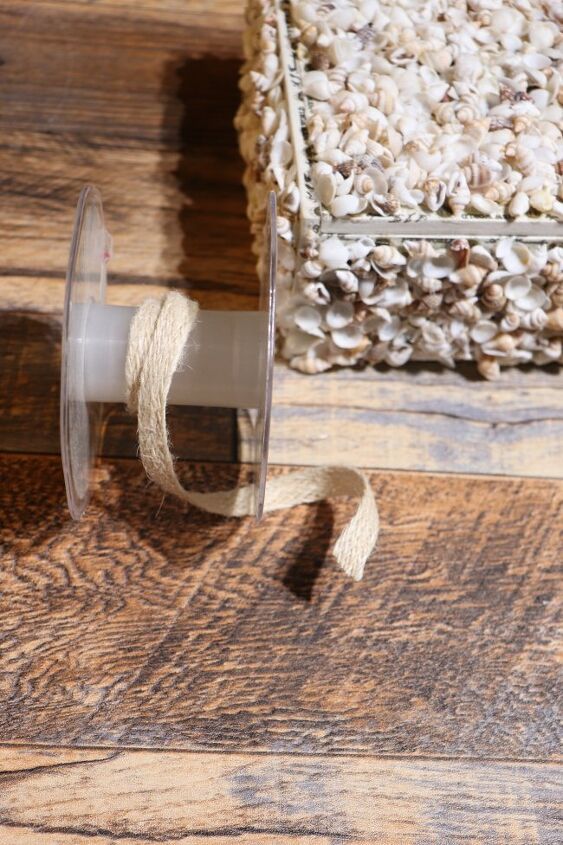
I made a loop out of jute ribbon and hot glued it to the inside top of the box as a pull to open the cigar box.
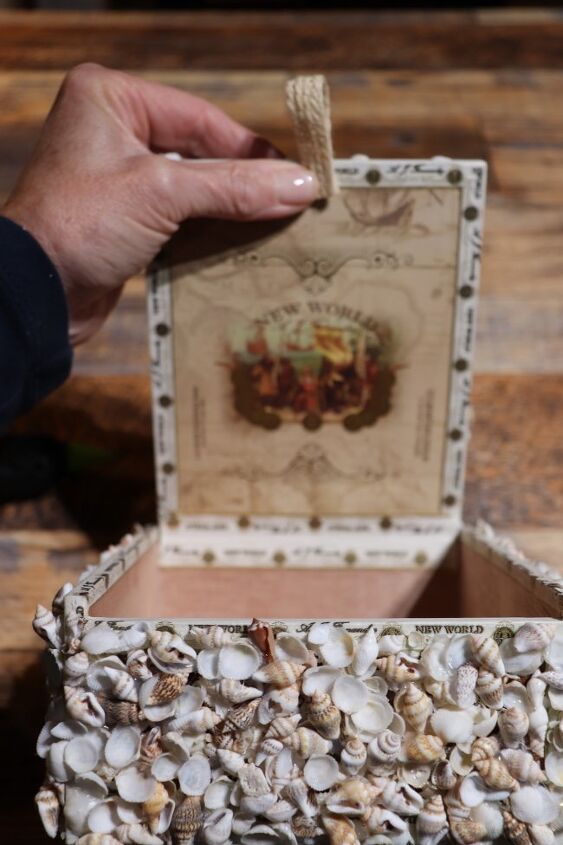
I liked the design on the inside of the top and chose not to cover it. If this does not appeal to you, it could be covered with felt or decorative paper.
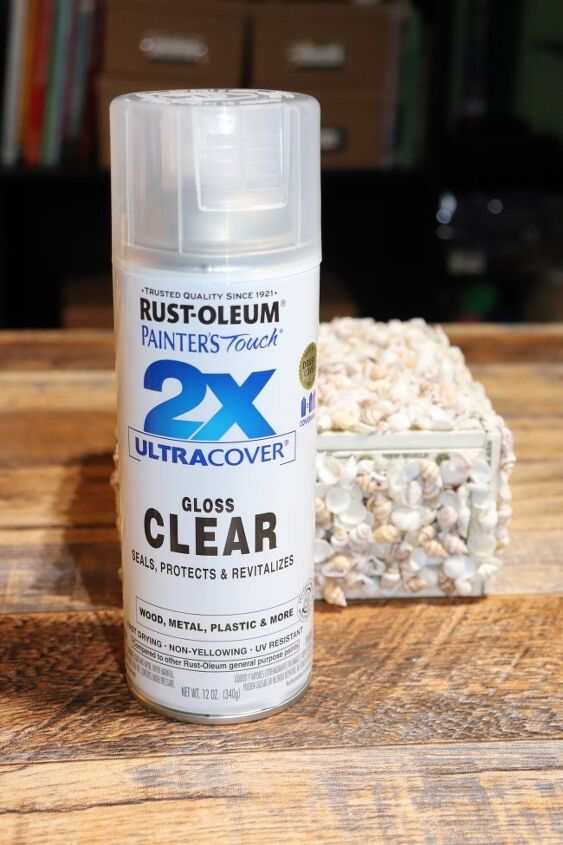
Finally, I sprayed the shells with a Clear Gloss sealer and protectant…

Once I was finished with the project, I was happy with the results. Just when you think it won’t come together, it magically starts to look like what was envisioned.
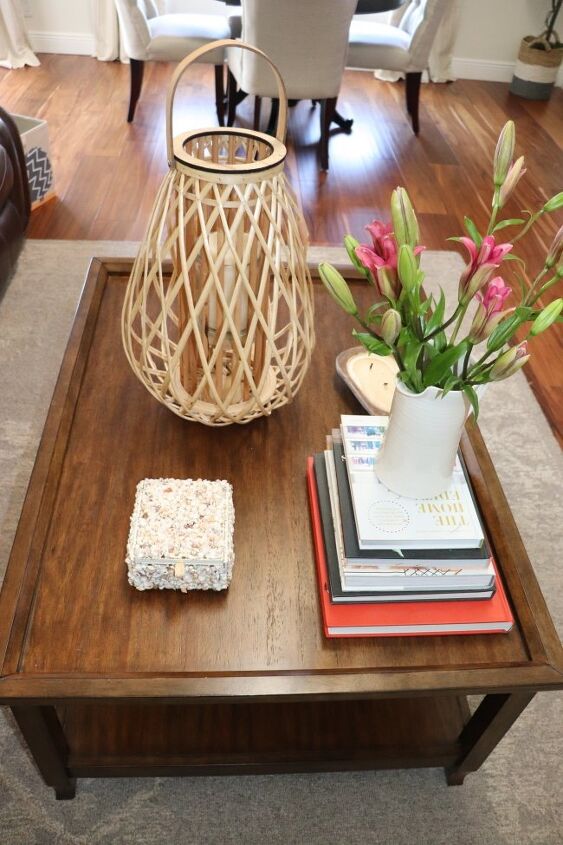
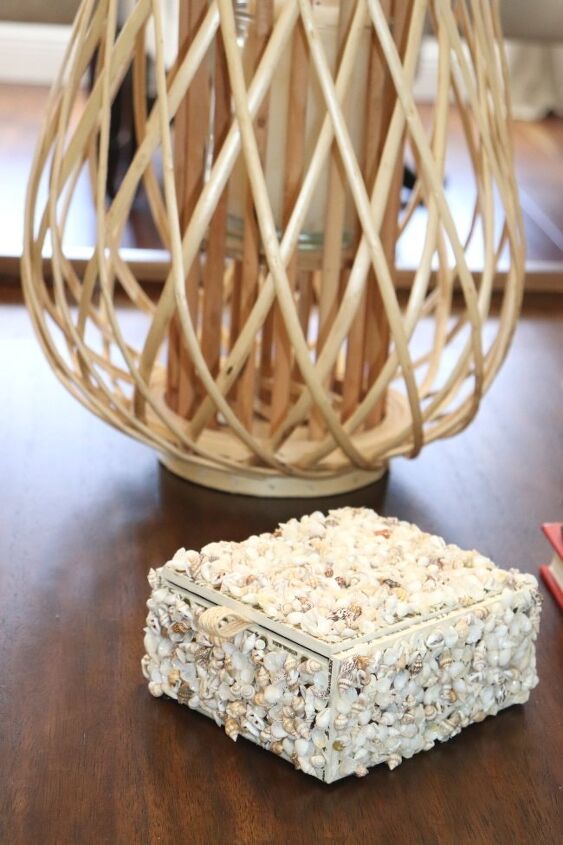
Sit back and enjoy… fill it with treasures or admire it as a decorative piece in your home.
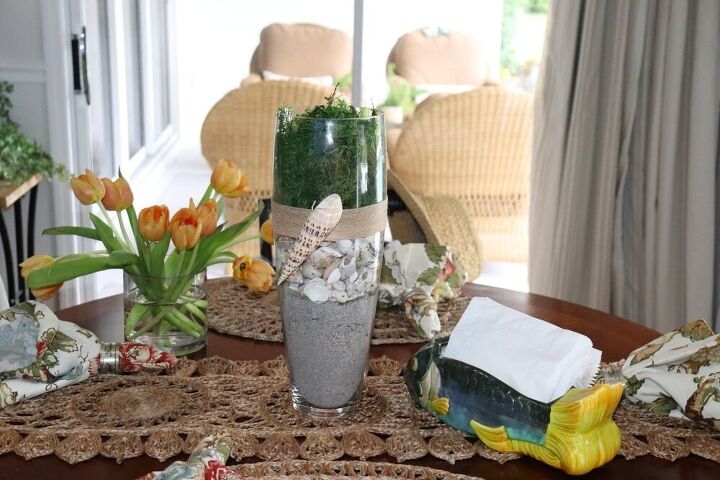
Here are the supplies I used:
- Vase
- Ribbon
- Shells
- Beach Sand
- Moss
- Hot Glue
- Clear Gloss or Matt Sealant
This is from an inspiration I saw in a small boutique. I changed it up to appeal to my decor. This is a quick and easy project and it perfect to change or enhance a theme or table setting.
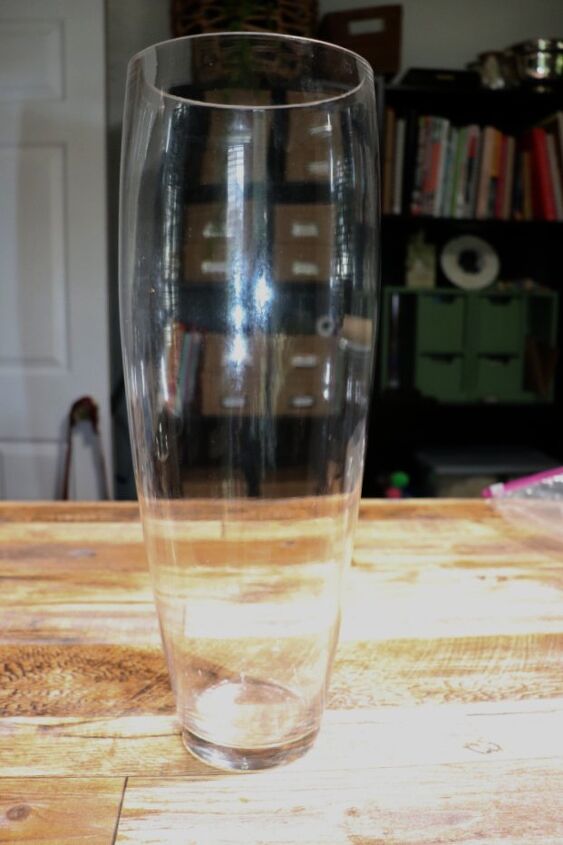
Chose any vase that fits into your decor; a tall vase allows the details to show and gives the project a substantial presence.

Place a layer of beach sand, if you don’t live near the beach, most craft stores or home improvement stores sell clean sand.
Place a layer of shells on top of the sand and topped with green moss for color.
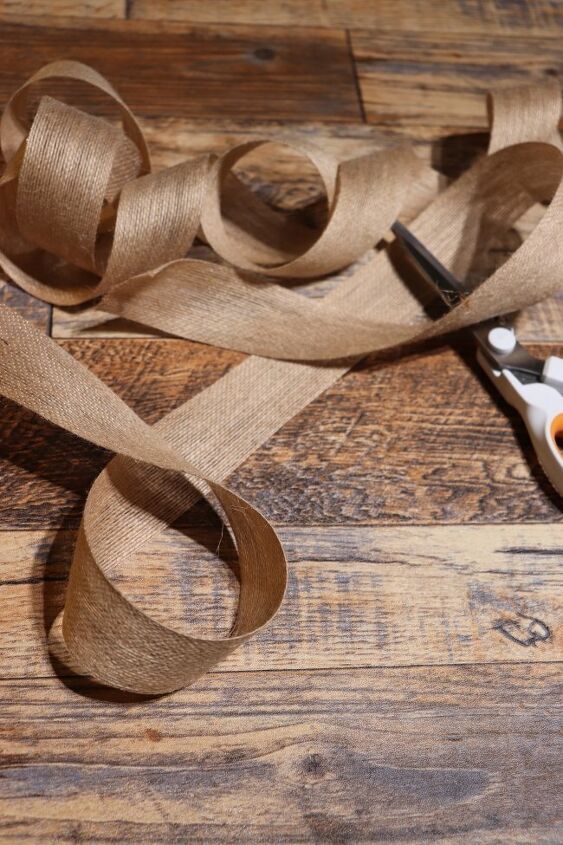
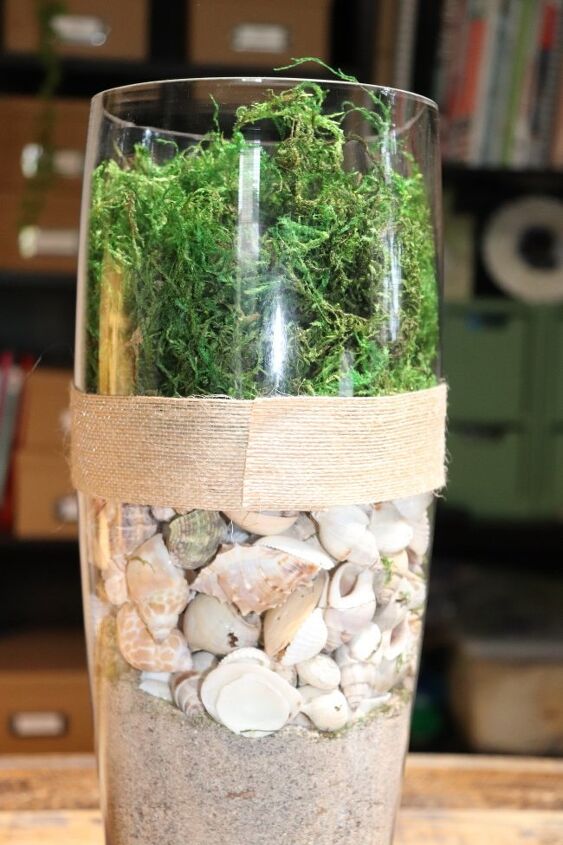
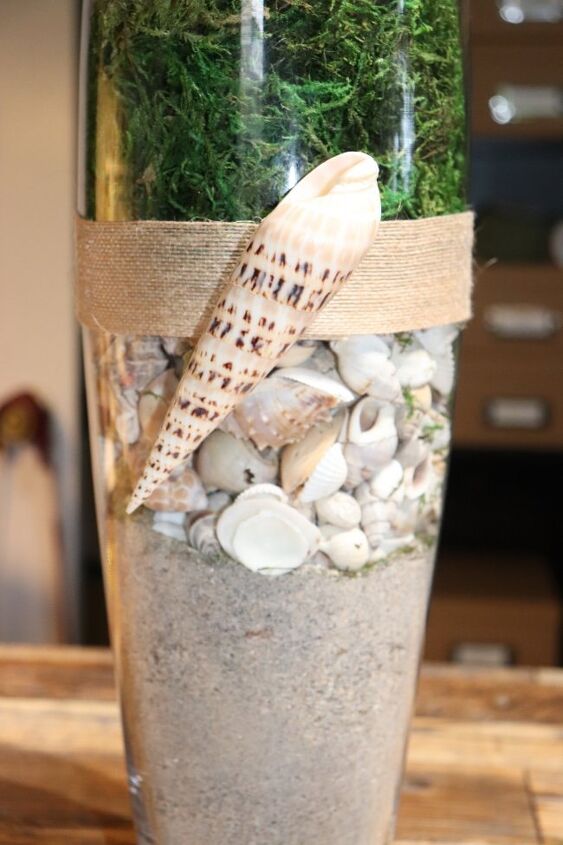
The vase could be finished as is, but I wanted to enhance the vase a little more. I wrapped a piece of jute ribbon around the vase’s circumference and taped it in place with double-stick tape.

I then hot glued a long shell where the jute ribbon met.
I enjoyed doing these projects, and I love to add an unexpected piece such as shells into my decor. Even though you don’t have a coastal theme, shells are universal and add beauty to any room decor. If you like this vase project, you might like the vases I made here Old Vases for an Elegant Table and How to Make a Eucalyptus Topiary

As an Amazon affiliate, I found the items used for these projects and for your shopping convenience at no extra charge to you! Your shopping may also help this blog!


Frequently asked questions
Have a question about this project?