


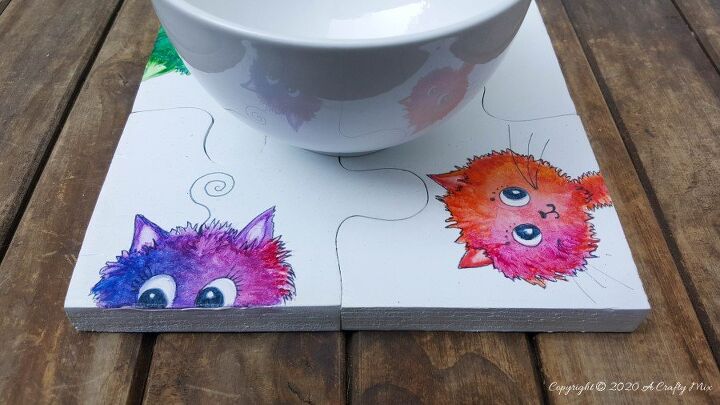
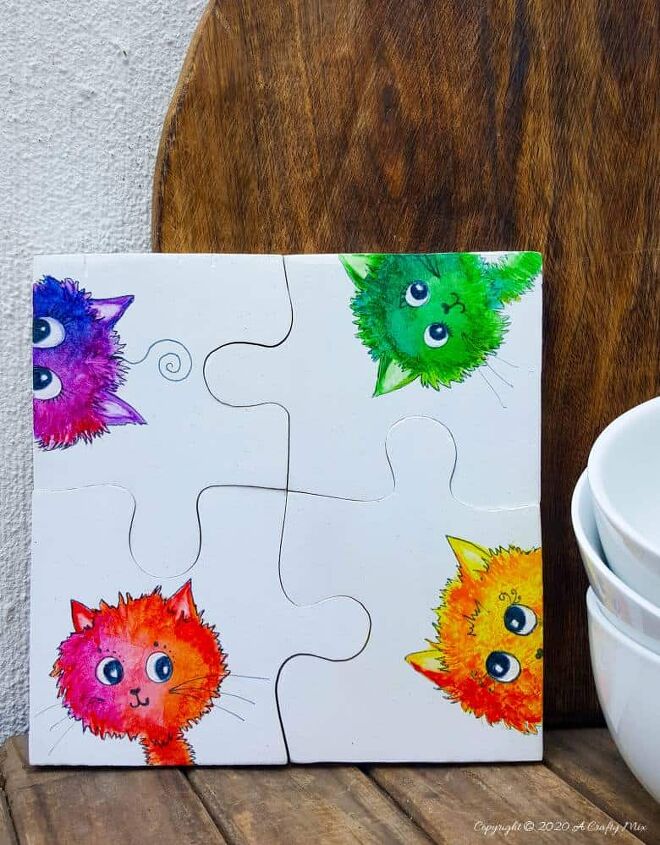
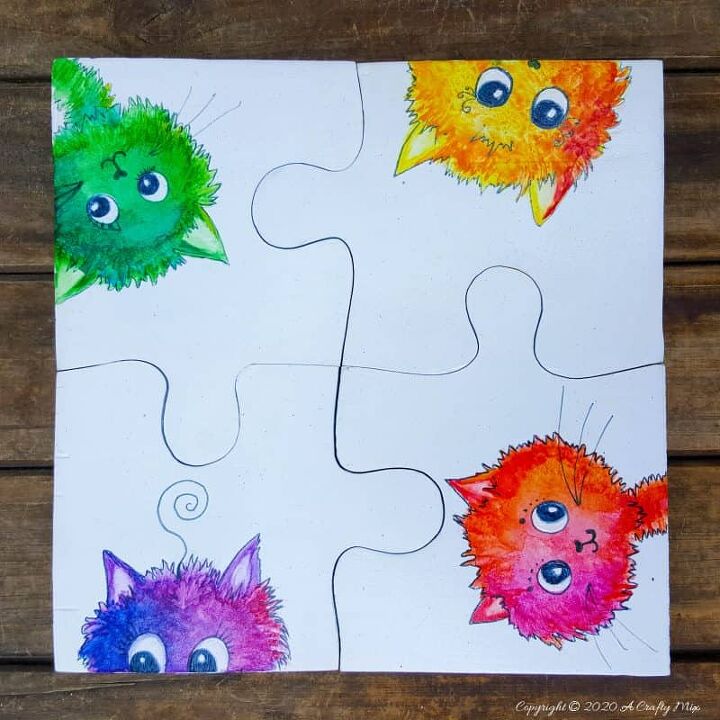
DIY Puzzle Coasters That Double Up as a Placemat
I have a tendency to try to draw everything as true to life as possible. And it frustrates me endlessly. Sadly “little Ms. Perfect” inside my head always seems to get the upper hand. But I think I've finally managed to put her in her place. And it happened while making these cute puzzle coasters that double up as a placemat. 

There’s nothing true to life about them, but if you’re a doodler you’re going to love making a few for yourself and your friends. And if drawing and doodling isn't your thing, you can mod podge something on instead.
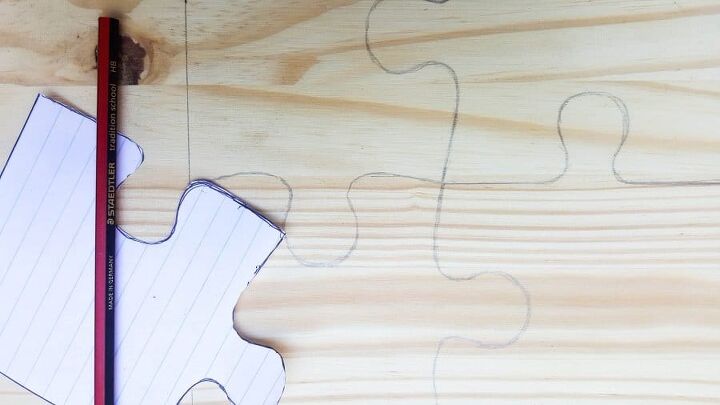
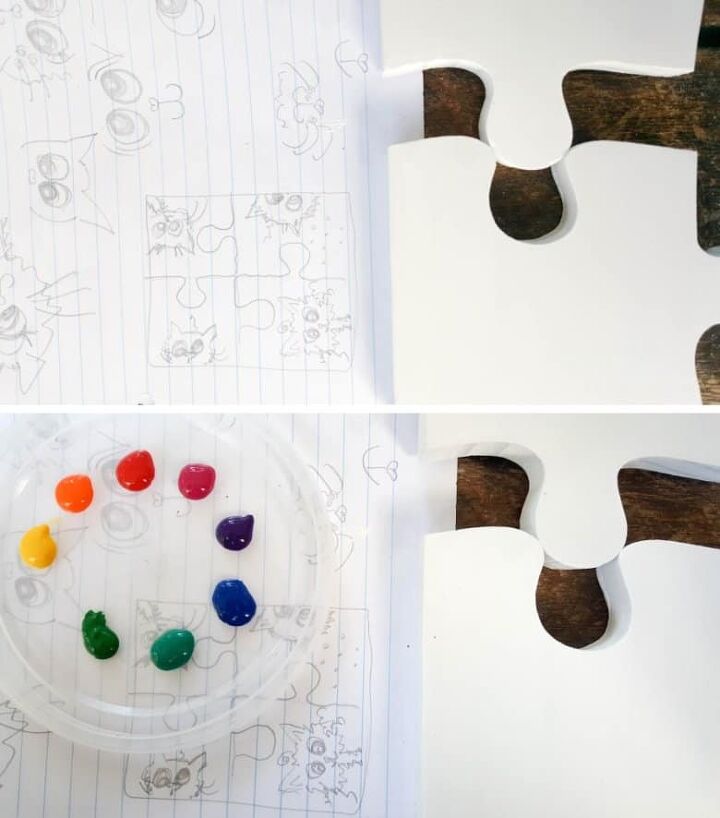
To make the coasters that double up as a placemat you'll need a piece of wood that’s at least 16″ x 16″ and anything between 3/8” to 3/4” thick. You'll also need a scroll saw or jigsaw to cut the wood, paint brushes, and craft paint. I've included a puzzle template below that you can use as a guide to making yours.

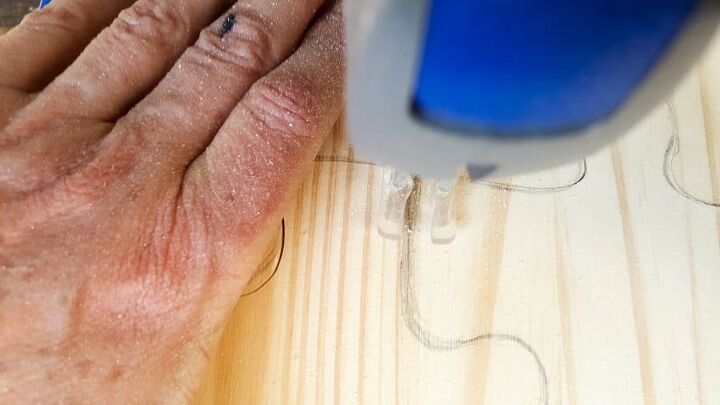
Transfer the puzzle template onto a piece of wood. Each puzzle piece measures roughly 4” (10 cm) and 4” (10 cm) and when you join them together to form a placemat it measures 16” x 16” (20 cm x 20 cm).
Use a jigsaw or scroll saw to cut along the lines.
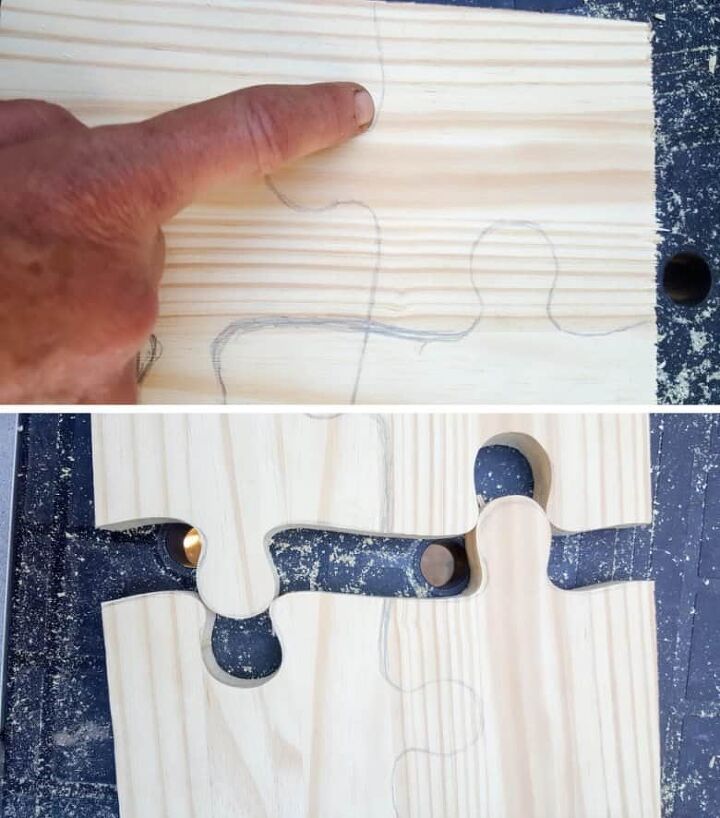
The easiest way to cut the puzzle is all the way across, and then with the pieces still joined, cut across the other way.
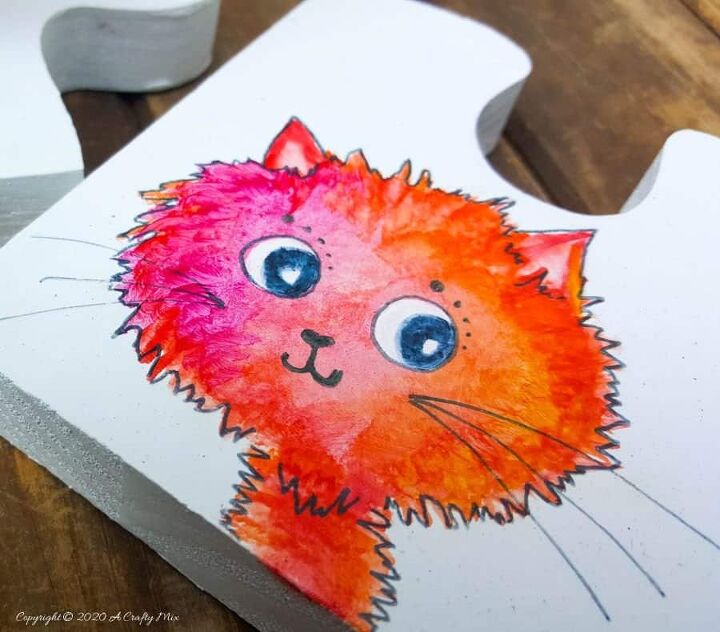
Sand any rough edges and paint the puzzle pieces with white craft paint or gesso. Once the paint or gesso dries, you can get creative. Doodle some kitties as I did, or mod podge a pretty napkin on. You can also use a stencil to dolly up your coasters. The possibilities are endless.
USe a clear glossy sealer to protect them against party spills or accidental oopsies.
I prefer using a water-based polyurethane or polyacrylic sealer. It gives the coasters a hard, durable finish that won’t yellow over time like most oil-based sealers.
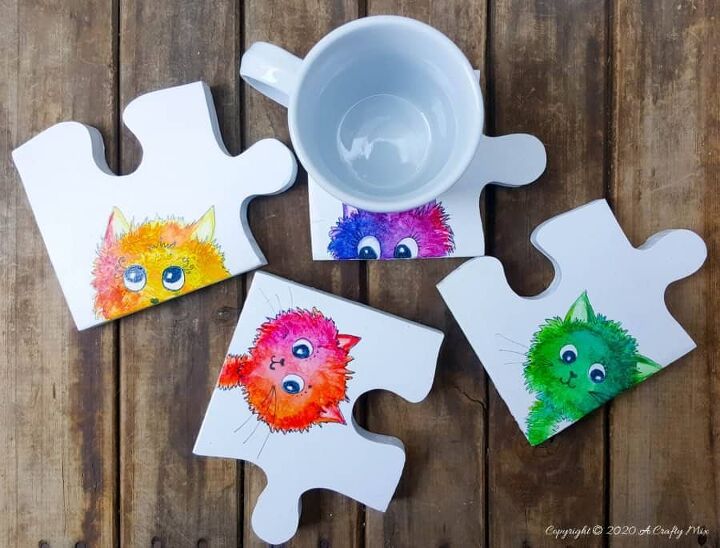
The novel puzzle coasters, erhmmmm I mean placemat  will definitely make your guests smile and the kids will have so much fun putting them together too.
How would you decorate yours?
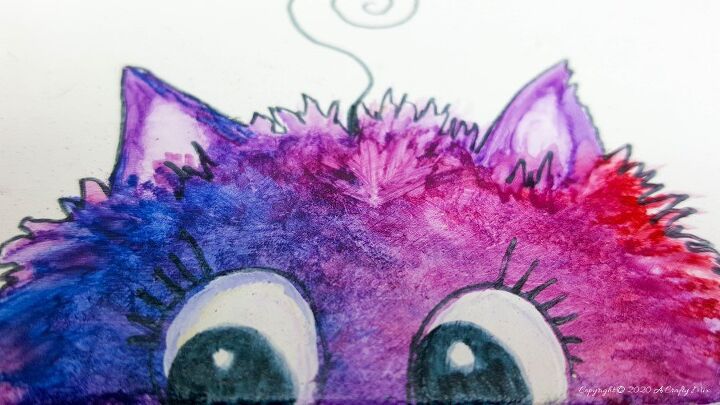
Oh BTW, you can find a detailed tutorial to paint those curious kitties here.
Resources for this project:


Comments
Join the conversation
-
Hi Michelle. This project is just adorable! You are very artistic as well! Great job!
- See 1 previous


Frequently asked questions
Have a question about this project?