


DIY Stacked Wood Books

Create these stacked books and add them to any room in your home. They are perfect for adding to decorative trays, tables, and much more!
Hi everyone! I hope you are doing well. This week I worked on creating this simple stacked wood book decoration. I've been inspired to create these for a while now. I saw a few other projects where a few people were using the Dollar Tree wood box.
I figured I wanted my stacked books to be just a little bigger than the Dollar tree ones, so I decided to take a look at a few wooden shadow boxes at Michaels.
I'll give you the step-by-step process I used when creating this project.
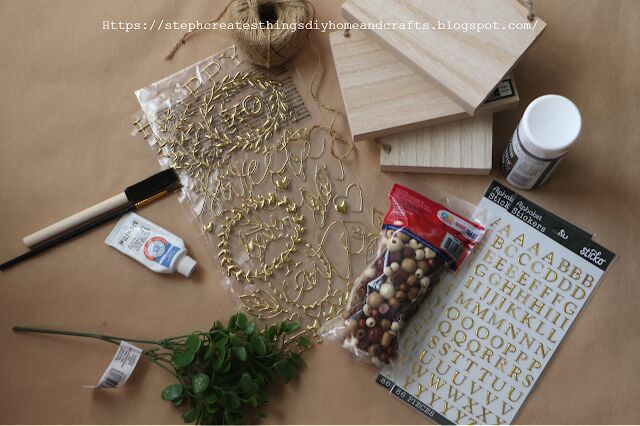
Materials
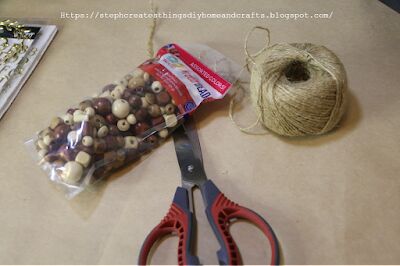
3 wood shadow boxes (These boxes were $1 each)
Wood beads
Twine
Black paint
White paint
Greenery
Wood filler
Hot glue
Gold lettering
Sponge brush/Paintbrush
Creating your stacked wooden books
Start off by taking any twine, and screws out of your box. This only applies if you have purchased the wooden shadow boxes from Michaels.
The back of each box had two screws in it, and also stapled twine. I went ahead and pressed the two staples completely down after removing the twine, and I filled the screw holes in with just a little wood filler.
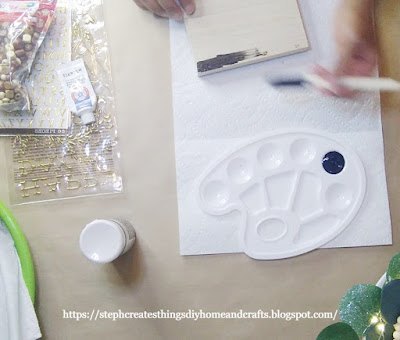
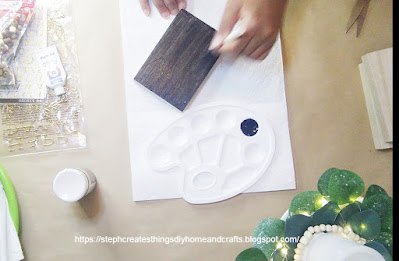
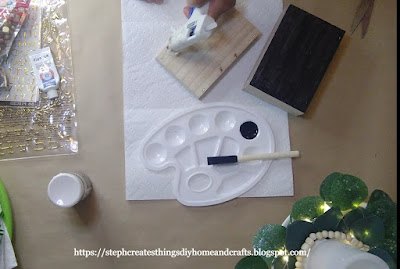
Next, apply your black paint to one wooden shadow box. Work on painting the top of your box. I applied around three coats of paint.
Once you have painted your first wooden box, take your hot glue, and apply the glue to your next box.
You won't have to paint the tops of the other two boxes since they will be stacked. Be sure to flip your boxes over so that the open side of each shadow box is facing down.
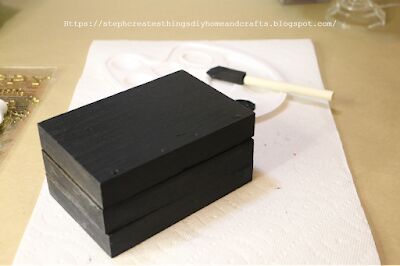
Apply your glue on the closed/solid side of each box. Glue, and stack your boxes on top of one another.
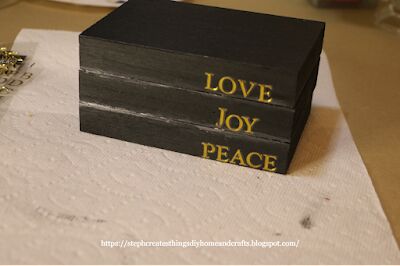
Once your boxes are stacked apply black paint around all four sides. Allow the black paint to completely dry.
Take some white paint, and add a line of paint between the spaces on the front side of each block. By doing this you are creating a shadow effect.
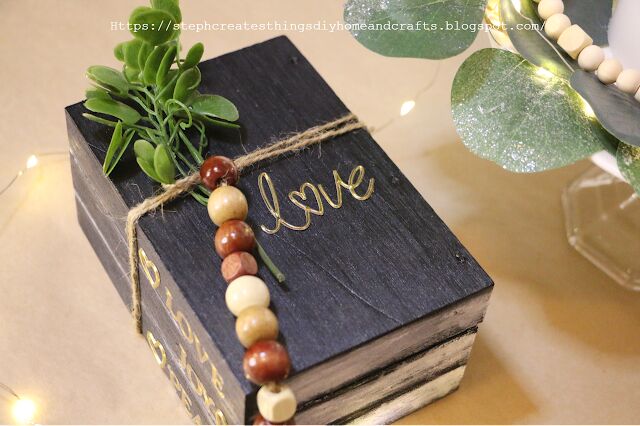
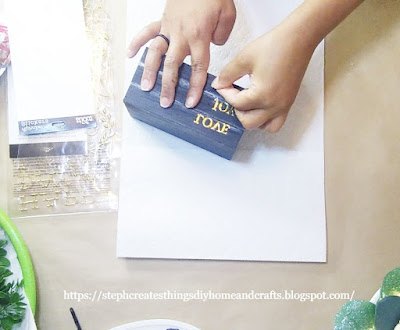
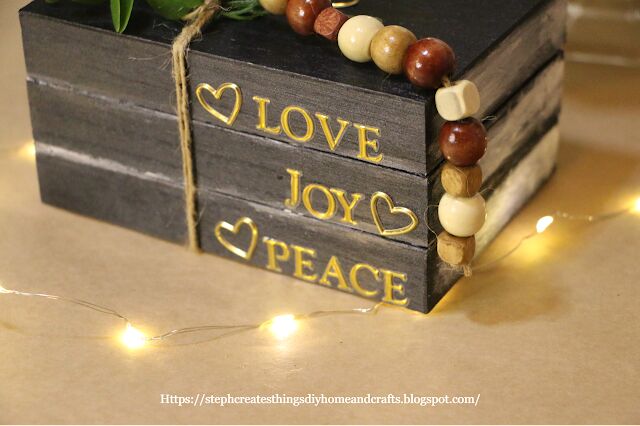
Next, take your gold letters and apply them to the front of your boxes. I went with, love, joy, and peace.
If you have any gold heart stickers, you can apply those as well. It is completely optional, but I also applied a gold love sticker on the top of my book stack.
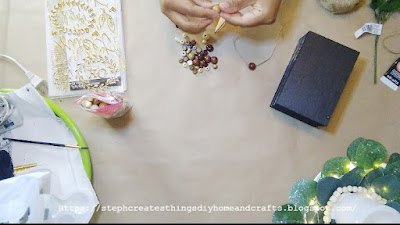
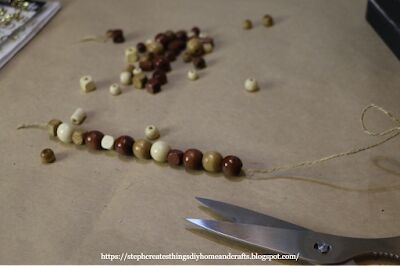
Now you are ready to create your bead design. Take some twine, and string a few beads onto your twine. You can go with any pattern that you choose.
I found that if you apply just a small amount of clear adhesive on the very end of your twine, it makes it easy to string the beads down the twine.
Once you have around ten beads, you can tie off the end. I tied a knot at the very end and cut off any extra twine.
Next, take your greenery and cut a small section off. Set it aside with your bead design.
You can now apply white paint to all three sides of your books. I did this because I wanted my wood-stacked books to appear to have pages.
Applying the black paint first, and the white after helps give the books a shadow effect.
Take some extra twine, and wrap it around your stacked books. I used two sections of twine that I cut and tied around my books.
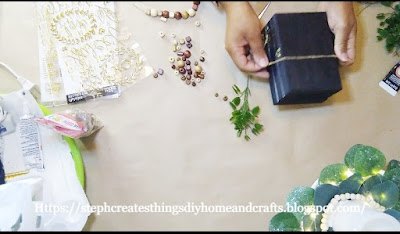
All that is left is to insert your greenery through the twine on top and add your beads. I tied my beads through the top of the twine next to my greenery.

That is it, your stacked wood books are complete! I hope that you have enjoyed this simple DIY project. If you have any questions please feel free and ask! I love hearing from all of you. Be sure to check out my other DIY projects! Thanks so much for stopping by.


Frequently asked questions
Have a question about this project?