


DIY Vintage Advertising Jar

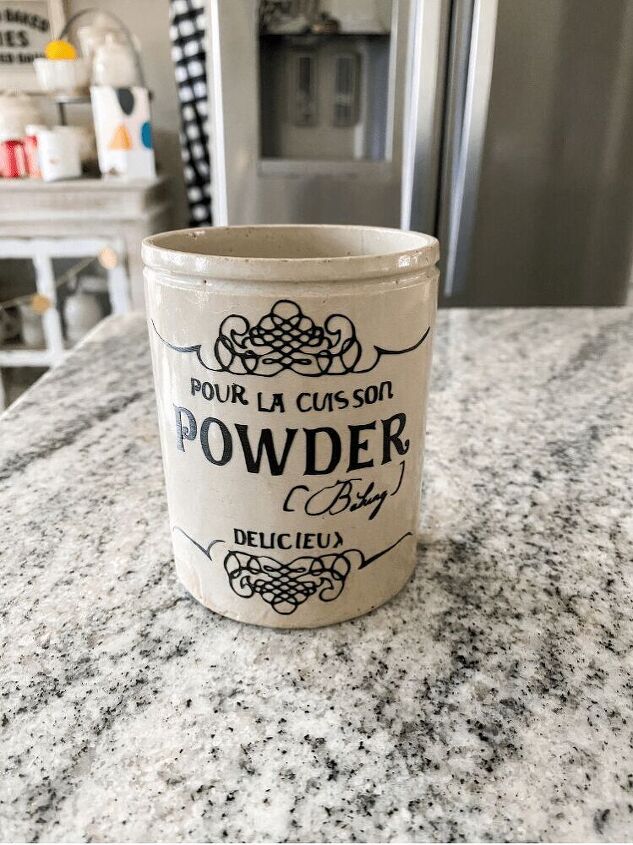
I recently won a giveaway on Instagram (yay!) that included a vintage inspired advertising jam jar. It also included a blank jar which I thought was so cool. I haven’t really seen one that size before that was blank. So I thought it would be perfect to turn it into something new. Hence my idea for a DIY Vintage Advertising Jar! I thought I could use my Cricut machine to create a vinyl label that I would then attach to the jar. I have to say it was pretty time consuming, but it turned out very well! If you’re wondering just how I did it, then keep on reading to see!
This post contains affiliate links. Click here to read my disclosure policy.
Materials Needed:
- Cricut Machine (I used my Explore Air 2 machine)
- Black Vinyl (or whatever color you prefer)
- An old jar or crock
- Cricut Standard Grip Mat
- Transfer Tape
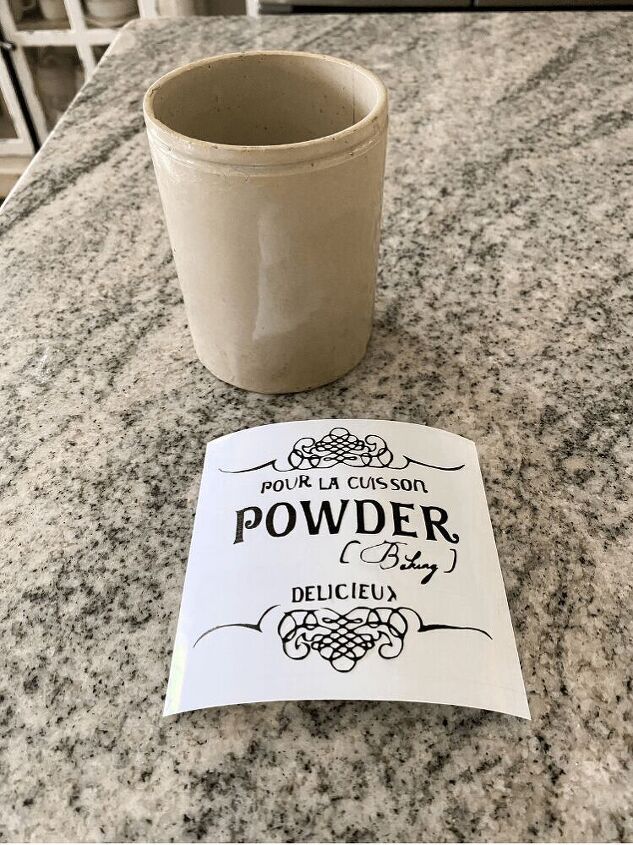
Design Your Label
I looked on Circuit Design Space for a vintage kind of label I could use for this. However, I did not find anything I liked. So then I went to Google and did a search there. I was able to find a blog post that had printable labels that were Vintage French Inspired. This was exactly what I was looking for! They weren’t technically meant to be printed on vinyl, but I thought I could make it work. It did prove to be a little more challenging than any other vinyl creation I have made thus far. Just because it had a lot of little cuts and designs to it. But, I figured it out and was able to do a pretty decent job with it.
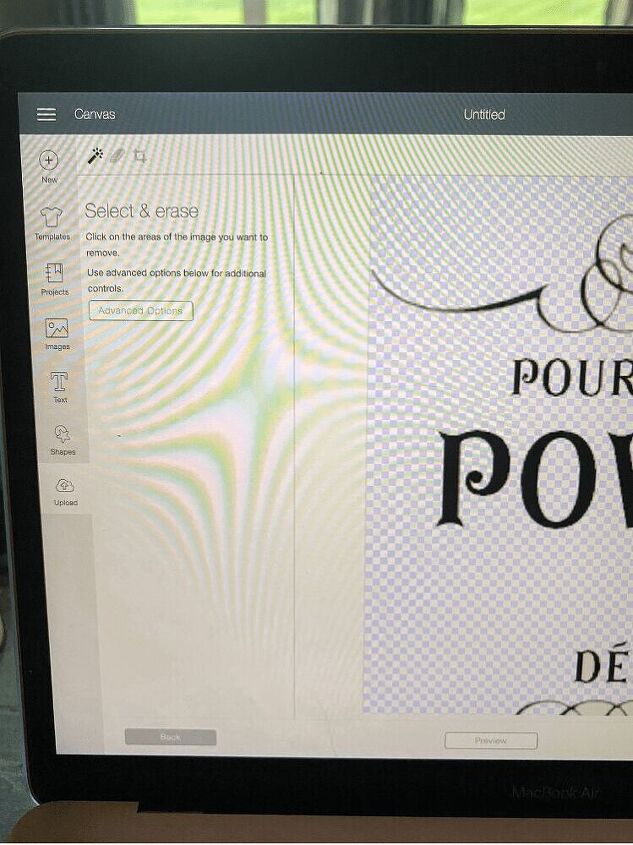
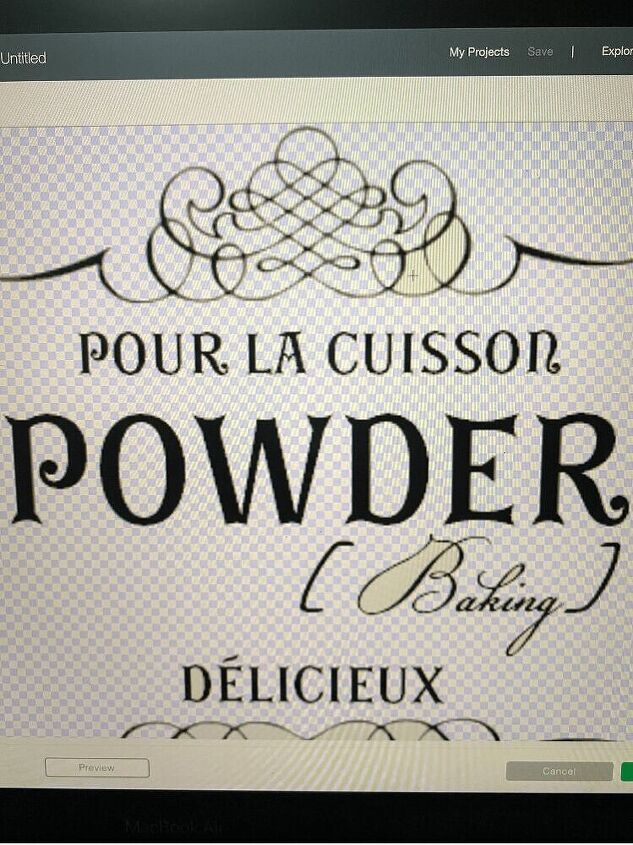
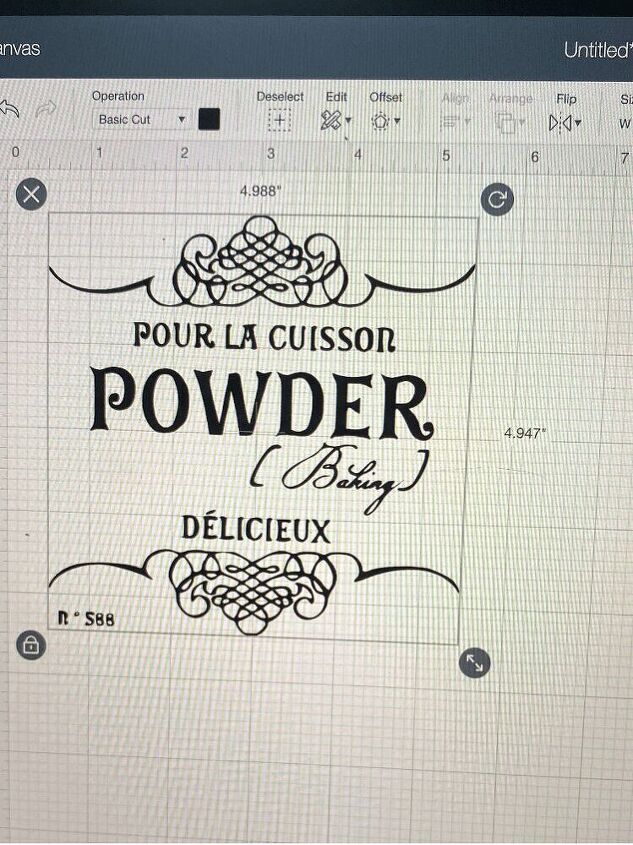
I simply saved one of the labels that I liked the most and then uploaded it into design space. Then, I used the “Select & Erase” option to remove everything that I wanted the Cricut to cut out. This was a little time consuming too because I had to zoom in a lot to make sure I got everything. Afterward, I placed it into the canvas working space and altered it to my desired size.

Print Out Your Label
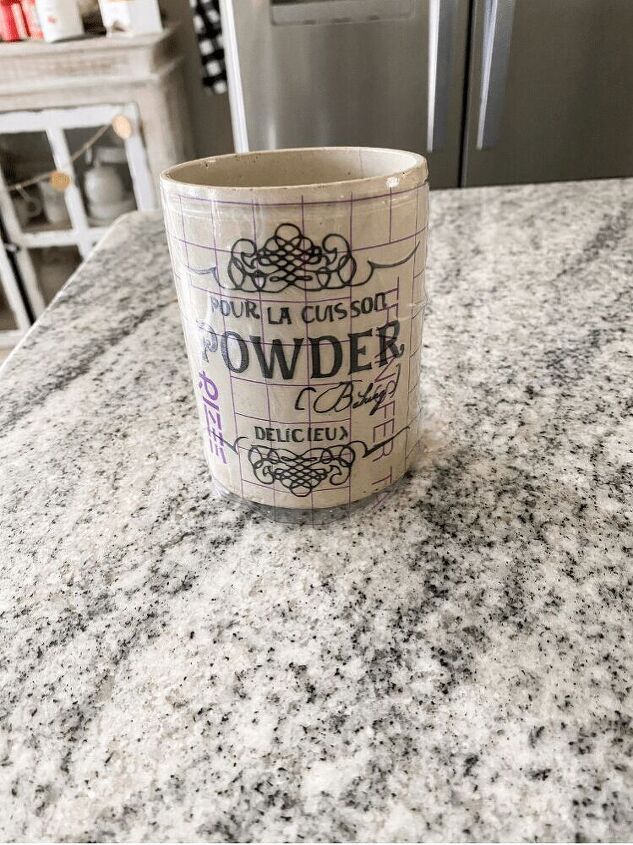
Once you have your label all designed, now it’s time to print it out! I used my standard grip mat with my black vinyl and let the Cricut get to work! After it was done, I removed it and began my work of discarding the unwanted vinyl. Which let me tell you, was a lot of work! Like I mentioned above, this design was intricate so there were a lot of little pieces here and there that needed to be discarded. I’m not gonna lie, this process took me like a week to complete. Mainly because I just did a little bit here and there. If I worked at it for too long I got frustrated. Plus, it felt like my eyes were going cross-eyed trying to see all the little cuts to remove!
I did mess up a little on it because I couldn’t see all the cuts and sometimes I accidentally pulled a piece off that was supposed to be left on. You can clearly see where some of the “X” is cut off at the bottom. However, since this is trying to be a vintage inspired piece, I think it’s totally fine. Vintage pieces aren’t perfect either so it just goes with the flow of that.

Apply Your Design to The Jar
Now for the fun part of my DIY Vintage Advertising Jar! Applying the label to the jar! You will need some transfer tape for this. Simply cut out a piece big enough to cover your design. Then, apply the transfer tape right on top of the vinyl label. Be sure to put firm pressure on it. You can use the Cricut scraper tool here or even just a credit card will work nicely. It took me a few times to be sure that I had the entire vinyl label on there. To check, peel off the transfer tape slowly and at an angle. If you see some vinyl that is still stuck on the backing, just place the transfer tape back down and apply more pressure to get it.

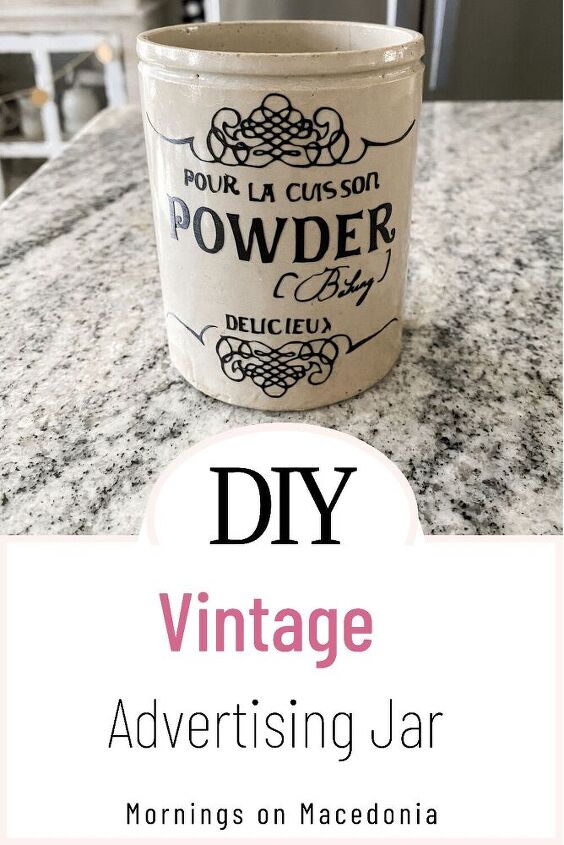
Once you have the full design on your transfer tape, you can add it to the jar! I just kinda eyeballed it here. Because again, it’s vintage and doesn’t have to be perfect. Then, I used the scraper tool again to apply firm pressure on the jar. Peeling slowly and carefully, I removed the transfer tape to discover a pretty cool new label on my jar!
Conclusion
As you can see, this DIY Vintage Advertising Jar is just one of the many Cricut projects I have been doing lately. I am beginning to be a little obsessed with it! There is so much you can do with it and I love how it lets my creativity flow! If you’re looking for other Cricut Ideas, than check out some of my other DIY blog posts I have shared:
- HOW TO MAKE A T-SHIRT WITH CRICUT’S INFUSIBLE INK
- EASY DIY PLANT LABELS
- EASY WIND CHIME REFRESH
And be sure to keep coming back because you know there will be more too! Do you have a love for vintage inspired jars like I do too? How do you think this one turned out? Let me know below, I would love to hear!


Frequently asked questions
Have a question about this project?