


DIY: Vinyl Polka Dot Decals
3 Materials
$10
1 Hour
Easy
This was probably one of the easiest DIY crafts I have ever done. Mike can attest to that – since he’s had to deal with me sewing ruffles for two months straight when I was making the girls duvets. This craft took me MAYBE an hour cumulatively if you don’t count drying time/shopping time. I can’t wait to re-purpose it and make lots of other vinyl decals! I’m thinking vase decor, milk jug numbers, framed silhouette…the possibilities are endless. The contact paper is vinyl so you don’t have to worry about water damage to the sticker. The sticker side won’t damage your walls yet it sticks really well since its made to be a shelf liner.
Here's the tutorial!

Supplies:
White contact paper – this is the stuff you line shelves with or cover books with. It’s matte vinyl on one side and sticky on the other. It’s $1.97 at Lowes for a 10′ x 12″ roll. That’s 10 feet people for less than $2!
Spray paint – I used brushed nickel in a matte finish.
Hole punch – the size I used is 1.5″ diameter. I got it at Michaels. I used a 40% off coupon and it was about $5.

Step 1: Estimate how many dots you need. I’m not a big estimator so I just cut off about 3′ of my roll.
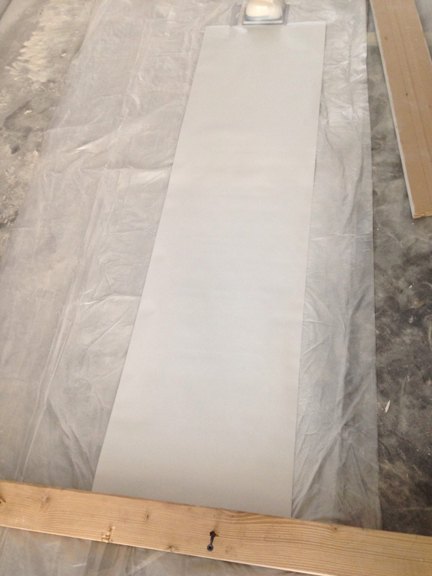
Step 2: Lay the roll out on something you don’t mind getting paint spray on. We are doing a huge additional on so I happened to have a plastic tarp.
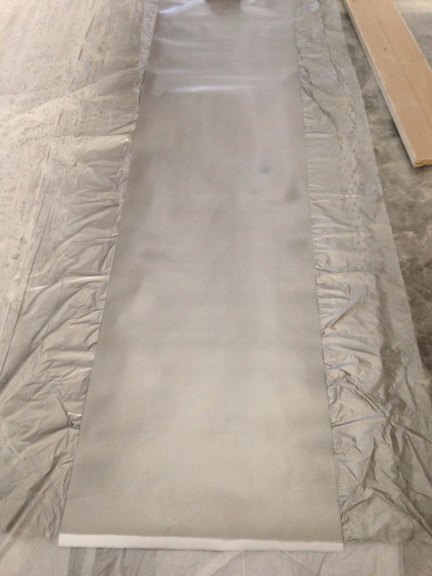
Step 3: Spray your paint on the vinyl side of the contact paper. Obviously if you don’t have spray paint you can roll or brush paint on. Spray is just the easiest. I also had some primer laying around so I put a coat of that on first. I don’t really think the primer was necessary. So if you don’t have any don’t stress it – especially if you buy the spray paint that has primer in it. I did three coats of my chosen color and let it dry an hour between coats.
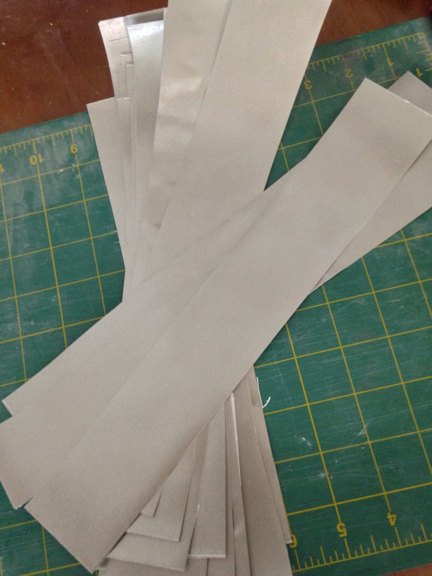
Step 4: Cut the newly painted but now dry contact paper into 2″ wide strips. If you are using a larger or smaller hole punch make your strips about .5″ wider than you need so you can line the punch up properly.
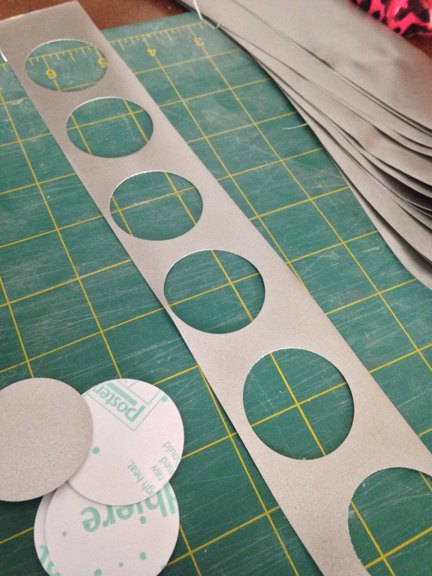
Step 5: Using your hole punch, punch out your dot or other shape from your color strips.
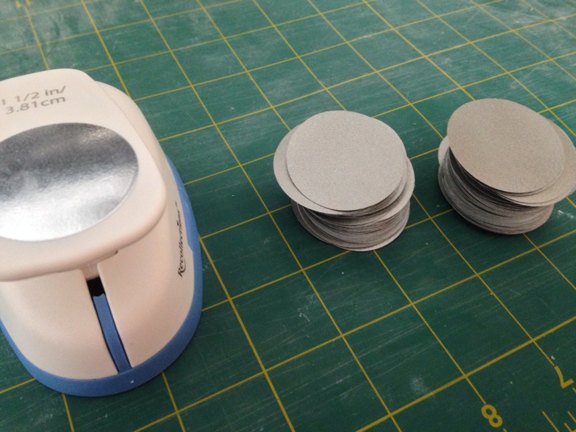
Look at all these lovely dots!
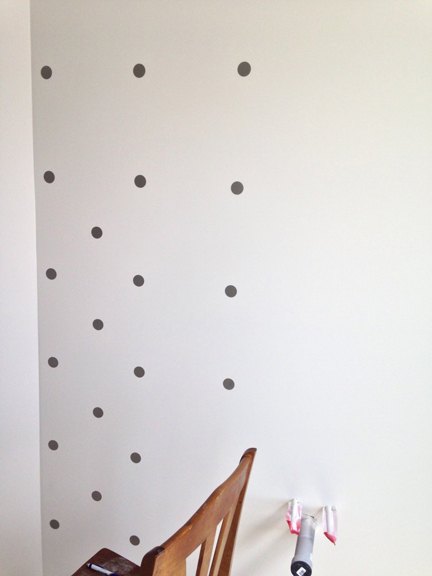
Step 6: Prep your walls. Wipe your walls down with a damp cloth so any dust or residue is removed.
Step 7: Stick the dots to the wall. You can obviously do any pattern. I did just a standard polka dot diamond pattern. My wall is 6′ wide and 8′ high. My polka dots are placed 12″ apart. I didn’t want my dots to land on a crease/corner/edge so I started my pattern 1.5″ away from the corner of the room and 1/8″ from the top of the ceiling. I used a level and a tape measure to make sure everything stayed relatively in line. If you butt your tape measure up to the top of the ceiling and let the body of it drop straight to the ground with it laying flush against the wall you’ll get a pretty solid straight path to line your dots up on. I then took a pen and marked a period at 1/8″ moved my tape measure down to 1/8″ then from there marked at 12″, 24″, 36″, 48″, 60″, 72″, and 84″. That made the first row of dots. The second row of dots have to be offset by 6″ to make the diamond pattern. To do this measure along the ceiling edge 6″ from your ceiling dot then 6″ down – this should give you a dot roughly 6 1/8″ from the top of the ceiling and 6″ across from your first row of dots. Then just drop your tape measure down the wall to the floor and mark from the first dot 12″, 24″ 36″, 48″, 60″, 72″, and 84″. The next row of dots will start 12″ from the very first row and line up with the first row down the wall. Then repeat this across your wall or door or mirror or … 
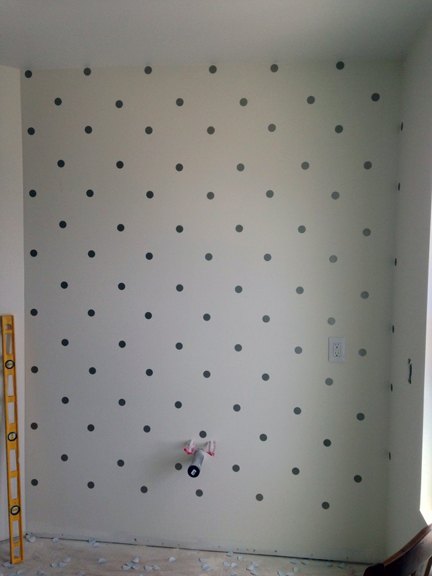
Yes, I did just throw the trash on the ground. I’ll clean it up later. With all the drywall dust it could use another sweep.
Hint: To remove the backing off the contact paper hold the contact paper with the vinyl side facing away from you then fold back a small edge of the paper. It should separate easily from the backing and the crease goes away when you smooth the decal onto the wall. It’s also a great idea to smooth the decals onto the wall with a credit card to make the edges adhere really well.

Want more details about this and other DIY projects? Check out my blog post!
Comments
Join the conversation
3 of 53 comments
-
Love this! I am wondering if my textured walls will be an issue?
-
Thanks! Glad I asked!


Frequently asked questions
Have a question about this project?
Can this be removed for renters?
Looks wonderful! Quick question.... Is there a reason you used white contact paper and painted it? Contact paper comes in tons of colors and patterns. I did something similar to this when I first began teaching kindergarten. I had found contact that had the alphabet and cut them out to decorate the kids bathrooms. Thanks for reminding me how creative you can get with contact paper!!!
How well does it come off the walls?