


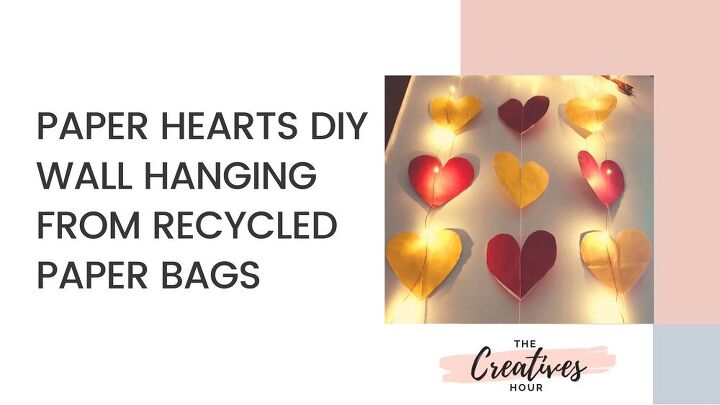
DIY Wall Hanging From Recycled Paper Bags
A simple project that you can do with paper bags lying in your house.
Hi there! 🙂
With the outburst of COVID 19 and the resultant lockdown and quarantine going on, I felt like making a creative DIY wall hanging to add a positive touch to my room. I tried making a wall hanging at home for the first time and it turned out pretty well, so I decided to share it with you guys.
By the way, if you are looking to make some fun DIYs while at home, check out my compilation of 7 easy DIY home projects. There are some more DIY wall hanging ideas there.
Many a time, I come across beautiful DIY wall hangings while scrolling through Pinterest and Instagram. This time, I finally decided to try it out.
What I love is that this DIY is made entirely using recycled materials. I cut out the paper hearts for the decor from old paper shopping bags and used a wooden branch from my backyard as a rod to hang the hearts.
I have followed a yellow and red color scheme here, but you can customize to make your own piece of art. Remember, there are no rules, except to have fun!
First, I collected all the different paper bags that I found in my house. I had a few yellow and red paper bags, hence decided to go forward with that color scheme.

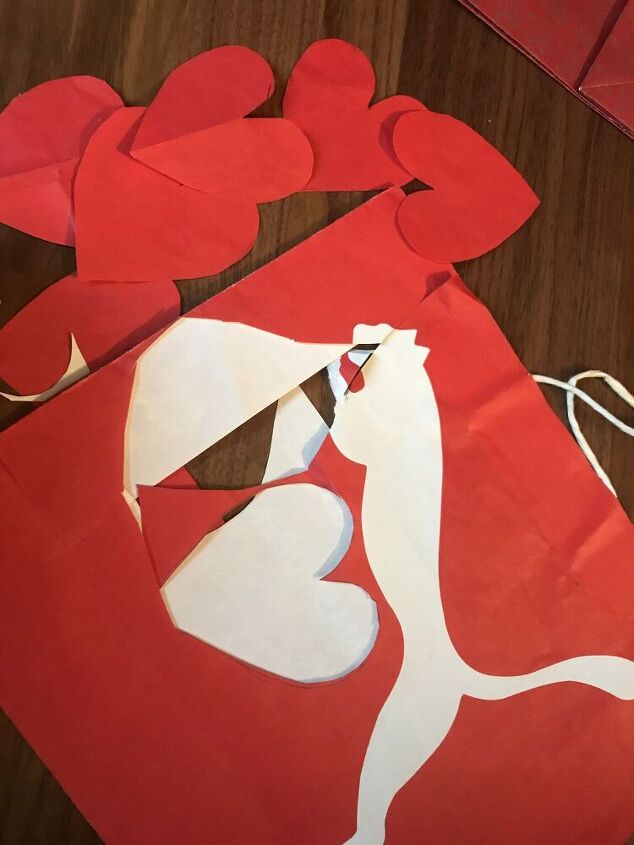
I started by taking the plain red paper bag and folding it in the center as shown in the image below. Then I cut out symmetric hearts by cutting along the folded edge.
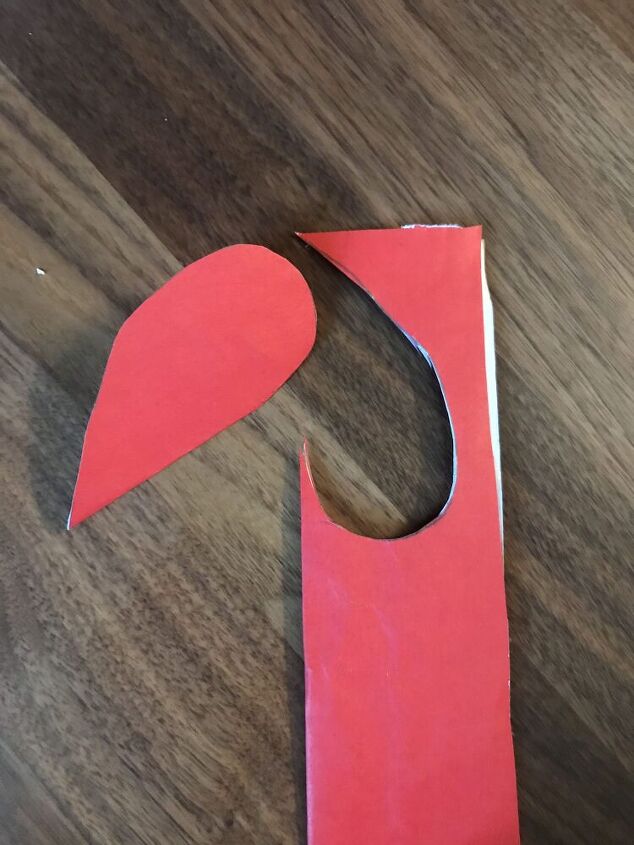
Make sure to space the hearts in such a way that you can cut multiple hearts from the same paper bag. I was able to cut four hearts from each strip of the red paper bag.
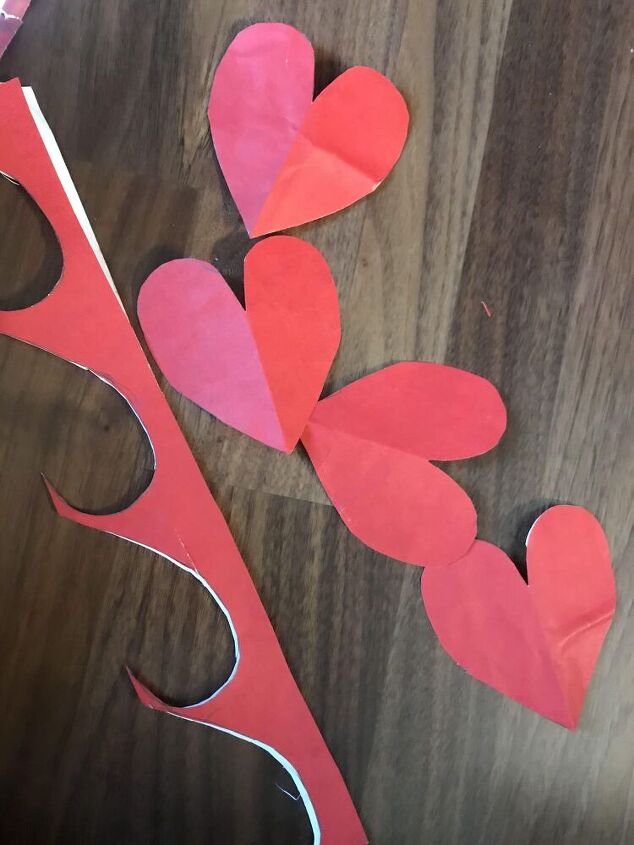
I made sure not to cut the white logo part of the bag as the theme was red and yellow and I didn’t want any white patterns in between.
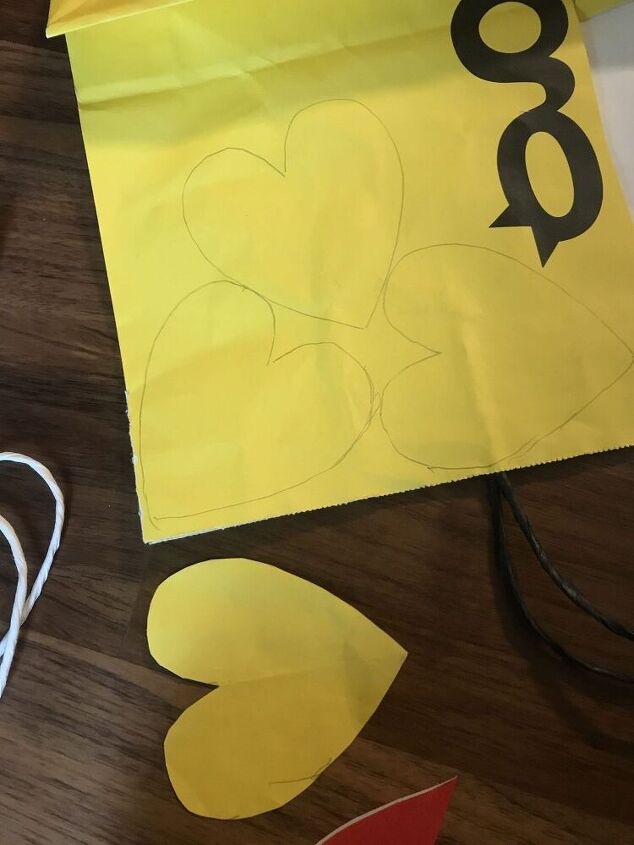
Once I had enough red hearts, I grabbed the yellow paper bag and went on to cut out some yellow hearts. For this, I started by drawing hearts on the paper with a pencil and then used a pair of scissors to cut through the outline. When you do this, ensure that all of these hearts are uniform and similar in size.
Notice that I have drawn these hearts as close to each other as possible to avoid any wastage. Here, again I have avoided the logo part on the cover.
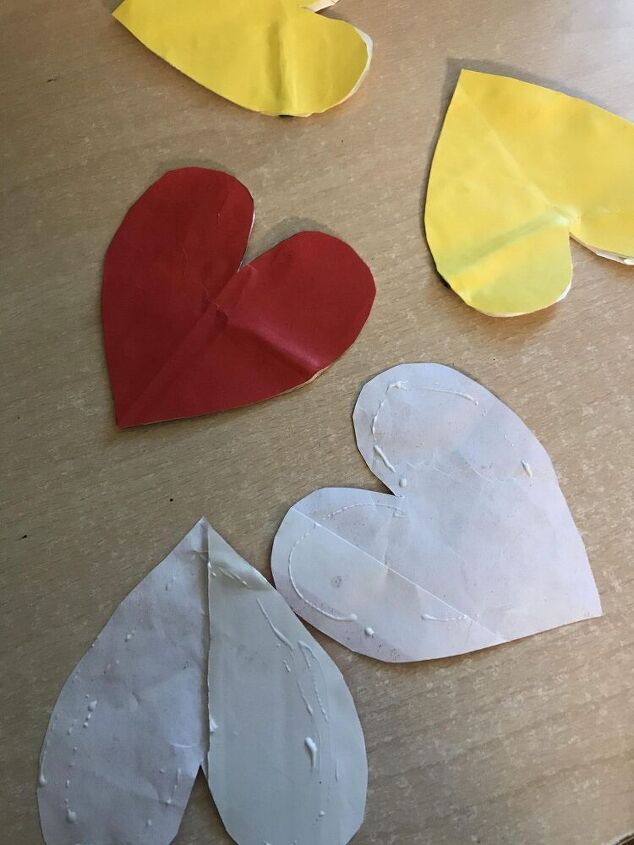
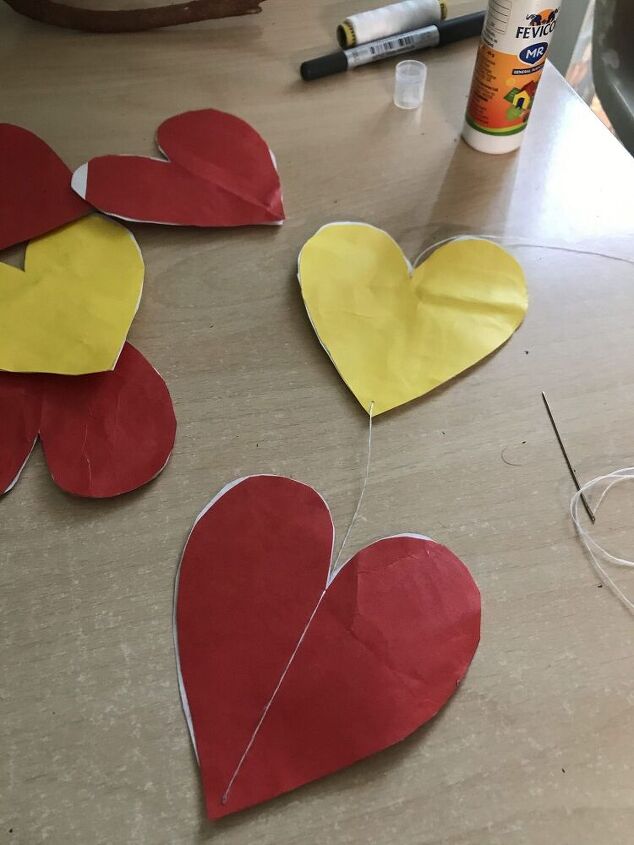
The problem with using paper bags instead of colored sheets is that the part inside the paper bag is white in color. To use these paper hearts for my DIY wall hanging, I decided to paste the hearts of the same color back to back.
This is important because our wall hanging will dangle in the air and both the sides of the hearts are visible. It is a good idea to paste the hearts of the same color together. This way, these hearts will be colored yellow or red on both sides. But if you are trying multiple colours, then you can paste paper hearts of two different colors also back to back.
As you can see, I have used regular white glue to paste the hearts together.
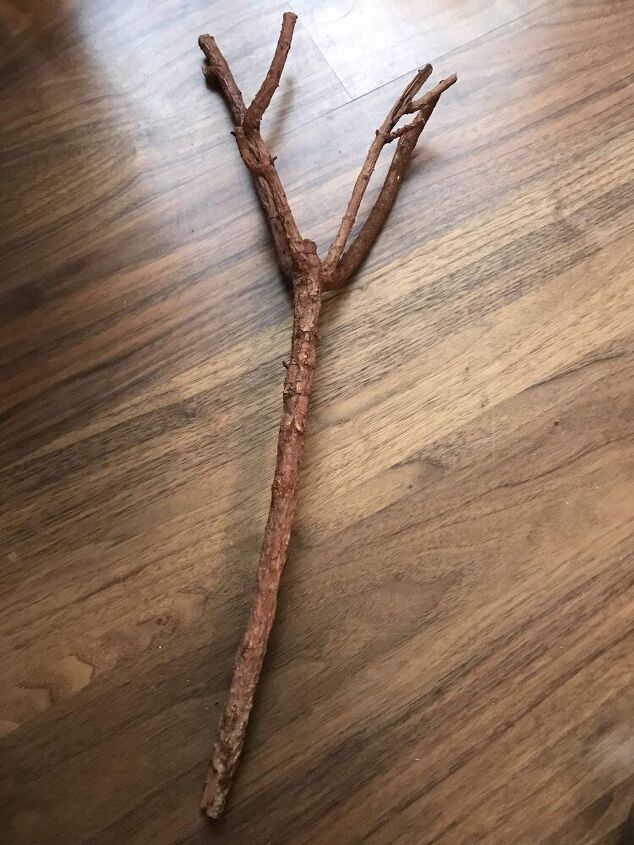
Next, I decided to use a wooden branch to hang my paper hearts. I was lucky enough to find the perfect branch in my backyard. Since this branch looked more grey than brown, I thought to would be a good idea to paint it.
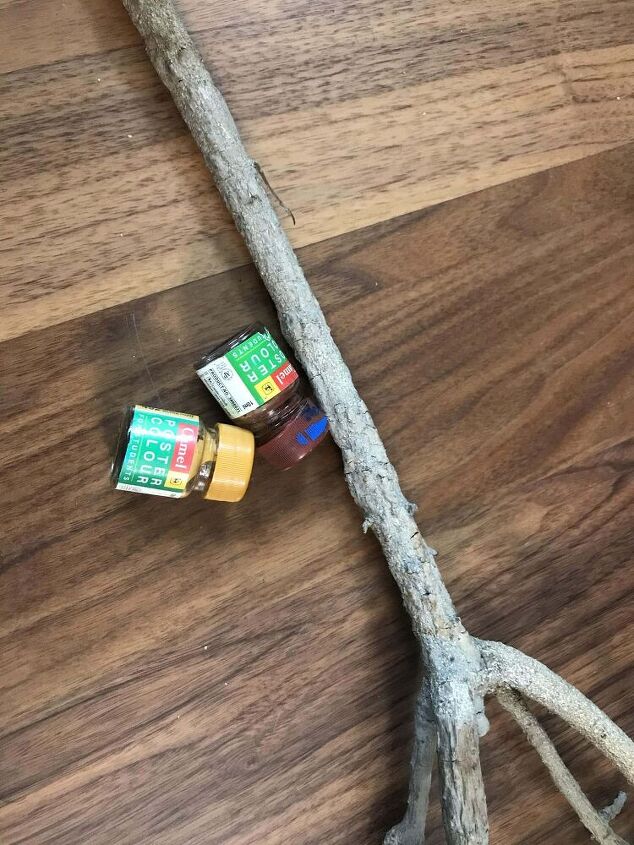
Painting this branch was indeed fun. I used the Camel poster color set to paint the branch. I decided to go with deep brown and yellow ochre paint to give a nice brown look to the branch.
Then, I used a needle and thread to sew the hearts together. I made holes at the top and bottom part of each heart and connected the hearts of alternate colors.
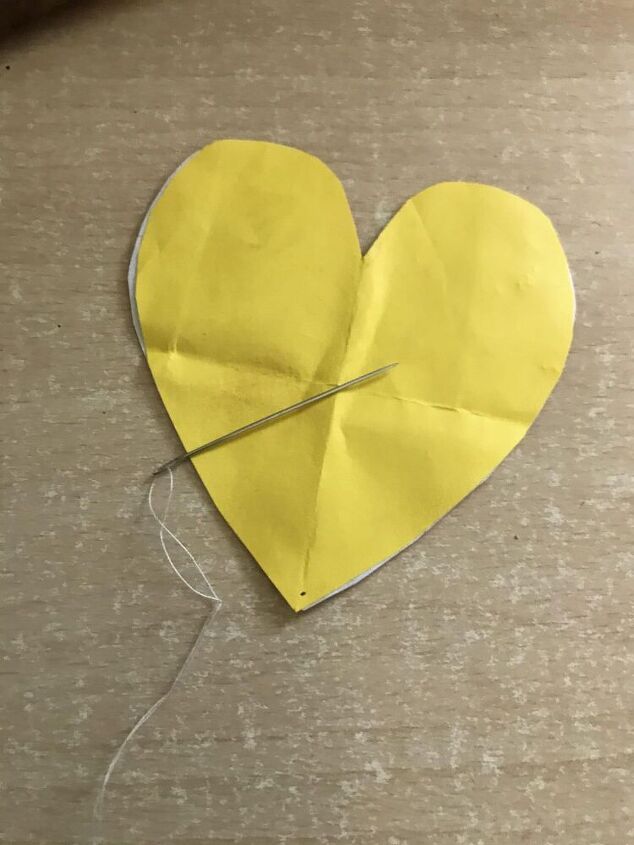
As you can see, I used this needle and thread to sew alternate colored hearts. I went on to make three columns of these paper hearts with four hearts in each column. This means that each line of hearts will consist of 2 red and 2 yellow hearts sewed together alternatively.
You can choose to make as many lines as you want. You can add more hearts to each line as well. I kept mine sweet, small, and simple because of the limited space. But if you want to place it on a bigger wall, you can plan your wall handing accordingly.
The last step was to fasten these heart garlands to the wooden branch. I used the same twine that I had used to sew these hearts together to tie them to the branch. Then, to decorate it further, I added battery operated fairy lights to it. I simply wrapped the fairy light around the branch and let it dangle loosely along with the paper hearts.
If you don’t have a wooden branch, you can roll a chart paper tightly and use it to hang your paper hearts by a thread.
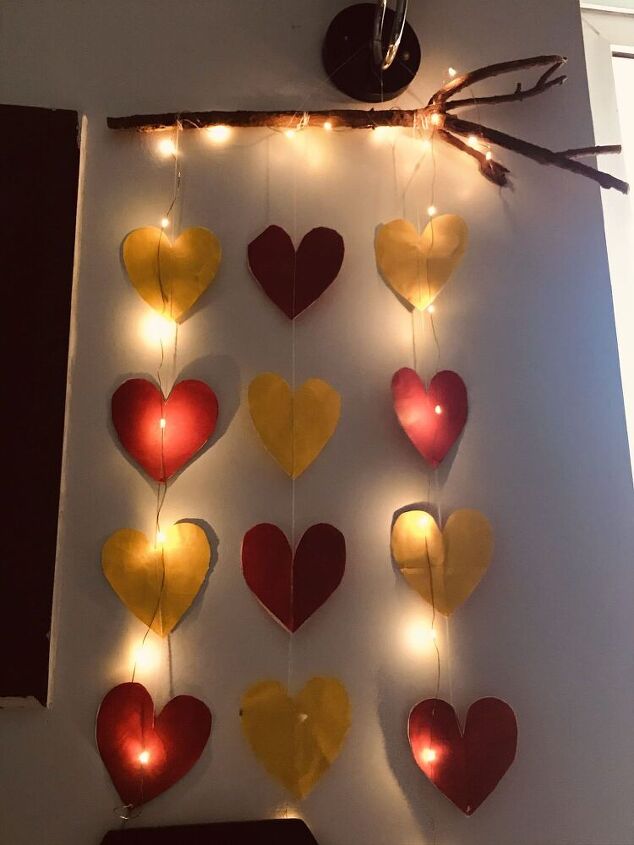
Voila! There you go. A simple and easy DIY wall hanging that you can make at home. I had a lot of fun while making this particular DIY. And the part that I like the most about this is that it is made from recycled materials.
If you try this too, then do let me know how it goes in the comments section below. I would love to see your take on it. Also, let me know if you would want me to share more DIY ideas in the future. 🙂
Love,
Shreya
Source - https://thecreativeshour.com/diy-wall-hanging/

Comments
Join the conversation
-
View images of complete project here - https://thecreativeshour.com/diy-wall-hanging/


Frequently asked questions
Have a question about this project?