


DIY Wood Tray Made From an Old Photo Frame

by
Maura White
5 Materials
$5
1 Day
Easy
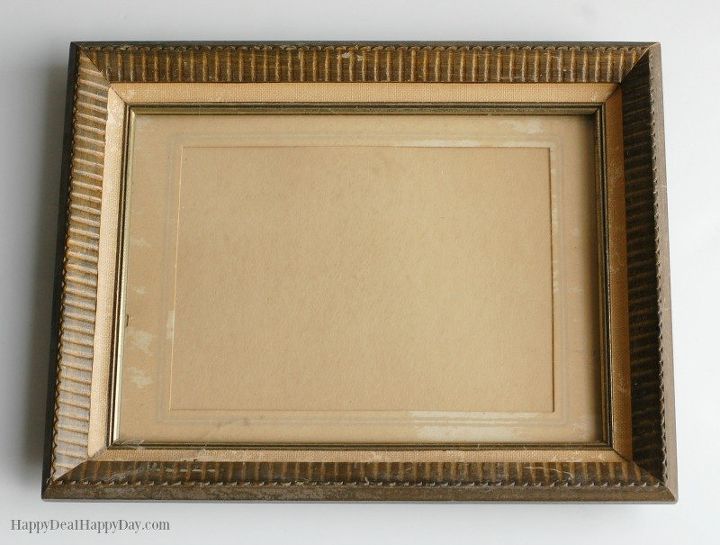
I just had fun making a DIY wood tray made from an old photo frame. My mother in law found this frame and asked me if I could use it for one of my up-cycle projects - and I snatched it right up so that I could make this rustic tray for my coffee table!
Materials Needed To Make Your Own Upcycled Wood Frame:
- 11X14" old wood frame (head to a thrift store or hit garage sales to find one! Or, if you don't want to hunt that way, here are "antique frames" on Amazon.)
- Foam Board (get at the Dollar Tree or Dollar General for $1)
- Wood Grain printed paper
- Mod Podge & foam brushes
- Drill
Jute rope
In order to make the bottom of the tray, I was just going to cover the glass in the original photo frame with some wood grain printed scrap book paper. The glass actually broke in the process, so I replaced the glass with some foam board. I cut the foam board into a 11X14" piece, along with the scrapbook paper to match that size.
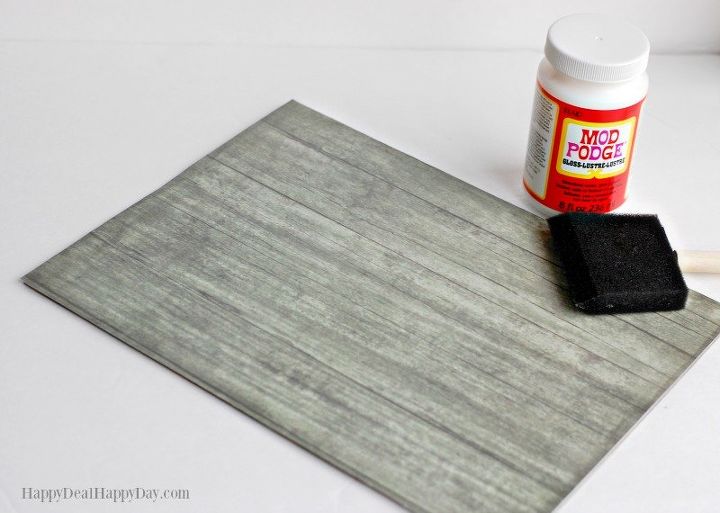
In order to make the bottom of the tray, I was just going to cover the glass in the original photo frame with some wood grain printed scrap book paper. The glass actually broke in the process, so I replaced the glass with some foam board. I cut the foam board into a 11X14" piece, along with the scrapbook paper to match that size.
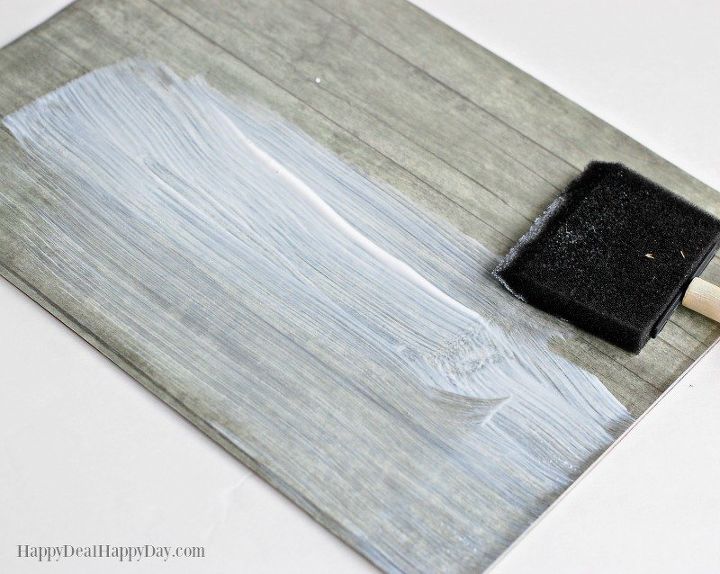
Then use Mod Podge to glue the scrapbook paper onto the foam board. Cover the scrapbook paper with an even coat of Mod Podge to seal it. Wait an hour and give it a second coat of Mod Podge on the top to be sure the surface is waterproof. Also be sure your Mod Podge is smoothed out with the foam brush, or you'll get "glue" bumps on the surface of the tray. Wait 24 hours for this to fully dry before you assemble the rest of the tray.

Now to turn the frame into a tray, you should add a handle to each side. The way I did it was to drill holes into the frame and use jute rope for rustic rope handles. Depending on the structure of your frame, it may also look great to just add some antique looking hardware handles.
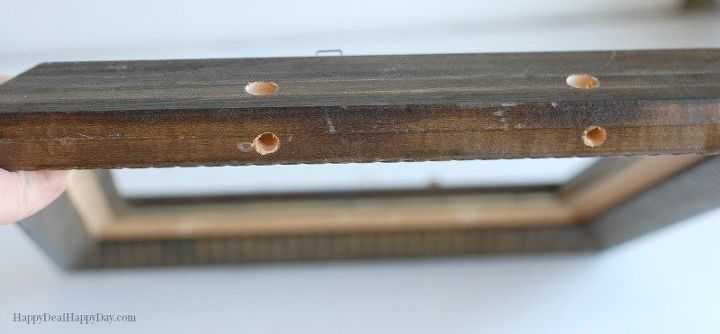
Here is a side view of the drilled holes. There are actually 2 drilled holes at an angle because of the angle of the wood on the side of the frame.
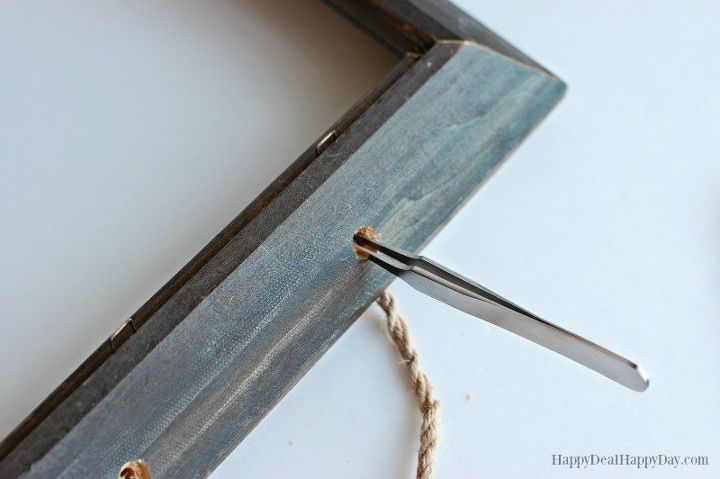
Because of the angle of the drilled hole, I needed to use tweezers to pull through the rope since I couldn't just feed it through the hole straight through.
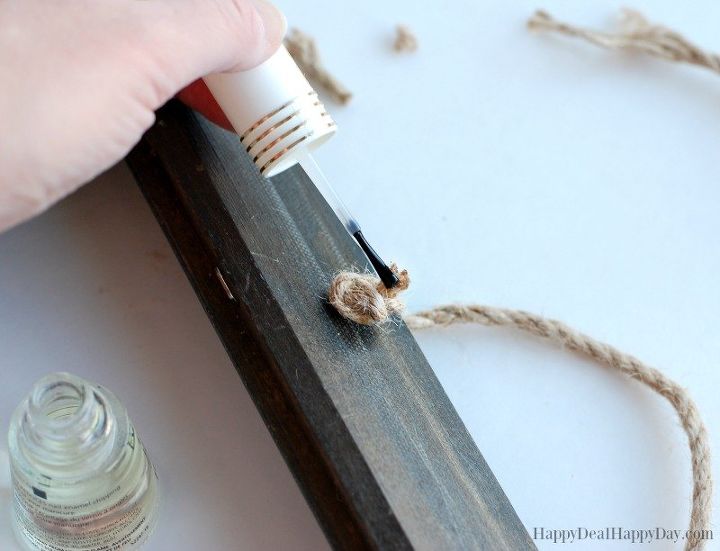
I also recommend using clean nail polish on the end of the jute rope to keep it from unraveling in the future.
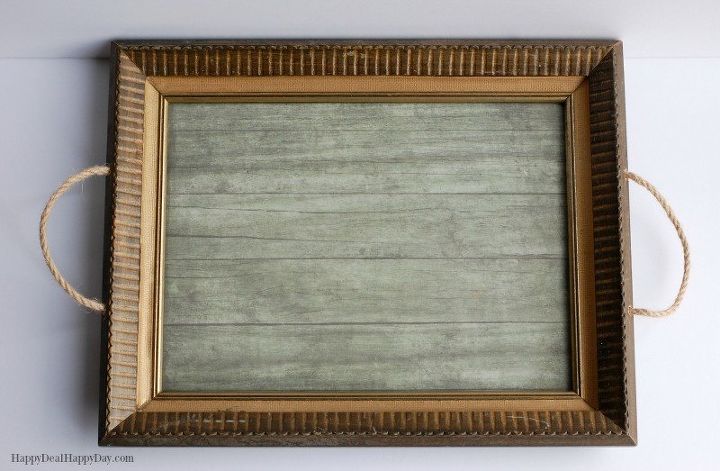
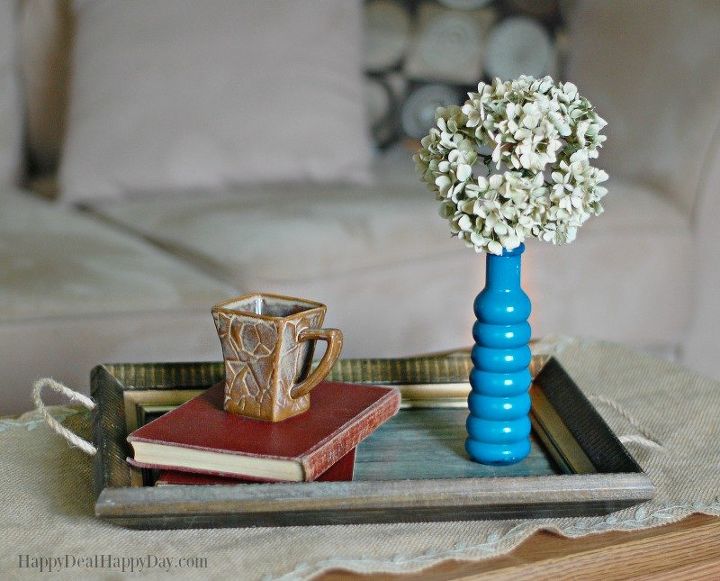
After the foam board is fully dry from the Mod Podge coat, then go ahead and add it to the frame just as you would if it were a picture. Here is the final version of the photo frame turned into a wooden tray for my coffee table:
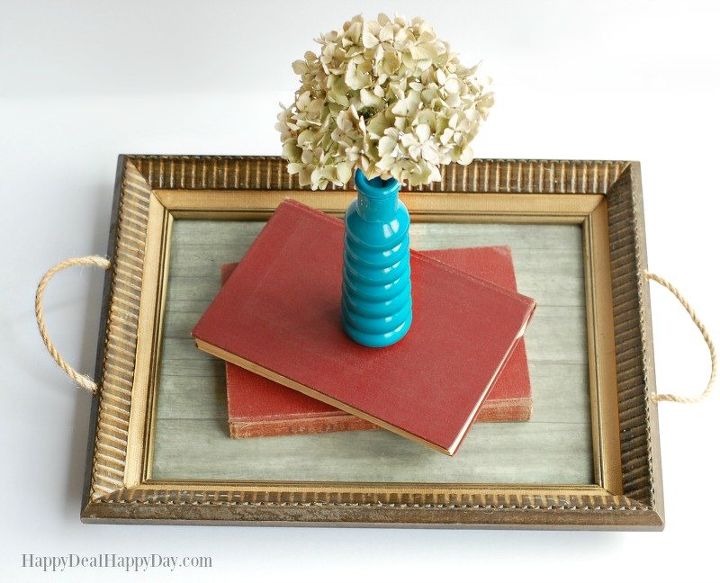
I will give a little warning that this tray is not as hardy and strong as a fully wooden tray would be. I would only use this tray for decor purposes and not to carry hot cups of tea or coffee around the house. I use mine to hold my remotes for the TV. Some old books and a decorative vase can also be a great way to enhance the tray with a pop of color.
Looking for more rustic DIY ideas? Check out these posts:
Want more details about this and other DIY projects? Check out my blog post!
Comments
Join the conversation
3 of 24 comments
-
I'm going to make this. Can't wait.
-
I would love to try this and I would add a piece of glass cut to size and clear caulk the edges for a liquid proof seal .


Frequently asked questions
Have a question about this project?
How much weight will foam board hold? I don't think I would trust it.
I think I would use a thin ply wood instead of the foam board, and I would mod podge snap shots of my kids and grandkids to the surface and follow up with a protective glaze to seal both the base and old frame. Sorry no question just a suggestion!!