


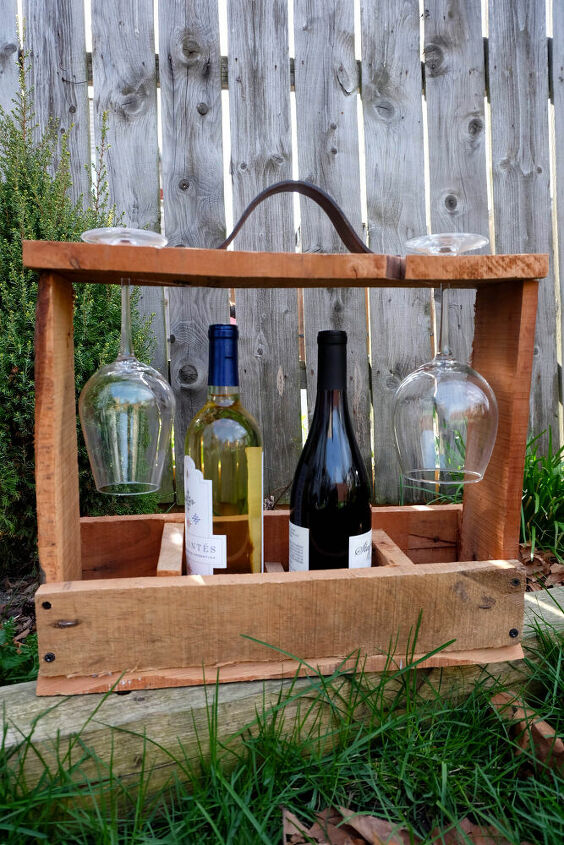
DIY Wood Wine Carrier Caddy
Looking for an easy way to bring along a couple bottles of wine and some glasses? Build this easy DIY!
Using what I had around the house, I constructed a spiffy, sort of rustic, wine caddy so that we can easily tote a couple bottles of wine with us along with glassware, openers, and other small items.
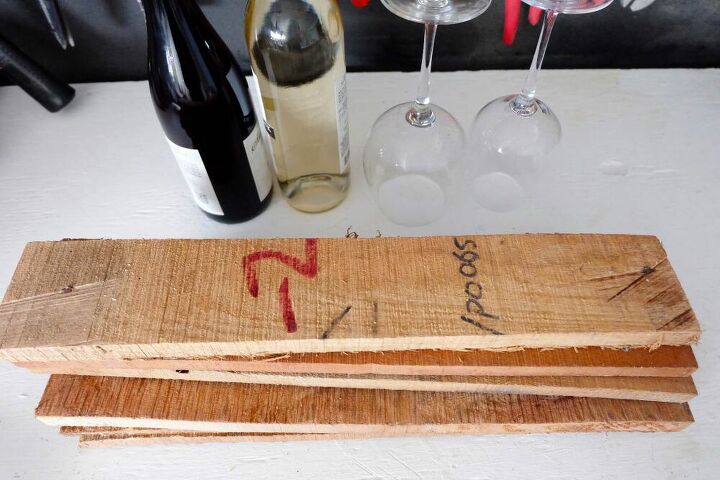
Technically, this was a use-it-up project so everything here was free to me, zero dollars, but this can most certainly be made with cleaned up, straight, nice wood. I used pallet wood mahogany pieces I had on hand.
Grab a bottle or two of wine and a couple glasses to help with assembly, but don't wine and power tool.
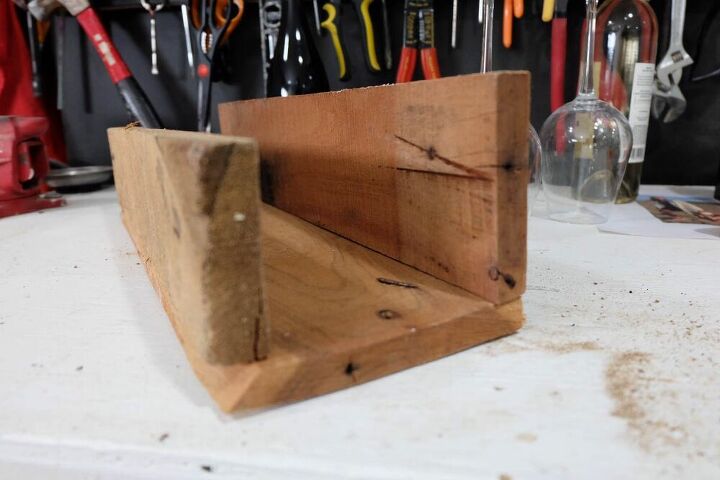
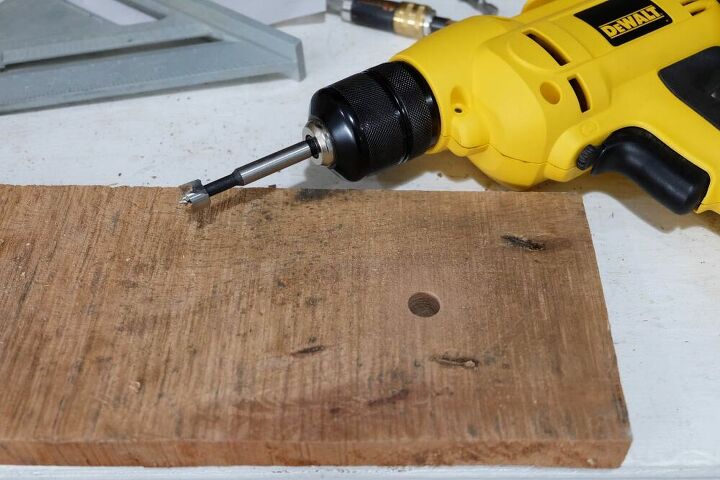
I know, this photo is horribly blurry sorry, my camera is giving me a hard time. But grab two side pieces of lumber and butt join them, screwing in from below. All these pieces were about 17" long.
Be sure to use a countersink bit so the screws will sit below the level of the wood and not cause the whole thing to wobble.
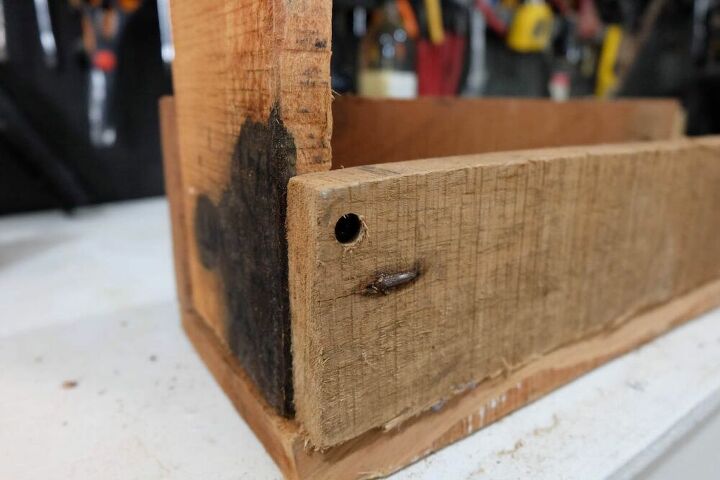
Using the same countersink drill bit, attach the sides to the sides of the base box. Feel free to use wood glue along with the screws for added security. The side vertical pieces were about 15" tall.
The top is the most complicated part of the project. Don't attach the top just yet, but you can set it atop to make sure your measurements work.
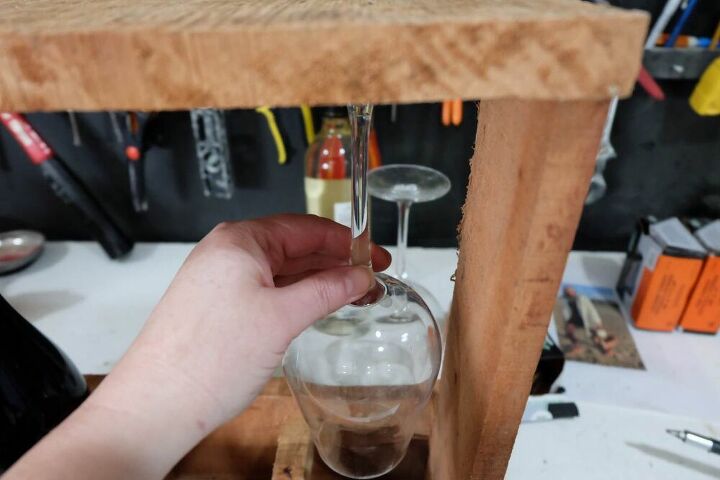
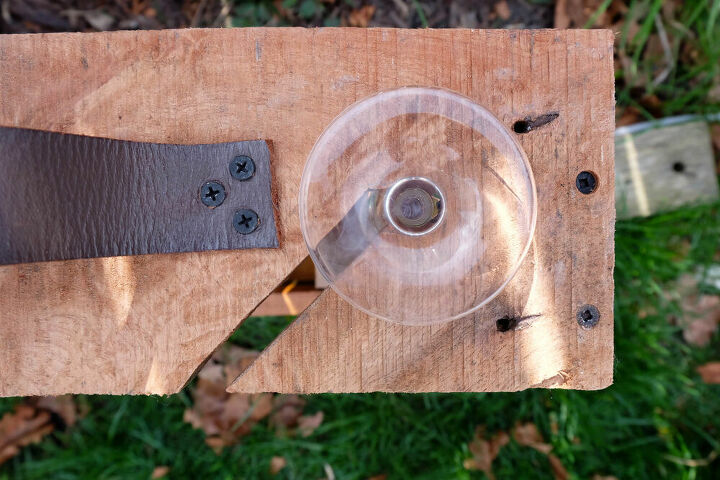
Using a wine glass, I eyeballed where it should end up as the wine glasses are stored hanging upside down in this. I marked the spot on center then measured so I could repeat it on the other side.
Be sure to swing by my blog Flipping the Flip for more on this and a load more fun!
I used a 1/2" Forstner bit which is an uber fancy drill bit, my favorite, as they clear out an incredibly clean hole. So drill out where you marked for the wine glasses. Be sure to use a backer piece of scrap under where you're drilling.
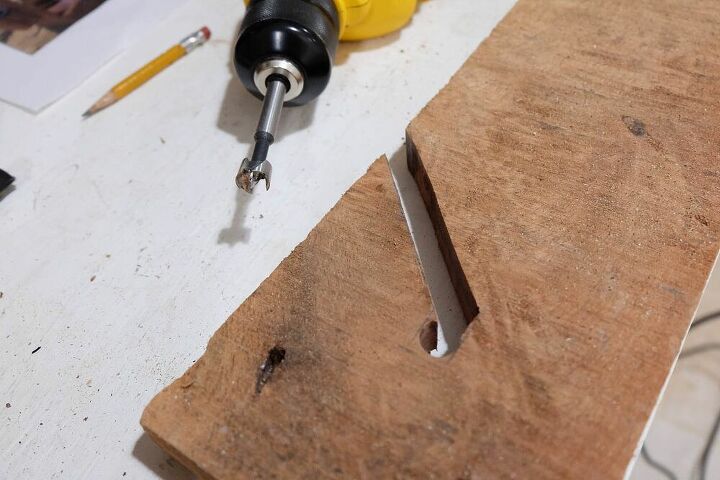
Next I marked slots on a 45 degree angle coming from the hole I just drilled, then cut them out with my band saw. Sure, it's a bit messy but goodness, mahogany is hard hard wood! Plus, eh, I wasn't in this for the precision.
Not going on a hardware store run kept me limited to items on hand which turned out to be a leather belt for a handle. Just cut about a 10" strip and screw it on! To get that nice bow, attach one side, scrunch the other end towards the attached side until it bows, then attach the second end.
For more details about this project and for free free free plans to build your own, come on by the blog post!
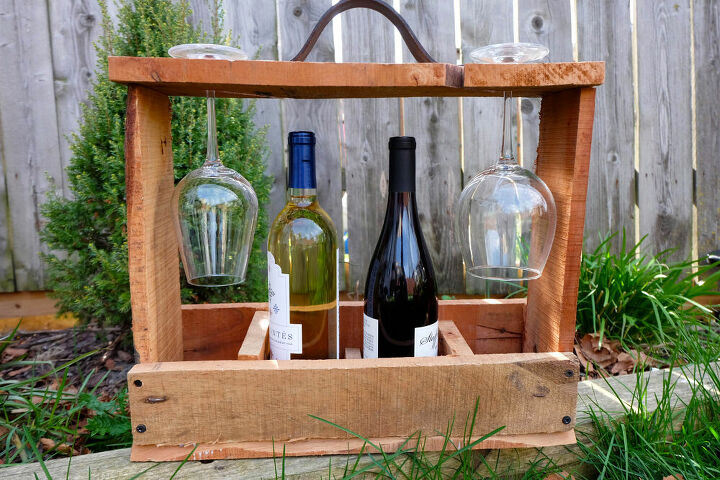
Because I was building this for two, I slipped in some divider pieces. Those I cut purposefully super tight so no fasteners were needed.
Lastly, just attach the top in the same way you've attached all the other parts and voila! Wine Carrier Caddy!
Have fun!
Resources for this project:
See all materials


Comments
Join the conversation
-
Super cute, I love the rustic look💞👍👍


Frequently asked questions
Have a question about this project?