


DIY Wooden Maple Leaf Trivet
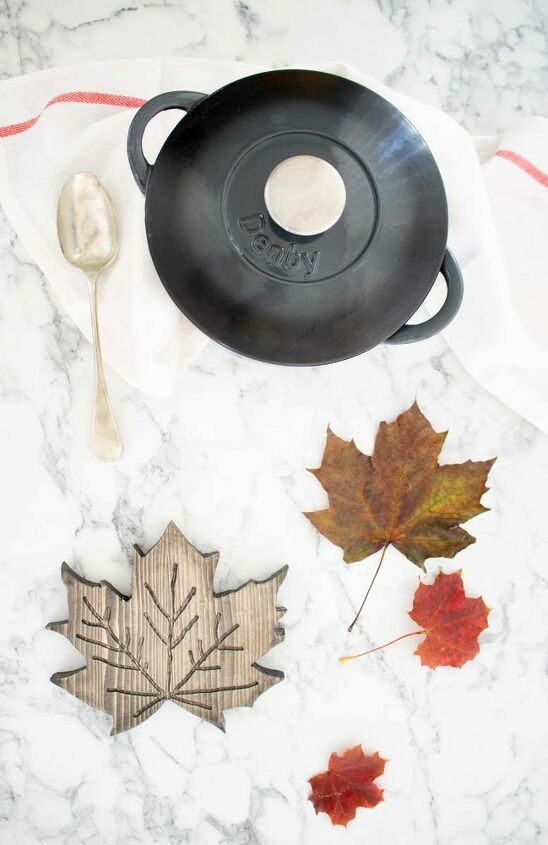
As I cook a lot and it's now autumn, I thought I'd combine my need for a pan trivet and create a leaf shape.
My inspiration came from the many free fallen leaves on the ground that are the perfect template.
Originally posted on my blog: http://thecarpentersdaughter.co.uk/woodworking/leaf-trivet/

I first took a photo of the leaf and uploaded to my computer.
Then enlarged, printed in black and white, cut out with scissors and stuck it to some 18mm thick pine using glue.
You could use a scanner, but as usual, mine was playing up.

I then clamped my trivet to a worktop and carefully cut out with a jigsaw.
You'll need to unclamp and rotate. Or, if it's on the small side, you would be best using a band saw.
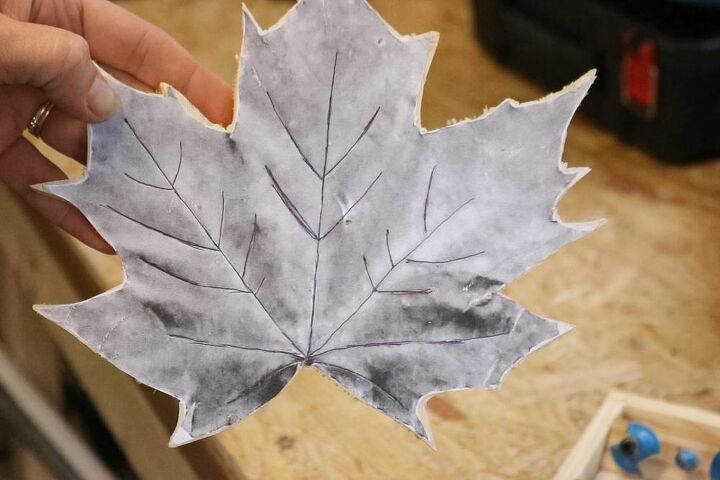
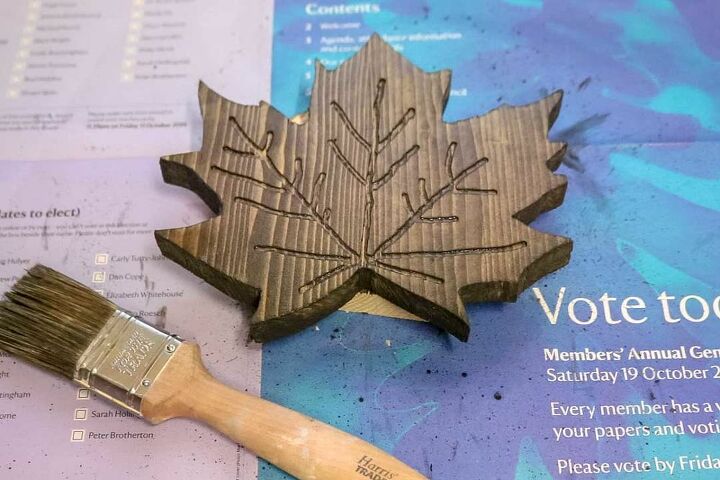
Then using a pen, draw along the vein detail to enhance so they're more visible for the next step.
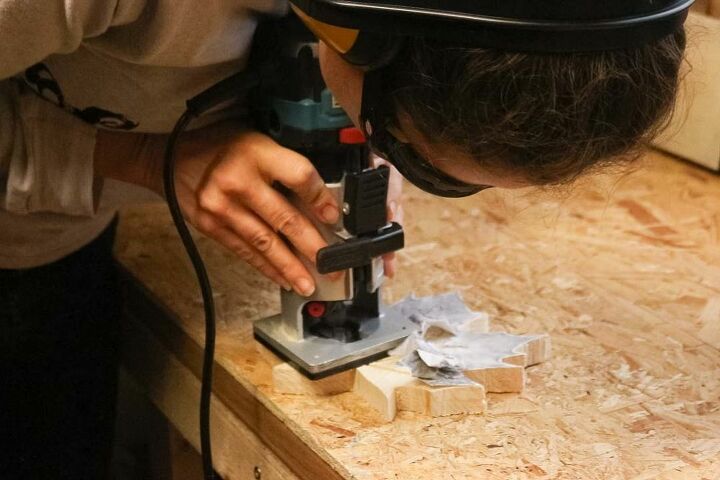
After temporarily glue gunning the trivet to a worktop, I then use a narrow router bit in my router to carve out the vein detail.
Note, wear ear defenders, goggles and a respirator if carving MDF and any other wood where the dust is dangerous.
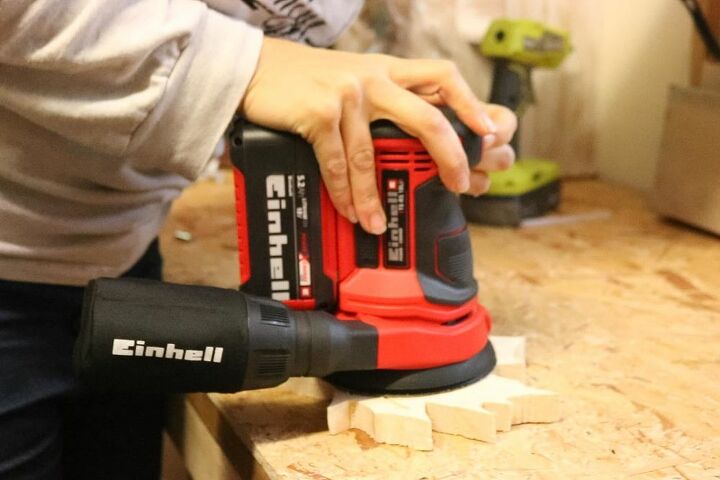
Remove the paper template and sand the top and bottom to tidy.
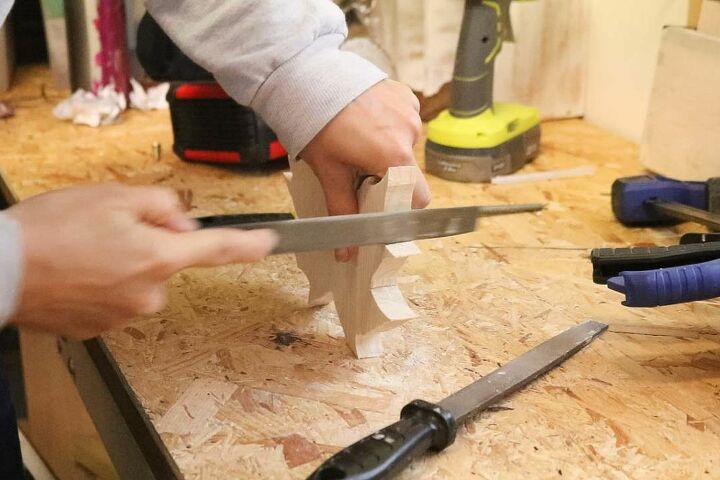
Using a set of rasps (or files), sand down all the cut edges to tidy and dust down. A hoover is great for this.
Then stain and leave overnight before finishing with two coats of waterbased varnish.
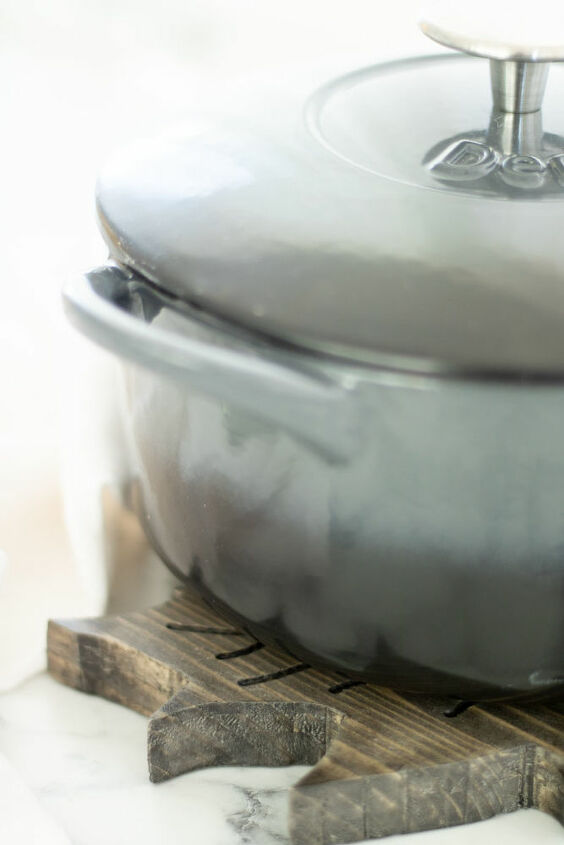
Add rubber dots on the base to protect your kitchen worktop even more.
For more pictures and steps if you need more help, you can find extra details here: http://thecarpentersdaughter.co.uk/woodworking/leaf-trivet/


Frequently asked questions
Have a question about this project?