


Do It Yourself Goodwill Table Lamp Makeover
$10
2 Days
Easy
One project is finally finished! I am elated that I can finally show it with you. For the month of June I am trying to tackle 6 Diy Home Decor Projects on My To List and now I can cross one off the list.
You can find the rest of the backstory on this lamp that article. Outside of that, I have become a little obsessed with stripes. I love them! I have been trying to implement them in to a few projects. I think this project was truly inspired by my Cane Back Chair Makeover a few months ago. I fell in love with the black and white stripe pattern.
You can find the rest of the backstory on this lamp that article. Outside of that, I have become a little obsessed with stripes. I love them! I have been trying to implement them in to a few projects. I think this project was truly inspired by my Cane Back Chair Makeover a few months ago. I fell in love with the black and white stripe pattern.
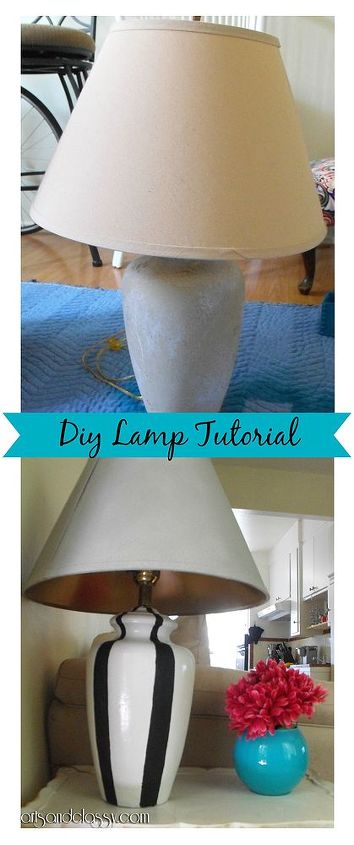
If you like what you see so far, I would love to teach you how I transformed this $10 goodwill lamp and lampshade into something more.
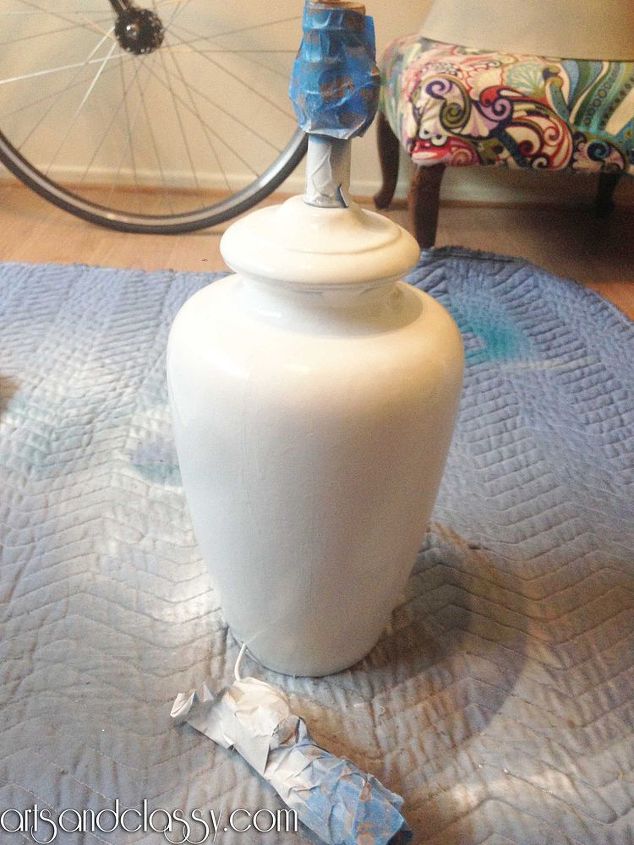
Once I sprayed the lamp with a few layers of primer and spray paint. I gave a day to dry. After toiling around with the idea of using painters tape to create my stripes, I realized how hard that would have been since the stripes I wanted to do were not the same thickness in certain areas.
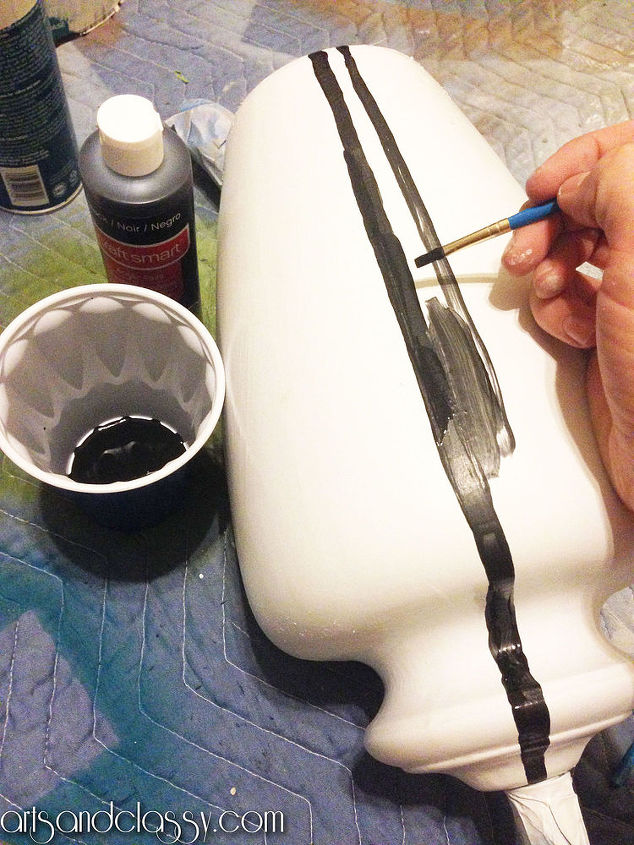
I decided to be brave and hand paint the stripes myself. I used a very small detail brush and began doing my best to create the illusion of a perfect stripe. I even spaced out the stripes as best I could.

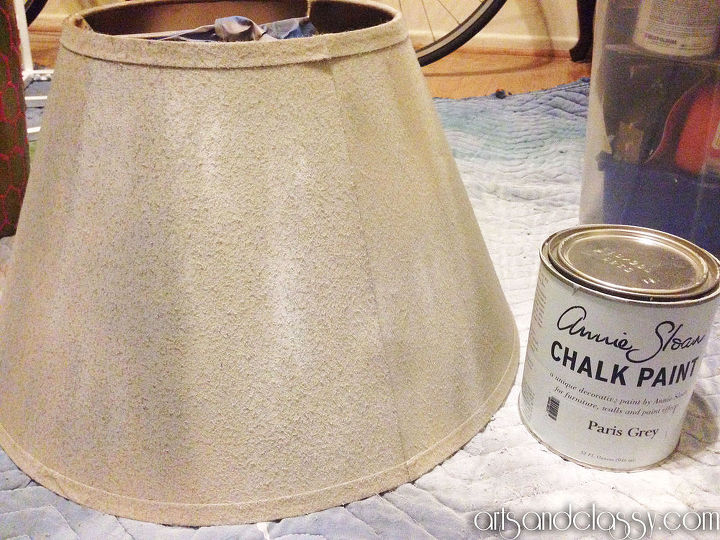
Next, I attempted to tackle that old lampshade. The fabric was fraying on it which gave it a dingy look.
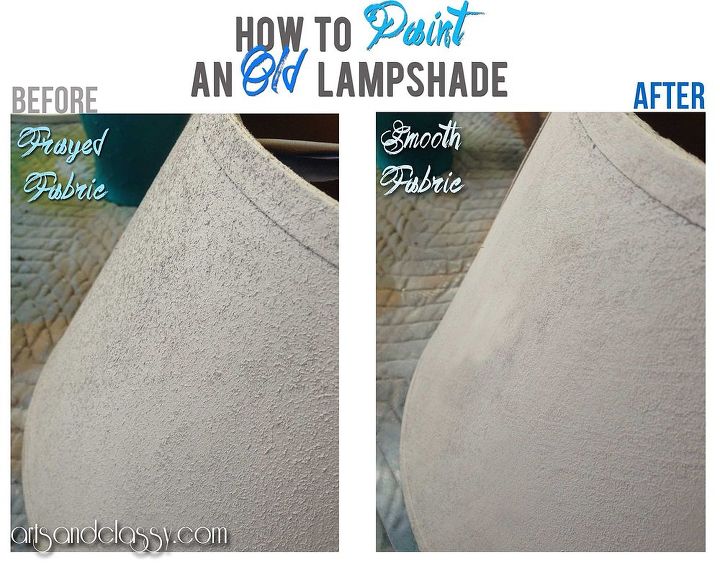
Once I applied 2 coats of chalk paint (see before photo below) you could still see the fraying. It does not look attractive.
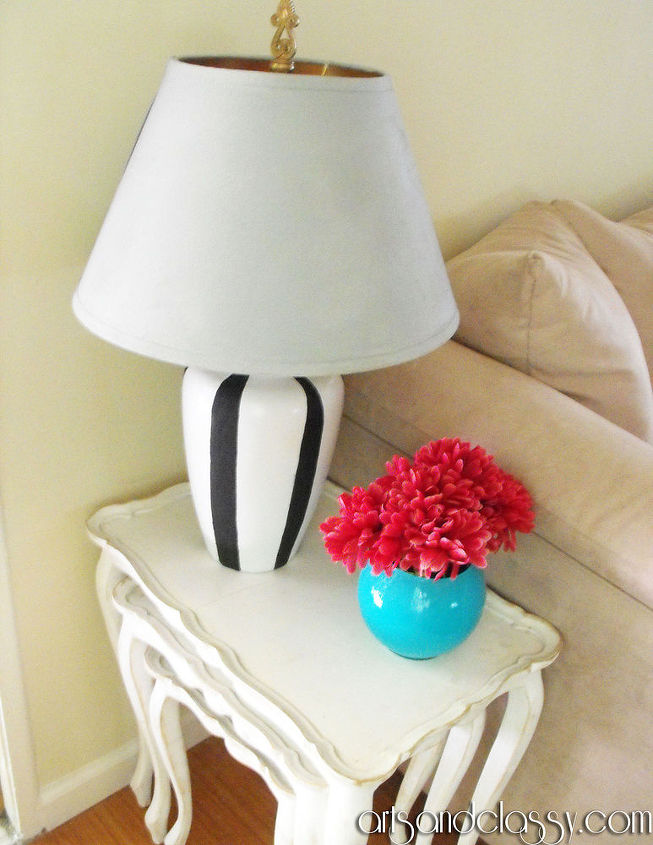
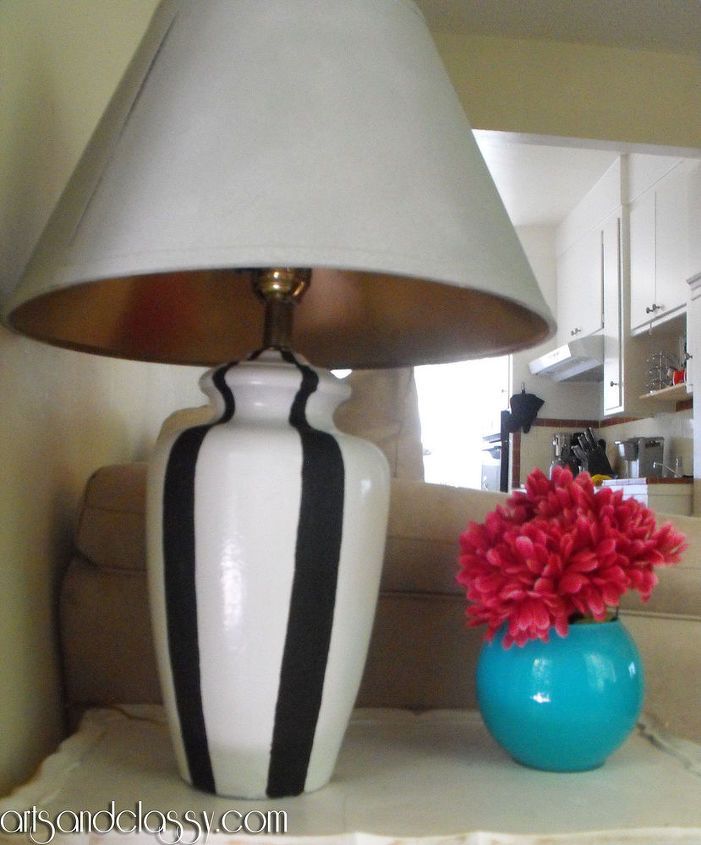
I am very happy with this table lamp as it is now in my living room. It feels nice to have finally tackled this project and it looks great in the space. Love the additional light, and I would love to hear your feedback. What do you think? Please comment below and let me know your thoughts.

Want more details about this and other DIY projects? Check out my blog post!
Comments
Join the conversation
4 of 7 comments
-
You did a GREAT job! The hand painted stripes give it character and more artistic.
-
Very nice and thank you for the information about sanding an old lamp shade....brain buzzing now about an old shade I have. 🌴


Frequently asked questions
Have a question about this project?