


Easiest DIY Bed Skirt With Box Pleats
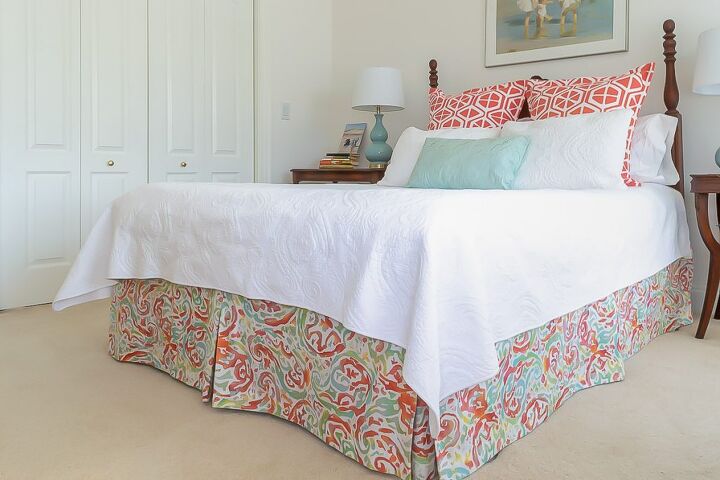
Detailed instructions on how to make the easiest DIY bed skirt with inverted box pleats. If you can sew a straight line and read a ruler, you’ll have no problem with this easy DIY. Not only is this an easy project, but this bed skirt is very practical and functional.
This is the second post detailing how I gave our guest room a badly needed makeover. When I say ‘makeover’, it is my version of a makeover. I am loathe to get rid of or buy furniture. Most of what we own was passed down to us through our families and so has special meaning to us.
The bed in our guest room was my bed growing up. The hope chest was given to me by my parents when I turned 18 and the dresser was an antique we purchased when Kate graduated to a ‘big girl’ room. While I can’t tell you the specific genesis of the nightstands, I can say that we’ve had them for 30+ years.
All this to say, when I ‘makeover’ a room I focus on paint and fabric.
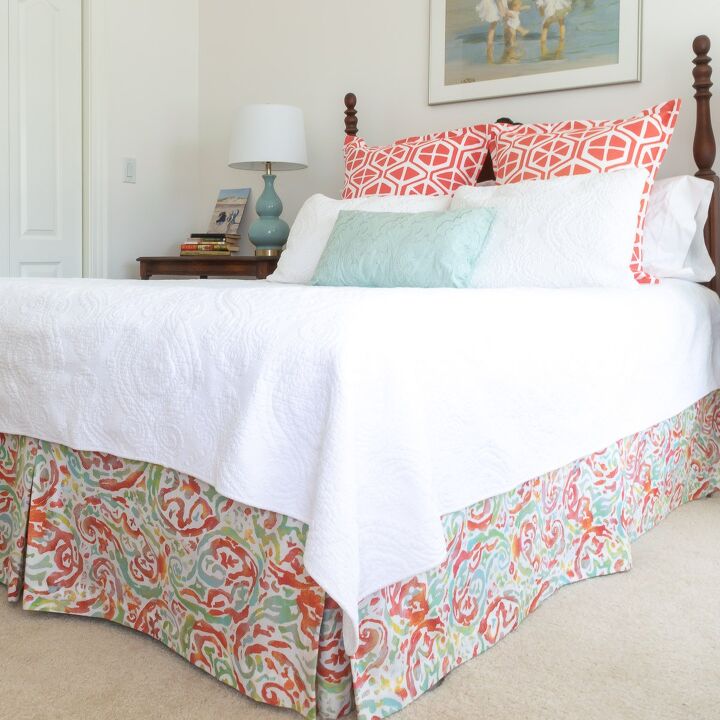
We gave the room a coat of a nice white, which is such a great palate to jump from. I made the Euro Sham pillows and have a tutorial for them on the blog...see the link below.
Next up was a bed skirt. This fabric was a bit of a splurge for me, but I loved all the colors in it. The many colors make it easy to pull from as I continue to decorate the room.
And I said this when I made the Euro Shams, but it bears repeating here…no special sewing skills are required to make this DIY bed skirt. If you can sew a mostly straight line and read a yardstick, you’ll knock it out of the park!
Here’s Why I Really Like This Bedskirt and Will NEVER Go Back to the ‘Traditional’ One.
This DIY bed skirt is unlike every other bed skirt I’ve ever had in that each section is separate from the others…there is not a large piece of fabric to which each piece is attached to.

The benefits are:
- It stays in place! No more shifting bed skirt!
- If you spill something, just wash that section. Lift the mattress and detach it to clean and to reattach. No more having to take the whole mattress off, wash the whole skirt and then have to lay the mattress back on top just so to avoid the skirt shifting…you know what I mean!
- It is SUPER easy to make.
- If we get a new mattress, I can adjust the length accordingly.
What Material Do You Need for Bed Skirt
- Fabric (discussion of how fabric and diagrams showing how to cut the fabric on the blog)
- Sewing Machine
- Thread and Straight Pins
- Velcro Tape. This is what I used. It is machine washable. This is a 10 foot roll and I had a wee bit leftover.
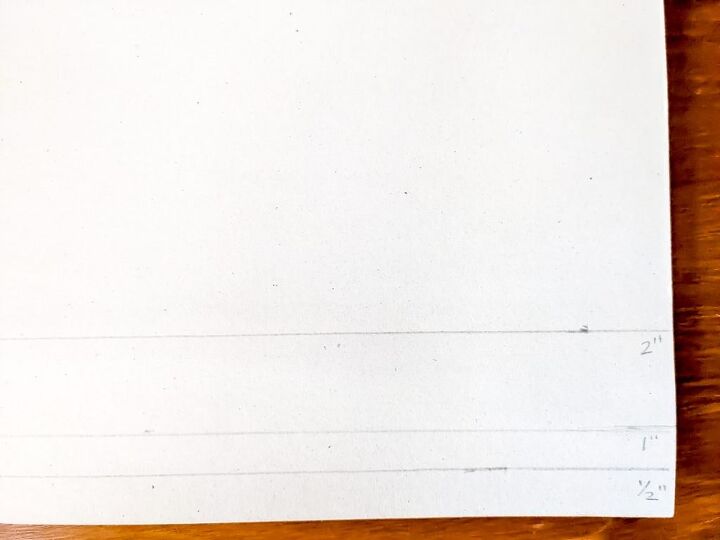
- Yardstick and Measuring Cardboard. I use a stiff piece of cardboard that I marked measurements of 1/2″, 1″ and 2″. Folding along the lines when ironing makes it so very easy to get the right fold.
- Water soluble fabric marker
- Iron and ironing board
How to Make a Tailored DIY Bed Skirt with Inverted Box Pleats
- If you plan to wash your bedskirt down the road, then go ahead and wash the fabric now. If you are afraid of it fraying, then run a quick seam around it. In fact, before I buy all the fabric I need, I typically buy a small piece, like 1/8″ of a yard and run a seam around it. Then, I measure and wash it. I look for two things; did it shrink and did it hold up well through washing?
- Lay your fabric out and cut it similar to my diagram shown on the blog. If you have a King size bed, your c and d pieces will run the whole width.
- Sew pieces c and d together at one of the short edges, making sure your pattern lines up if you have a pattern in your fabric. A 1/2″ seam is sufficient. We will call this long, 76″ piece, cd.
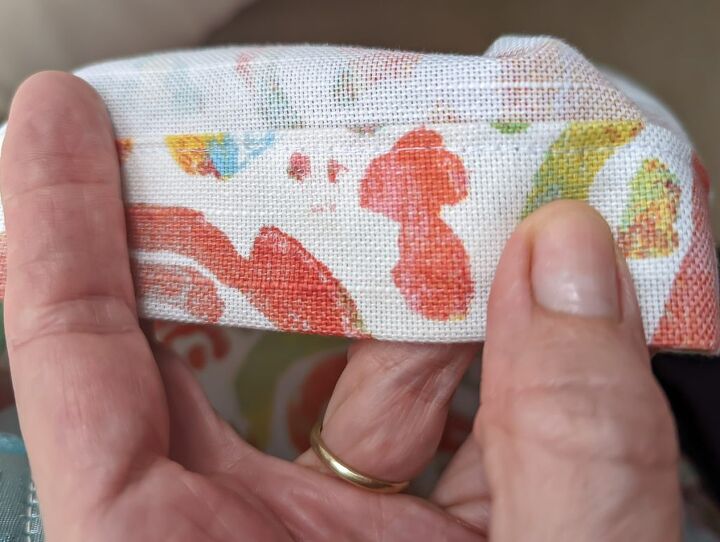
- On one of the long edges (the edge that will be against the floor, if you have a pattern that matters) of a, b, and cd, fold 1/2″ and press. Then fold another 2″ and press it down. This is where my handy cardboard measuring thing comes in very handy!
- Then on the other long edge of a, b, and cd fold over a small 1/4 – 1/2″ and run a seam along that edge. This will be the edge that is under your mattress, so won’t be seen.
- For pieces a, b, and cd, on each short edge fold over 1″ and press it down and then fold over another 1″ and press it down
- Sew a seam on the inside edge of that hem.
- For your last two pieces, e and f; you’ll want to do similarly, but don’t get confused. Refer to the image below. Run the 1/4 – 1/2″ seam on side b. On side d, fold over and press 1/2″ and then another 2″ and run the seam. For sides a and c, fold over 1″ and press it down and then fold over another 1″ and press it down. Then run a seam along those sides.
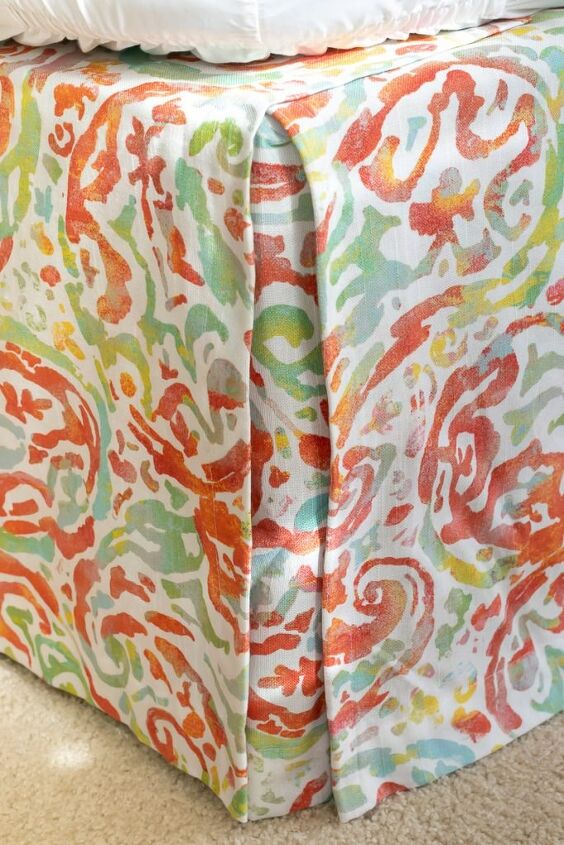
Let’s Make the Box Pleats!
- Set aside the two small pieces; we are now going to make the inverted box pleats on the 3 longer pieces.
- Let’s start with the piece that was seamed together, cd.
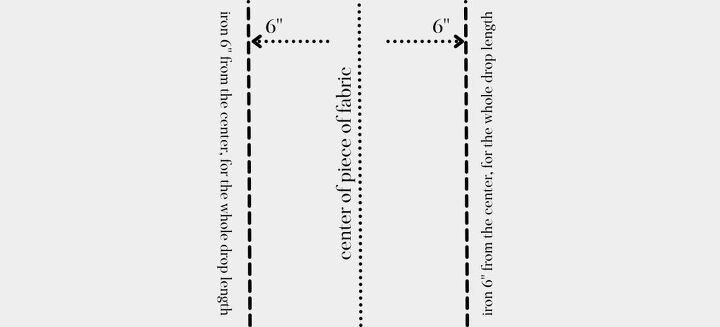
- Measure out 6″ from both sides of the seam along the whole drop length. If you have a fabric marker, this a good place to mark a line 6″ out on both sides of the seam. Press that line well with an iron so that it is a nice crisp edge.
- Then you are going to bring the crisp ironed edges to the center. In this case they will line up with the seam.

- Pin all along the crisp edges to keep them lined up with the center seam.

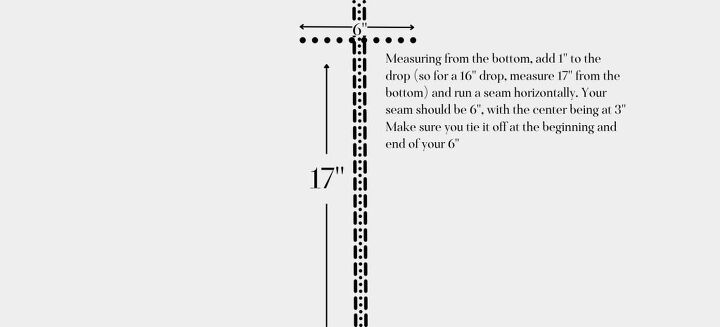
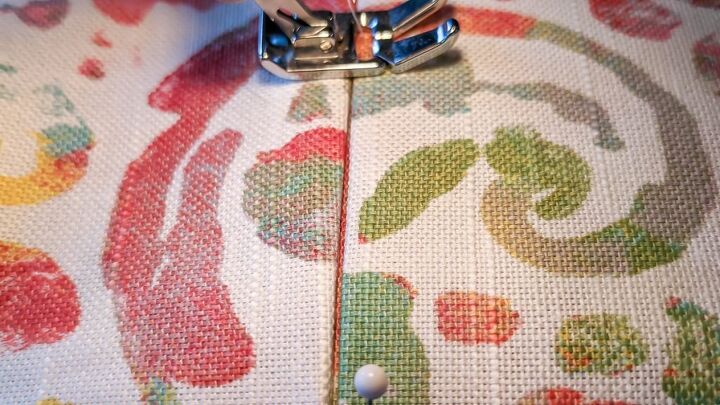
- There’s a little math required here, but it’s real easy math. Take your drop (in my case it is 16″) and add 1″. So, in my case it is 17″. Measure up from the bottom of your skirt and mark it. At this mark you are going to run a horizontal seam that will hold the folds of your pleat in place. Make sure it begins at the outer edge of one fold and ends at the outer edge of the other fold. It should be 6″, with the halfway mark (3″) right at the middle.
- Press the pleat down again and set this piece of fabric aside. You will now repeat the same process on the other two pieces. The only difference is that you won’t have the seam to guide you, so use your water soluble fabric marker to mark the middle of your 96″ pieces (48″ is the middle) and have at it!
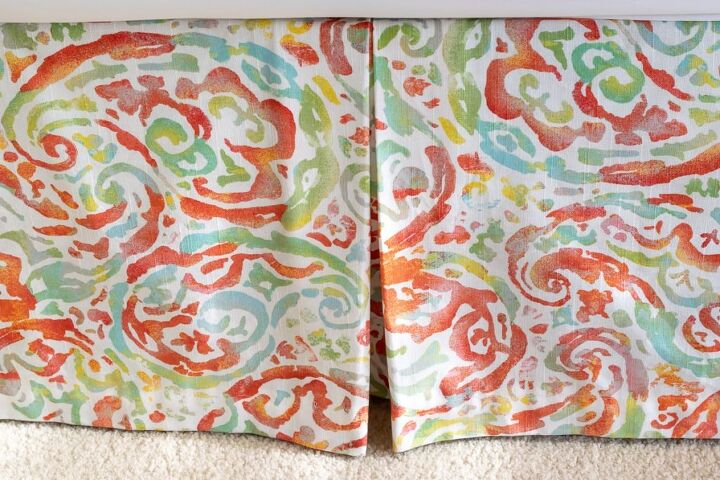
- Once all your pleats are done, it’s time to put your DIY bed skirt together…this is the fun part.
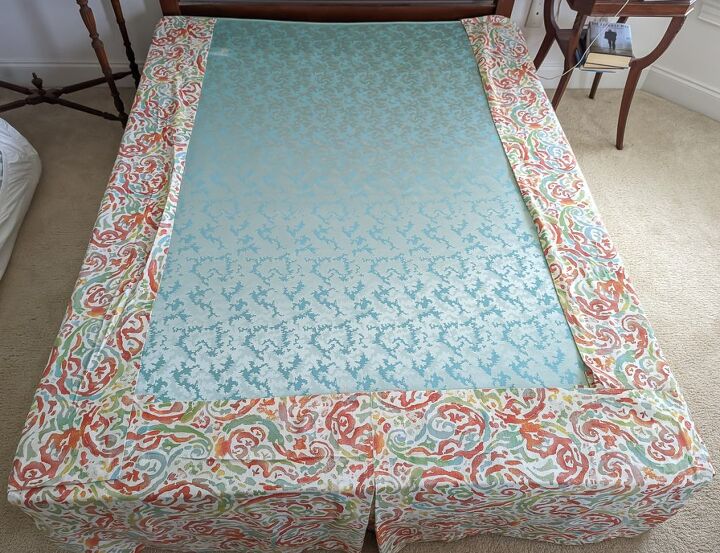
- Remove the top mattress from your bed and place the pieces where you want them, in my case I want them just grazing the floor. You may need to temporarily pin them or lay a book on them to keep them where you want as you line up the whole length.
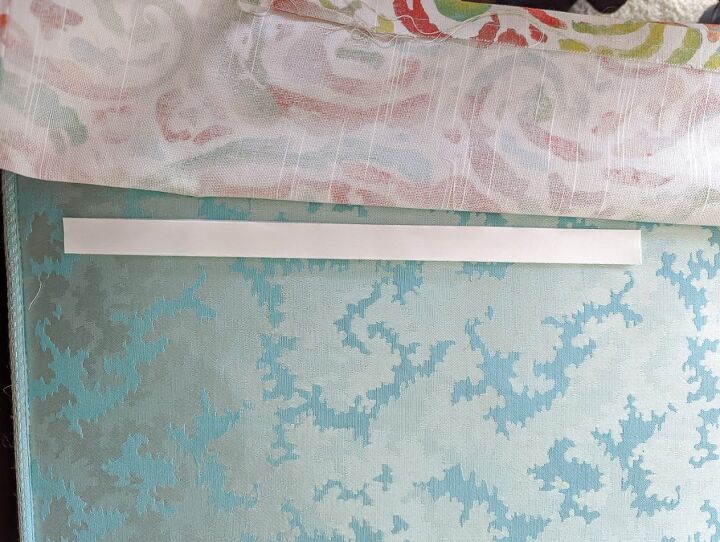
- Once they are where you want them, grab your velcro tape.
A note here…the first time I did this I used those screw pins made specifically for upholstery and bed skirts. From the get-go I was underwhelmed; several of the plastic heads broke as I ‘screwed’ them into the box frame the first time, leaving the screw pins in the box spring frame. Then a couple of times my fingers caught them while I was making the bed and they popped out. I had this huge fear of someone stepping on these barbaric screw pins and decided I needed another option.
It seems the options are A) those screw pins or B) Velcro tape. So I moved to plan B and so far so good. The package claims that the tape will stay on even in the washing machine; my experience is that it will…with an admonition. As you know, Velcro has two sides. If there is anything else in the washing machine that the prickly side of the Velcro can catch on, it will and can pull off.
- Whether you use the pins or the Velcro tape, it is just a matter of lining the pieces on your bed frame and securing them where you want them. The Velcro tape comes separated, so I stuck it together, removed both sides of the tape and adhered it to the box spring first. Then I laid the fabric down where I wanted it and pushed down to adhere it to the tape. Put the coarse side of the Velcro on the mattress pad so that the soft side is on fabric. This will help ensure it stays attached if you need to wash the bed skirt as the coarse side is more likely to catch on other fabric.
- The 2 little fabric pieces get attached on both corners at the foot of the bed, right under where the other longer pieces meet. Velcro the under piece first and then the long pieces.
I haven’t had to wash my bed skirt yet, but it will be easy to line up both sides of the velcro when I need to reattach it.

This is where we started...I'd say it is quite an improvement!


Frequently asked questions
Have a question about this project?