


How to Make DIY Fabric Tile Coasters in a Few Easy Steps
If you're looking for a fun and creative way to protect your surfaces while adding a touch of style to your home decor, look no further than these DIY fabric tile coasters. These coasters are not only functional but also customizable to match your personal taste and home aesthetic.
In just a few easy steps, you can transform ordinary tiles into beautiful fabric coasters that will impress your guests and make a statement in any room.
Get ready to unleash your creativity and learn how to make DIY fabric tile coasters in a fun and simple way!
Do you have any of your favorite fabric left over? Grab it to make these beautiful fabric tile coasters and keep your coffee table ring free.
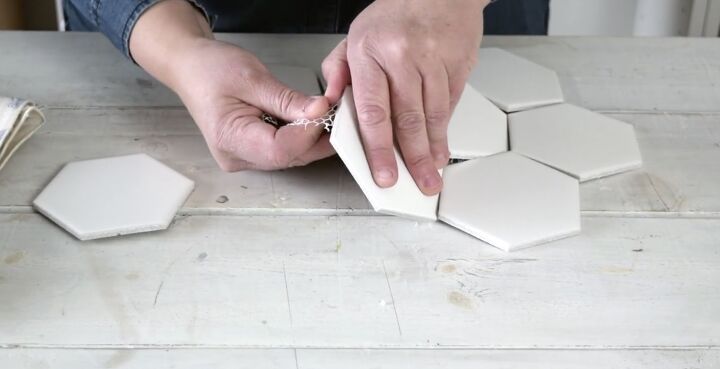
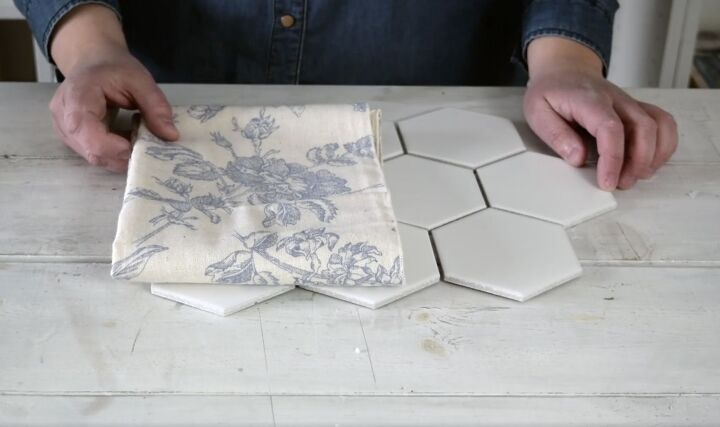
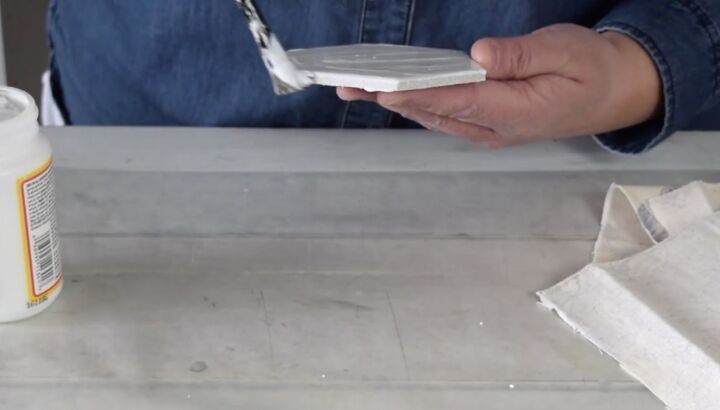
1. Remove mesh from the tiles
First up you need some ceramic tiles. If they are attached like mine, you will need to remove them from the mesh backing so that they are individual tiles. They usually just pop off, and you can pull the mesh right off the back.
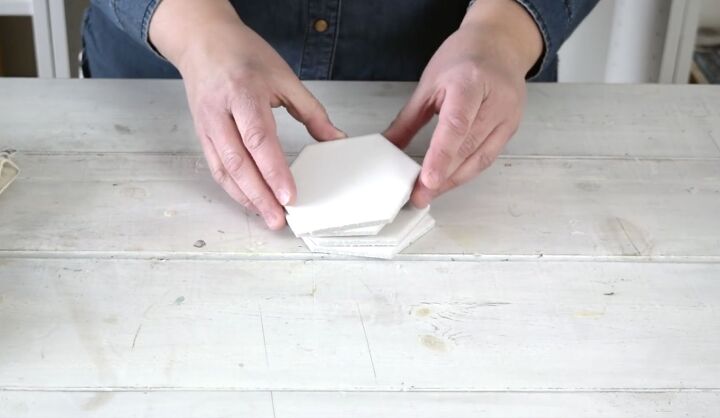
You will want 4 of the tiles for these DIY fabric tile coasters.
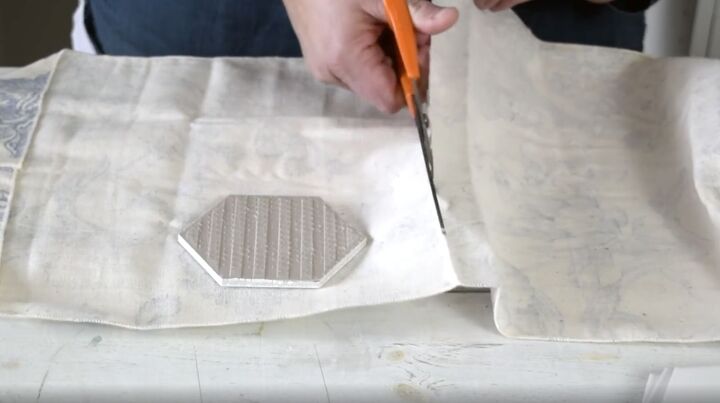
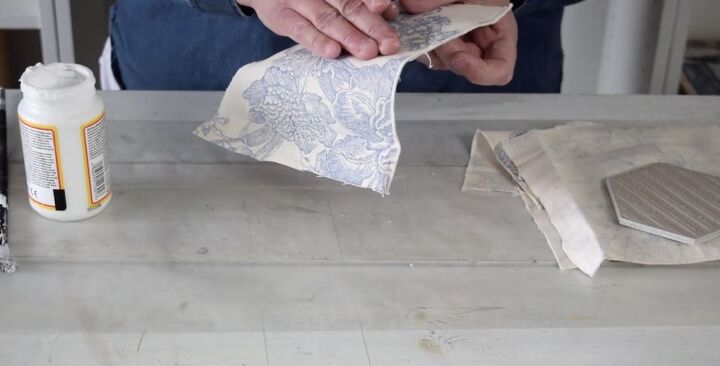
2. Cut out the fabric
Next, you want to grab your favorite fabric and cut out 4 pieces that are larger than the tiles you will be using. If your fabric has a pattern, remember to choose areas that you will want to see. I chose some beautiful flowers from the blue and cream fabric I had.
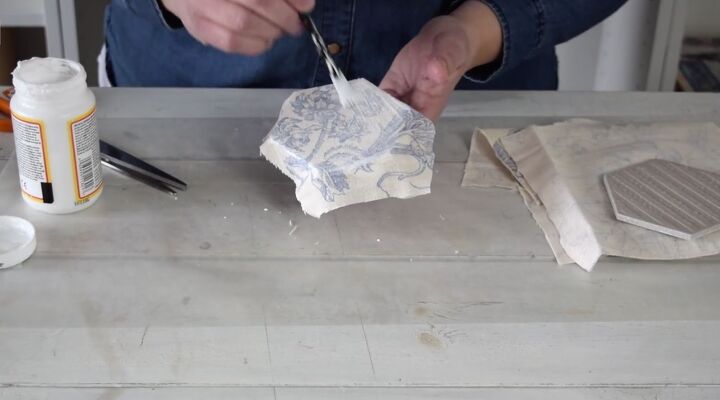
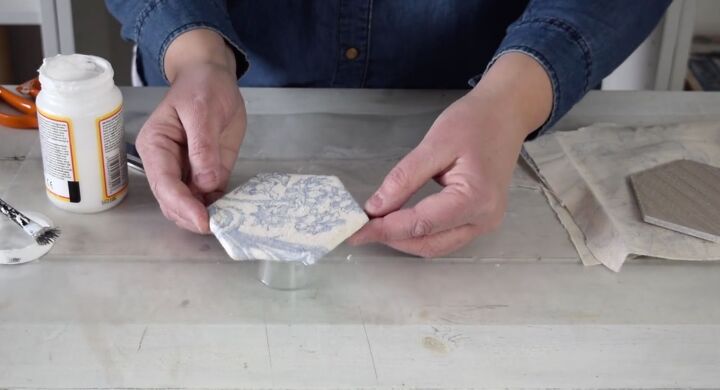
3. Stick the fabric to the coasters
To assemble your coasters, you want to start by adhering the fabric to the tiles. To do that, put a thick coat of Mod Podge over the tile top and its sides.
Then lay the fabric over the tile and smooth it into place. You want to make sure there are no air bubbles in the fabric. You want to make sure to wrap the fabric around the sides of the tile as well.
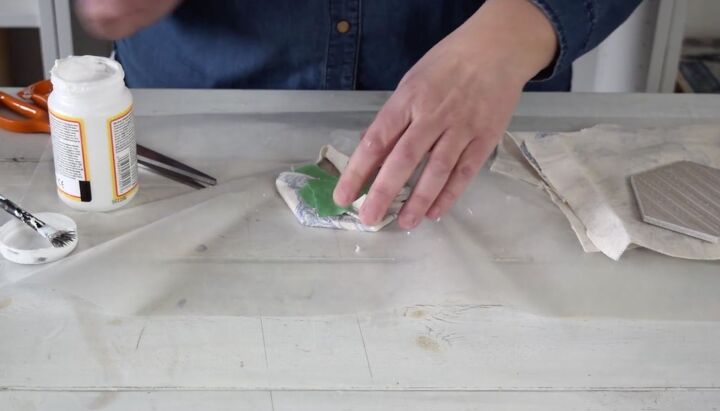
4. Seal the fabric with Mod Podge
Once the fabric is in place, add another layer of Mod Podge all over the fabric. You want the fabric to be sealed with the Mod Podge so that it doesn’t turn colors when we apply the resin later on.
5. Tape the edges
When you have everything covered in the Mod Podge, gather the edges together at the back of the tile and hold them in place with a piece of tape.
Pop the tiles on top of a cup and leave them until they start to dry.
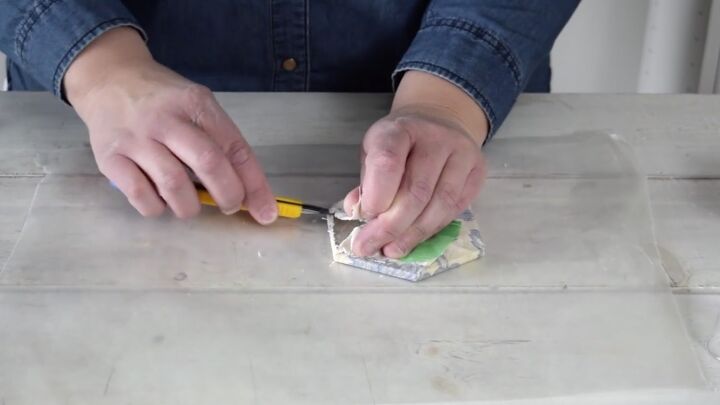
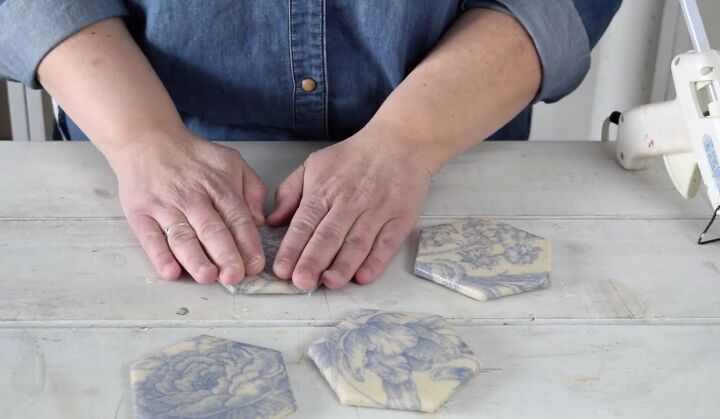
6. Trim the excess fabric
When the Mod Podge is partially dry, remove the tape and trim off the excess fabric using a straight-edged knife. It is easier to do this when the Mod Podge isn’t fully dry so that it is still pliable.
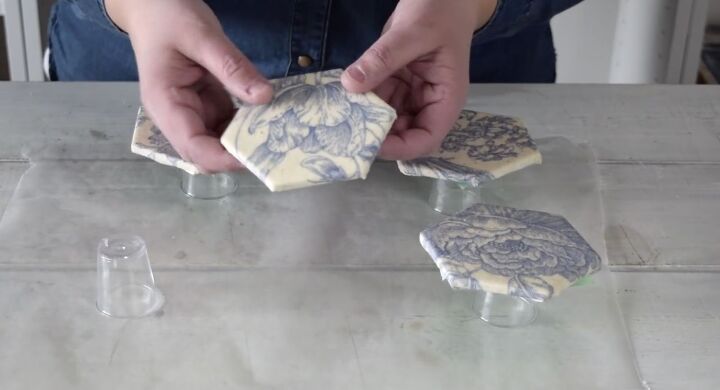
With the excess fabric trimmed off, place them back on the cup and allow them to dry completely.
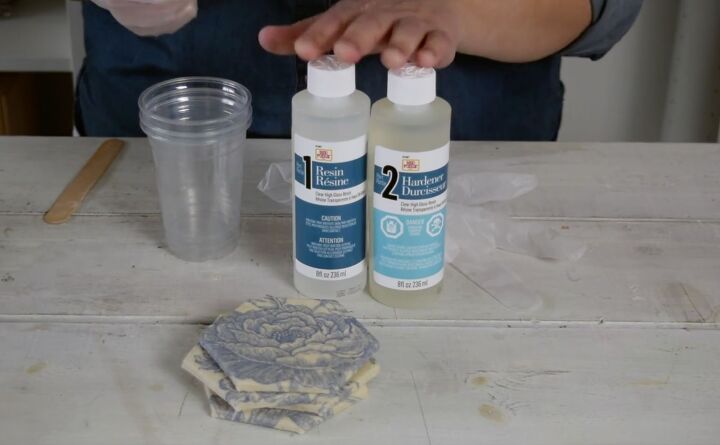
7. Apply resin
Once the fabric is nice and dry, and everything is hard, it's time to start working with the resin. Each resin kit is going to be a little different so make sure that you follow the directions on your resin kit. Generally, though, it is usually one part hardener to one part resin.
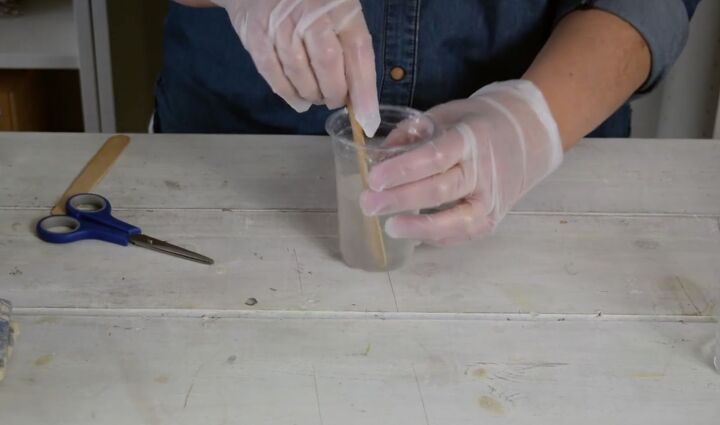
Pour them into a cup and be sure to mix them well trying not to create any bubbles.
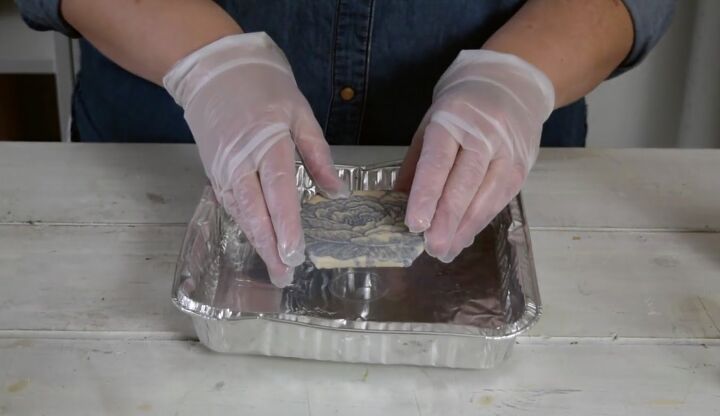
To prep the tiles for the resin, place them on top of a disposable cup that is smaller than the tile. Make sure they are all level and placed on a cookie sheet or a disposable tray.
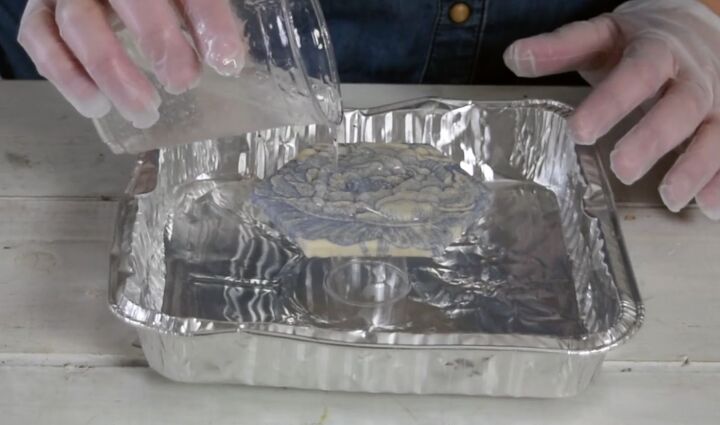
Next, pour the resin right over each coaster allowing it to drip down into the tray.

Use a little stick or straw to coax the resin into moving over the edges. Run the stick around the bottom lip of the tile to remove any drips as well before the resin hardens.
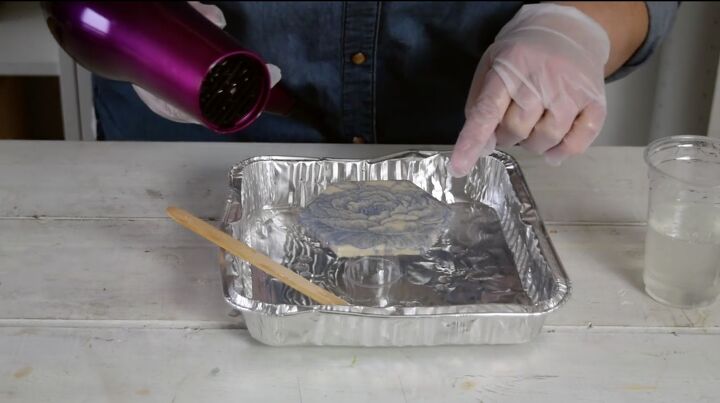
Make sure everything is nice and level and smooth. If any air bubbles appear, you can use a hairdryer to gently pop them before they harden and then leave them to dry before finishing off your DIY fabric tile coasters.
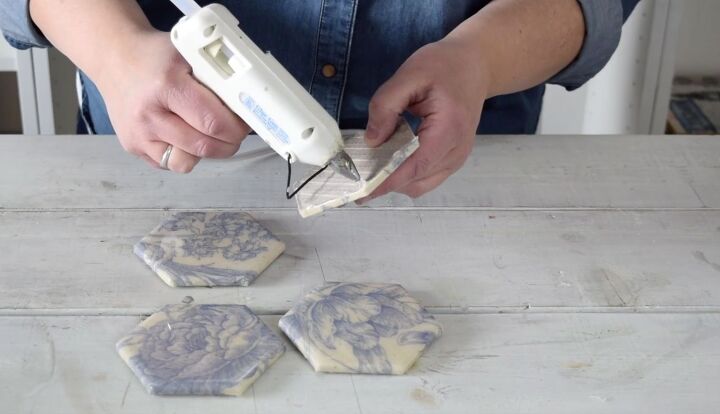
8. Make feet using hot glue
The last thing you will need to do is add some little feet to the tiles. To do this, use hot glue to add dabs of glue at each corner on the bottom of the tile.
You can smooth them out by placing the tile on a covered surface and gently pushing them down. The weight on the tile will make the glue feet even.
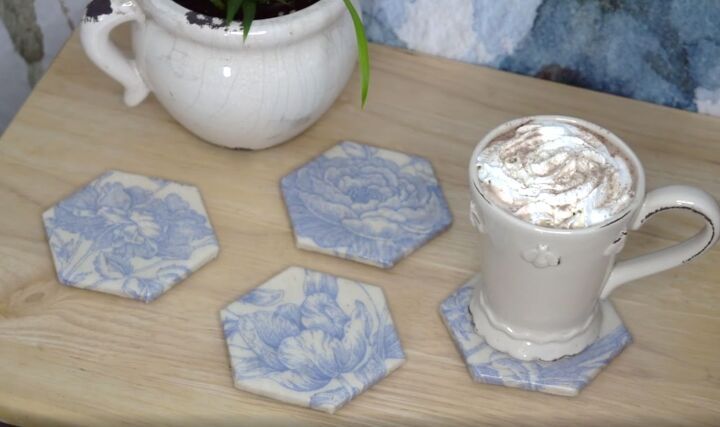
DIY fabric tile coasters
Turning your favorite fabric into these fun coasters is such a great way to enjoy something that you love every day. I hope the next time you're looking for something to do with your scrap fabric, you'll grab some tiles and make some of these fabric tile coasters.
Find more vintage-inspired DIY projects over on the blog at Recreated Designs.
Grab my handy new shopping list "10 Things to NEVER Pass Up at the Thrift Store" here...
DIY home decor using vintage fabric


Comments
Join the conversation
-
Cork comes in sheets with adhesive backing, just cut to size and it will hide all the seam allowances underneath
-
Beautiful!


Frequently asked questions
Have a question about this project?
or add resin on both sides?