


Farmhouse DIY Foaming Hand Soap Dispenser
I've been making my own foaming hand soap for years but I've always just reused an ugly plastic foaming hand soap dispenser straight from the store.
I finally decided I wanted a more classy look in my kitchen and bathroom.
I painted some mason jars to match my room's decor and found foaming soap tops that fit. Now I have gorgeous farmhouse-style refillable hand soap dispensers.
Such a nice upgrade for our sink areas.
Read on to learn how to do this yourself!
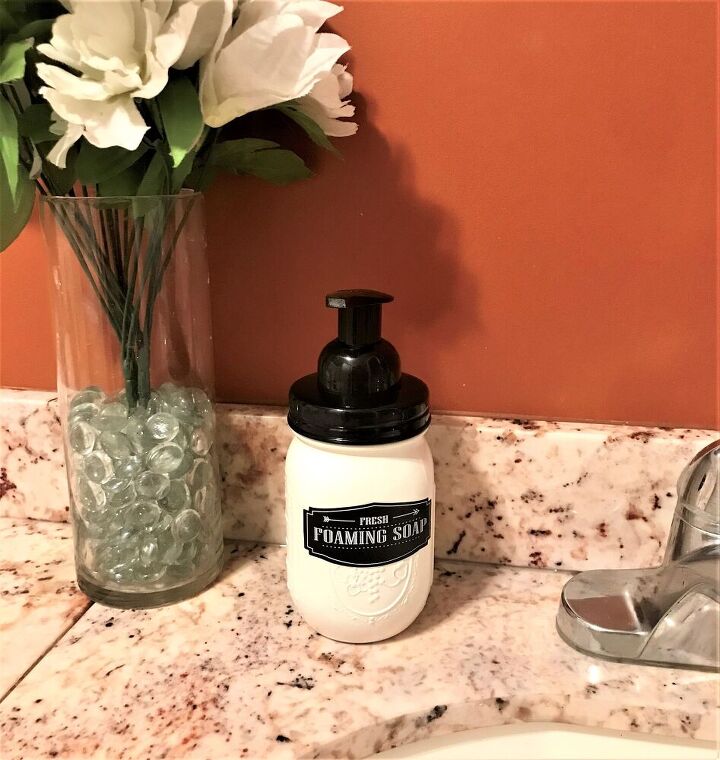
Here's my new hand soap dispenser in my bathroom. It looks SO much better than the plastic bottle from the store.
I already had the mason jars lying around as well as the paint. So my only expense was the cost of buying the lids which was under $10.
I was surprised to learn years ago that the only thing that makes foaming soap special is the dispenser. It pushes air into the soap mixture to make it foam.
Foaming hand soap is usually just watered down liquid hand soap. I make my own by mixing liquid Castille soap with water.
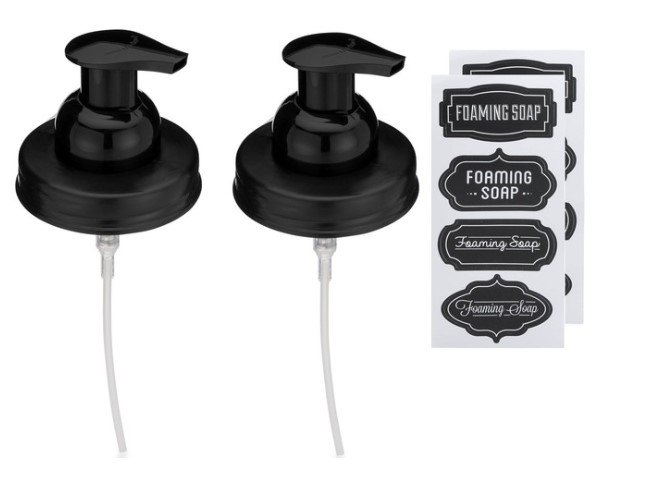
I found this set of two foaming hand soap lids and labels for less than $10 on Houzz. You can also likely find them on Amazon.
These fit regular mouth jars (not the wide mouth) so just make sure you get the right top for the jars you want to use.
I decided to use pint-sized jars for my soap dispenser. But you can use any size mason jar as long as it has the correct sized top.
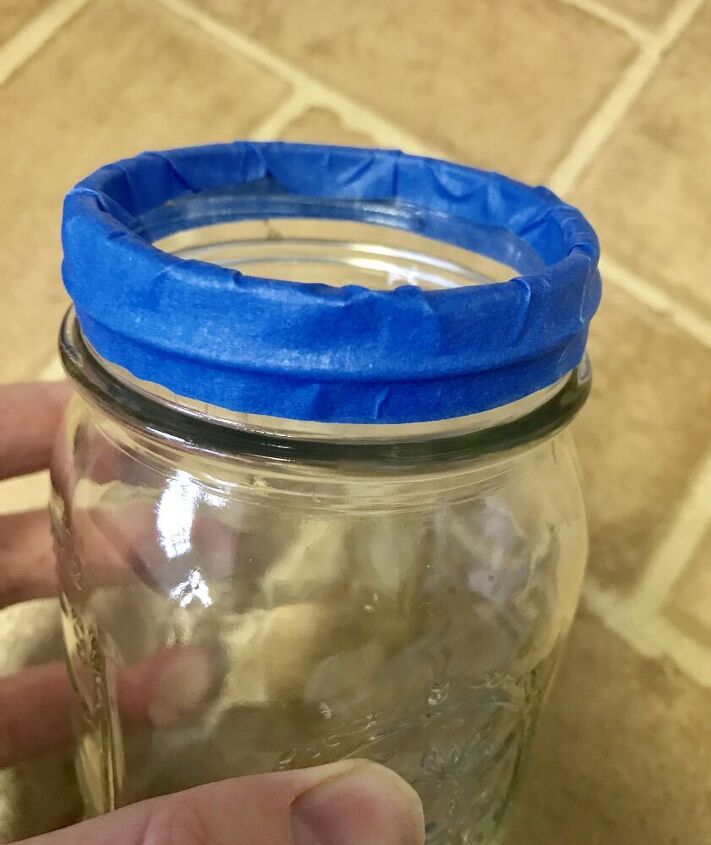
I taped the very top of my jar so no paint would get into the grooves where the lid screws on.
This will prevent little bits of paint from coming off and getting into your hand soap.
You can really use any kind of paint for this project.
It's great to be able to match the dispenser to your decor using some extra paint you have lying around.
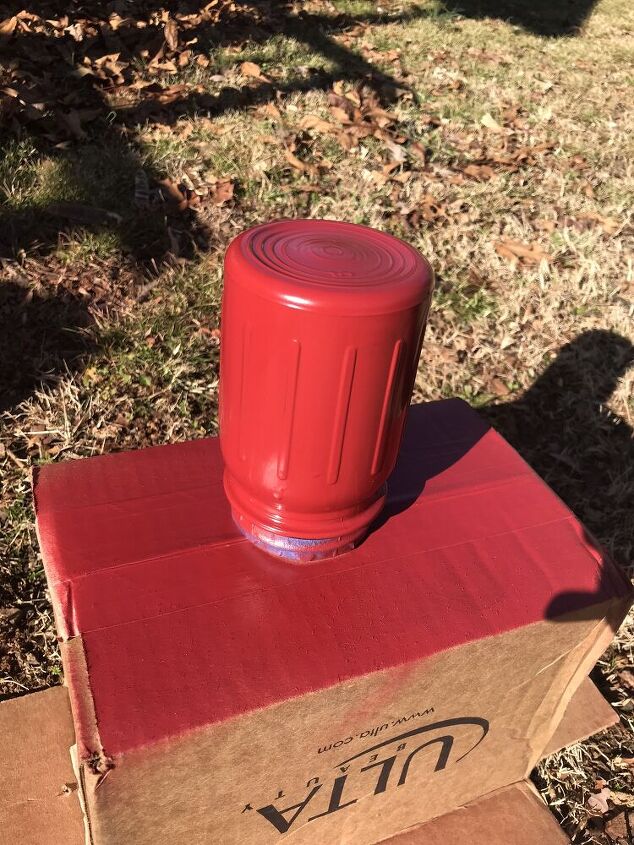
If you are using spray paint, then you can set the jars upside down on a cardboard box and spray away.
I prefer spray paint for this project because in my experience the paint lasted longer without getting damaged by the constant exposure to water.
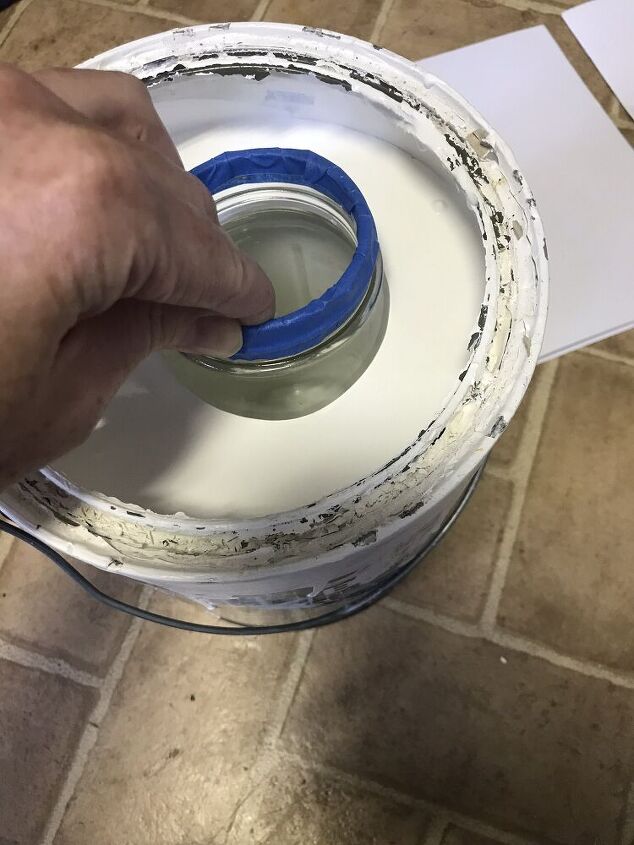
If you aren't using spray paint, you can hold tight to the rim of the jar and dip it into the can of paint.
Let the paint drip off for a minute or two, then place the jar upside down on some cardboard to finish dripping and drying.
Extra paint will run off so be careful where you place it!
If you use indoor paint you will want to coat it with a spray acrylic or poly finish. I made this mistake and the paint started to come off from the water exposure.
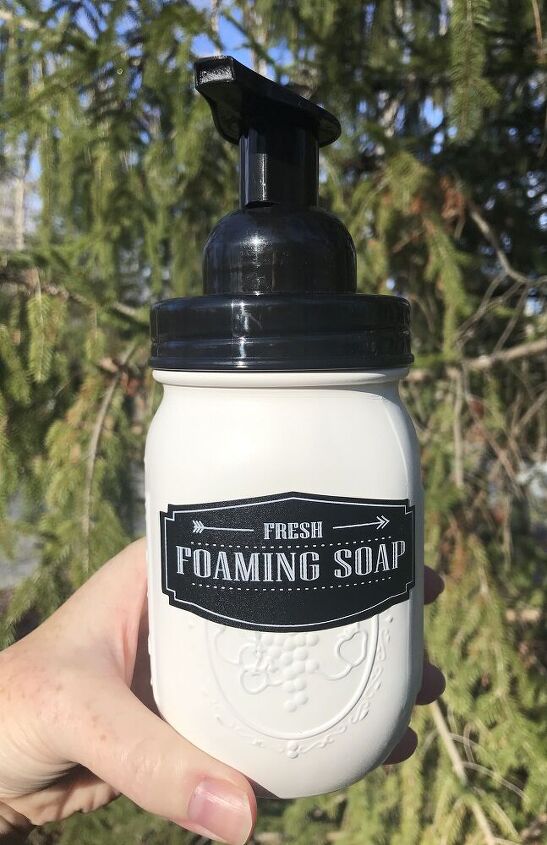
After the jar dries you are ready to remove the tape, fill it with soap, and add your top and label!
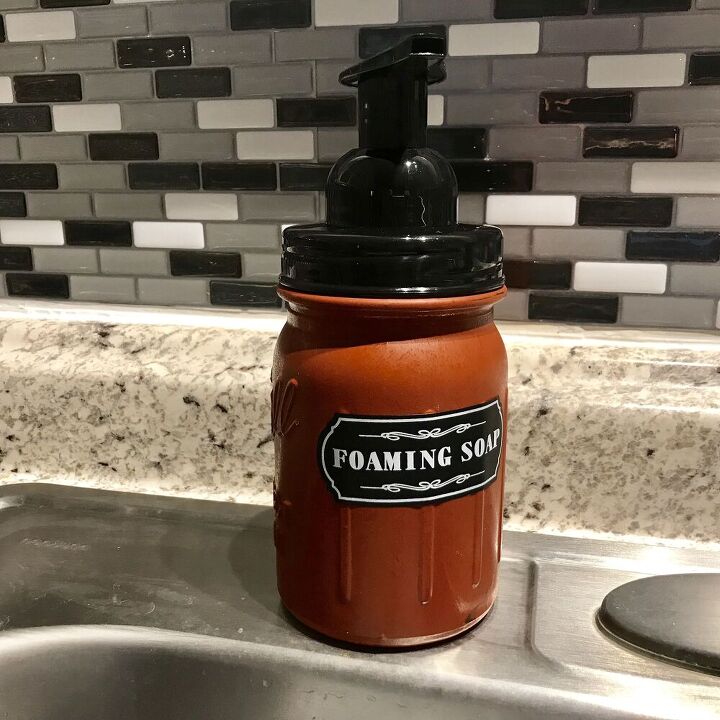
I love how my new soap dispensers look in my kitchen and bathroom.
Their large size means I don't have to refill them very often, too.
Resources for this project:
See all materials


Frequently asked questions
Have a question about this project?