


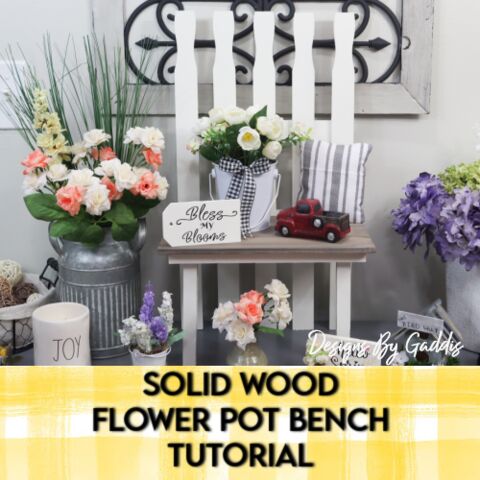
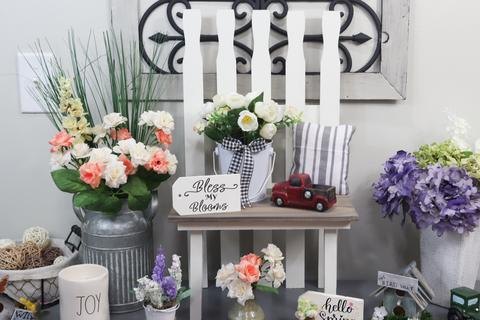
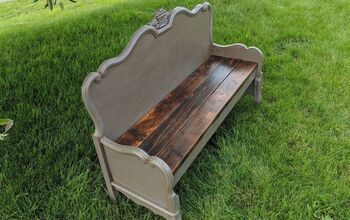
Farmhouse Wood Bench Plant Stand ➕ Decor | Solid Wood Plant Stand
I have found a new favorite. I love the way this little Wood Bench turned out. It is perfect to display your treasured items in your home or as a display on your porch.
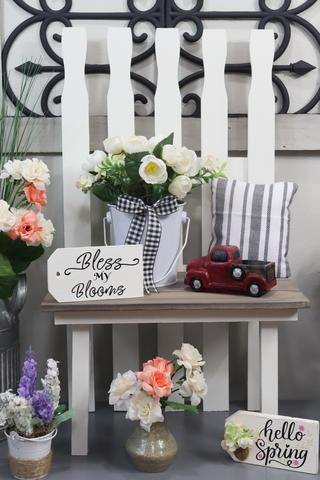
This solid Wood Bench sells for $129.99 and I made mine for around $20, and that includes the hand-crafted Wood Bench decor I added.
WATCH THE VIDEO FOR THE FULL TUTORIAL
So, to get started I had to figure out how large I wanted it to be.
STEP 1.
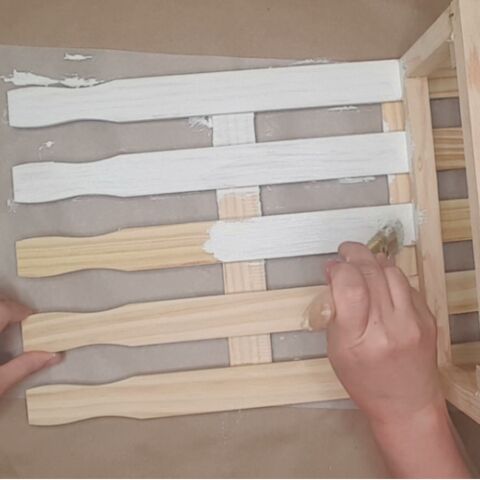
- For the back part of the bench I used 5 large paint sticks from Home Depot. They were 21 inches long.
- I used the smaller paint sticks to as spacers.
- Once I got the back part set up I took 2 more 21" paint stick and marked where I needed to cut them. They will be the supports in the back of the plant bench.
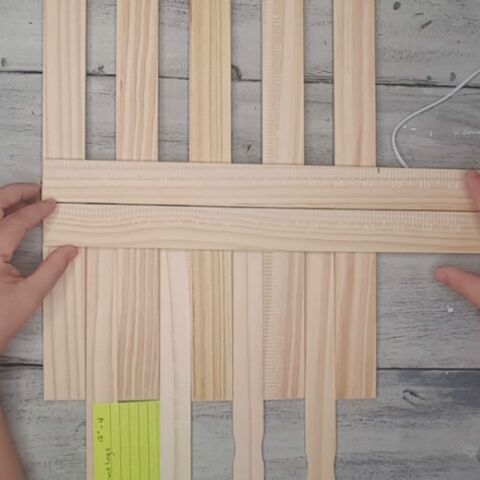
I took all the wood outside and cut them using a miter saw.
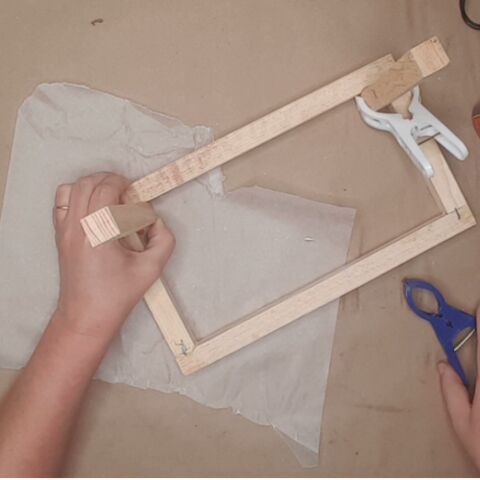
STEP 2.
Next I needed to make the box for the seat to sit on.
- I used a plant stake from Dollar General for this. They have these sticks for $1. I purchased about 20 of them on my last trip. They can be used for so many different projects.
- I cut the larger pieces to the same width as the back and the side pieces I cut to 4.5".
- I used Gorilla Glue, hot glue and staples to hold the box frame together. I also used a square to make sure the box frame was square.
- I added staples to all the corners of the box frame. And also to the back of the back part.

I was afraid I would get glue on my mat so I replaced it with some craft paper while I worked on the plant bench.
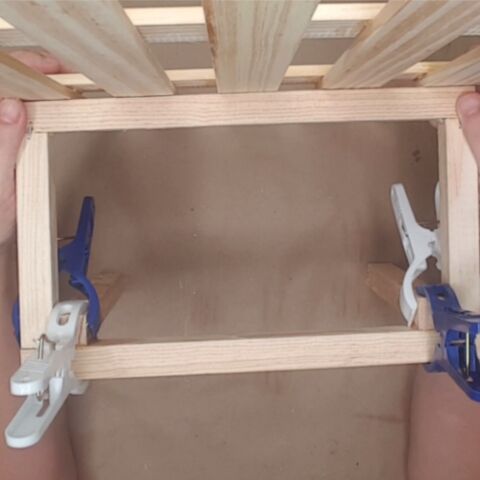
STEP 3.
The next step was to attach the box frame to the back.
- I cut 2 more pieces of the plant stick from Dollar General at the height I wanted the seat. I glued them in place and added clamps to hold them until I could get them square and level.
STEP 4.
- I put the box frame against the back and used a level. I marked where the box frame needed to sit.
- I laid the back down on my work table and applied glue between the marks I had just made on the back.
- I then aligned the box frame, check the levelness, and clamp everything together.
After the glue dried I removed all the clips.
STEP 5.
- I used Waverly Plaster Chalk Paint to paint the entire plant bench. I painted both the front and back.
While I waited for the paint to dry on the bench I cut the wood for the seat of the bench.
STEP 6.
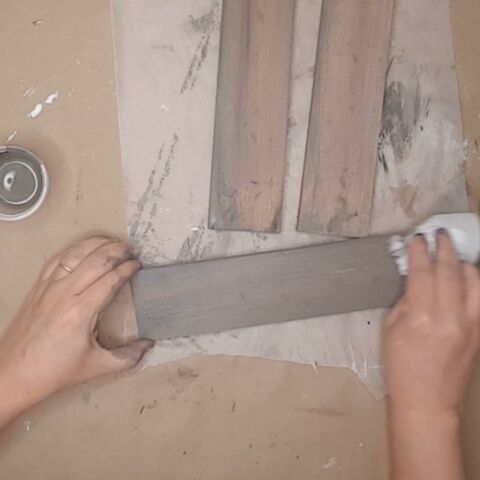
- I mixed up water, dark gray acrylic paint, and black acrylic paint to create a dark gray stain for the seat.
- I used a Dollar Tree kitchen sponge to apply the stain mixture to the wood and wiped it down with a paper towel.
STEP 7.
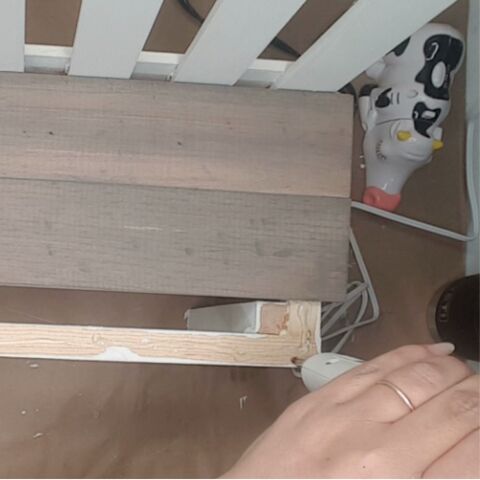
- Once everything was dry it was time to put the seat on.
- I used hot glue and pressed the stained wood down and held it in place until it was set.
This is the cutest little plant bench ever and I can't wait to show it off.
Items Used:
- 5 gallon paint sticks
- Garden stacks
- Wood Planks
Join my community for access to free printables, cut files, and special discounts for subscribers only.
My Disclaimer: All of the video footage, photos, and designs are created by me and are owned by Designs By Gaddis. You may only use the video footage, photos, and designs with my permission. My content is mine and it is protected. I am not sponsored or paid by any of the product companies or tools shown in these videos unless otherwise mentioned. I have full rights and control of the content.
Copyright @ Designs By Gaddis 2021. Any reproduction or illegal distribution of the content in any form will result in immediate action against the person concerned.
0 comments
Resources for this project:
See all materials


Comments
Join the conversation
-
That is so adorable! It would look cute on a small front porch too! Thanks for the idea! I will definitely add it to my project list!
-
Very cute😍


Frequently asked questions
Have a question about this project?