


Game of Thrones Themed Lamp
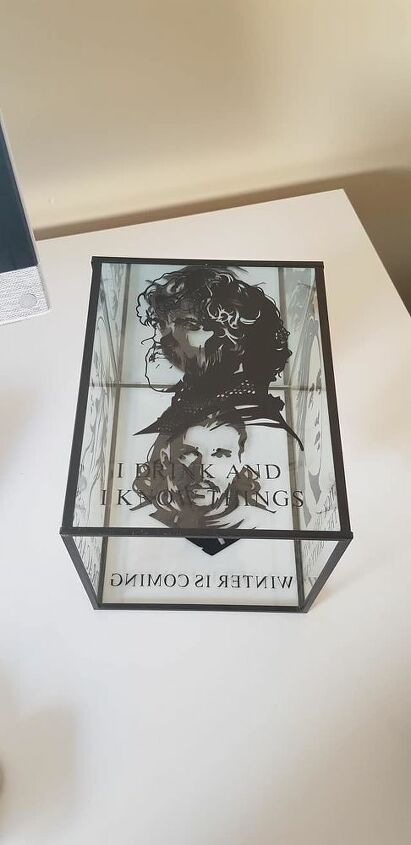
I have recently started decorating wine bottles using mixed media, and when it was finished I thought to myself. "What am I going to do with it now". So I tried to make a lamp with the materials I had at home. I found this glass tea light candle box which I thought would look good with graphics added to it, for the lampshade. The glass box was a bit unstable on the wine bottle, so I tried a Jack Daniels whiskey bottle which worked perfectly. I was trying to come up with a theme for the lamp and who does not love Game of Thrones.
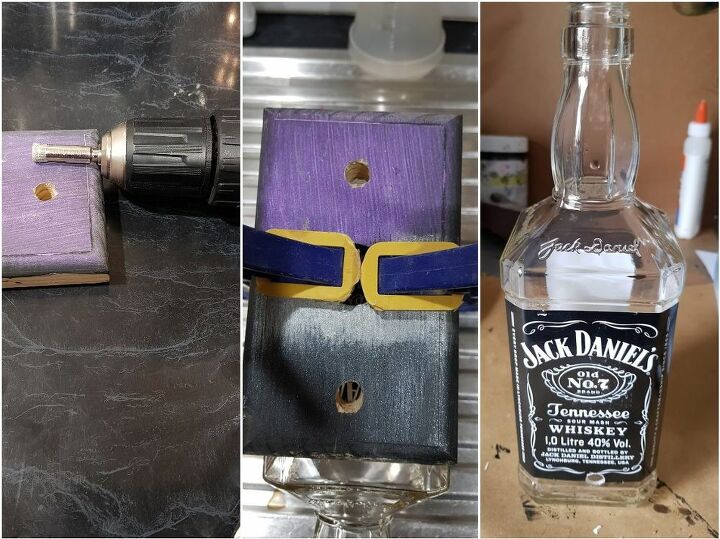
It is a good idea to cut the hole into the bottle first for the light fitting. My first attempt broke the bottle. I used a diamond tipped hole cutter. But when it arrived there is no drill bit to hold it in place. I made a template from a scrap piece of wood and drill a hole the same size as the cutter and used it as a template. I clamped the wood to the bottle and drilled the hole, which took about 4 seconds. Yay!
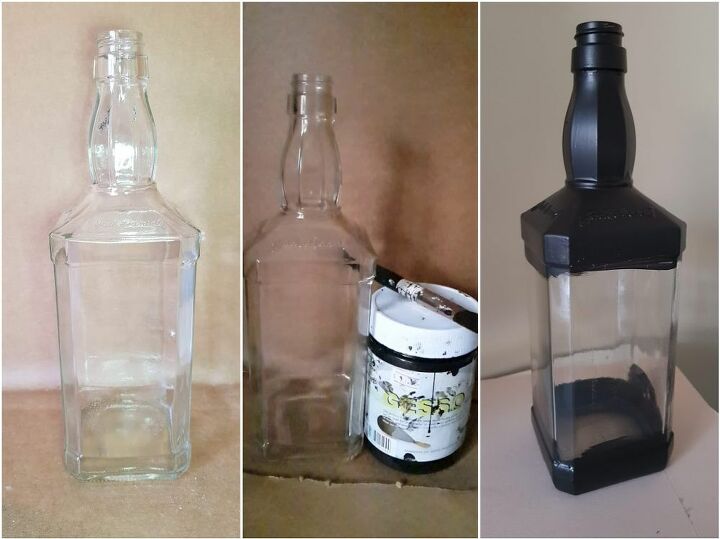
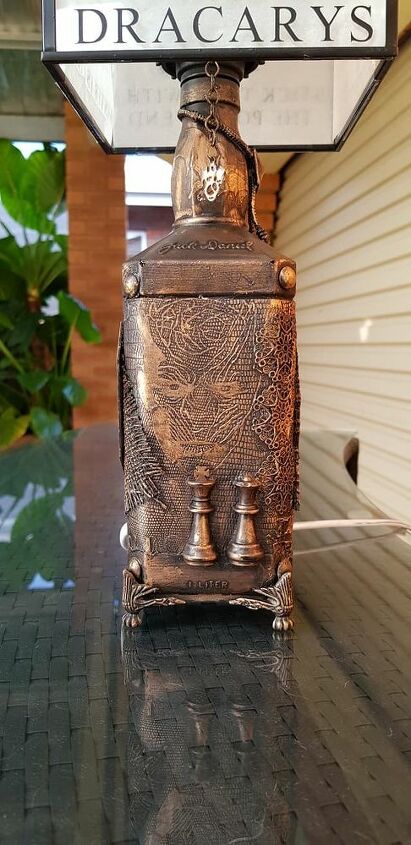
Wash the bottle and remove the labels. Using the black Gesso primer paint the top and the bottom of the bottle. Paint the whole bottle if you are not adding the faux leather. I had scraps of faux leather at home, you can use any colour because it will be painted. Glue the leather on to the bottle.
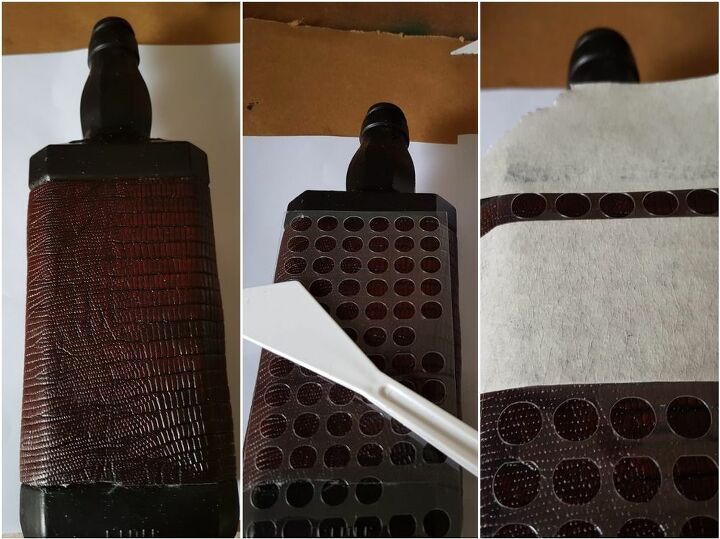
To add texture to the bottle I used stencils and texture paste. You can use any design it is just to add some character to the bottle. Looking for mixed media ideas check out this mixed media canvas which shows you can use lots of everyday item in your projects. Tape the stencil to the bottle and spread a layer a texture paste over the stencil. Remover the stencil straight away and wash it. The texture paste does not need to look perfect, the imperfections make it more appealing once the bronze is added. Use a heat gun or hair dryer to speed up the drying time.
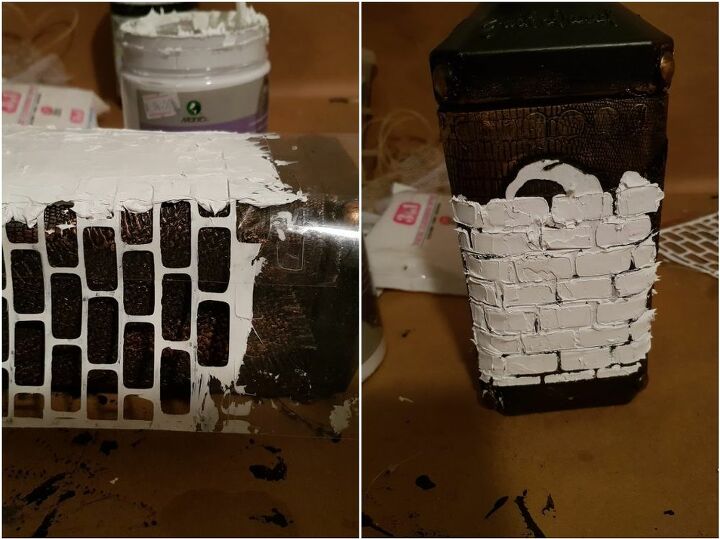
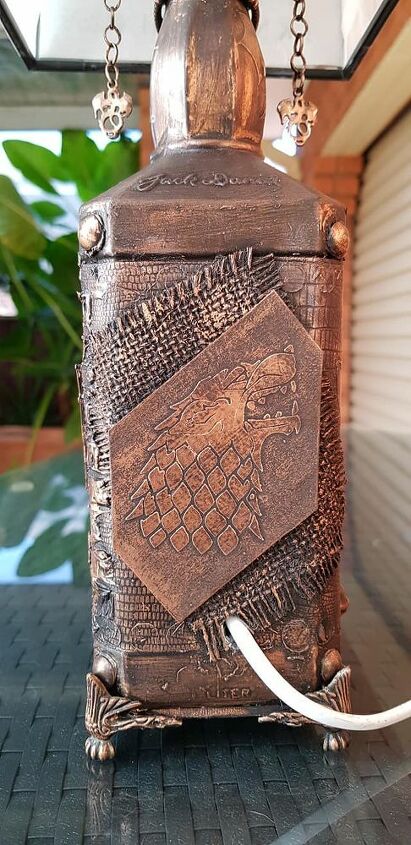
I went for a brick wall design because any fan of Game of Thrones would know what it means. I did change the design of this bottle a few times because some of my ideas looked good and others did not. But the joy of mixed media is that you can just cover it up with something else.
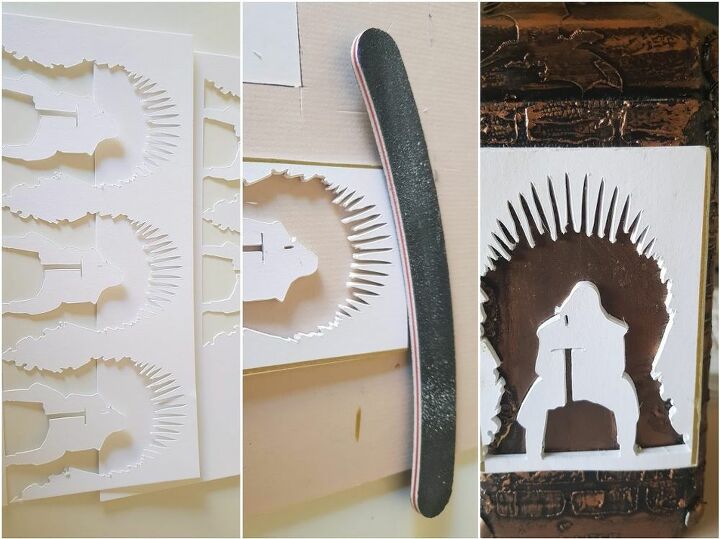
The 3D images were made using a Cricut and cardstock. I have to laugh because all these images got scrapped in the end because I changed my mind. But you will get the idea of how I made them. Cersei looked good on vinyl but not in 3D and the throne I reversed out. Add the graphics into the design space (Cricut software) and repeat the design 6 times. Glue them all together to get the shape. Scuff up the edges with a nail file to remove the hard edges, it looks better.
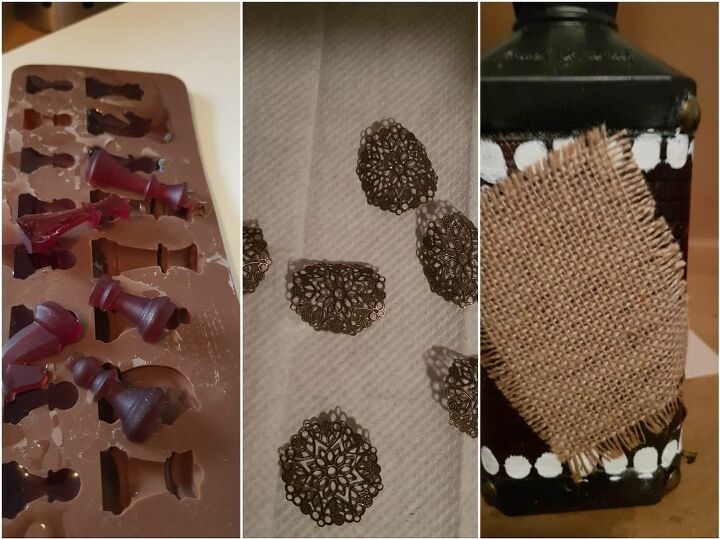
I added a small piece of burlap to give added texture, you can use whatever you have at home. I had previously made some chess pieces out of epoxy resin. The king and queen were added as a 3D effect. I cut the pins off some tack to go on the corners. And used some bendable charms on the edges. The extra bits and bobs I added were broken jewellery and studs from my workshop. The more textures the better the outcome.
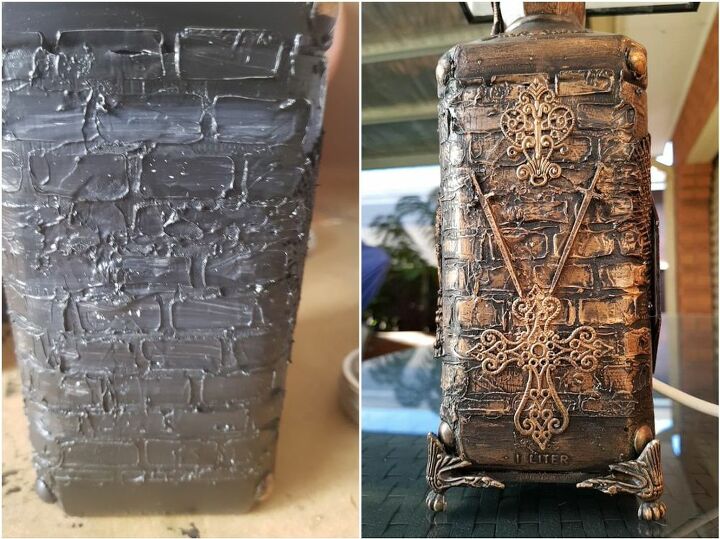
Once you are happy with everything you have glued on, added 2 coats of black Gesso. Using bronze wax paste, dip your finger in the paste and rub your finger over the surface of the black Gesso. Don't add bronze to all the nooks and crannies or the effect will be lost. To make the vinyl stand out more like the dragons and the night king you can cover the whole area with the bronze paste. The legs were ordered years ago from wish without checking the description and when they arrive they were tiny. But they worked great for this project. They were glue on using contact glue.
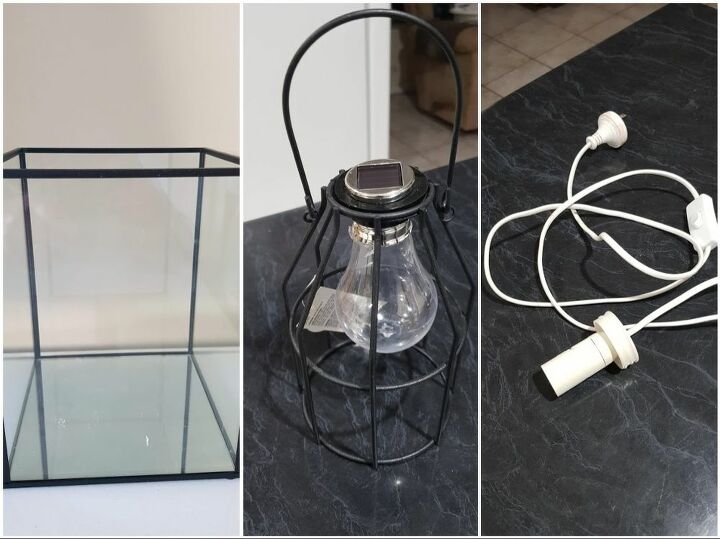
You can stop here and buy a lamp shape or you can make one like this. I used a tea light candle holder and recycled an old lamp fitting. I had to come up with a way to fit the lampshade to the bottle. I found this solar light in Kmart for $4 which worked perfectly. Fit the cord through the bottle. I got my electrician husband to wire the lamp up for me. I used the lid from the bottle and drilled a hole the size of the fitting and pushed the fitting into the lid. The basket for the solar light came with a rubber seal which fit perfectly over the bottle lid to hold it in place.
All the graphics were made using a Cricut. To duplicate this lamp you can buy the graphics off Etsy and get one of the many crafters on etsy to made them for you. I don't know why I didn't think think this would happen, when it should of been common sense. Once all the images were added it was a hot mess. All the images mashed up together.

I tried lining the glass with paper at first, but it blocked out too much light and could be a fire hazard. Then I came up with baking paper. My thinking was, if it can go in an oven it can withstand the low heat for the modern light bulbs. I cut the baking paper to size and fitting it into the gap between the glass and the frame. I also taped it inside for extra measure. I used epoxy glue to secure the shade to the fitting which was a big mistake because I cant change the light bulb. Any ideas will be greatly appreciated. I will updated when i come up with a permanent solution.
More photos and details on this stunning lamp are available on my website listed below. Looking for ideas on mixed media check out this themed mixed media Canvas.

If you are a regular to craft and Diy you may have the materials at home to make your own mixed media supplies. Here are some ideas for you. Your cost for this project will depend on what you have at home. Only small amounts of each product were needed so my costs were low.
Resources for this project:
See all materials


Comments
Join the conversation
-
cool!!!!!
-
Awesome 👍


Frequently asked questions
Have a question about this project?