


How I Shrunk a Picture Frame

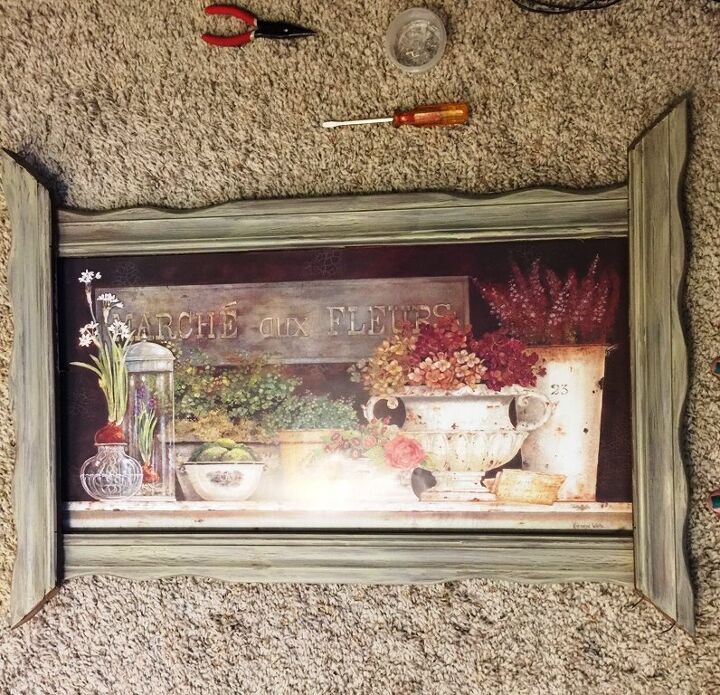
Well, 'shrink' might not be the exact term but I had a picture frame that was too big for my print. And, it's been too big since I bought it to frame the print; but I used it anyway. Let me tell you why. I found a print that I loved! It was poster-sized but I didn't want a standard poster frame - they are SO boring! I could have made a frame but thought it'd be quicker to just buy one. So, I went on the hunt to find a frame that would work; one that had more interest to it.
While I browsed through Michaels, Walmart, Ross, my main search for a frame was at the thrift stores. I always prefer to find 2nd hand items for my materials and supplies and only buy new when I am unable to find items that can be reused. After much search, I found a unique frame that was the right width, but the height was too big. I thought about reducing the size but then decided it might work as it was.
Now I had to decide how to make it work. Could I find a backing that would either blend with or accentuate the print? Eh, not really. Could I 'sandwich' the print between two sheets of glass? Hmmm, yes, I think I could. I took the frame into a local glass business so they could get exact measurements and asked them to cut 2 thin sheets of glass to fit the frame. A few days later, I picked up the glass and brought it home. When I picked up the glass, I was surprised at how heavy they were!
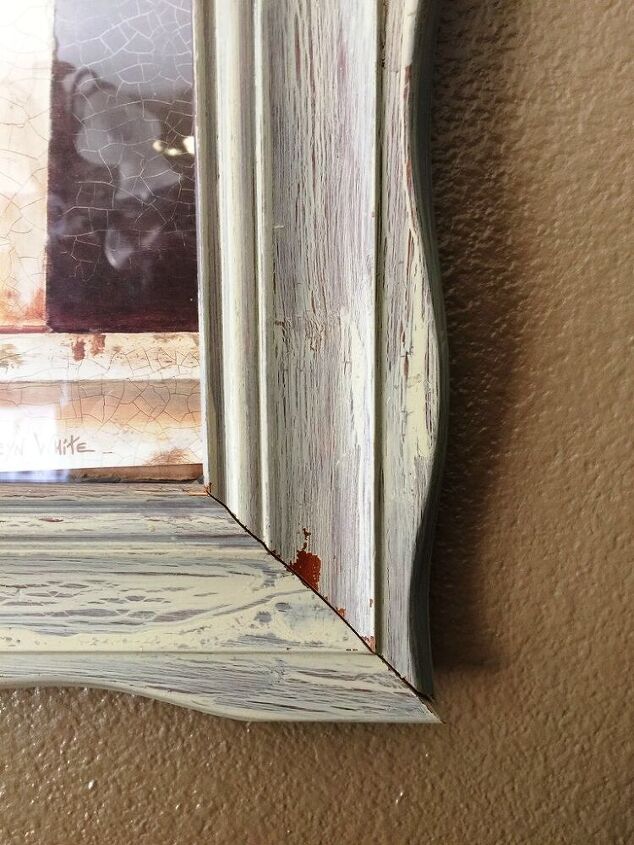
Before installing the print, I painted the dark brown frame by lightly brushing on one of the wall colors in the dining room where the print would hang. The resulting look was a bit shabby-chic and I really liked it! I don't have pictures of the frame when I bought it or of the painting process - my apologies! To install the print, I laid the frame face down on the carpet and placed the first sheet of glass inside the frame. The next step was to center the print in the frame and place a small piece of double-stick tape to each of the 4 corners. Finally, I placed the 2nd sheet of glass on top of the print. To secure the glass, I carefully installed staples into the frame using a manual staple gun.
Now that the print and glass were in the frame, I lifted it. Did I mention that the frame was made of really dense, heavy wood? Well, the weight of the glass combined with the wood made the framed print really heavy! Drat! Now, I would have to find studs in the wall in order to make sure the frame was securely hung.
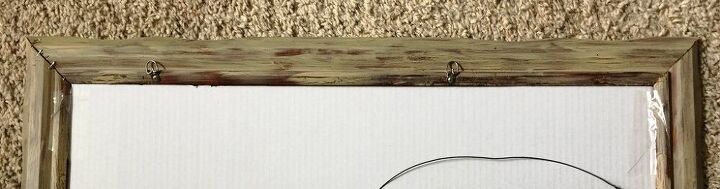
Unfortunately, there was not a stud in the center of where I wanted to hang the print. To compensate, I installed two hangers on the back of the frame where they would hang on a stud. They were off-center, but it worked!
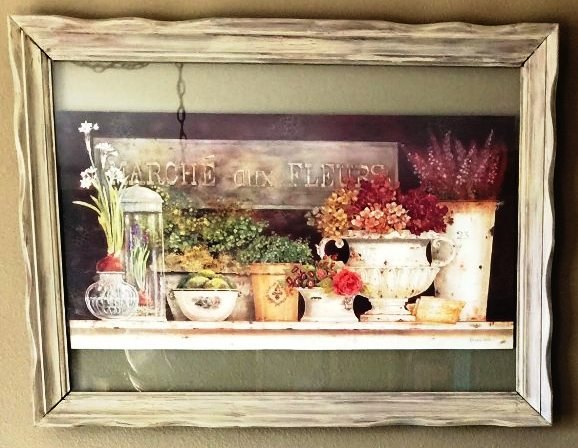
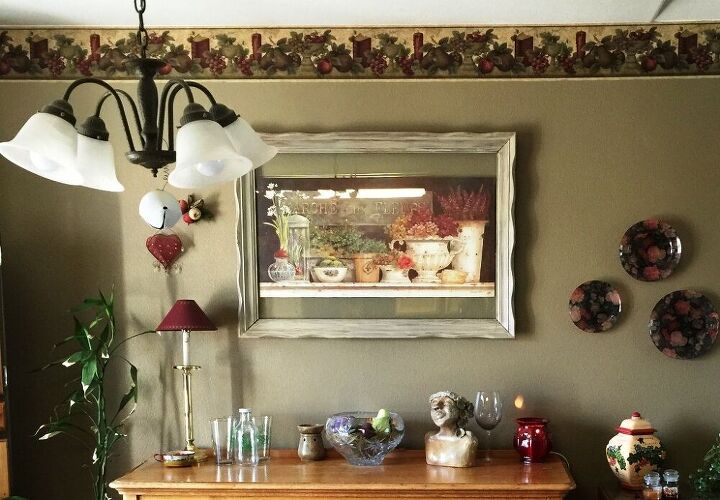
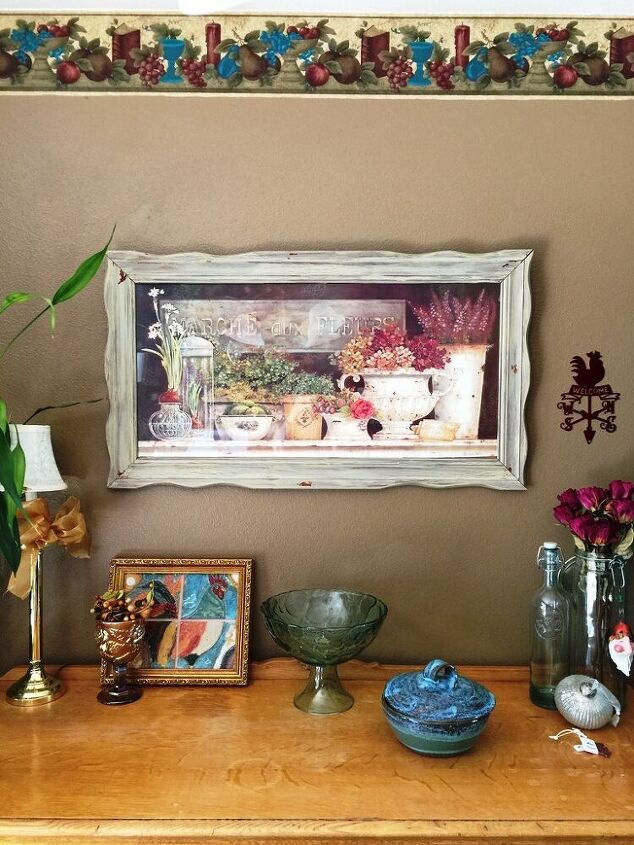
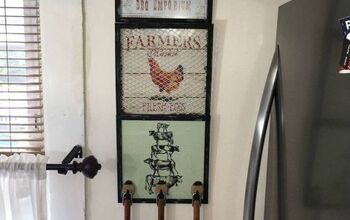
I loved the look of the print floating in the frame. The wall paint could be seen between the print and the frame and the color-coordinated well with the print.
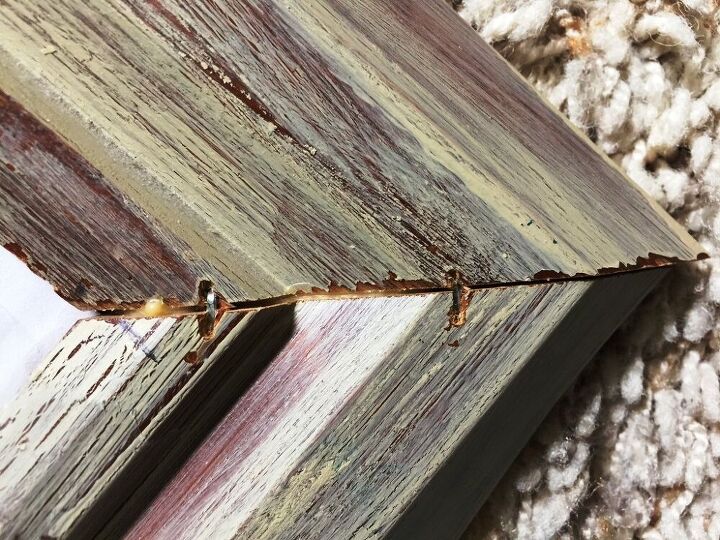
Even though I hung the frame on studs, I worried about the weight of the frame. I wasn't worried that the massive nails I installed in the studs would fail or that the hooks I screwed into the frame would come off, I was worried that the frame would come apart.
If you look at each of the 4 corners of the frame, you can see where the sides are not tightly attached to each other. I cannot tell you how many times I stood and stared at the frame, convinced that those corners were slowly drifting apart. Were the corners this way when I bought the frame? I don't even know; which is why I fretted.
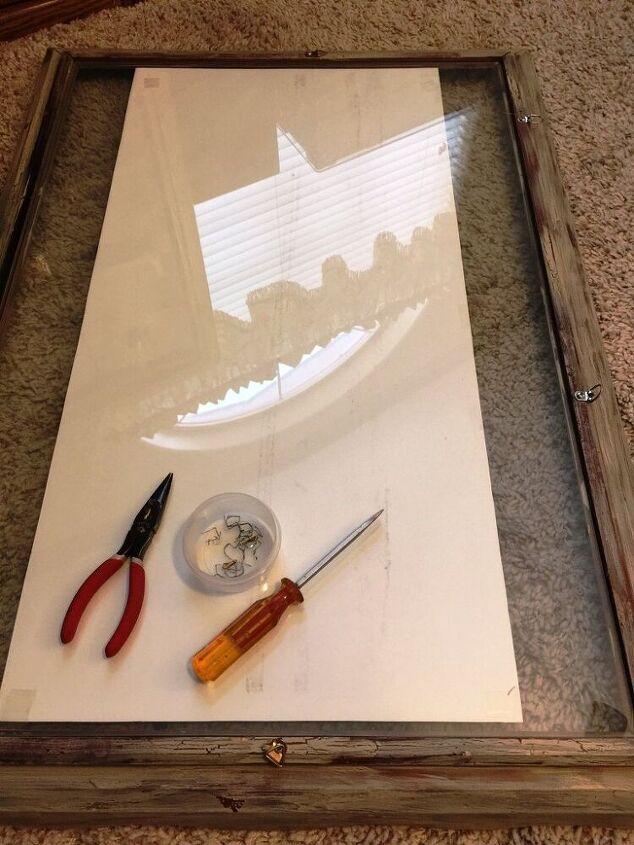
Recently, I was doing some updates in the dining and kitchen areas. One of the projects was to repaint. Since I was going to be taking the frame off the wall when I did the painting, I thought it was the perfect time to remove my worry and make the frame smaller. The first step was to remove the glass.
Using needle-nosed pliers and a flat head screwdriver, I carefully removed the staples that held the glass in place. (I forgot I had furniture staple removers - they would better than a screwdriver). After removing the glass, I started to pull the frame apart. I grabbed the top of the frame and one of the sides and pulled - nothing happened! I then put a foot on the top of the frame and grabbed the bottom of the frame and pulled while pushing with my foot. At that point, the frame started to come apart - very slowly. Hmmmm - I guess the glass was NOT causing the frame to slowly come apart after all.
Too late now, the frame was all skewed with one side almost apart and a large nail exposed where it had helped hold the corner together. Since I was unable to push it back together, I continued to dismantle it.
Now that I had 4 individual pieces of the frame, I set the top and bottom next to the print then the sides on top of those pieces to get a visual. My thought was that if I didn't like the look, I'd reattach the frame and buy some plexiglass to replace the glass. I did like the look, though, so using my miter saw, I cut the 4 pieces to fit the print.
Once the pieces were cut, I noticed that the corners did not line up perfectly. Figures! Since the frame paint already has a bit of a shabby chic look, I decided not to fret that the corners wouldn't be plumb and continued with the project.
I thought I would be able to use my brad gun on the corners but found that the width of the brads was too narrow so I used my manual staple gun and Elmers glue instead.
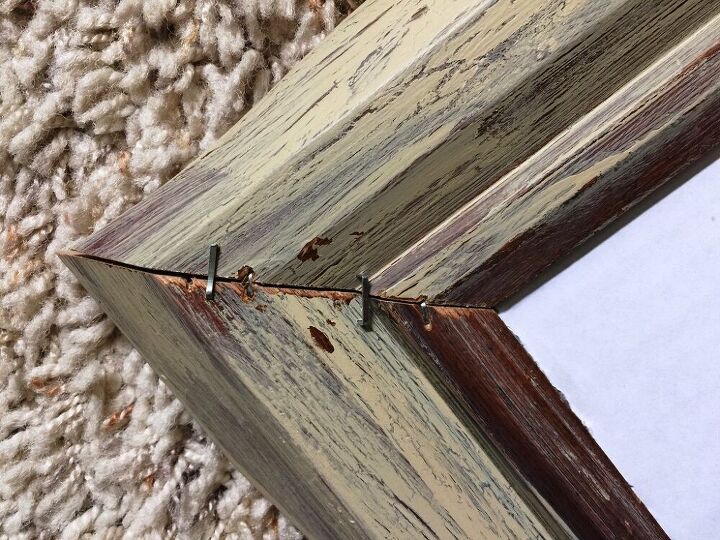
As you can see, the wood was so dense that the staples didn't go in completely even though I used a hammer to help them do so.
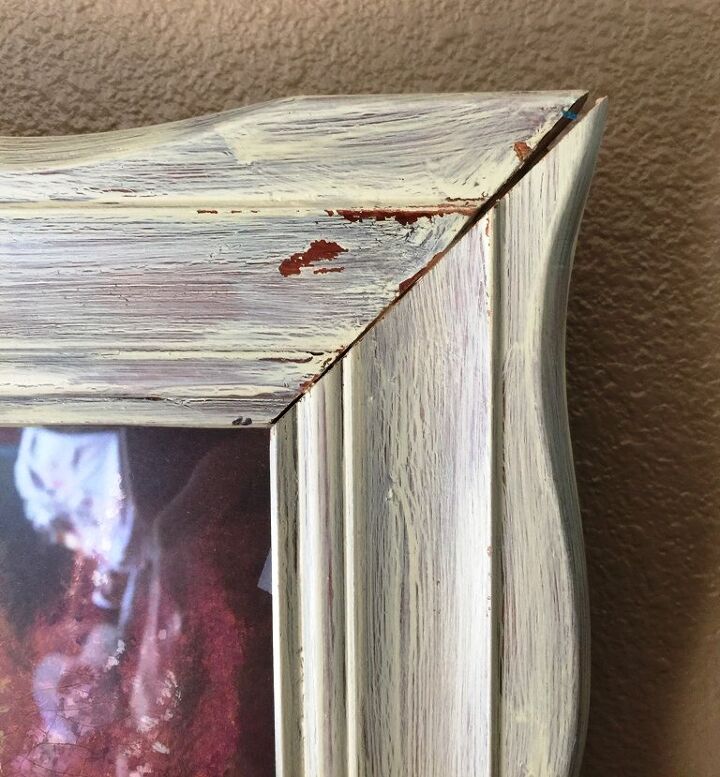
Also, I used duct tape to hold the corners together while the glue dried since my clamps didn't work and when I removed the tape, some of the paint came off - bring on more of the shabby chic look!
Now that the frame was made, it was time to measure it for plexiglass - I wasn't going to go with the weight of glass again, even though I'd only need one piece. Well, since the corners weren't plumb, the frame wasn't completely square. I measured for the smaller side and ordered the plexiglass from a local glass business. The cost was $22.
When the plexiglass was ready, I set it in the frame. One side fit perfectly but the other side was a bit too narrow. To compensate for the shortage, I took a small strip of rubber and set it inside the frame. Just that little bit of rubber was enough to keep the plexiglass in place.
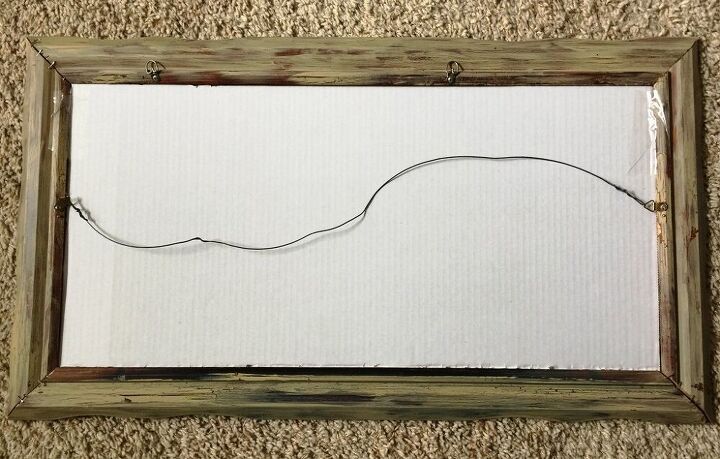
I cut a piece of cardboard for the backing, making it just a little bigger than the frame so I wouldn't need to use any nails or staples to hold it in place. The last step was to attach a wire hanger.
Even with the struggles I had working on this project: the difficulty taking the frame apart, the new size of the frame not being square, the tape removing bits of paint, I do like the way the print looks now. Did I like it before? Yes! Could I have saved myself a lot of time & headache by just replacing the glass with plexiglass? Yes! Would I do it again? Most likely :) I love a good project and most of the time, I'm figuring things out as I go. That's what makes DIY so much fun!
*The light on the frame makes it look lighter than it is. It goes better with the paint than it appears to in this photo*
Resources for this project:
See all materials


Comments
Join the conversation
-
Jeanne, I had to look back and watched the whole thing on the frame, to remember. It really turned out beautiful, a one of a kind. I love Shabby Chic. I also love having issues which require me to figure something out, as in the piece of rubber you came up with!!! I just get lost in DIY things. Time flys by, and it is very calming. You deserve to know that others appreciate what you do!
-
Jeanne, I am sick right now, i have pneumonia. I have an old Captains Desk i want done. It is so beautiful. I have been wanting to sand it and do it myself, I have bought a sander but do not remember if it is an orbital one or not. I would love if you could tell me how to prepare to strip it! I hope you post this stereo cabinet so i can see it. But i sure would appreciate if you could just tell me how to start. I think i use something like Crud Cutter to clean it, then some king of stripper, and then sand using a 100 grit of higher i do not remember. When i get better i want to do it. I would have to You Tube to figure this out, and i can, but can you just text me the stages that i would go through and tell me if i am correct! You are awesome and what a sweet act of love to do for your son! Kathy


Frequently asked questions
Have a question about this project?