


How to Add Wool Tassels to a Cushion
Confession - I will do almost anything to make a cheap, plain, boring cushion look more expensive! I’m not ashamed of it – it’s just who I am. I just don’t like boring. Some people will buy (or make) a cushion and live with it, just as is. Not me. I’ll buy it (only if it’s on special – usually I make them) and then I’ll think, hmmm, I’m sure that cushion needs …
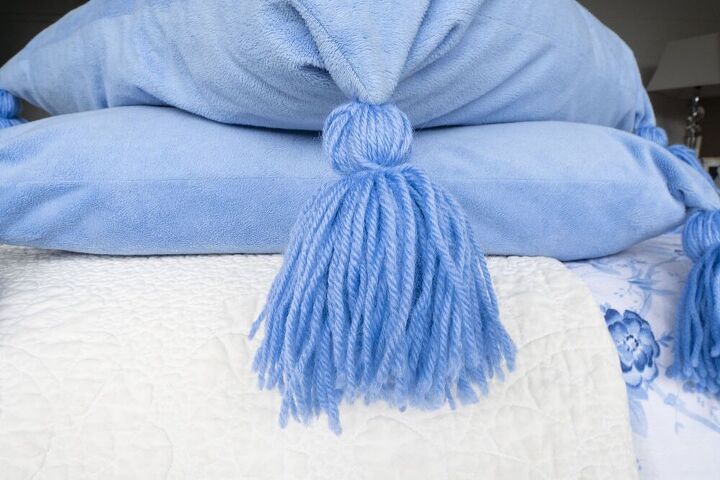
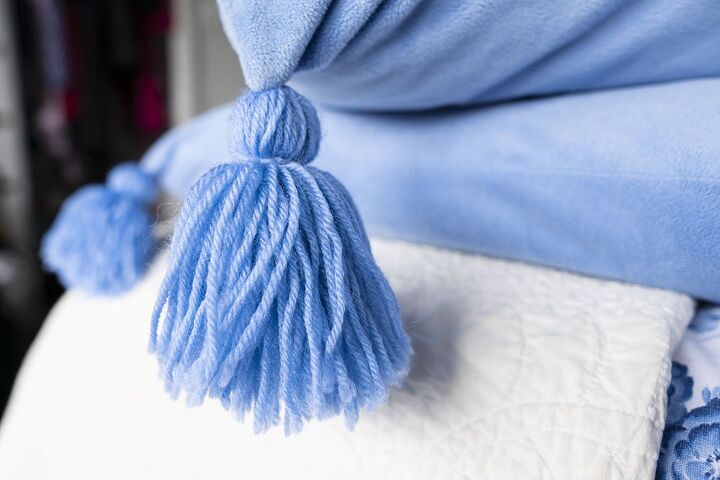
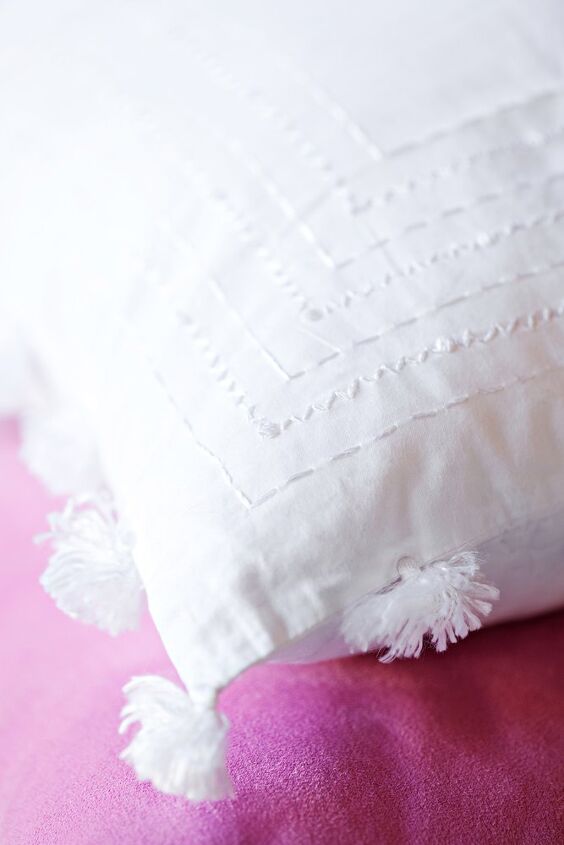
So today, I’m going to share with you the quickest way to jazz up a cushion – or almost anything else – simply by adding a tassel.Wool tassels are so much fun! They add depth, warmth and texture to an otherwise plain piece.You may have seen these tasseled cushions in my Lockwood Master Bedroom Reveal post a few weeks ago.
They are also soooo easy to make. When I was a child, my Mum taught us all (four kids) to make pompoms and tassels. I can’t tell you the hours we spent knitting scarves and hats and making pompom and tassels to give them that special touch. What a great way to spend a cold, wet day.
I remember a certain scarf that was knitted for my brother for school. It was in his school colours of black and white. Everyone took a turn and the scarf grew exponentially over a long weekend. The scarf was worn every day and one day, a few years later, was used to tow a motorcycle. It became somewhat longer than before but was still worn every day.Nowadays, (yes, I sound like I’m 100!) kids don’t learn these simple things and really, it’s the simple things like this that give us pleasure.
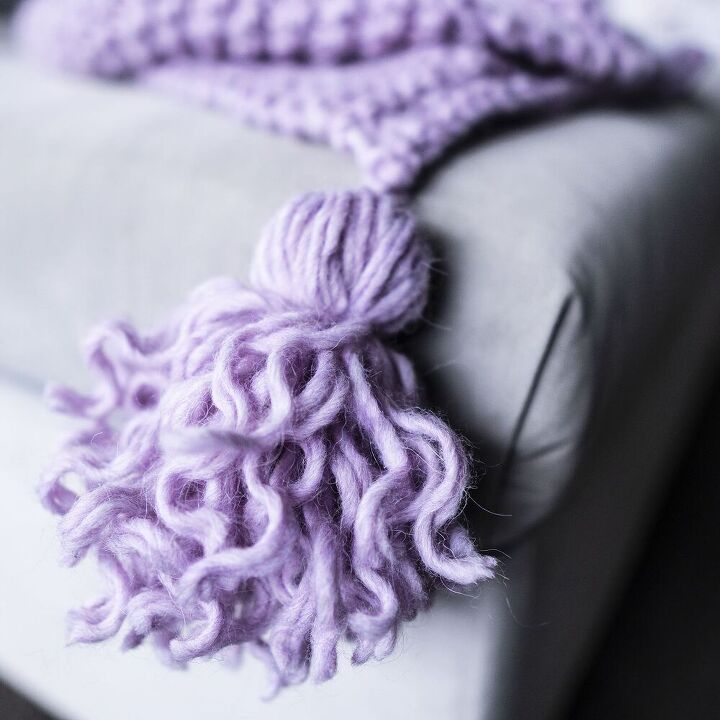
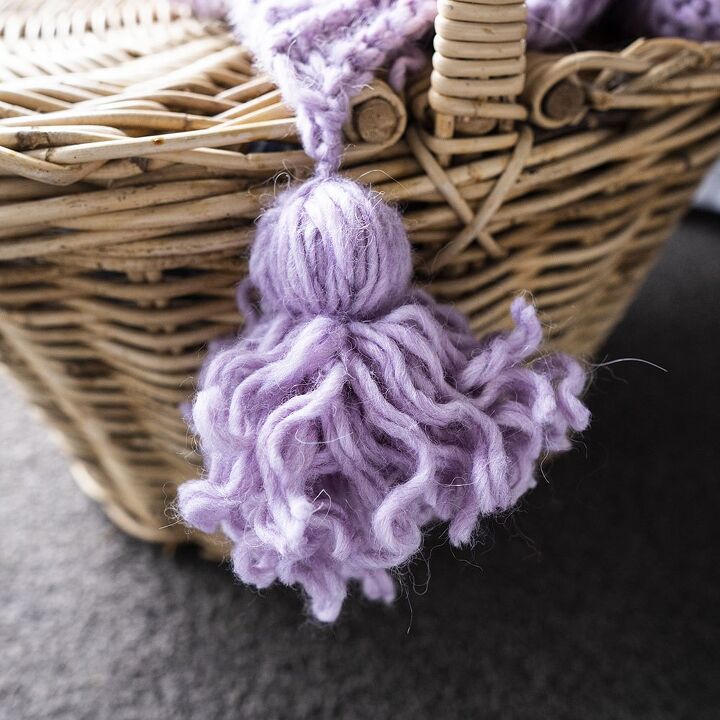
While it’s easier to add the tassels to a cushion with a removable cover, it isn’t necessary. You will just have to be a bit more careful when you attach the tassels to the cushion to hide the ends. You could also add these tassels to a blanket or a curtain, or anything else you can dream of.I added these purples ones to a blanket I knitted. The wool had previously been knitted so the tassels were curly.
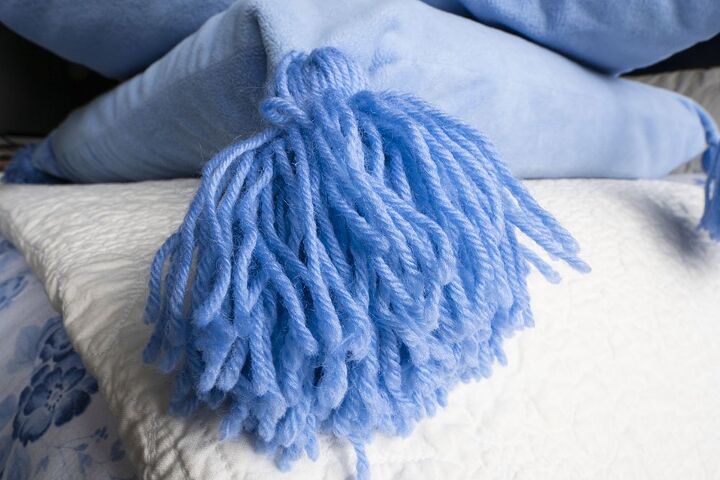
I used about 2/3rds of a ball of double knit wool – the more you use, the fuller your tassel will be. Wool can be any thickness. Tassels made with thicker wool will create fatter tassels.
You don’t have to use wool. You can use embroidery thread or silk thread, or even string if you want to. Possibilities are unlimited.
You will need some thick card to wrap the wool around. If the card is too thin, it will bend.I cut the card 14x9cm (5½ x3½ inches) but the size doesn’t have to be exact. The longer the card, the bigger the tassel.If you don’t have a piece of card, you could always use a small book.Tools
- Scissors
- Needle with large eye
- Tape
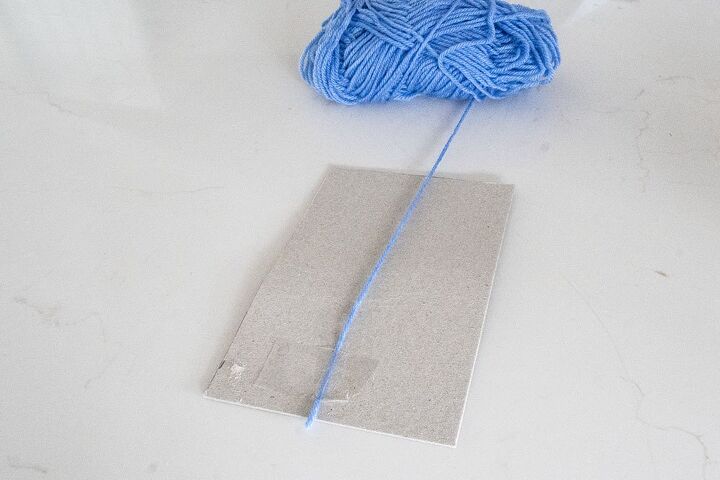
Cut two pieces of wool approximately 30cm (12 inches) long. Set aside.
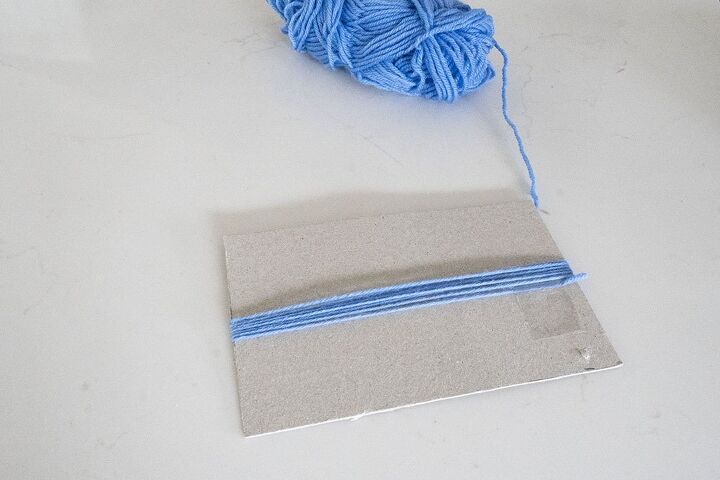
Wrap the wool loosely around the card lengthwise - too tight and the card will bend. Try to keep the strands lying next to one another. When it’s about 2.5cm (1 inch) wide, start layering the strands on top of each other.
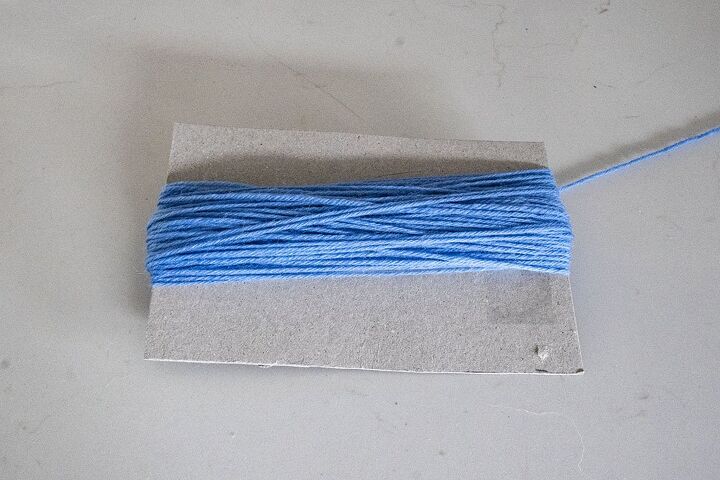
Once you have the fullness you desire, cut the wool at one end of the card.
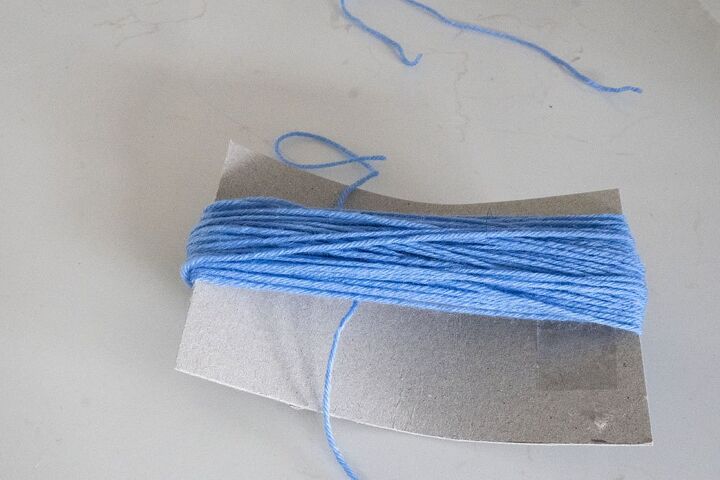
Thread one 30cm piece you cut earlier under the wraps.

Pull it to the top of the card and tie it tightly, leaving the ends at the top. You will use these to attach it to the cushion (or blanket or whatever else you decide you need to tassel!).

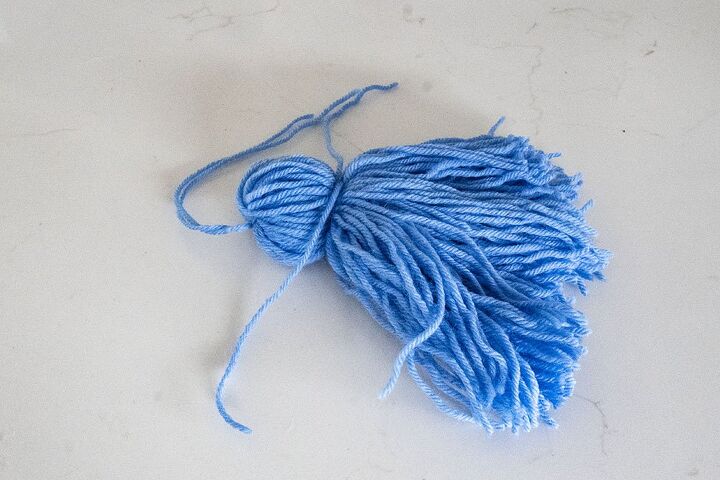
Cut the wool across all wraps at the opposite end of the card to where you tied it. I remove the wraps from the card before I cut, but you could also do this while it’s still wrapped around the card.
Using the other 30cm piece, wrap it around the tassel about 2.5cm (1 inch) from the top end you have tied and tie it tightly.One tassel made!
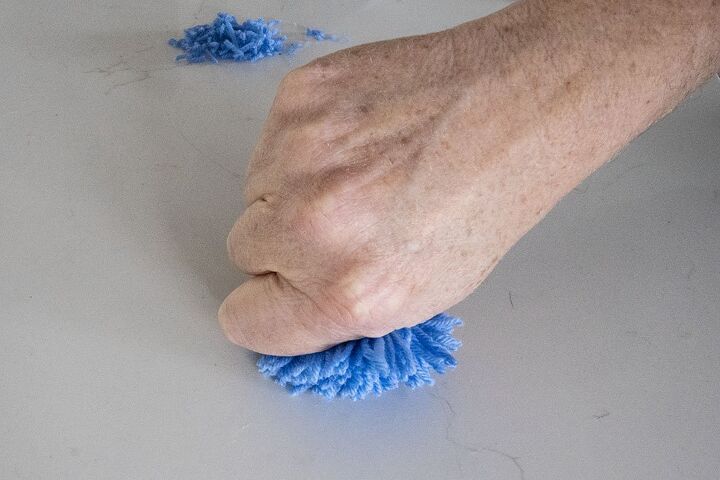
You might need to trim your tassel to make the ends nice and even. To do this, hold the ends in your hand firmly and cut across the ends with sharp scissors.
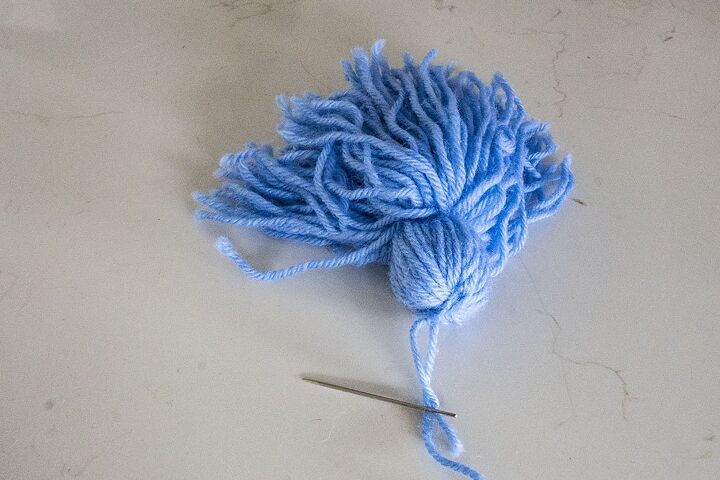
You attach the tassel using the thread you tied across the top. Thread one piece of the wool onto the needle.
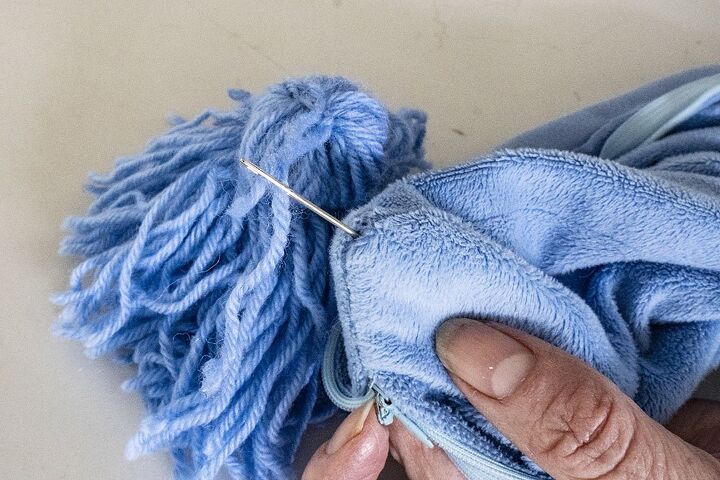
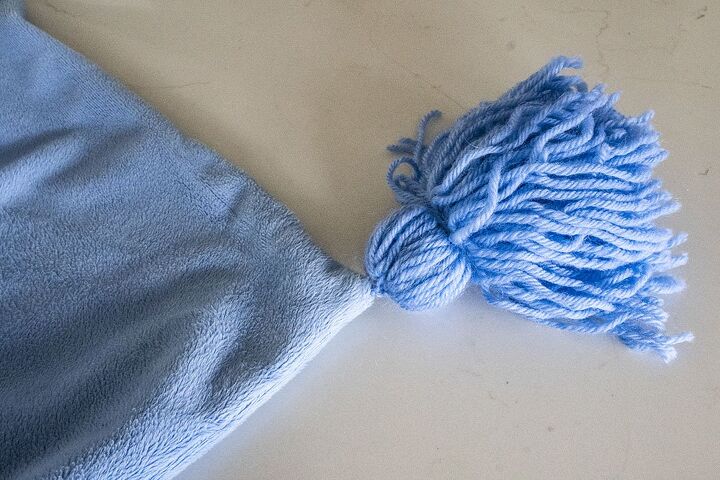
Push the needle through the cushion as close to the corner as you can. Thread the each piece of the wool through separately about a 0.5cm (1/4 inch) apart.Turn to the inside of the cushion cover and pull the needle all the way through. It could be quite difficult to pull through. I used pliers.I would recommend you make a few stitches to better secure the tassel, then tie the two ends in a knot very securely. This is important, as this is the only way your tassel is secured to your cushion. Don’t trim the ends.Turn cushion cover right side out and fluff the tassel.
I would love to have you stop by my blog Living a Real Life for the full tutorial as well as sign up for my latest creations, renovation, posts, recipes, exclusives, and more...


Comments
Join the conversation
-
Love this idea, I plan on doing the same thing to many things in our home, very classy.


Frequently asked questions
Have a question about this project?