


Build A Decorative House With Frames!

by
Anita K
9 Materials
$25.00
2 Hours
Easy
Inspired by a decorative piece in a magazine - I designed my own frame house with picture frames! This piece can be used to display a small plant or seasonal decor as desired. Let's start with fall!
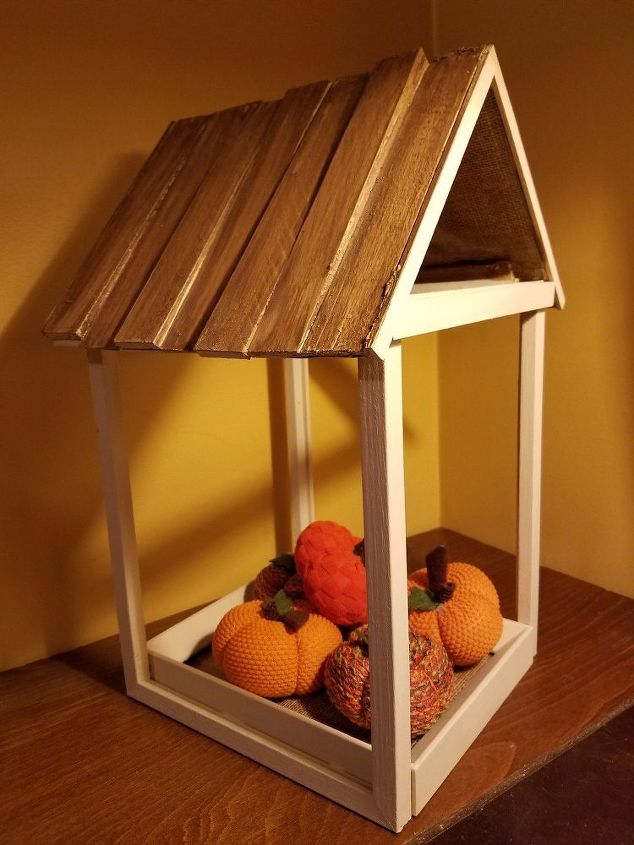
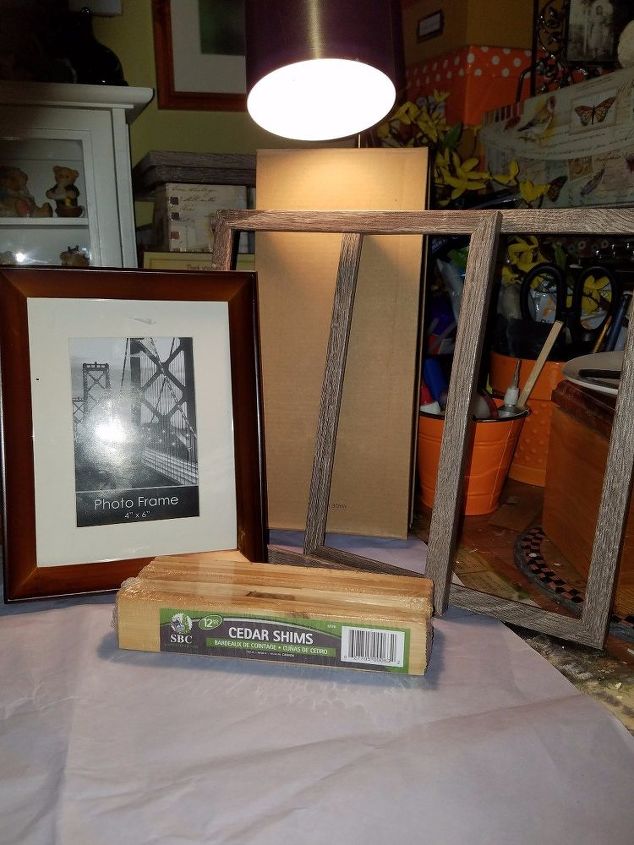
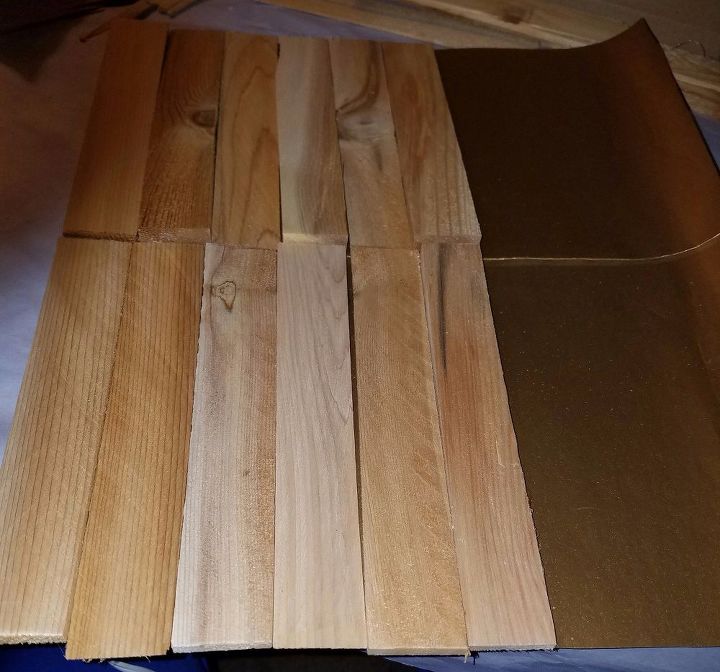
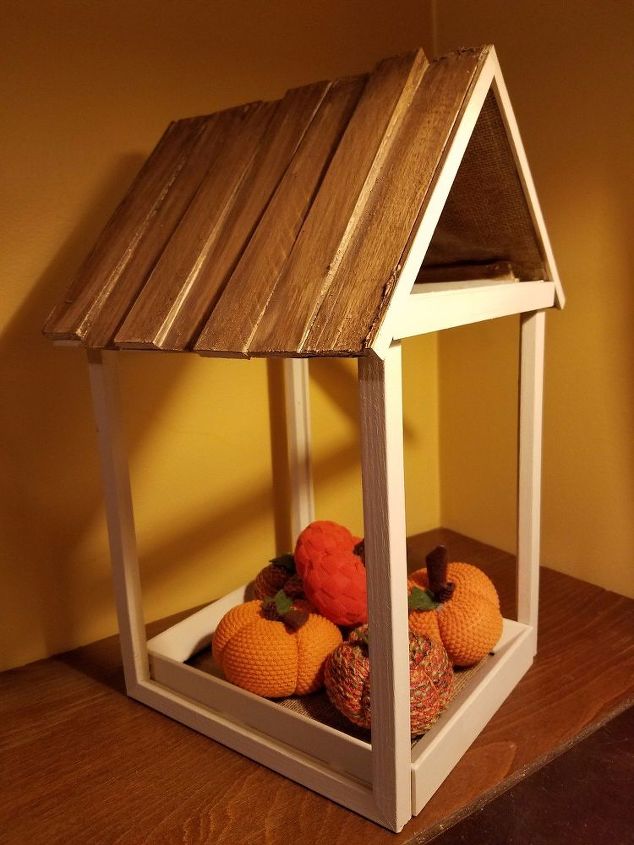
I used two 8" X 10" photo frames for the sides, one 4" X 6" frame for the base, and cedar shims for the roof.
Prepare the Frame of the House:
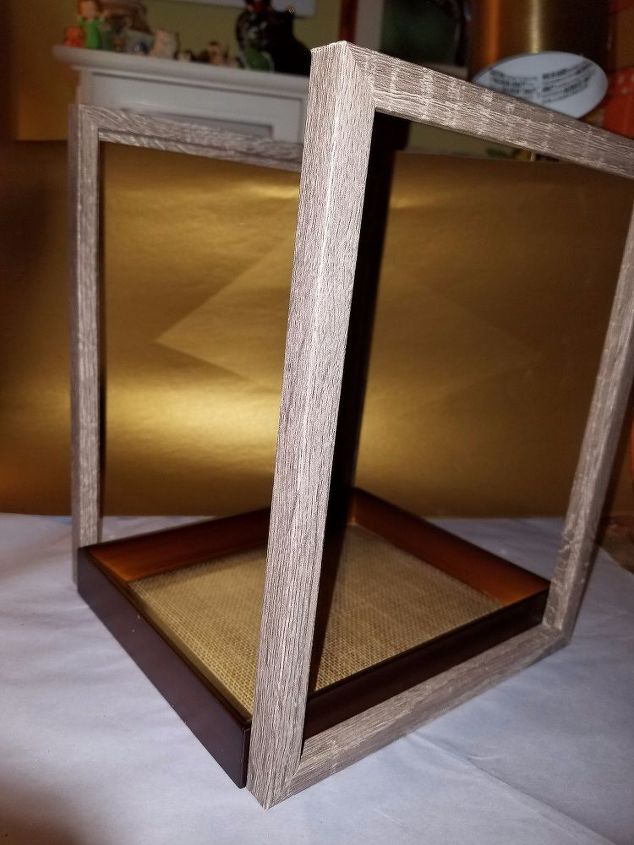
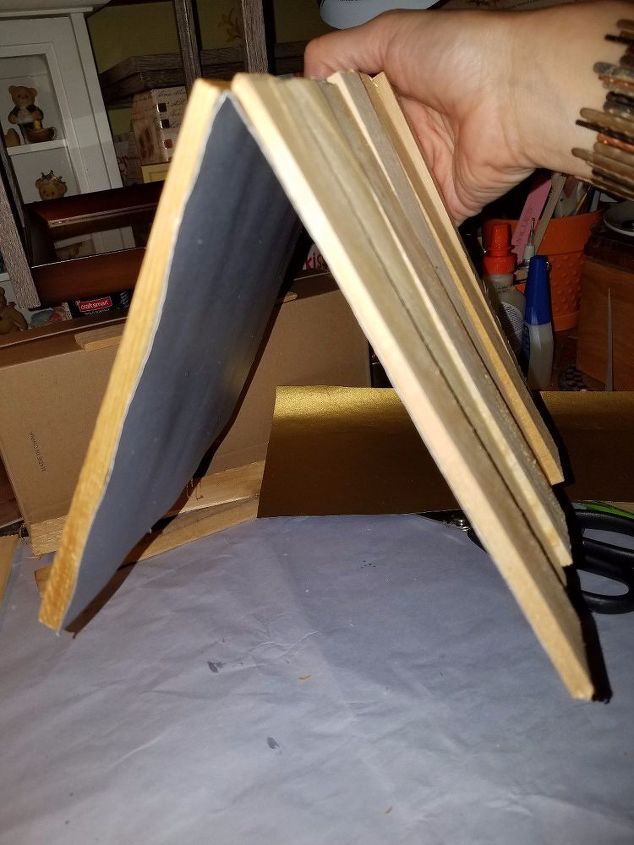
1. Remove the glass and any clips that holds in the glass from the 8" X 10" frames. These will not be needed for the project.
2. Remove the backing of the smaller frame, and line with a paper of your choice. I used a burlap design gift wrap. Note: You may prefer to paint the inside of the frame backing and place it back into the frame.
3. Stand the larger frames vertically and glue to either side of the small frame with Crazy Glue. It bonded instantly for the frames used. You may prefer E6000 glue or another heavy bond glue.
Create the Roof:
4. Cut a piece of cardboard (I used poster board) and fold it in half. The poster board should be the size of a roof, suitable to cover the top of the frames. Allow enough room for overhang - so the cardboard goes over the edge of the top frames.
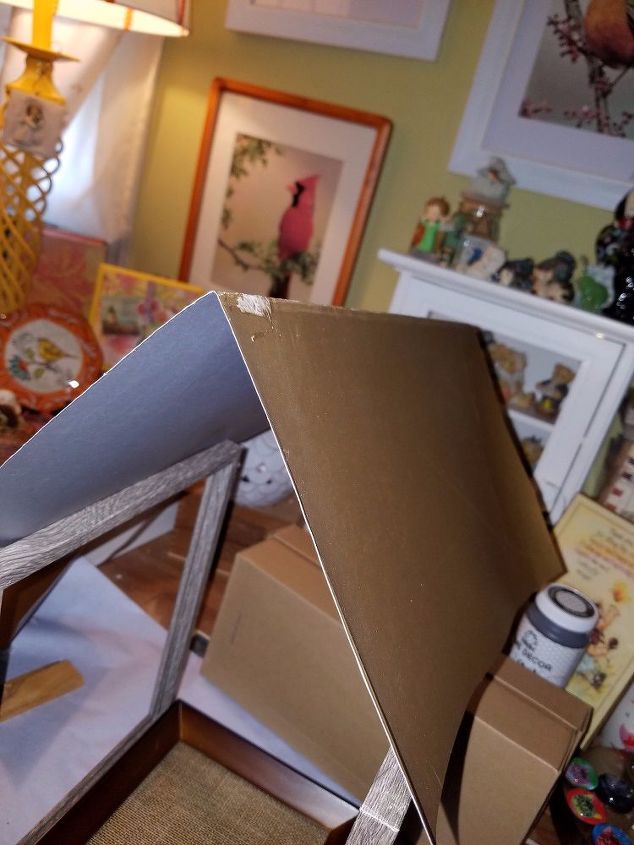
5. Open the cardboard (or poster board) and lay it flat. Glue 6" wood shims to the poster board - alternating thick side to thin side for a more interesting roof design (I used hot glue). Note: Do not glue on the fold - that will be the pitch (pointed part) of the roof.
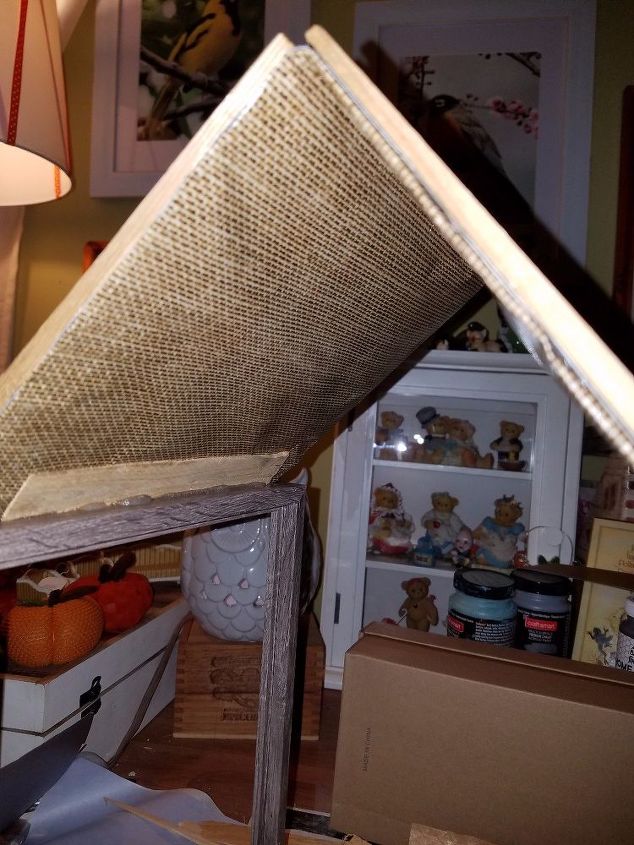
6. When all shims are glued - bend the roof into shape. Note: I chose to cover the bottom part of the roof in a burlap design gift wrap. You may prefer to paint the cardboard or poster board instead.
7. Apply hot glue to one side of the roof - about 1" from the edge of it - to form an overhang over the frame. Hold in place till the glue cools a moment. Then, glue the other side of the roof down - leaving 1" from the edge of that side of the roof. Note: If additional support is needed - glue a wood shim to the lower portion of the roof. It can be painted later, if desired. Note: If you prefer to finish off the edges of the piece - you can cut balsa wood trim to fit and glue it into place. I chose to do that to the front peaks of the roof.
8. Paint the frame and roof, so that all the pieces have a cohesive, uniform look. I used chalk paint on the entire piece, then dark wax on the roof only.
Note: cover the glass on the bottom frame (the base) to protect it from the paint with painter's tape. It is awkward to remove the backing of the base after the roof is attached.
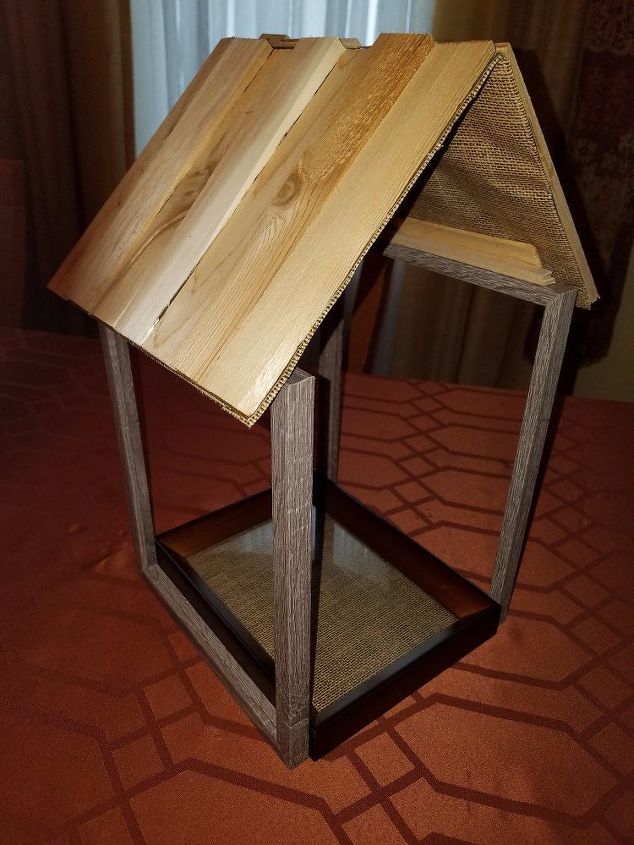
9. A tiny wreath can be suspended from the inside - this wreath is plastic ring, wound with burlap ribbon - and adorned with a decorative birdcage. It is hanging from a clear Command hook.
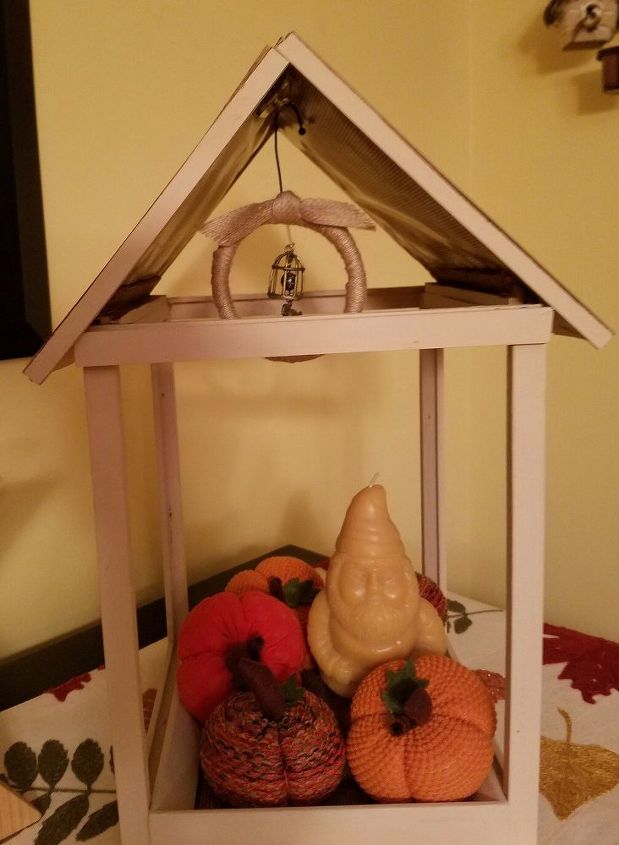
10. Display seasonal decor as desired and enjoy!
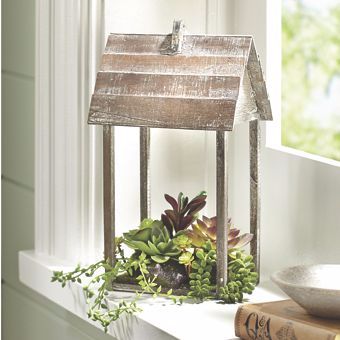
Inspiration From Catalog
This was my inspiration - I loved the piece, but not the price tag!
Comments
Join the conversation
3 of 30 comments
-
This is a very clever idea! Thanks for sharing it :-) I'm also thinking a nativity at Christmas, love it!
-
Oh gosh Anita K, sorry I'm just getting back to you; I would love to post more of my KreationZ! I have to include the instructions and inspirations for the others and learn how to include the supplies needed. Again, thank you and glad you enjoyed it


![Don't Throw Away Old Picture Frame[Turn Into Serving Tray] !](https://cdn-fastly.hometalk.com/media/2015/01/11/2054742/don-t-throw-away-old-picture-frame-turn-into-serving-tray.JPG?size=350x220)


Frequently asked questions
Have a question about this project?