


How-To: Design an 8 Foot Photo Wall for Under $10
$10
3 Hours
Easy
Because I am a military spouse, I am constantly moving from one house to the next. Finding cheap and easy ways to take up large amounts of wall space is always #1. I created an 8 Foot Photo Wall for Under $10 and I absolutely love the final result.
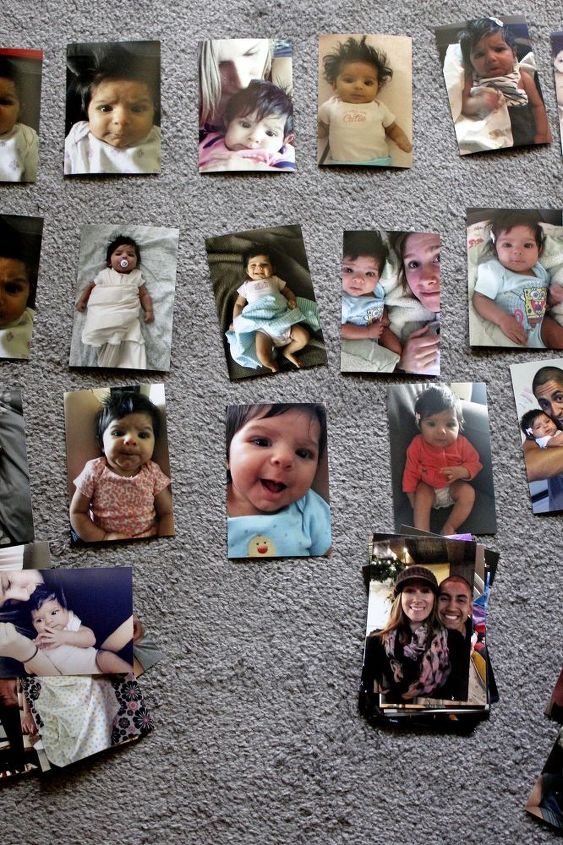
First start by selecting your photographs - I know it was so difficult for me considering I had so many adorable photos of my little girl. But you must!

Next you need to start measuring out where you want each photo to go and temporarily putting them on the wall to get a visual idea of the layout.
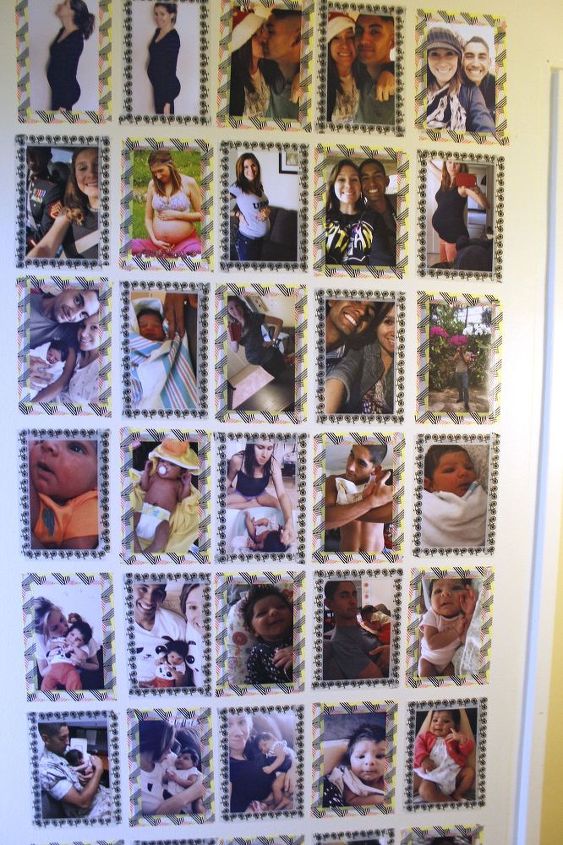
Finally, add different washi tape patterns to the borders to give it that clean "finished" look. It looks so fun and creative!
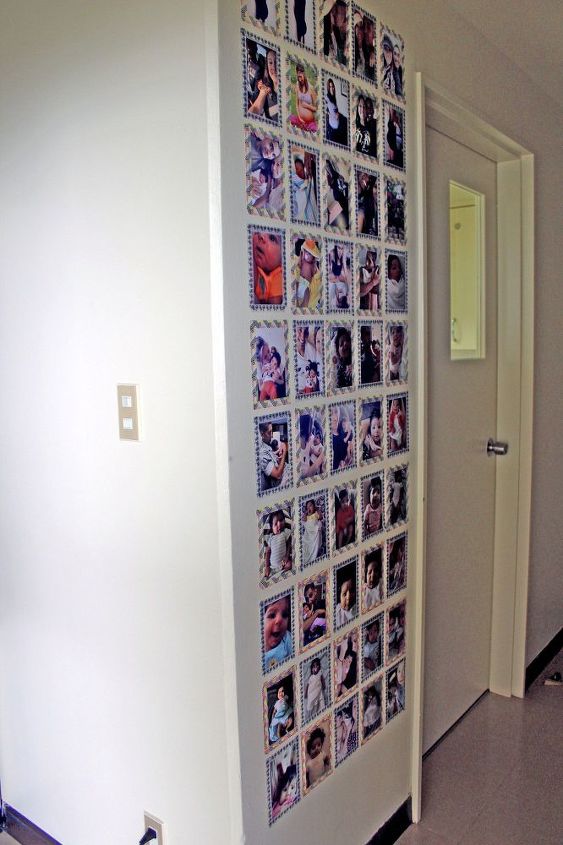
I was so happy with the final result, it makes me happy to have the chance to look at 50 of my most favorite photographs as soon as I walk through the door. You should make one too!

Want more details about this and other DIY projects? Check out my blog post!
Comments
Join the conversation
3 of 4 comments
-
This looks awesome! Under $10? Sign me up!
-
So are they stuck to the wall with something? or a board? I mean if you move alot doesnt it mark the walls?


Frequently asked questions
Have a question about this project?