


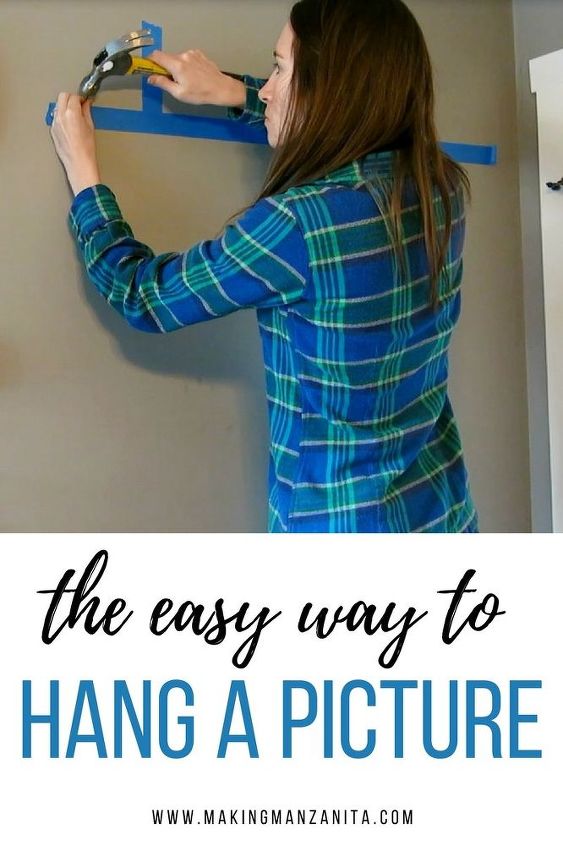
How To Hang A Picture The Easy Way
If you love this project, grab your quick start DIY guide & subscribe to our blog!
Let me tell you a story....Logan and I had just come home from our Ireland honeymoon and had gone through and unwrapped the humongous pile of wedding presents in the middle of our living room. We were smitten with newlywed bliss and decided to hang some decor up on the walls to make our little apartment feel more like a home. I grabbed the new step stool and he looked for the hammer. I asked him where the painters tape was and he was thoroughly confused. "Why do we need painters tape to hang a picture?" He thought to himself. It wasn't until we started working together to hang the picture that I realized that we were on two different wave lengths. "How does he not know how to hang a picture !?" I asked myself.
This was one of the first lessons of marriage that we encountered. We had two very different ways to do something so simple like how to hang a picture. After a little communication, we decided to compromise and do it my way.... because, well - it was the easy way to hang a picture!
Keep in mind! For most of the things we hang around our house, we use the Command picture hanging velcro strips and just love them. But there are some things that just require a nail and hammer. And so here we are. Guys, I almost feel silly sharing this blog post with you today. This guide on how to hang a picture is so simple, but this first compromise in our marriage taught me that not everyone knows how to hang a picture the easy way. I definitely don't want you guys to feel left out on a simple lesson like this, so here's your simple guide on how to hang a picture.
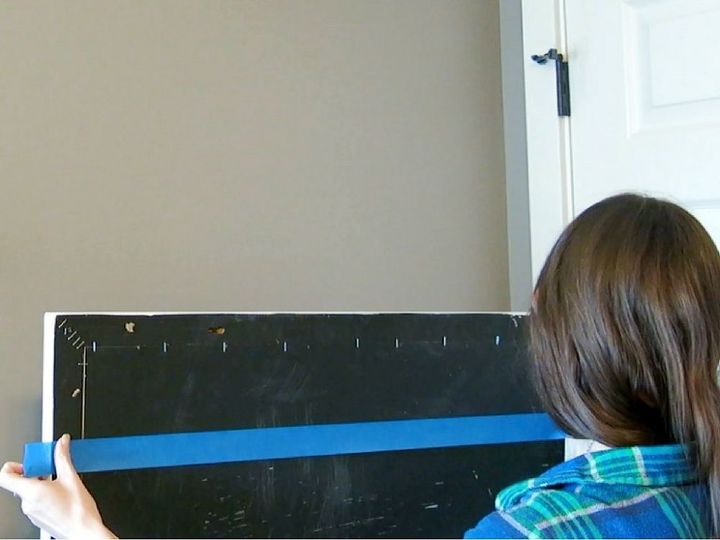
Step 1. Apply painter's tape to the back of the picture over the keyholes.
First, you will push the painter's tape onto the back side of the picture frame over the keyholes, which are the little holes that hang on the nails. You want to line the keyholes to the very top edges of the painter's tape.

Step 2. Mark the location of the keyholes on the tape.
Make a small marking with a pen or pencil on the tape where the keyholes are. Alternatively, you could also punch a tiny hole in the tape with the nail. You just need to know the location of the keyholes on the tape.
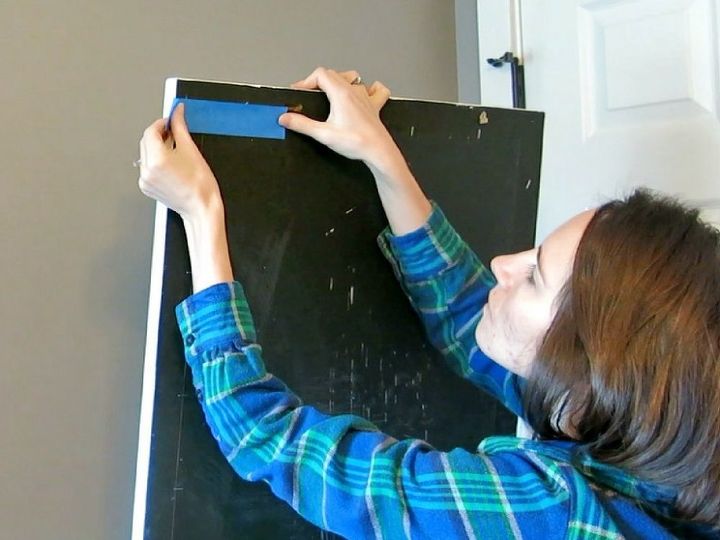
Step 3. Use tape to measure the distance from the top of the keyhole to the top of the frame.
Sure, you COULD get the measuring tape out to measure the distance. Then, you COULD hold the measuring tape on the wall with one hand and try to grab a hammer with the other hand all while balancing up on a step stool....but remember - this is the easy way to hang a picture! Save yourself the trouble and just use a bit of painters tape to measure the distance from the top of the keyhole to the top of the frame.
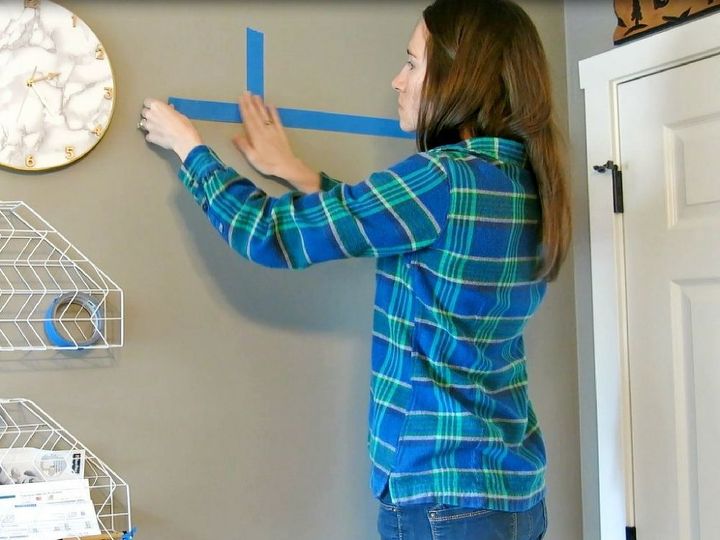
Step 4. Apply painter's tape to wall.
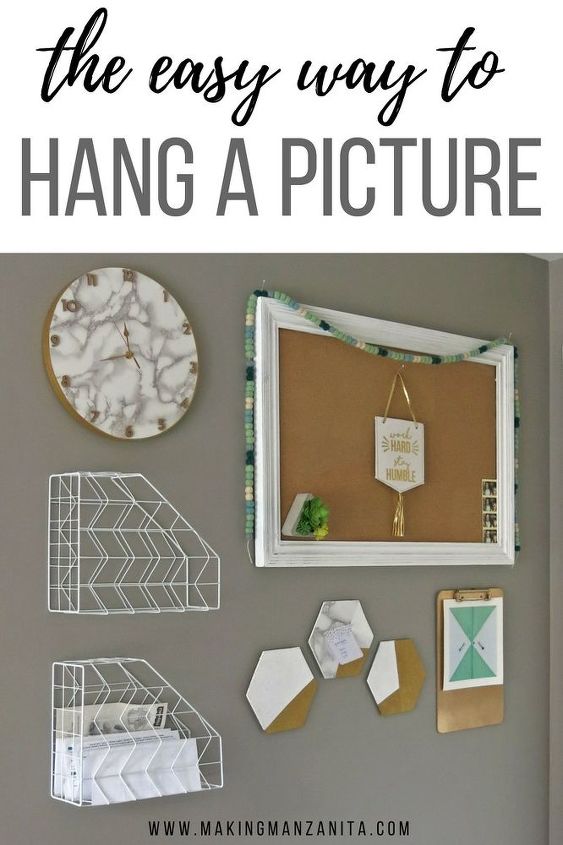
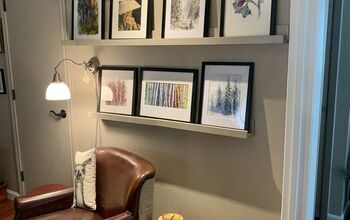
You will line the top of where you want to frame to be with the top of measured short piece of tape (which measured the distance of the top of the frame to the top of the keyhole). In my example photo above, I wanted the top of the frame to be lined up with the top of the clock.
Next you'll apply the longer piece (which had the markings of the locations of the keyholes on it) at the bottom of the short piece. This will tell you how far down you need to put the nails in the wall and how far apart they should be separated.
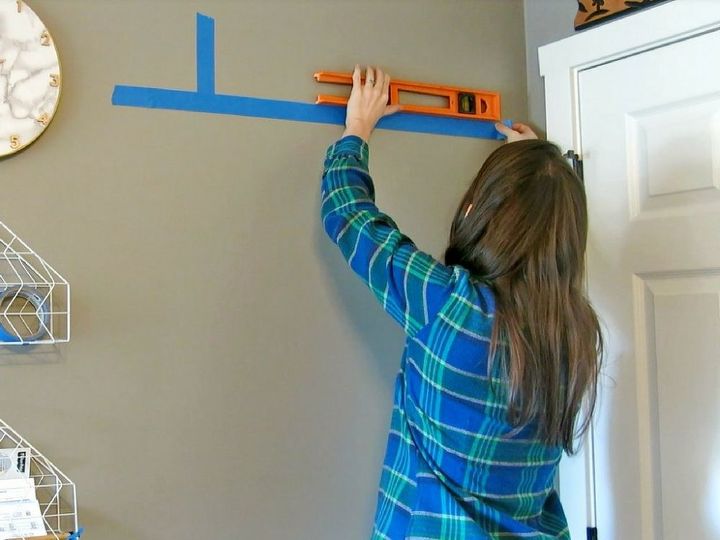
Step 5. Make sure your tape is level.
Since you made the markings on the tape at the very top, all you need to do is make sure the tape is on the wall level and your holes will be level too!
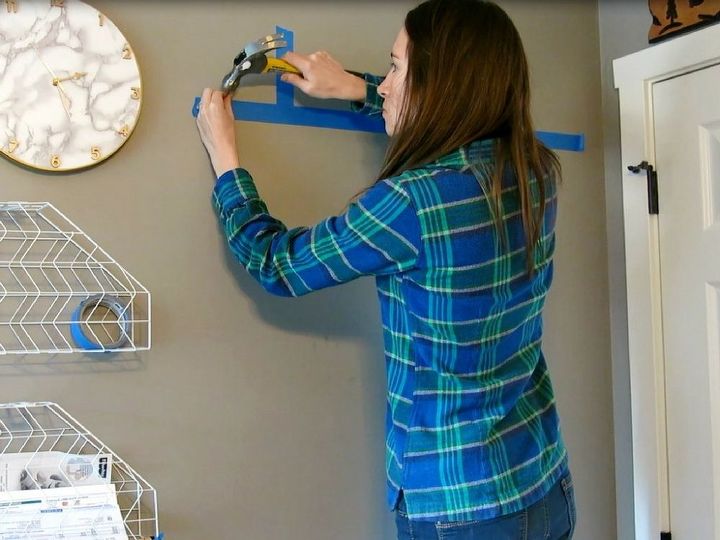
Step 6. Hammer your nails.
Next, you can hammer your nails into the wall. I recommend doing this at a slight angle (pointing downwards). I usually use finish nails unless a larger nail is necessary.
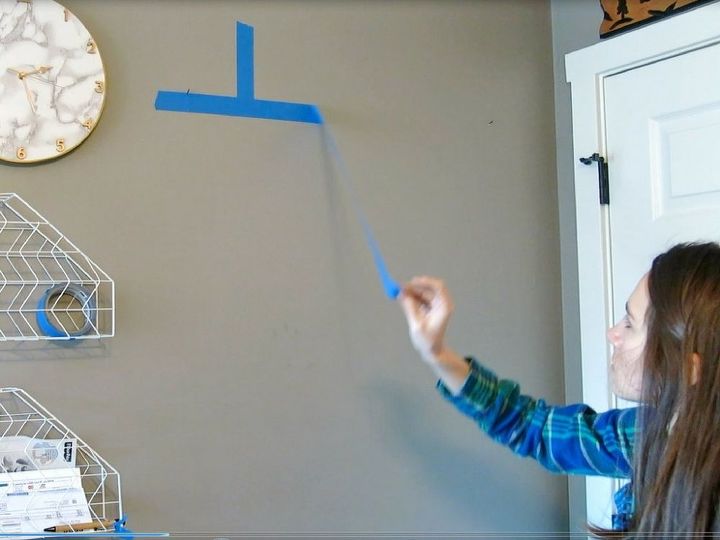
Step 7. Remove tape.
It's just like rippin' off a band-aid.
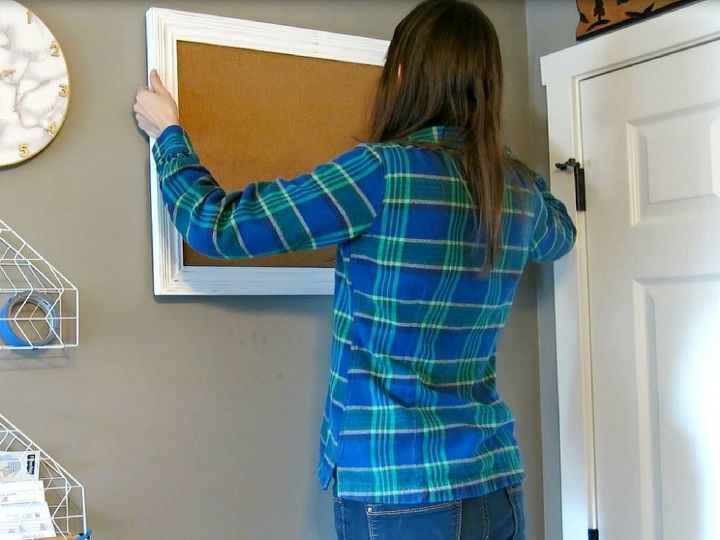
Step 8. Hang your picture!
You should able to place your picture right on the nails. If all goes and planned, the keyholes should line right up to the nails and your picture will be level.
The first compromise of our marriage ended up changing the way that Logan hung picture forever once we determined that my way was the right way :).
I told you that this was how to hang a picture the easy way! Couldn't get any simpler, right? Is this how you have always hung a picture or do you do it differently? I'd love to know if you have any other picture hanging tips!
Hop on over to my blog, Making Manzanita, for more helpful tips and home decor inspiration!

Comments
Join the conversation
-
This was incredible! I have always struggled with the "two nail" picture hanging. It was so easy....I got it on the first try! Thank you so much for posting!
-
How genius is this method!!! Now I can do it my self and be confident that it will be the right height and level. Obviously if you have to wire across the pic, just measure with the tape from the wire center to the top while holding it taut. Then you can do the level tape, although you might not need it but it will give you an idea of width and spacing. Thanks Pix


Frequently asked questions
Have a question about this project?
Your pictures don't use wire? What does the Key Hole look like?
my walls are so hollow , my nails always bend out and picture falls out. should I use anker screws ?
no question...just a BIG thank you! This was very easy to accomplish!