


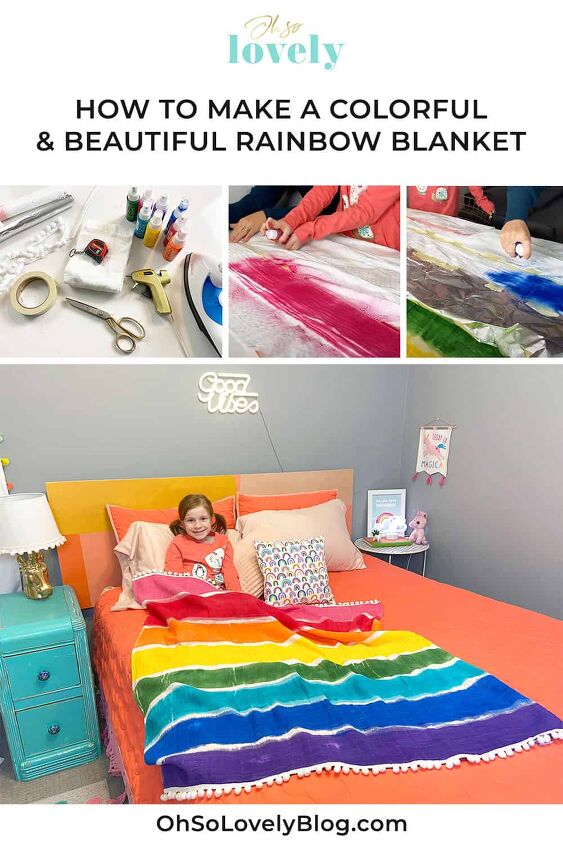
How to Make a Colorful & Beautiful Rainbow Striped Blanket
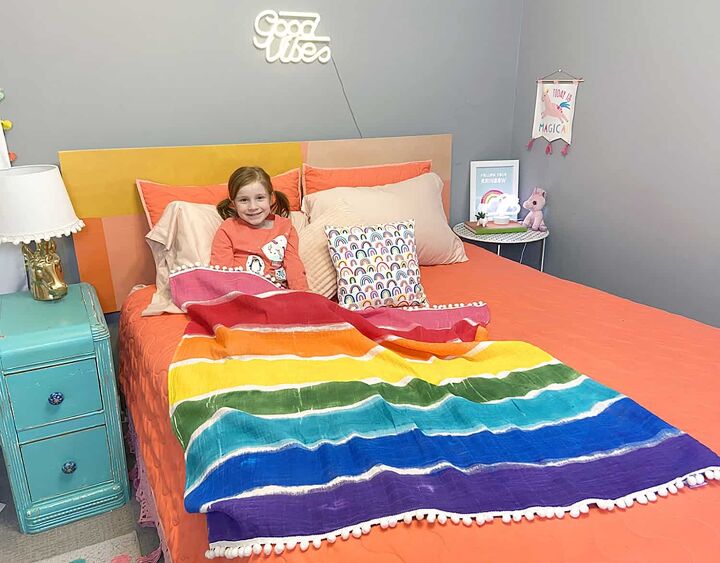
Rainbow blankets are so fun and perfect for a kid’s room. My daughter Vivienne and I up cycled a plain white muslin baby blanket into a colorful masterpiece.
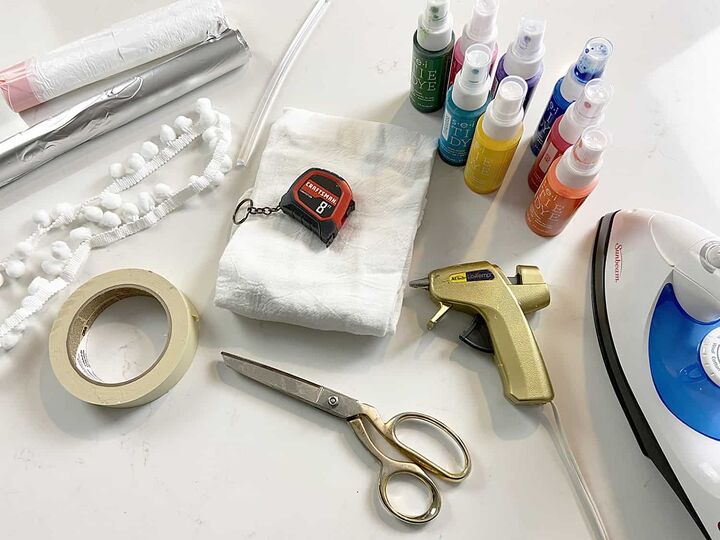
Supply list:
**all links available in my original blog post.**
- Muslin blanket
- Tumble dye
- Masking tape
- Pom pom trim ribbon
- Old iron
- Hot glue gun
- Tape measure
- Foil
- Trash bags
- Scissors
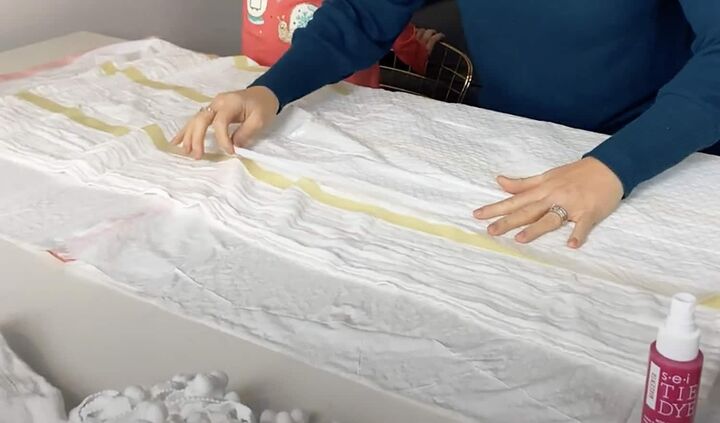
First we laid out the blanket flat and grabbed our tape and tape measurer. We knew we were gong to use eight colors on our blanket, so I measured the blanket roughly into eight sections.
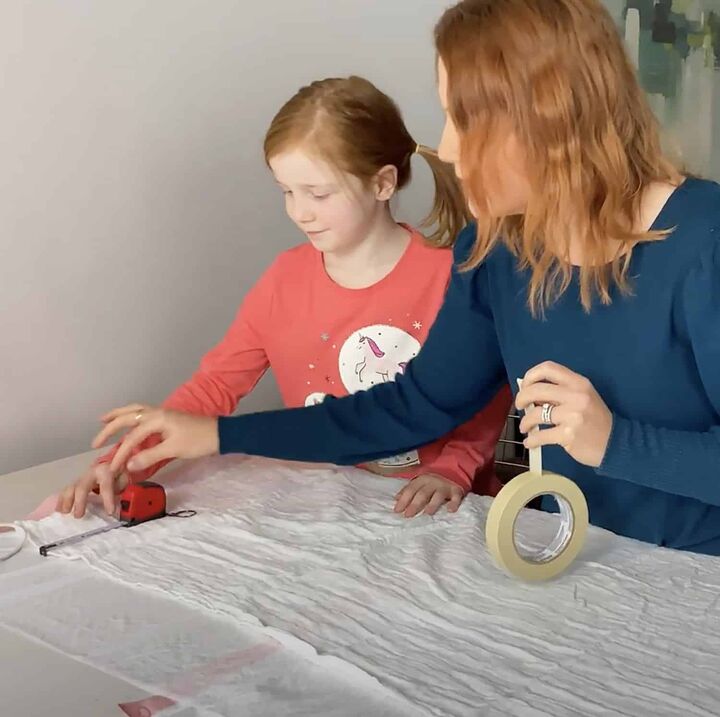
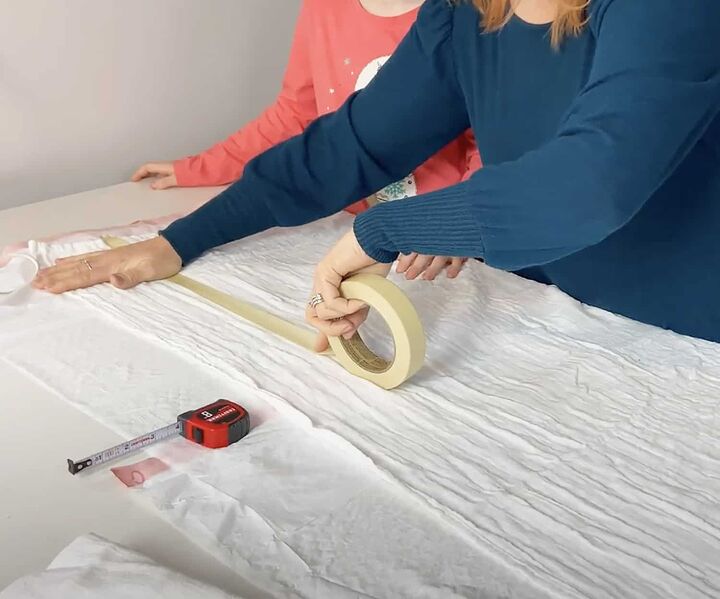
Once we had our sections marked I taped off to divide each area,
We repeated that step until the whole blanket was taped off into our striped sections. The areas were’t perfectly even, but close enough for us 🙂
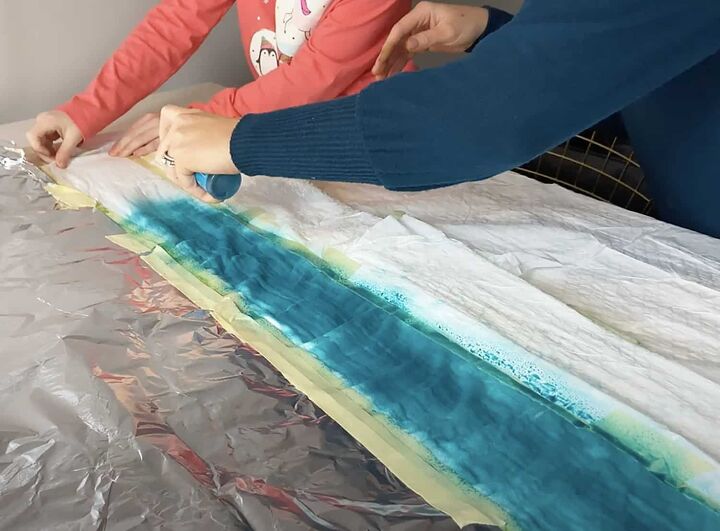
I laid out two trash bags under the blanket to soak up any dye that would bleed through the backside.
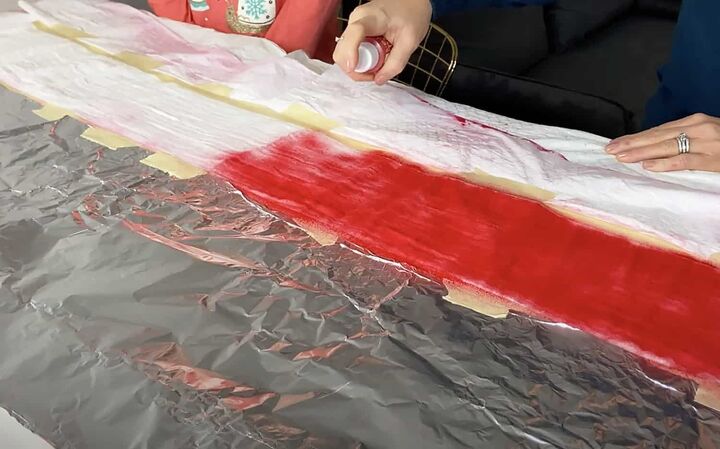
Using our Tumble dye spray, I started to spray the first section of our rainbow blanket.
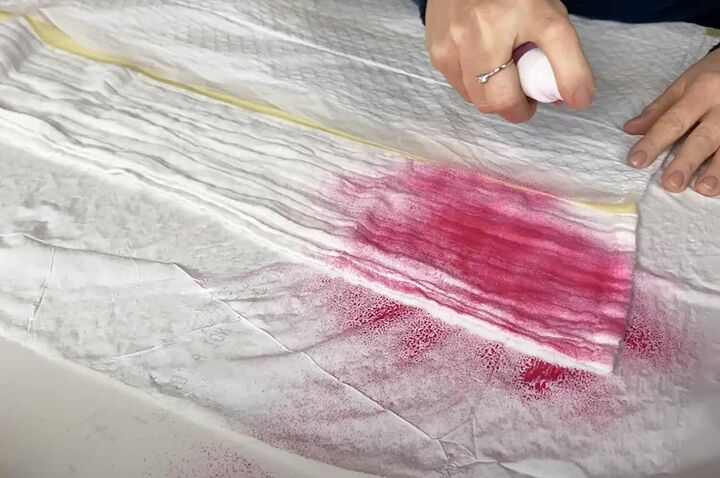
Vivi helped on the right hand side of each section while I held the blanket taught to ensure we fulled all the creases.
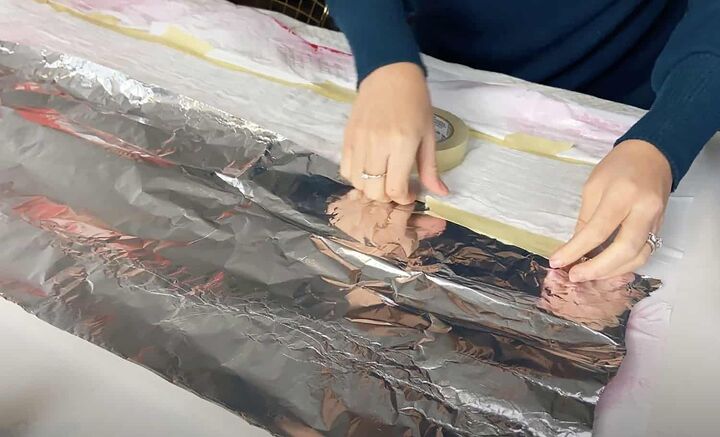
To avoid any overspray, I taped down aluminum foil over the pink sprayed section and taped it down to hold it in place.
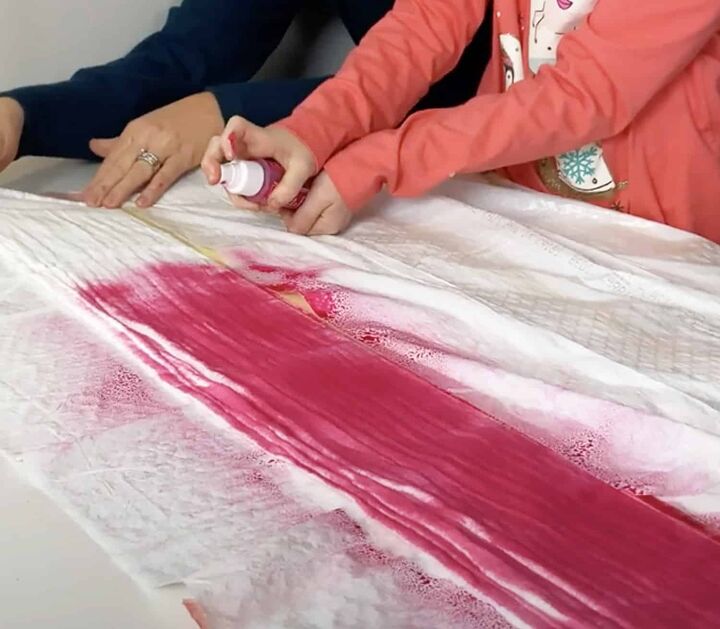
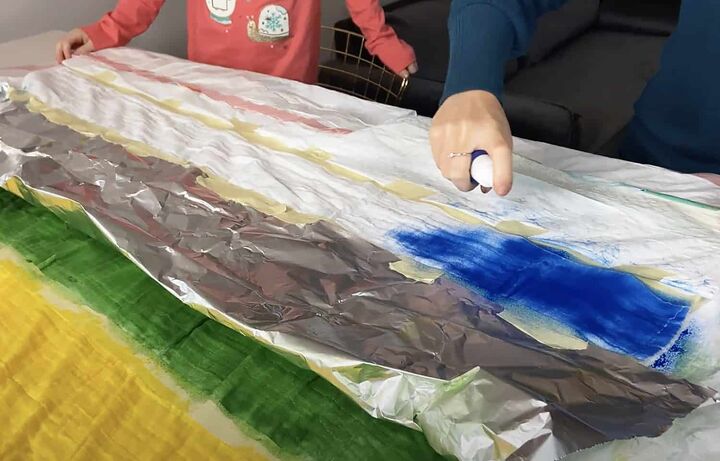
It was time to spray the next section in red.
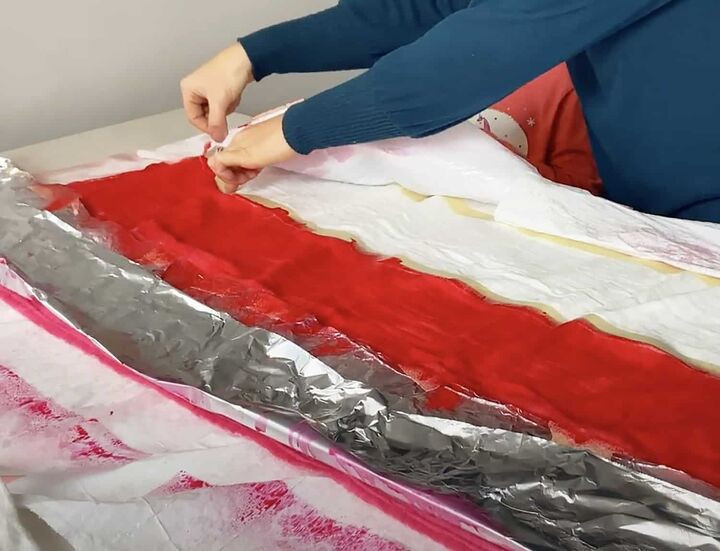
Once saturated, the red section was then covered in foil.
The same step was repeated with our orange spray.
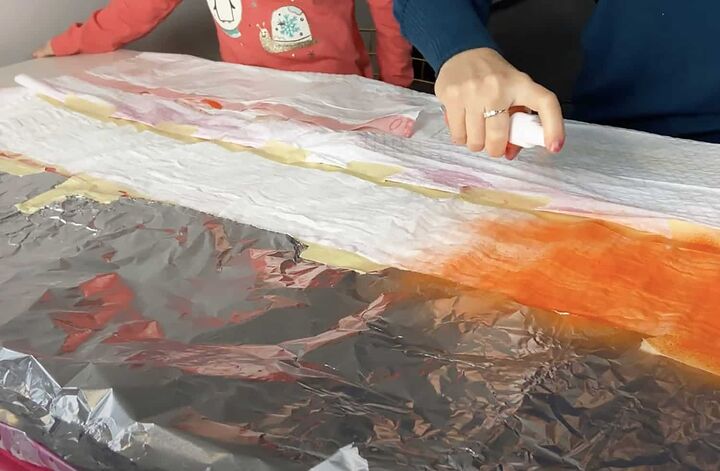
Then the yellow came next. I love that his project is easy enough for a child to help.
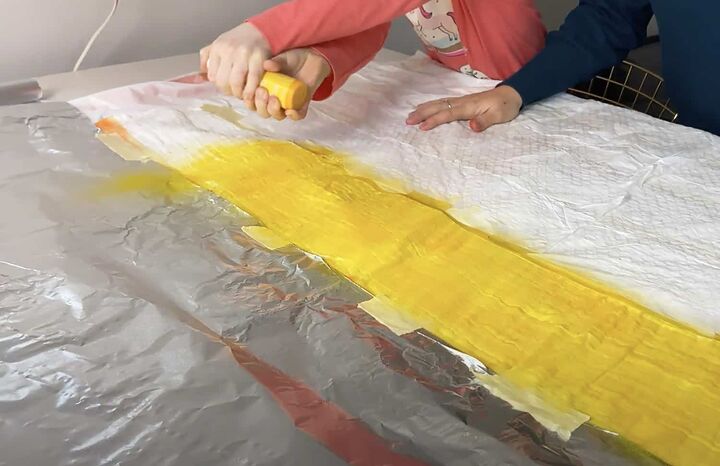
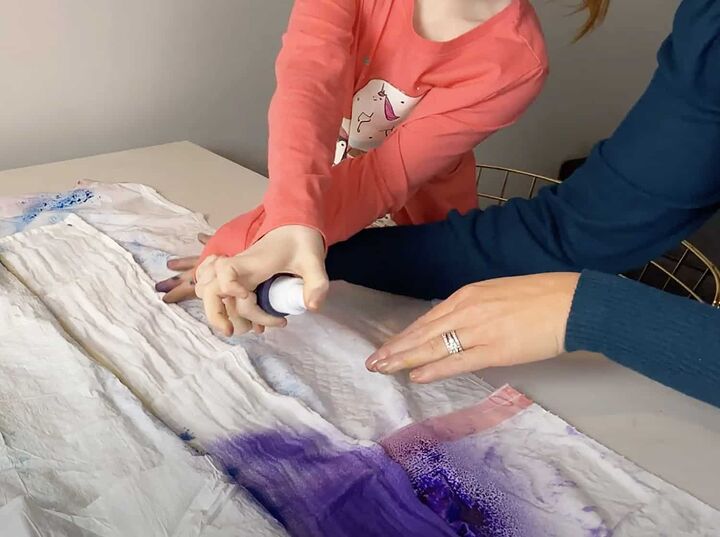
Time for the green Tumble dye!

Then turquoise, blue, and purple!
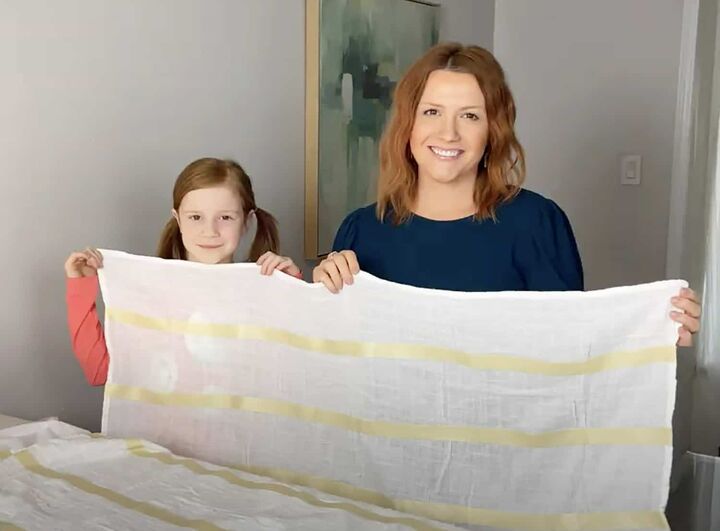
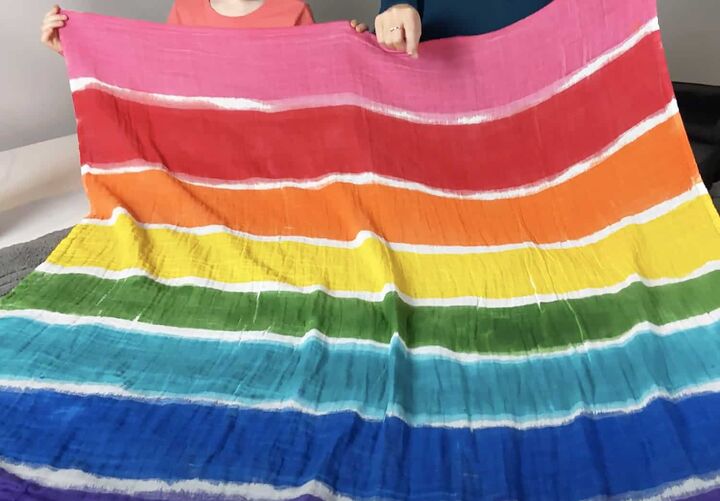
The most exciting part for me was peeling away the masking tape to reveal the white stripe dividers. I love that the paint bled a bit underneath. It gives our rainbow blanket a more organic look!
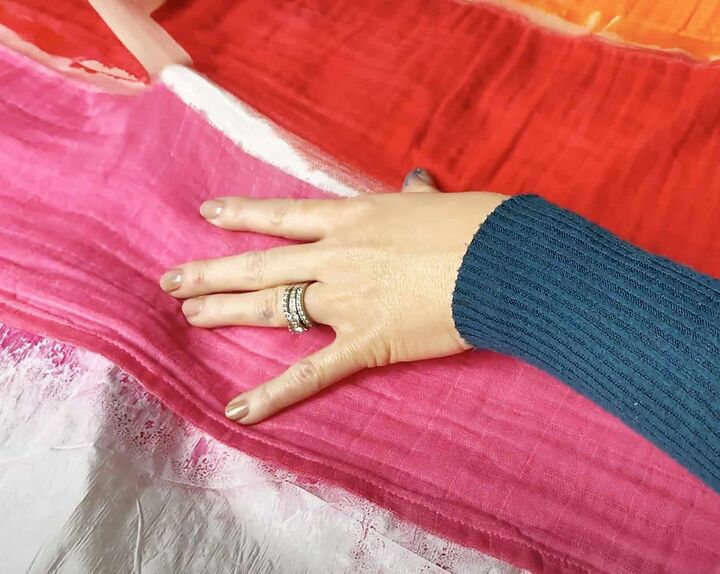
Once all the tape was peeled away, we admired our blanket masterpiece!
We let it dry outside in the sun for about 45 minutes.
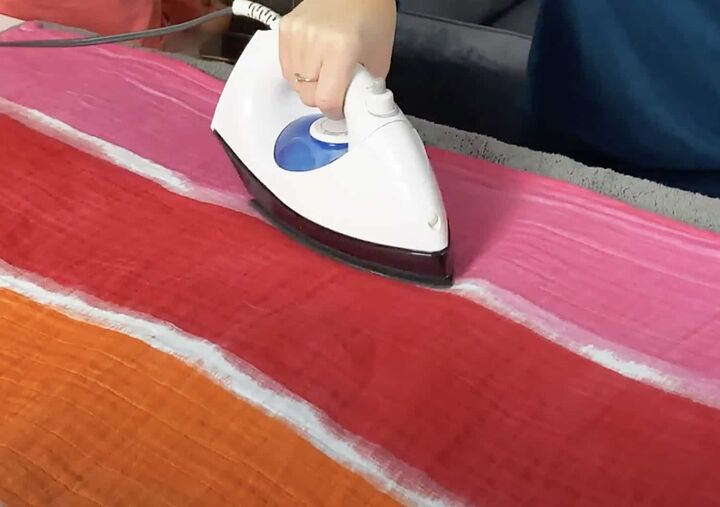
Once dry, it was time to set the dye, I ironed over the whole blanket.
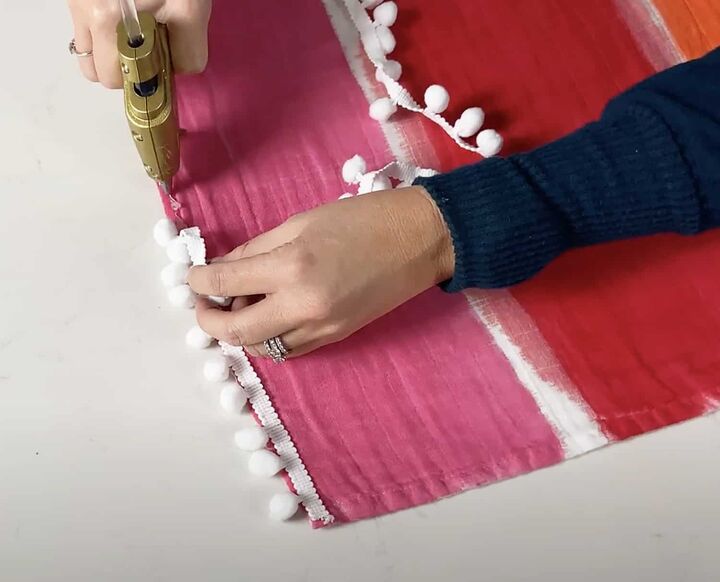
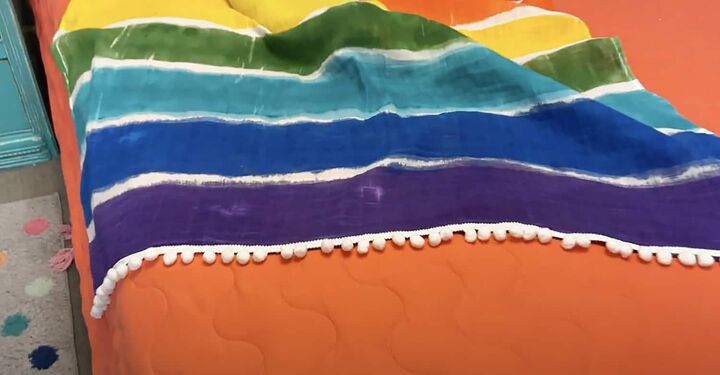
You could definitely stop here, but Vivi wanted me to add some pom pom trim.
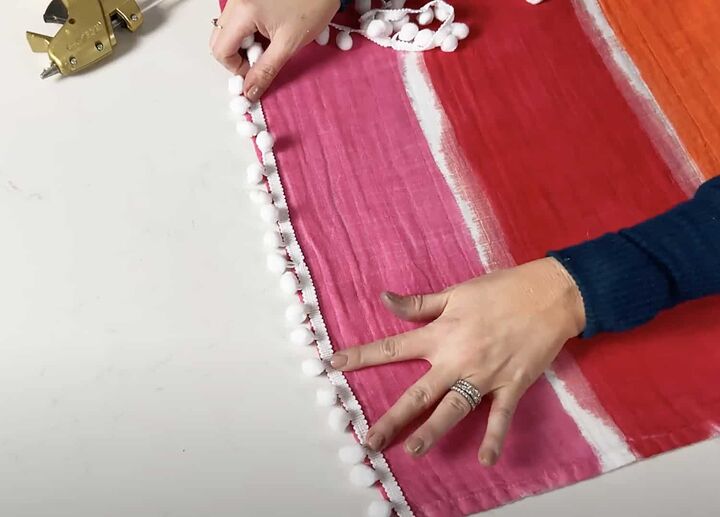
I simply hot glued the trim onto the two blanket ends. This adds such fun detail. So cute!
I’ll be sure to wash in a delicate bag when the time comes, but worst case and the trim comes off, I can always re-hot glue it. You could also choose to sew the trim on for a super secure option.
I would have done that, but my sewing machine is out of order at the moment.
We absolutely love how our rainbow blanket turned out! It adds such a great pop of color to her bed.
Cute huh?
What do you think? Will you give this DIY project a try? I recommend it, and it would make such a cute gift for your color-loving friends or kiddos.
You might also like come of my other easy DIY projects or free printable art prints and calendars!
xoxo
Audrey
Like this project? Pin it for later!

Comments
Join the conversation
-
Such a little cutie !
-
If you soak in vinegar it will set the colors prior to washing.


Frequently asked questions
Have a question about this project?
What is a Muslim blanket. Looks like drop cloth in pix