


How To Make A Light-up Bottle With Tinted Glass
In this tutorial, I show you how to make tinted glass easily at home using PVA Glue. Before turning our pretty coloured glass into a beach themed light up bottle.
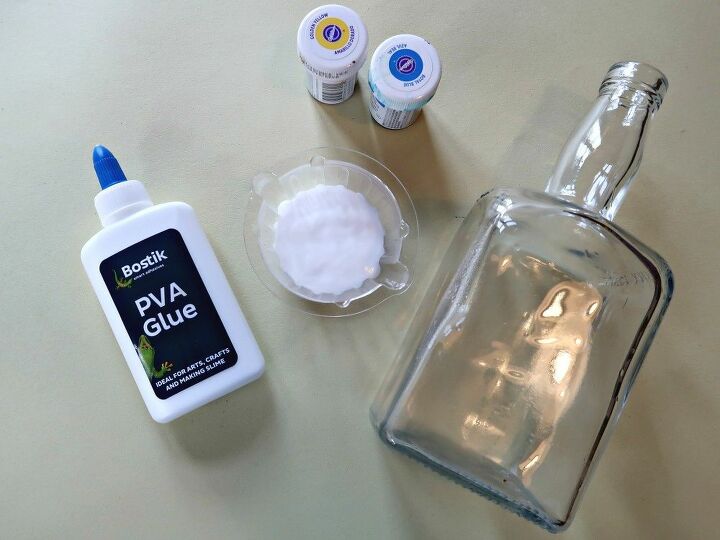
What you need to make tinted glass bottles
PVA Glue (White School Glue)
Food Colouring (I used gels)
Clear glass bottles or Jars
Before you start colouring your glass, make sure that you protect your work surface. Food colouring has a nasty habit of staining everything it comes in contact with.
How to Tint Clear Glass with PVA Glue.
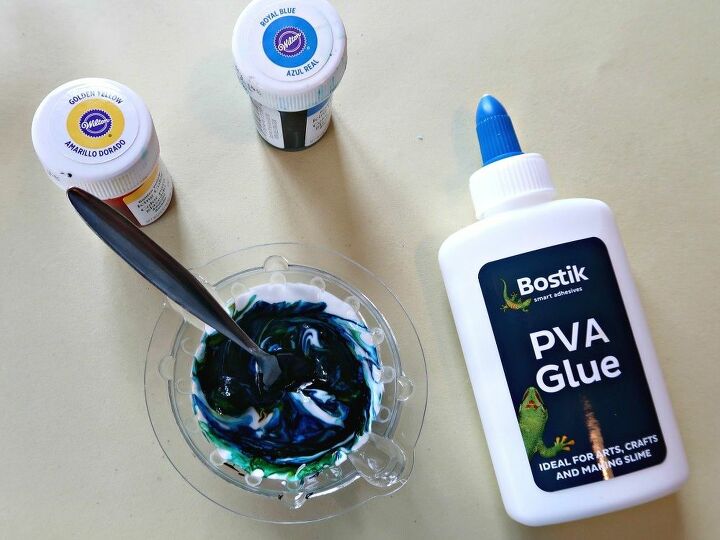
Mix three parts PVA glue with one part water and mix well. The consistency should be similar to a thick paint.
Add food colouring to obtain a deep colour of your choosing. As the glass tint dries, the colour will lighten so bear that in mind when mixing.
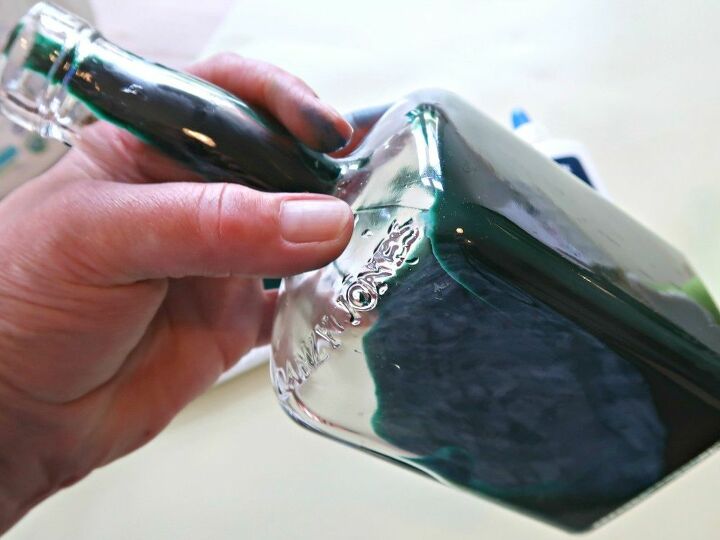
Pour the glue mixture into the bottle and turn it, so all the surfaces are coated before allowing the excess to drain out for a couple of minutes.
Sit the bottle the right way up and leave to stand for about an hour. This allows any excess colour to move to the bottom of the jar and will help prevent streaks on finished bottles or jars.
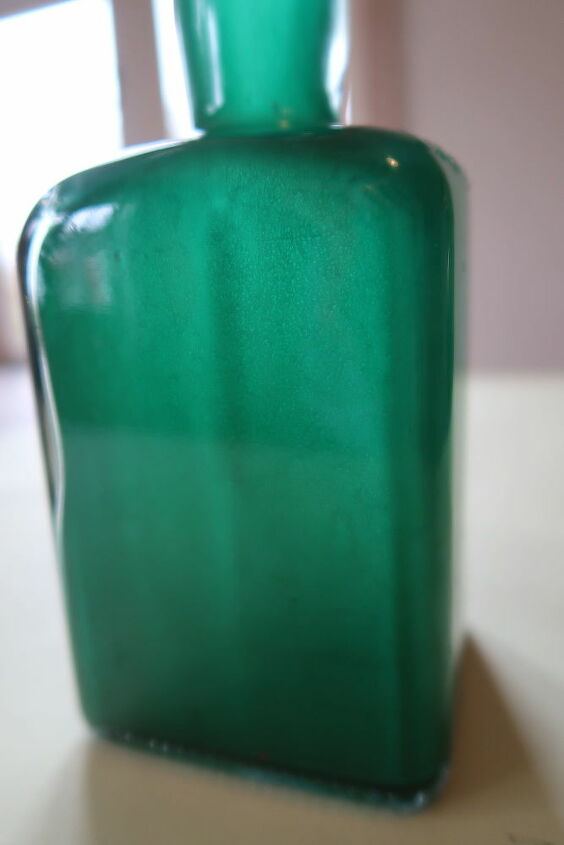
Place the bottle in the oven on it’s lowest setting and bake until the coloured glue is dry and transparent. I checked mine after 20 minutes and gave it another 20, so it took about 40 minutes in total. Jars or a wider necked bottle may well need less time.
Leave to cool before displaying however you choose. Please note this finish is not waterproof, so it is not suitable for the inside of vases or anything you drink from.
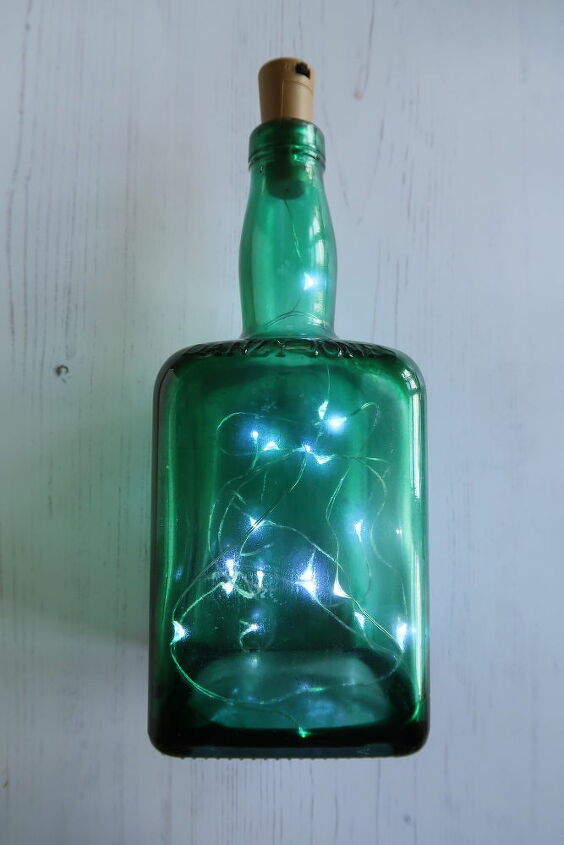
To turn my tinted glass bottle into a light, I used LED wine bottle lights (Amazon). They are available both in battery and solar versions and consist of a ‘cork’ power pack and a string of fairy lights on a wire that you push down the neck of a bottle.
Tinted glass bottles work beautifully with these lights even without any further embellishment, but my daughter had set her heart on having a coastal themed lamp for her bedroom, so we decided to embellish our bottle further.
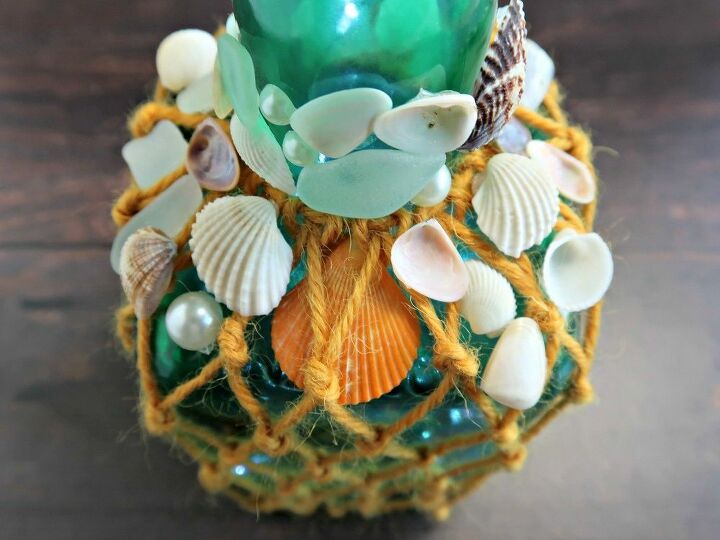
We knotted some string to make a fisherman's net to cover our bottle and picked out some pretty shells, sea glass and pearls to decorate it with.
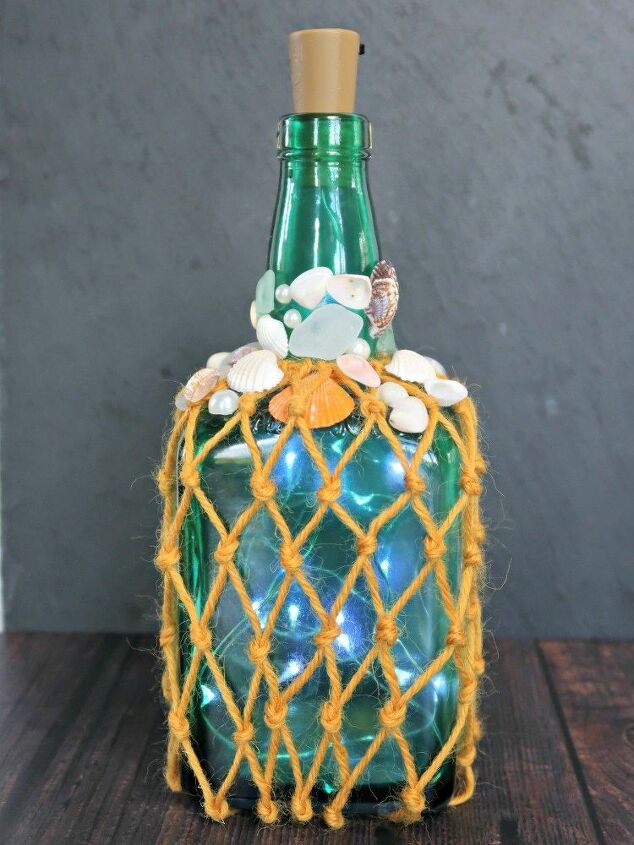
And here is our finished light up bottle. The tinted glass is coloured a beautiful sea green and decorated with our pretty beach finds. It’s a lovely way to re-use a glass bottle and bring a little bit of your holiday home with you.
For more creative crafts using fairy lights check out our twig chandelier, or acorn cap fairy lights and our stunning woodland table decoration, all of which can be found over on our blog.


Comments
Join the conversation
-
I love it. The sea shells and string give that extra OOMPH! Great share.


Frequently asked questions
Have a question about this project?