


How to Make a Tissue Box Cover
5 Materials
$3
2 Hours
Easy
Hello there!
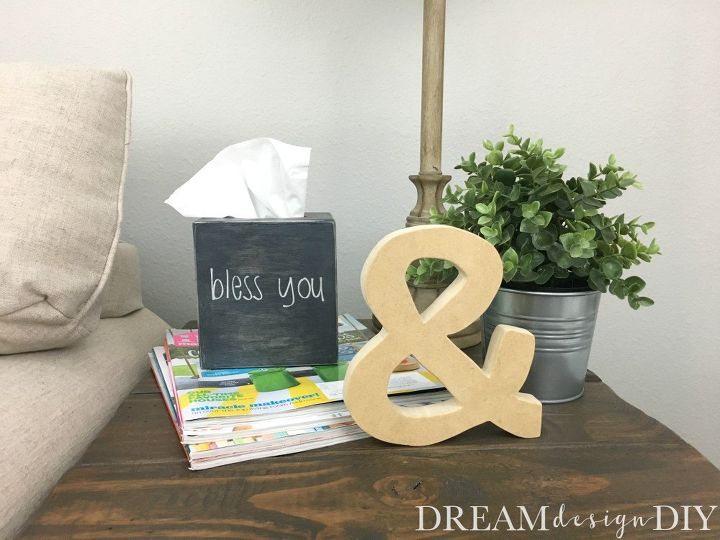
Want to cover up those eye sore tissue boxes? Granted over the years the look of them has improved. However if you want to learn how to make your own wood tissue box cover and add your own flair then stay tuned.
Before...
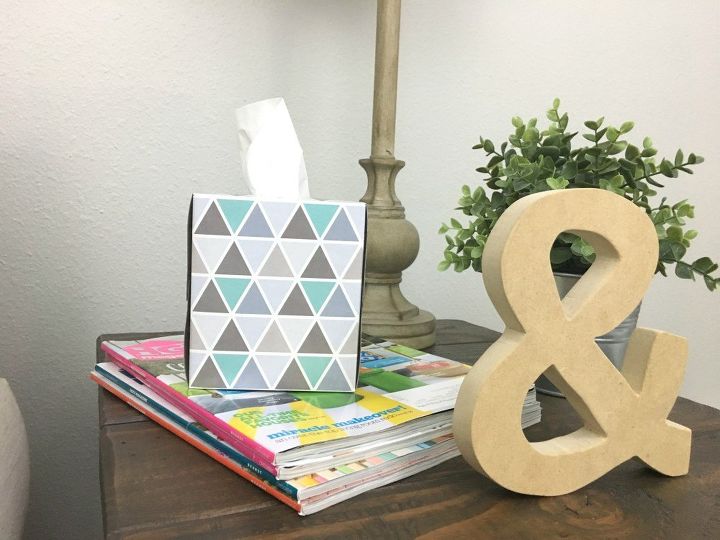
I was able to make this out of scrap 1/4 inch plywood and fit it perfectly to cover the Costco Kirkland brand tissue box. When I purchased pre-made tissue box covers in the past they didn't fit my box as well.
So lets get started!
CUTS FOR TISSUE BOX COVER
* These cuts are based on the small Costco Kirkland tissue boxes that measure 4 3/8 inches wide by 5 inches tall.
- 2 - 1/4 inch plywood at 5 1/4 x 4 5/8 inches - inner sides
- 2 - 1/4 inch plywood at 5 1/4 x 5 inches - outer sides
- 1 - 1/4 inch plywood at 5 x 5 inches - top (recheck after sides are assembled to verify measurement)
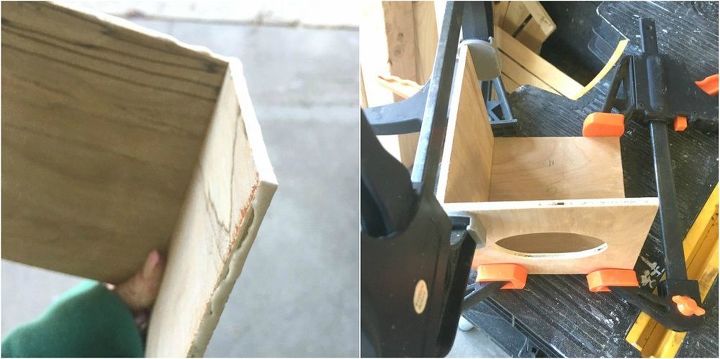
Step 1) I started out by attaching the side pieces together with wood glue and clamps. Make sure the 5 inch piece is glued on the outside edge of the 4 5/8 inch piece. Use a square to help with keeping 90 degrees and then clamp in place. If you have a pin nailer that would be perfect for this project and a lot quicker. I realized after I completed this project that I did actually own a pin nailer :-?.
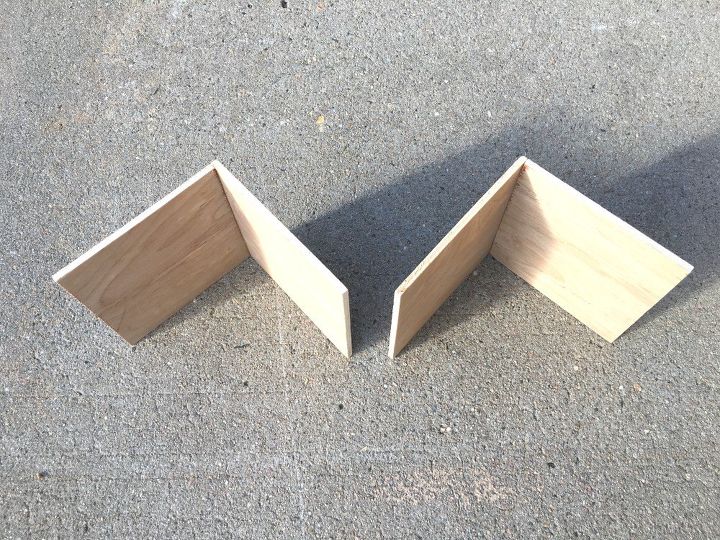
*Tip - If you don't own a pin nailer it helps to get creative and improvise so here is what I suggest. Use the inside of a box or two pieces of scrap wood and create a 90 degree angle. Using the wood either nail or clamp in place to maintain the 90 degrees. The glue causes the tissue box pieces to slide around making it a challenge to use a clamp while the wood glue is drying. I used this contraption that I found in my scrap wood and clamped the sides to it while the glue dried. I laid some plastic wrap between the two pieces to prevent the glue from sticking.
Repeat this step for the other two sides and allow the glue to dry.
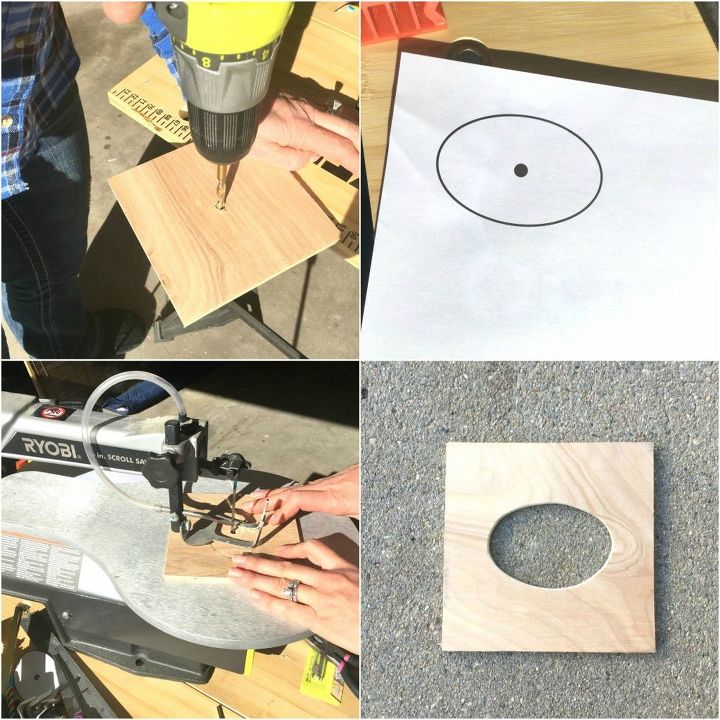
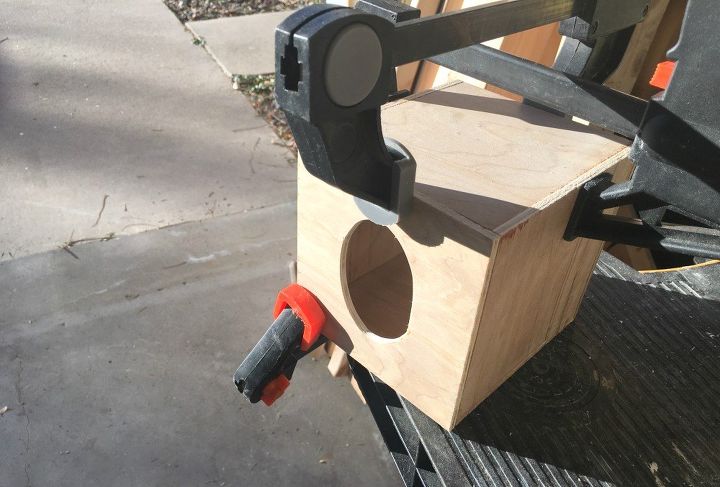
Step 2) For this step I dry fitted the two pieces together, measured and cut the top 5 x 5 inch piece. Then I created a quick oval image on my computer to cut for the opening. I wanted the opening to be slightly smaller than the actual tissue box opening. I traced the oval on the wood and then drilled a hole and cut out the oval with my scroll saw.
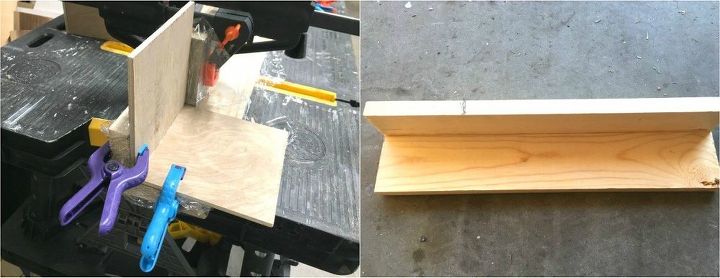
Step 3) Next I assembled all the sides together. For this I applied wood glue to the top edges and appropriate side edges. I attached the sides to the top, clamped in place and allowed the glue to dry.
Then I repeated this step for the last side pieces.
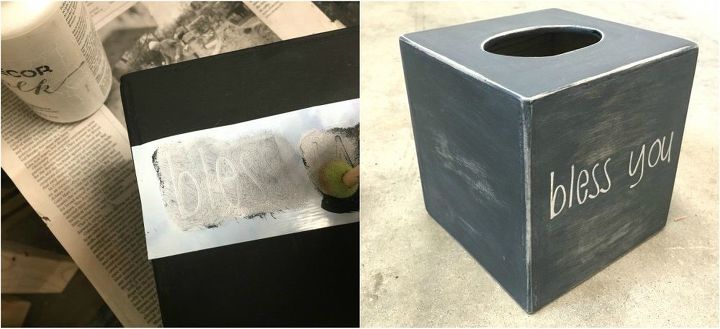
Step 4) I applied wood filler to all of the edges, allowed to dry then sanded the entire piece. I painted the piece with black chalk paint and applied a "bless you" stencil. I started out with applying the same black chalk paint to the stencil to prevent the stencil from bleeding and then I applied a couple coats of white chalk paint to the stencil. When the stencil paint dried I sanded all the edges, letters and other spots to give it a worn look. Finally I added a white wax coat sealer and wiped it off immediately. The white wax added a perfect softness to the box and brought out some details to the piece that I loved.
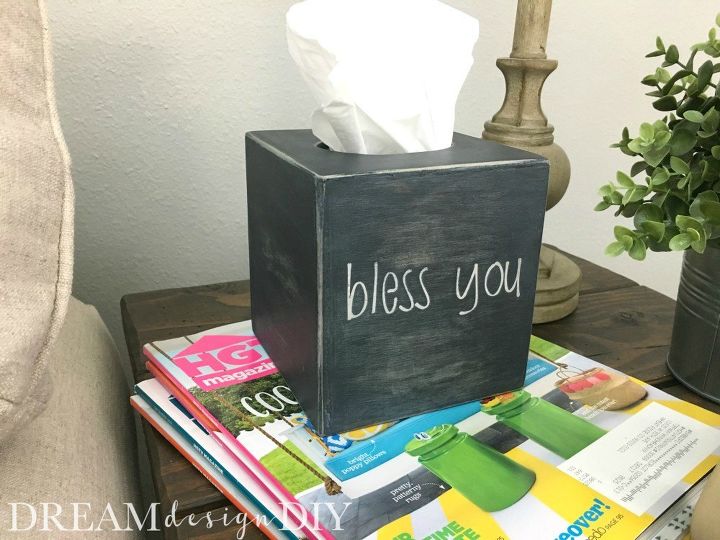
Hope you enjoy this DIY and come up with some fun designs to add to your box!
If you are looking for some other farmhouse wood projects to DIY check out this large Welcome Shiplap Sign and these Farmhouse Style Coasters made with large popsicle sticks.
Thank you for hanging out and Happy Building!
Tiffany

Want more details about this and other DIY projects? Check out my blog post!


Frequently asked questions
Have a question about this project?