


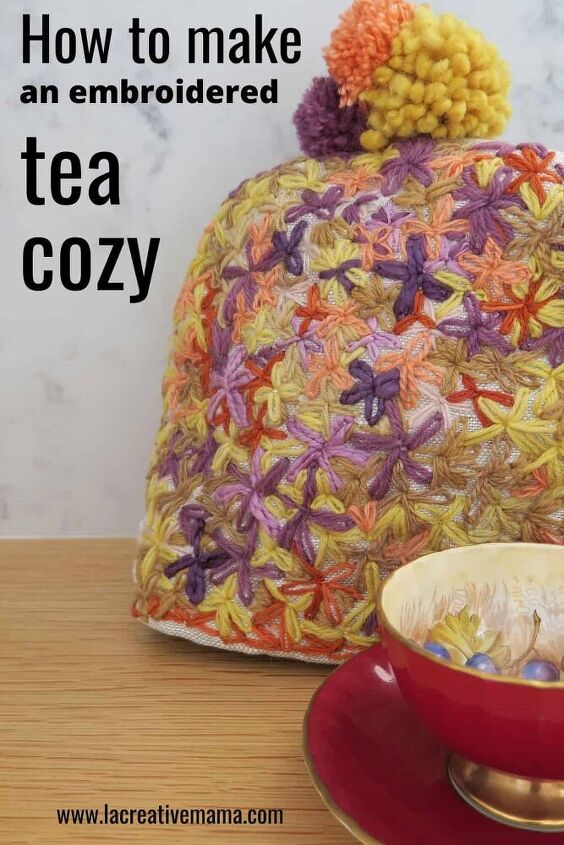
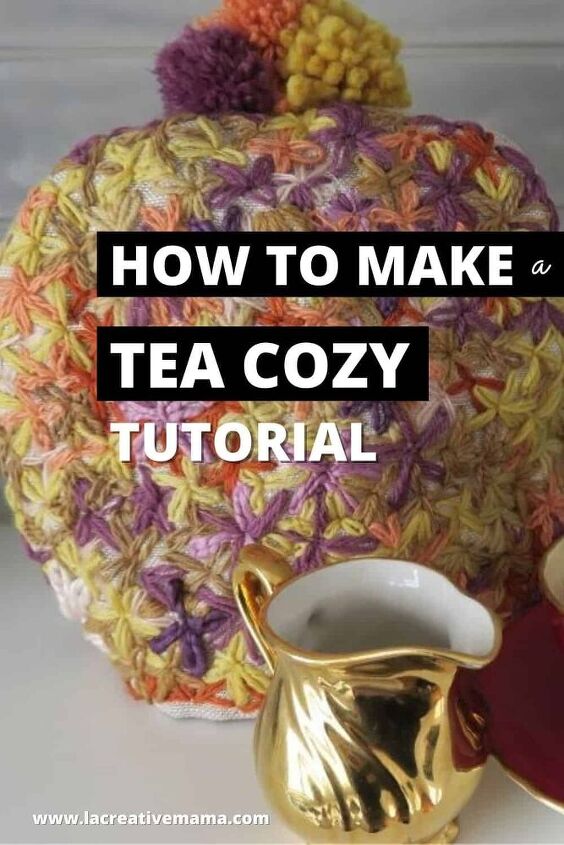
How to Make an Embroidered Tea Cozy
Hi Creative Mamas! I can’t wait to share with you how to make a beautiful embroidered tea cozy that will become the center of attention in all your future tea parties!
Call me old fashion, but there is nothing that I love more than to host an afternoon tea with lots of sweet treats, lovely crafty friends and a beautifully dressed table.
Having a hand embroidered tea cozy to claim the center spot at the table makes my afternoon tea parties a thing to remember. In this tutorial I will show you step by step how you can make your own embroidered tea cozy and become a tea party goddess!
All you need is a good sewing machine, a few hand sewing needles and your favorite colored yarn.
What is a tea cozy used for?
A tea cozy is used to keep your tea warm while inside the tea pot. It’s an old fashion custom since in the olden days (not that long ago ) boiling jugs didn’t exist and water was boiled on the stove.
It made sense to bring a couple of tea pots to the table and to make sure that the water would remain hot/warm. Hence the use of the tea cozy, it kept the water nice and cozy
What is embroidery used for?
Embroidery is the decoration of a piece of cloth through a series of stitches and it’s an amazing sewing craft to learn. It’s very easy to get started. You only need to learn a few basic stitches and you can embroider the world!
It’s simplicity is what makes embroidery so sophisticated. Simple materials are all you need combined with a little bit of time, practice and patience. for me embroidery is a vehicle for relaxation and calmness. It’s my stress release 🙂
Where did the idea of an embroidered tea cozy come from?
I always had knitted tea cozies around my house since all the women in my family are knitters. Knitting is something I grew up with but for whatever reason I have never been inclined to knit myself.
I adore working with wool yarn but my passion lies in naturally dyeing these amazing wool threads and yarns and off loading the knitting part to my mom and aunties :).
So, because of this reason I never really made any tea cozies. However a few years ago I visited an amazing exhibition in Auckland New Zealand called “With Bold Needle and Thread” by Rosie Mcleod.
It was a celebration of domestic stitching handcrafts of women from the past. A celebration of a time in which slow sewing crafts were part of every day life.
I was enchanted with the exhibition because it reminded me of my grandmothers and a life from the past. In her book, which was the publication that was part of the exhibition, Rosemary walks you through many different projects which she had collected from vintage magazines.
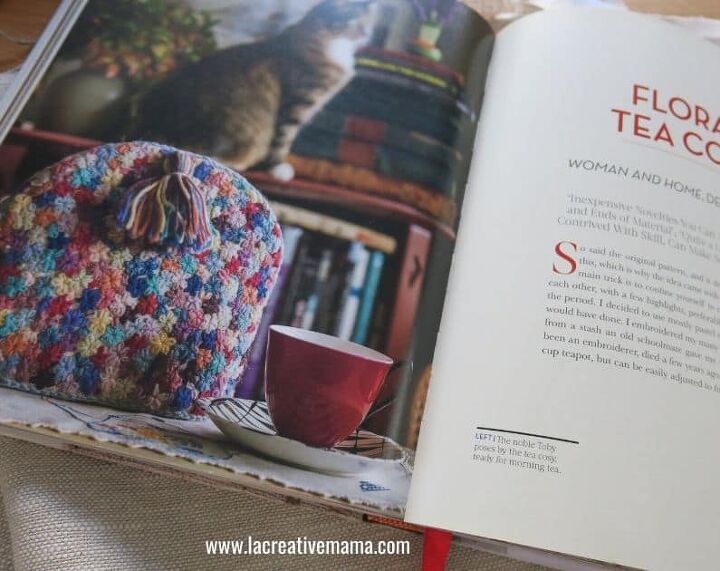
There are many tea cozies in this book, but this embroidered tea cozy one caught my attention many years ago :). Last week I went into my workroom and found my cutting table covered in naturally dyed yarn which I had dyed the week prior.
I decided to embark in my own version of Rosemary’s embroidered tea cozy and here is my step by step tutorial on how to do it :).
Basic Embroidery Stitches for Beginners
https://lacreativemama.com/embroidery-stitches/
In A Guide to Embroidery Stitches I teach you how to get started with the main and easiest embroidery stitches which are:
- Backstitch
- Running stitch
- Blanket Stitch
- Whipstitch
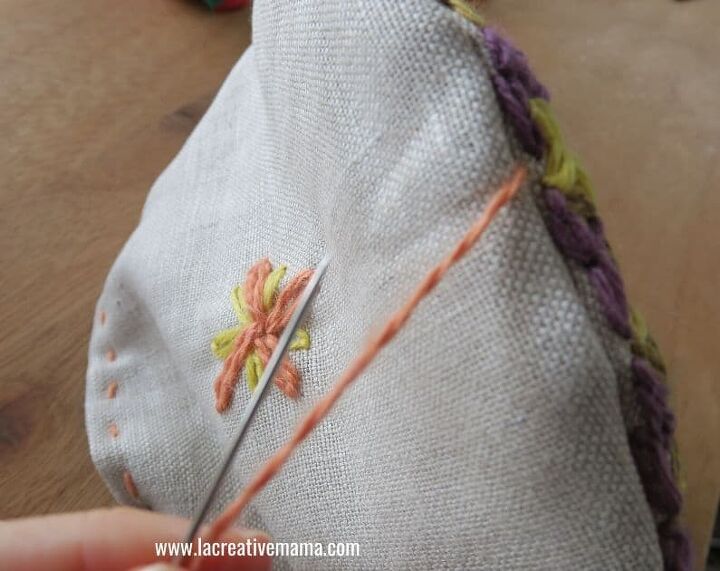
In this tutorial I will show you how to make a Lazy Daisy Stitch which is a variation from the chain stitch. Watch the video tutorial below for a quick and easy visual demo.
Embroidery stitches video. How to make a tea cozy? – Embroidered Tea Cozy Tutorial
Materials and Equipment:
- Sewing Machine
- Embroidery fabric
- Different colored yarn
- Batting/wadding
- 100% Cotton fabric for lining
- Pom poms, Click here for pom pom tutorial https://lacreativemama.com/how-to-make-perfect-pom-poms/
- Tea Cozy Pattern (available in my FREE RESOURCE LIBRARY— get the password for free by filling out the form below)
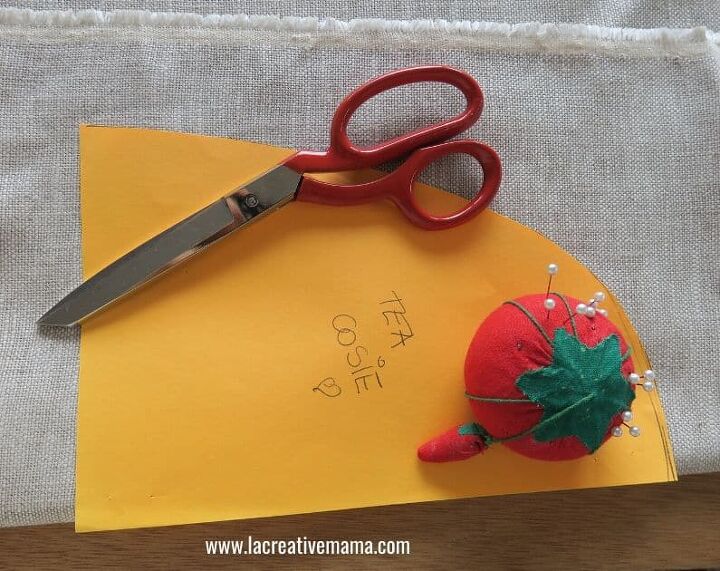
Step 1:
Download your Free Tea Cozy pattern by completing the form above.
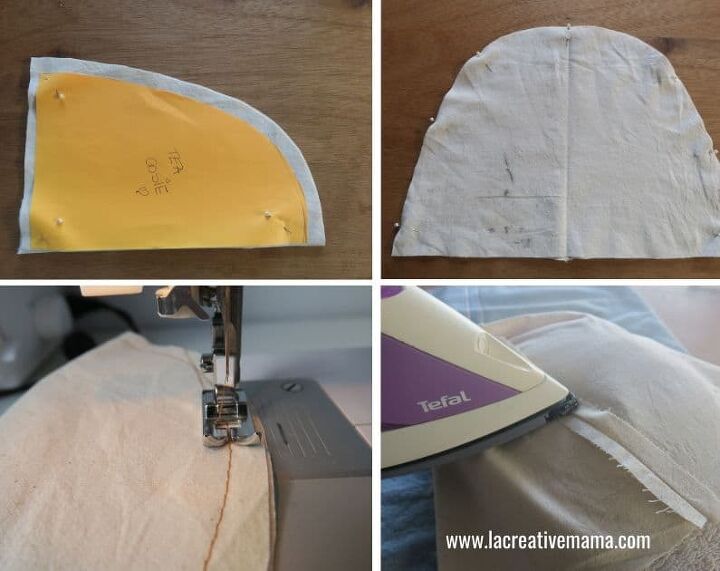
Cut around the pattern piece. Pin it on top of your embroidery fabric and cut around it allowing for your seam allowances. Make sure to fold the fabric and cut on the fold as shown in illustration below.
Cut two pieces (front and back).
Step 2:
Choose your combination of colored yarn wisely. Make sure you like the colors and that they go well together. My secret to color combination is to use natural dyed yarn because the colors that you get from natural dyeing always go great together
Once you have cut your two pieces of fabric its a good idea to serge around the edges or run a zig zag stitch to avoid fraying while you embroider.
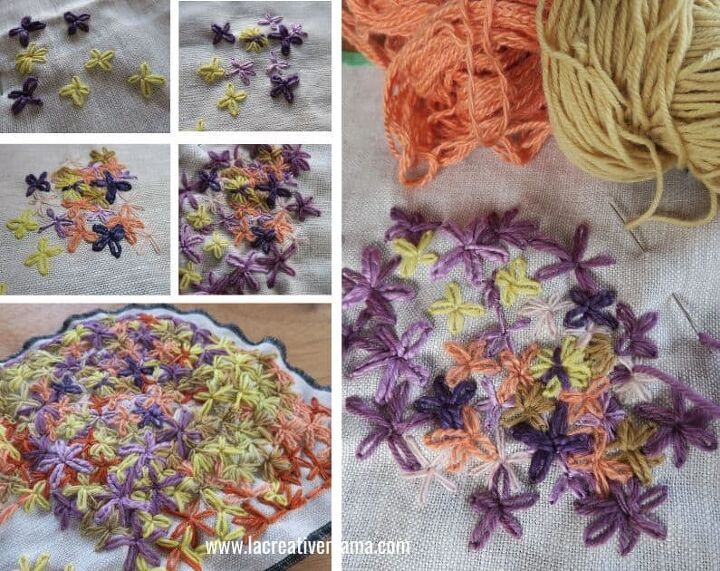
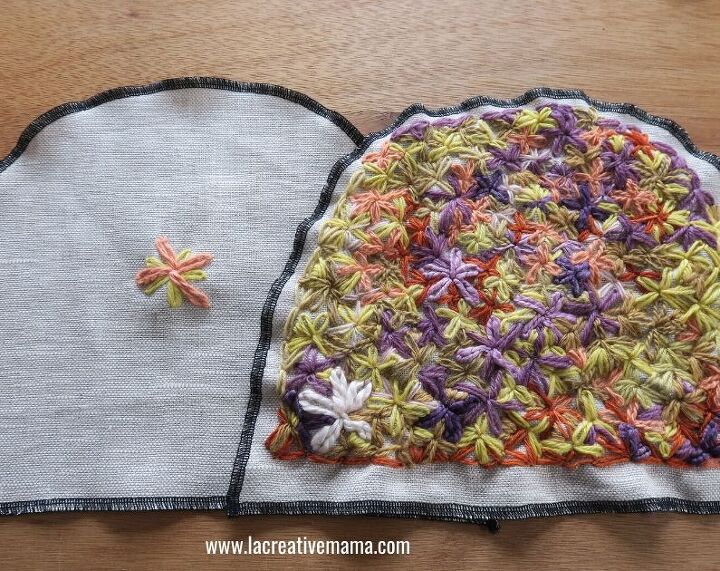
Start decorating the front piece with a lazy daisy embroidery stitch. I started with one color yarn and then changed to a different color yarn as I kept going. There was no plan, I just followed my instinct.
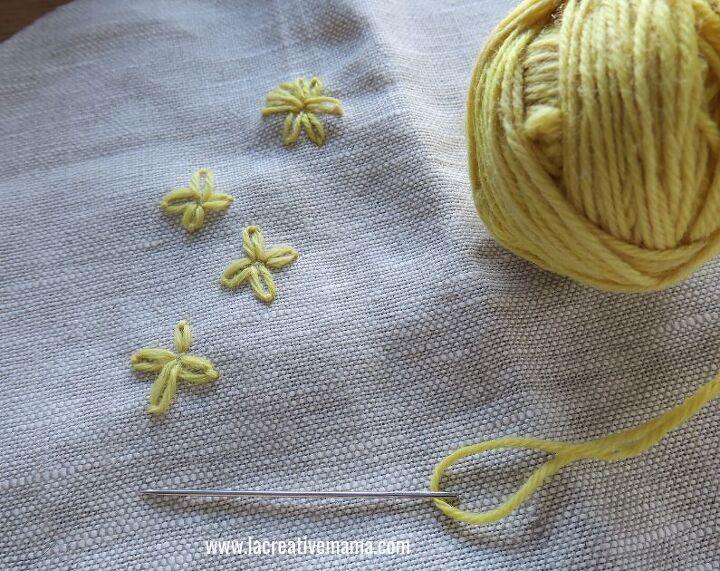
Make sure to watch the video above which shows how to make a lazy daisy stitch. Cover the whole front with different colored lazy daisies and make a big one in the center of the back piece.

Step 3:
Place front and back pieces together and make sure they are still the same size. Shrinkage will happen from all the embroidery and you want to make sure that both front and back are the same size before you continue. If the back piece is bigger than the front one make sure to trim it to the appropriate size.
Step 4:
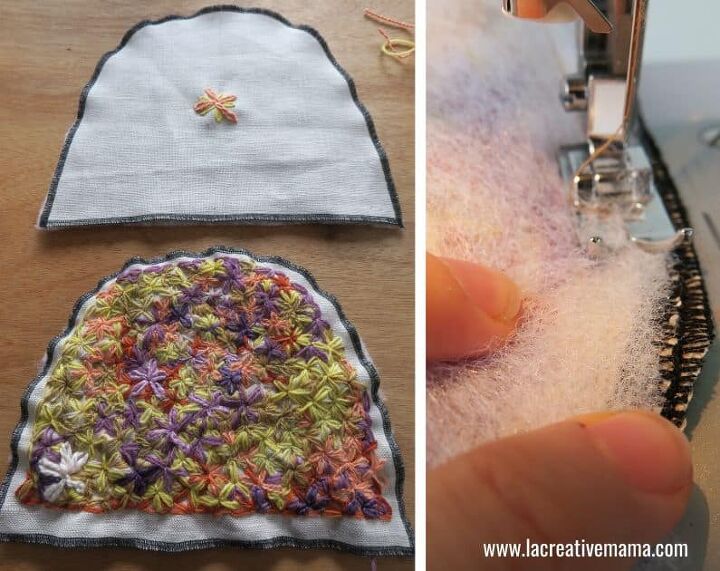
Cut two pieces of wadding/batting. Place the embroidered fabric right sides together.
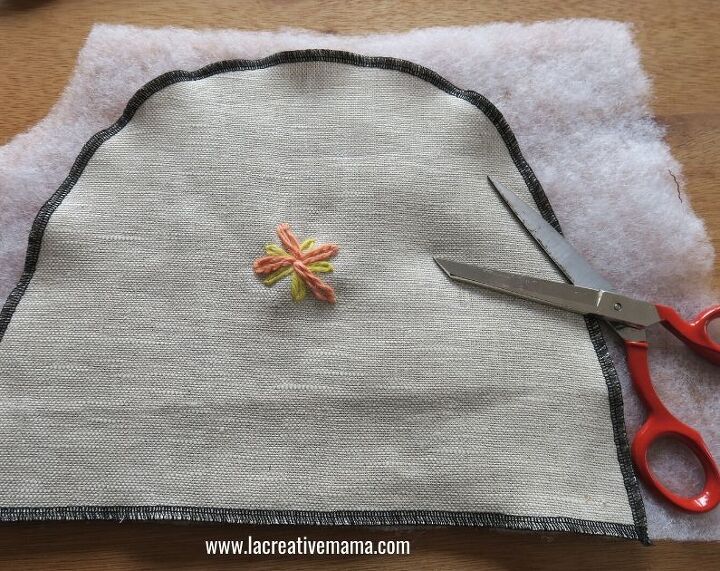
Place wadding/batting on top of front and back pieces and sew all four layers together.
Step 5:
Flip inside out and put aside while you make the lining.
Step 6:
Cut the lining pieces by placing pattern on the fold just like you did with the outside pieces. Pin pieces right sides together and sew. Press seams open. Hem.
Step 7:
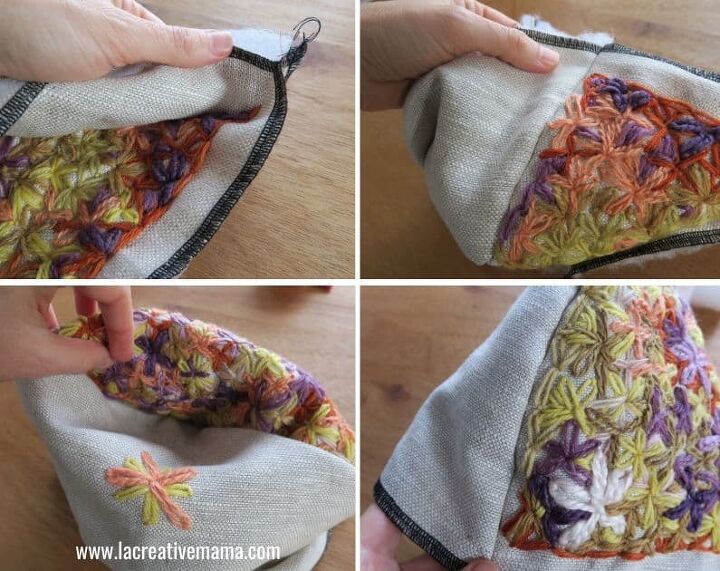
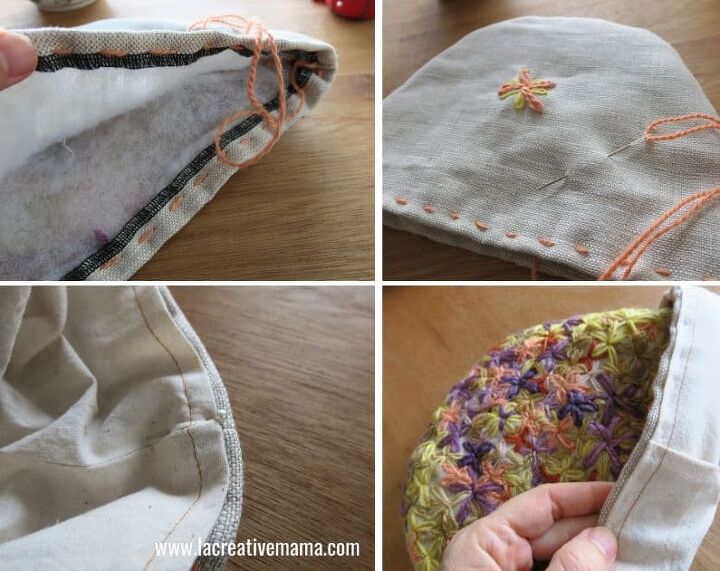
Now it’s time to combine all the layers together. Make a hem on the outside layers by sewing a running stitch through the embroidered layers and the wadding/batting. Insert the lining and attach the hems together with an invisible stitch (or herringbone stitch).
Then, insert a needle (threaded with one of your colored yarns) through the inside of the tea cozy. It needs to go through all the layers. Bring it out through the top middle as shown in illustration below.
Step 8:
Make 3 pom poms in 3 different colors.
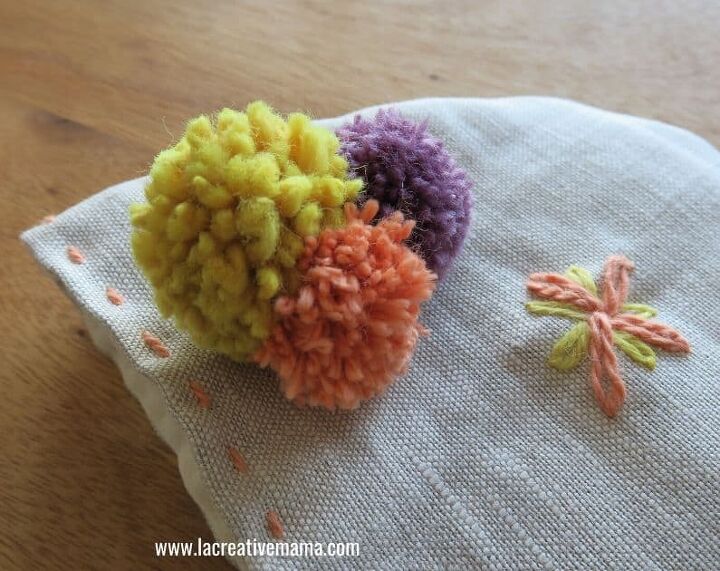
Attach the pom poms to the thread at the top of the tea cozy. Make sure you make a few knots so that the pom poms are secured
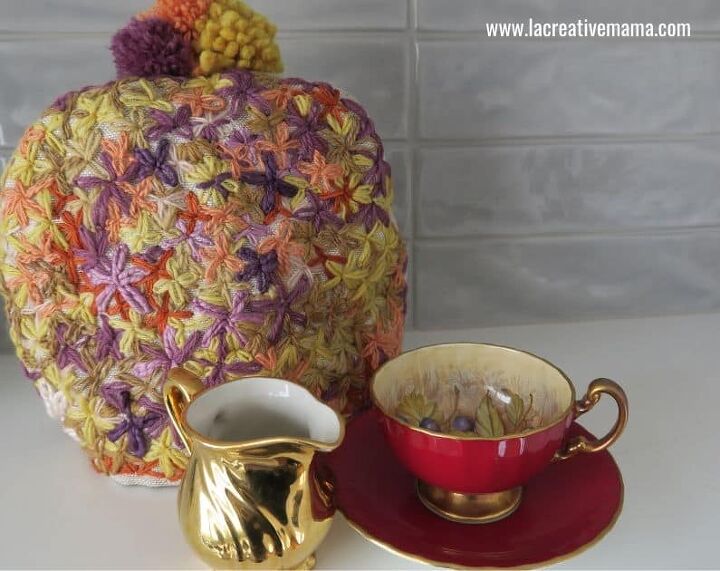
Voila the tea cozy is ready to go!!!!!
Check out these tutorials so that you can make beautiful handmade gifts using embroidery stitches
- Hand embroidered pillow that your kids will love
- How to make an applique pillow by embroidering appliques
- How to make a simple quilt in one day
Save this tutorial to your favorite Pinterest board


Comments
Join the conversation
-
Hi Linda, thanks :) Great question! There are many different tea cozy patterns and the ones I have at home that have an opening are usually made using crochet or they are knitted. The ones I have always made by sewing are like the one in this post, they are easier to make and will keep the tea super hot inside all that fabric cover :)


Frequently asked questions
Have a question about this project?
Oh my! That is just beautiful! But isn’t there usually an opening on one seam for the teapot’s spout to come through?
Linda W