


HOW TO MAKE YARN WRAPPED DECORATIVE BRANCHES
These yarn-wrapped branches are easy to make and can be used to decorate mantels or side tables. These decorative branches are perfect for your winter home decorating.
He almost threw them away!
Twice!
You see I gather stuff. I can go for a walk, just an easy stroll through the neighborhood, an everyday walk so to speak.
And come back with my pockets full of finds.
Someday finds.
Little treasures that have great potential for beautiful creations.
I can see it in my mind: the possibilities for wonderful transformations.
My house, garage, attic, and craft room are full of those treasures.
But my roommate doesn’t always get it.
Aargh, I know! How could he possibly think it is waste? That it is garden trash? That it is rubbish to be discarded?
So I caught him almost throwing out these branches I had dragged home with me.
At least he asked first…
I have trained him well…
But when I had saved my branches two times already and they were in danger of being thrown out for the third time I knew it was time to step up my game and start creating.
I decided, my home could use a bit more winter home decor. Some decor that would add interest and texture and a bit of fun.
TO SEE HOW I DECORATED MY HOME FOR WINTER CLICK HERE (30+ tips for a cozy winter home).
I also wanted it to be easy and something I could do while binging some tv series.
I rummaged through my craft room and found a whole bag full of leftover rolls of yarn in various shades of white. I knew they would be perfect for what I had in mind
So I set out to create some yarn-wrapped decorative branches.
If you happen to have some sticks laying around and you are wondering what you can make out of tree branches then stick around (pun intended) and see how to create home decor with them.
DIY Yarn Wrapped Decorative Branches Tutorial
1: Gather Materials
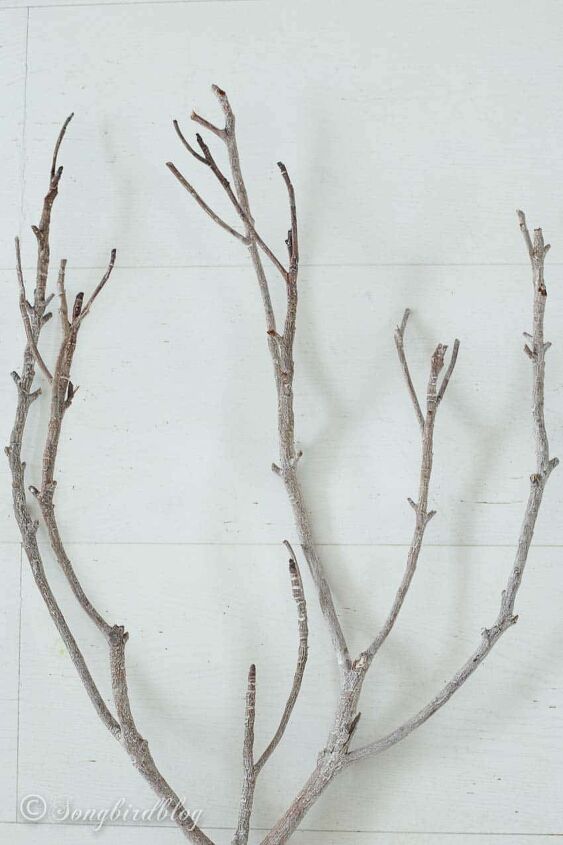
You will need an assortment of tree branches and sticks. It is best if you have collected them some time ago and let them dry.
Select twigs that have some side branches, but snip off the ones that are too small. Keep it simple.
If you want you can give your branches a light coat of spray paint to make them less dark. But that is totally optional.
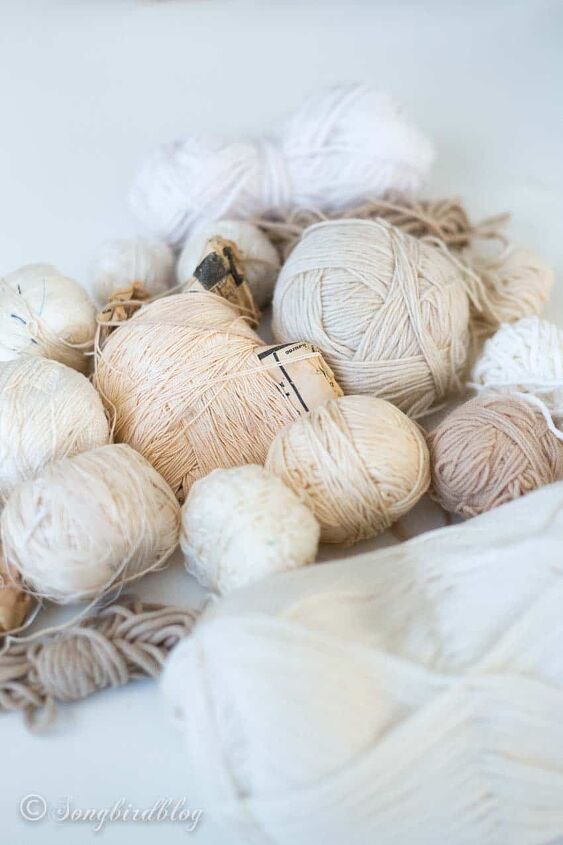
You will also need a fair amount of yarn. Any yarn or twine will do but the chunkier it is the faster the wrapping goes. I choose winter white colors and gave preference to my wool yarns because they fit my winter craft vision the best.
If you are going for a more modern look, then using all kinds of colors could also work really well.
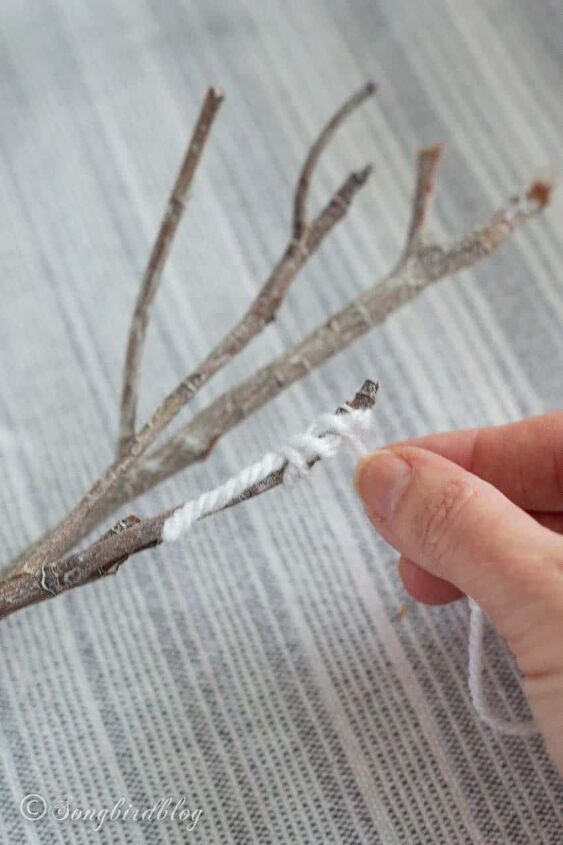
2: Wrap The Branches
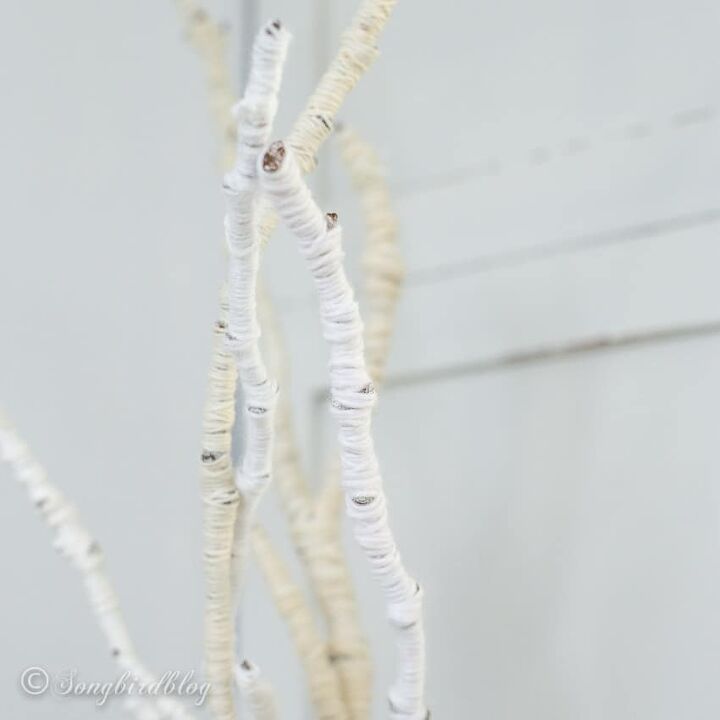
This is really simple to do. It just takes time and patience.
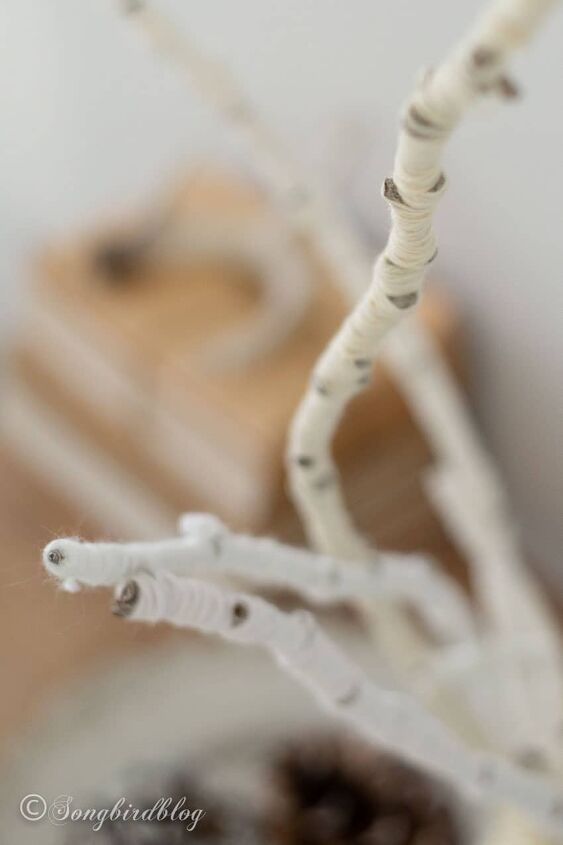
Start at the top. I started about an inch from the tip and made a loop. Then I started wrapping up to the tip covering the beginning end of my thread. I then continued wrapping down the brach until I hit the spot where a side branch met. I tied off my yarn with a simple knot and cut it off with a generous amount of thread still hanging loose.
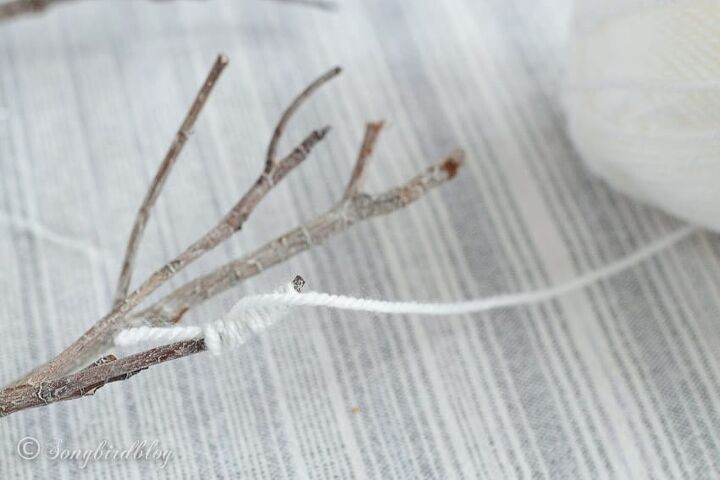
Then I started with the next side branch. Working my way down from that one.
Once a couple of side branches had met I would continue wrapping down the stem, covering the extra bits of loose hanging thread as I went along (this secured all the wrapped yarn so it would stay in place).
Just wrap and twist and wrap. Keep it tight and snug, but be careful not to break the branches.
3: Arrange Branches
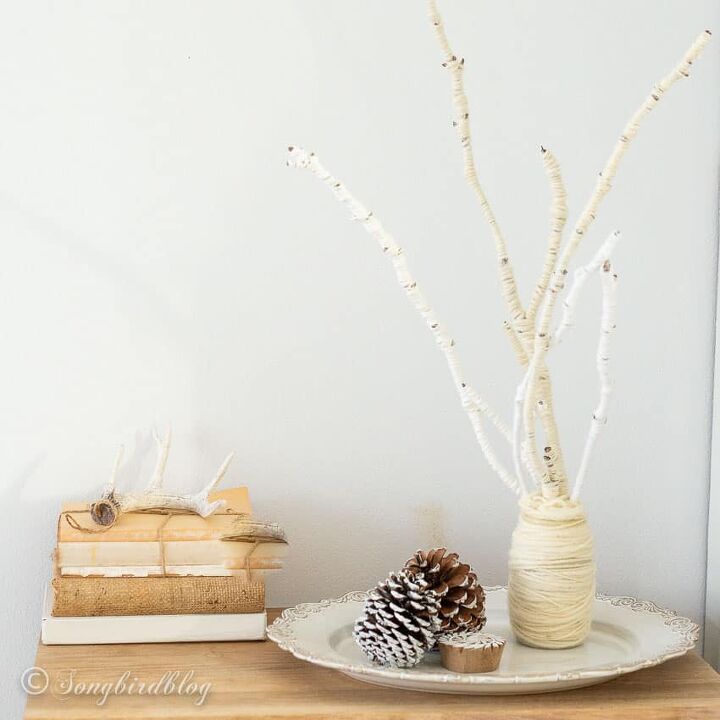
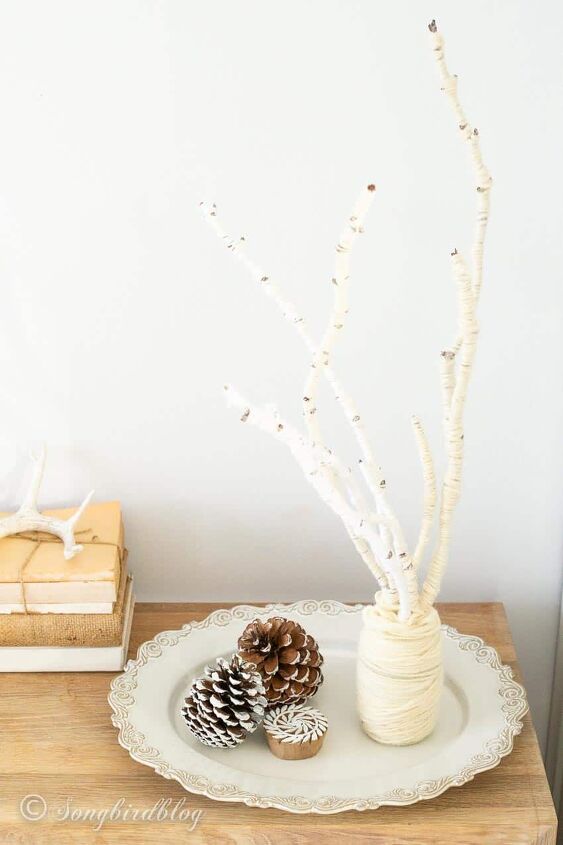
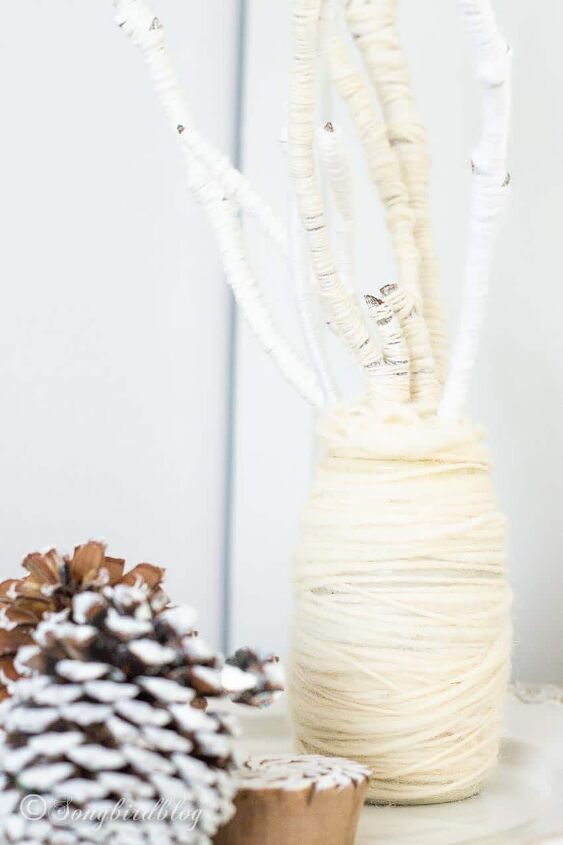
After I had done about four branches like this I arranged my yarn-wrapped twigs in a small pot (a vase, jar, or bottle could have worked too). I really liked how my tree branch home decor was shaping up. I fiddled with the arrangement until I liked how the branches looked together in my old mustard pot.
4. Wrap the container
To make my jar fit in with my branches and to keep the sticks into the place and position I had put them I decided to tightly wrap the jar itself too.
I started at the base of my biggest branch, widened my wrapping to include all the branches together, and then continued down the jar itself.
The surface of my mustard jar was very smooth and the bottom had no rim to hold the yarn in place, so I used a drop of glue here and there to keep my threads in place.
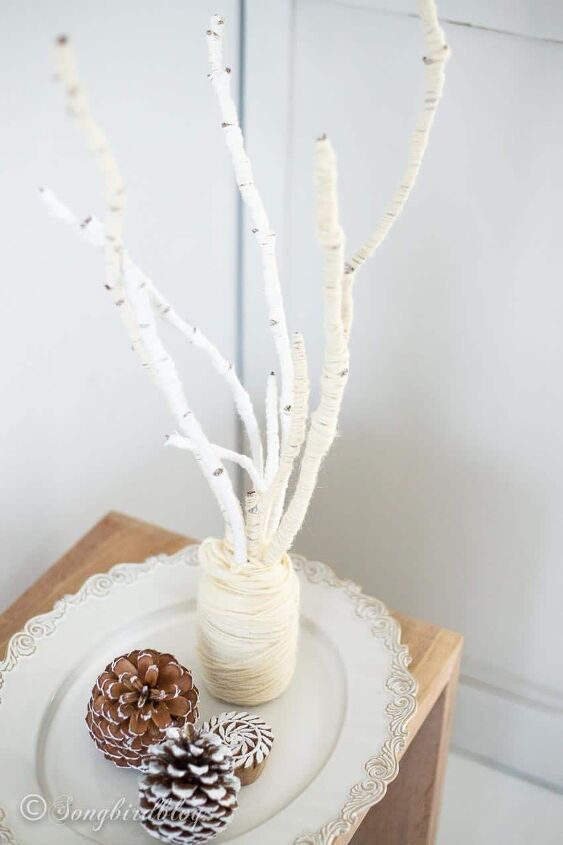
That’s it really. This is some really easy DIY yarn decor you can make. I love that it adds a touch of nature with a twist to this corner of the room.
I wasn’t at all sure how it would turn out, but now that it is finished I really like my little DIY yarn tree. I think it adds the perfect amount of wool fluffiness and soft texture to my winter home decor.
Of course, it is also a great way to recycle some leftover yarns, an old jar and to upcycle some simple, found tree branches from the yard.
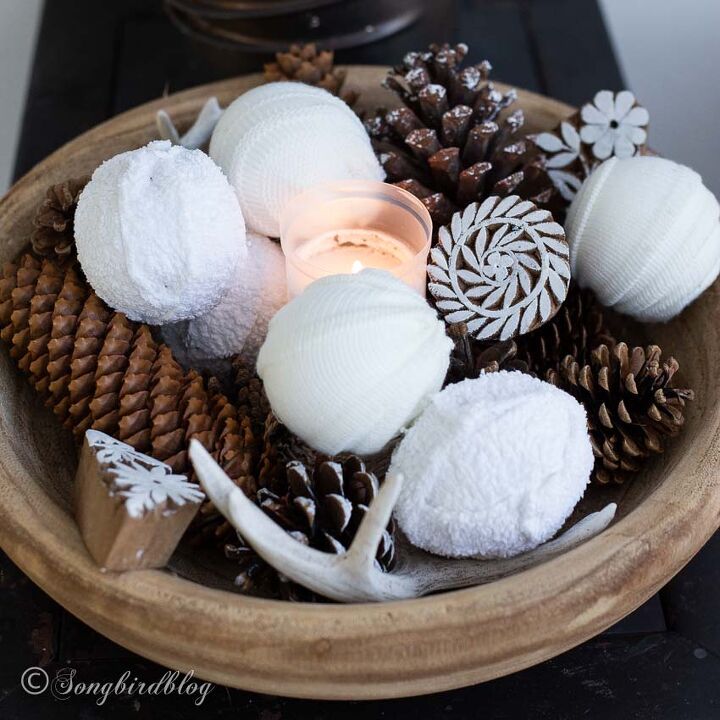
You might like my DIY faux fabric snowball tutorial too.
FIND IT HERE: DIY snowballs


Comments
Join the conversation
-
Not painting them first was a good idea as to me they now look like silver birch. My robins will look good next Christmas. Thanks.
-
What are the little brown round and triangular objects with painted white leaves on top. Very pretty arrangement.


Frequently asked questions
Have a question about this project?