


How to Upcycle a Children’s Globe in 5 Easy Steps

This project is how to upcycle a children’s globe, to take it from a toy to a pretty piece of decor, in 5 easy steps.
Globes are a lovely thing for kids to have. They’re fun to spin and there’s always somewhere new to discover.
But once you get older, a colourful map is not always something you want as decor. However, if done well, they can be a pretty little decoration.
This globe was £4.50 from a charity shop.
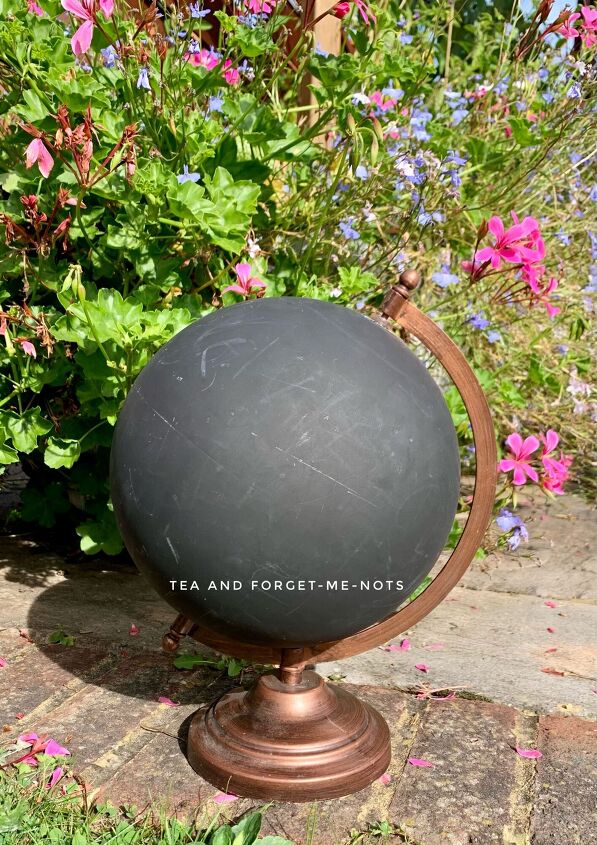
Someone had already upcycled it with chalkboard paint. Which was good for me as it meant there was already a non-slick base for my paint to stick to.
Chalkboards often seem like a good idea but aren’t always that useful. I suspect that was why this ended up at a charity shop.
Step 1. Clean
I could see that the chalkboard base was grubby so I didn’t have much faith that the frame was any cleaner.
I cleaned it with Dixie Belle’s White Lightning, at the same time as I cleaned the pine mirror in my white wax makeover.
As White Lightning needs diluting in warm water, it makes sense to try and clean a few things at the same time to get the boring prep steps out of the way.
I then gave it a quick rinse with plain water, making sure to get into the grooves of the frame.
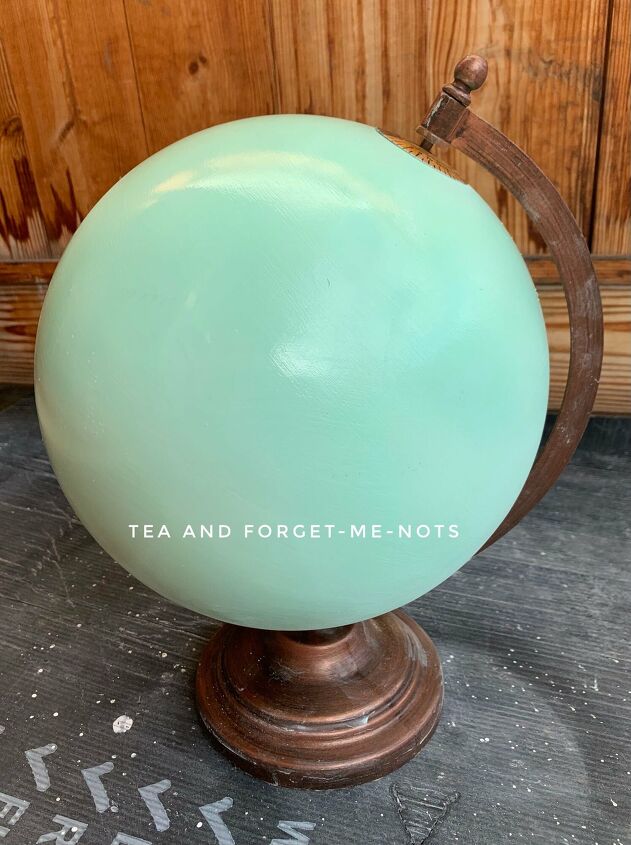
Step 2. Paint
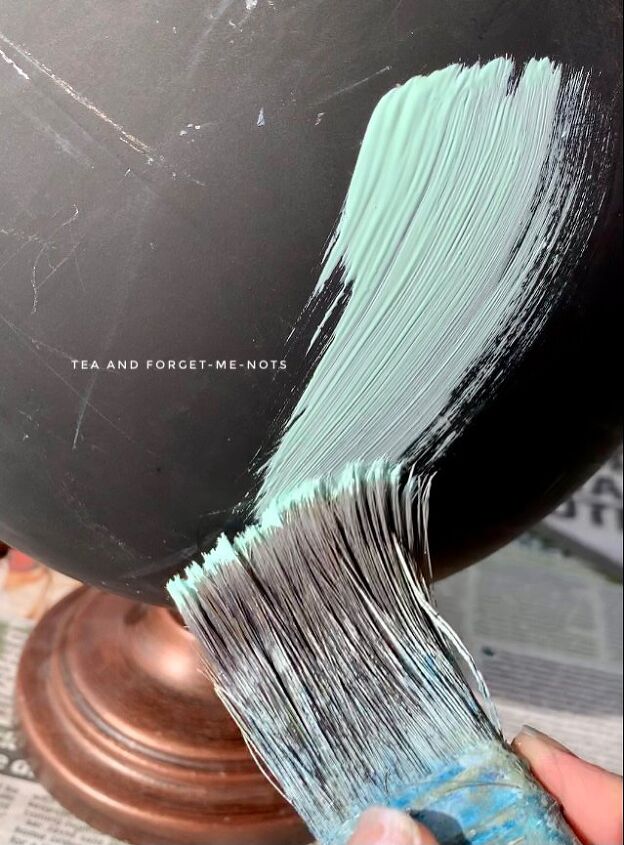
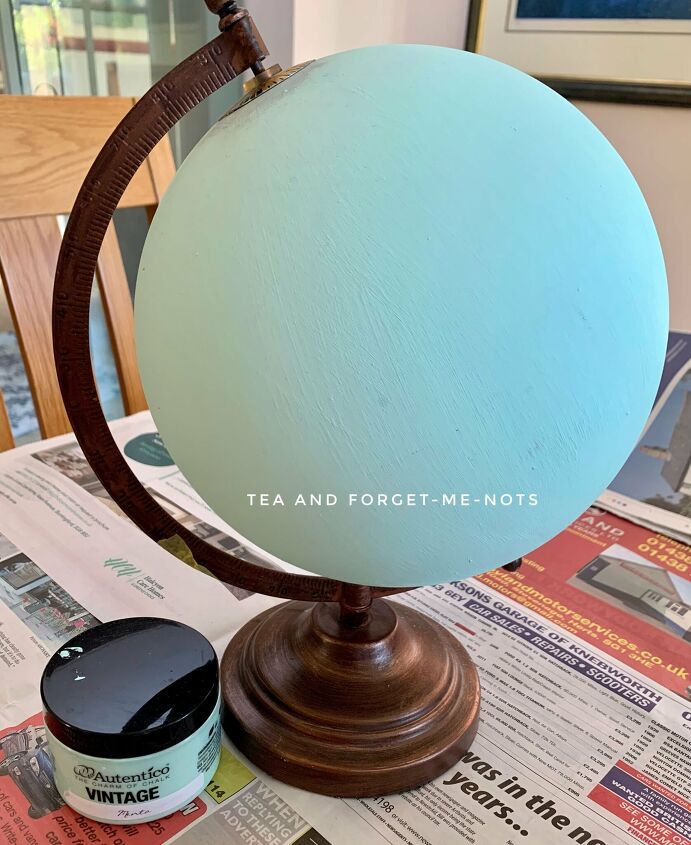
I chose the green paint, Mint, by Autentico as my base. I knew I was going to add flowers, although initially hadn’t decided if it would be a transfer or decoupage. So, it made sense to start with a nature-inspired colour.
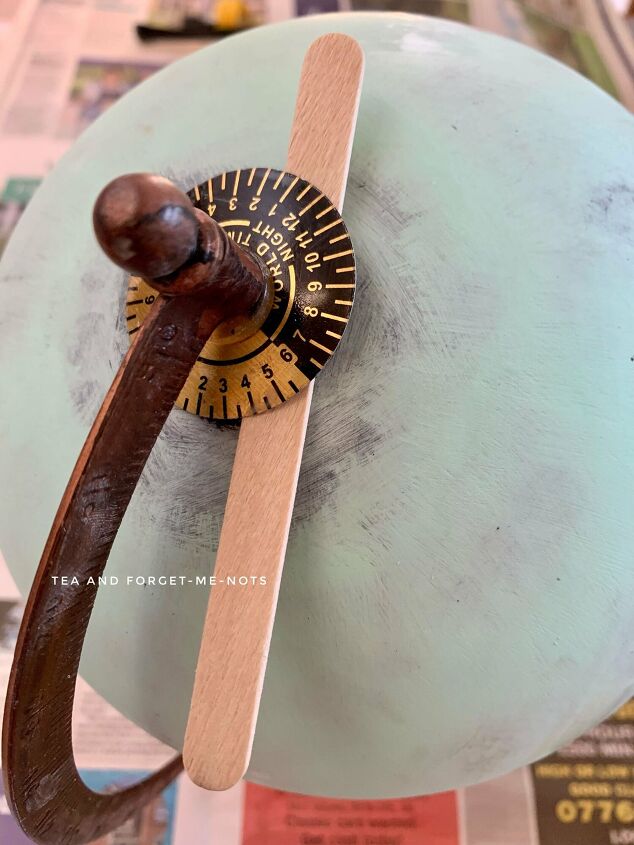
The top and bottom of the globe had these circular discs attached. I wedged them with a lollipop stick, to be able to paint neatly under them.
Have you seen my list of other hacks with household items?
I sanded between coats using 180 grit sandpaper, as the brush strokes were quite thick. This was probably because it was difficult to get an even stroke across the rounded surface.
I ended up doing three coats of green paint to make sure it was really well covered. It may have been fine with two but it doesn’t hurt to be sure.
Step 3 – Seal
Look how shiny, it’s like a bowling ball!
I used my favourite sealer on this one, Polyvine’s Wax Finish Varnish. It’s number five on my must-have products for upcycling if you’d like to see what else I recommend.
Polyvine also does a sealer called Dead Flat if you want to avoid the shiny look.
I did just one coat as it would help the transfer stick to it and isn’t something that needs to be really durable.
Step 4 – Transfer
I chose several flowers from the Redesign with Prima transfer, Spring Meadow Life.
There are so many pieces of this transfer, I recently used more of it on this fireguard makeover.
Once the wax paper backing comes off, the transfer sticks to anything it touches. It’s important to be careful about the placement as you won’t be able to reposition it.
I cut into the transfer at various points to help it fit around the globe more naturally.
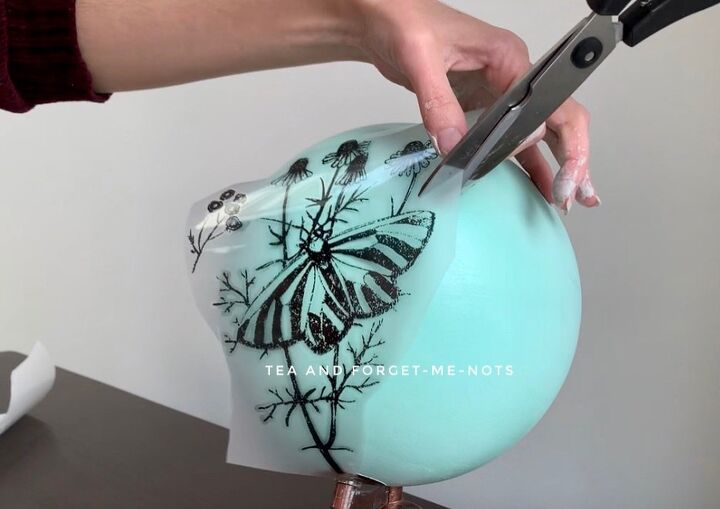
I used a plastic card to rub off the transfer, ensuring it attached well.
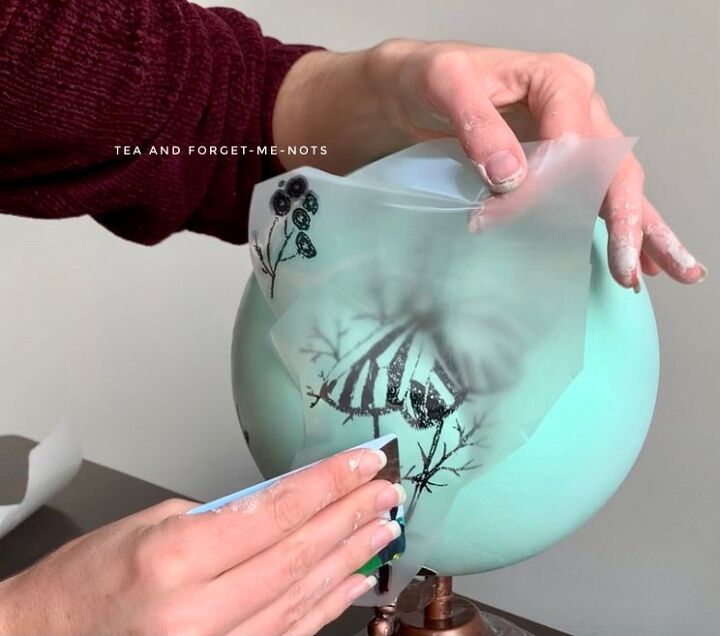
The transfer needs burnishing which means gently rubbing the edges to ensure it’s properly attached. I just used my fingers this time but you can also use a clean cloth.
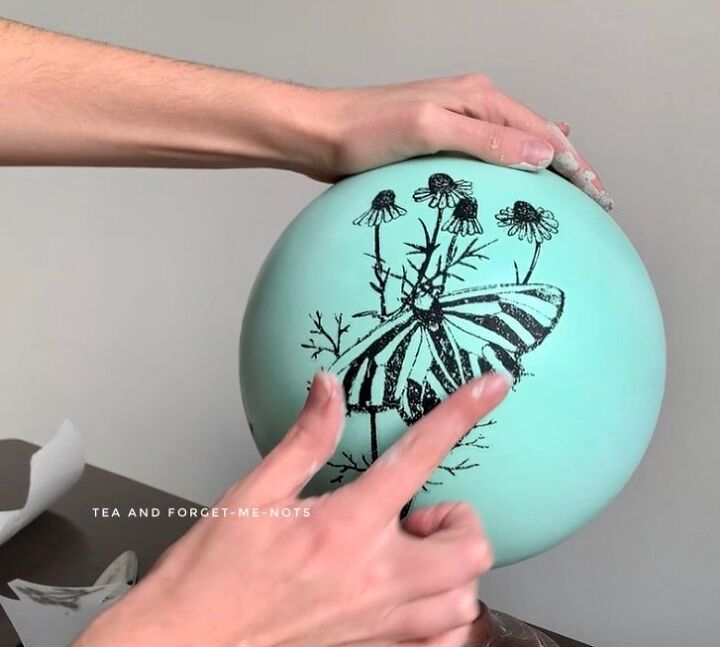
Here’s the finished piece before painting the frame.
Step 5 – Wax
Technically, this stage is paint and then wax…
I wanted to change the coppery colour of the frame as it didn’t suit the new colour scheme.
I debated between either gold or black, and in the end, used both.
I mixed the gold powder Frensheen by Frenchic, with Polyvine’s Wax Finish Varnish. By stirring the two together, it creates a thick, gold liquid.
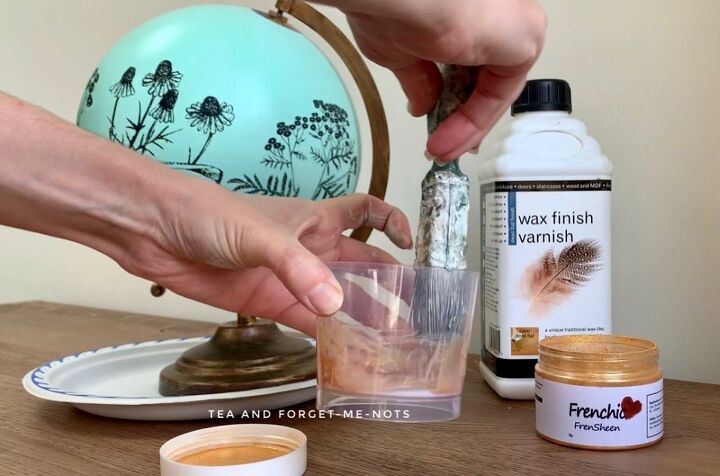
I dabbed the mixture onto the frame and base, which helps create texture. It makes it look a bit aged and more interesting than just a flat colour.
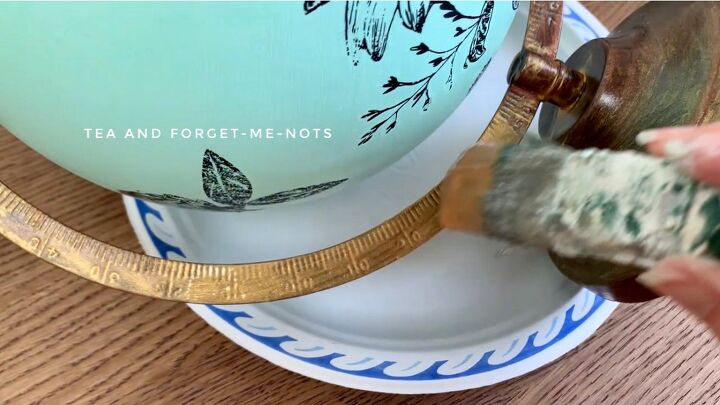
This is my professional drying station, a paper plate! I positioned the globe so that it touched as little of it as possible, so the paint didn’t stick to it.

I did an initial layer of Dixie Belle’s brown wax as I hoped it would bring out the details of the latitude markers without being too harsh of a contrast to the gold.
I quickly decided that it wasn’t a nice colour combination as it clashed with the black of the flowers. It only took a minute to do though, so I finished off the frame so that it was consistent all over.

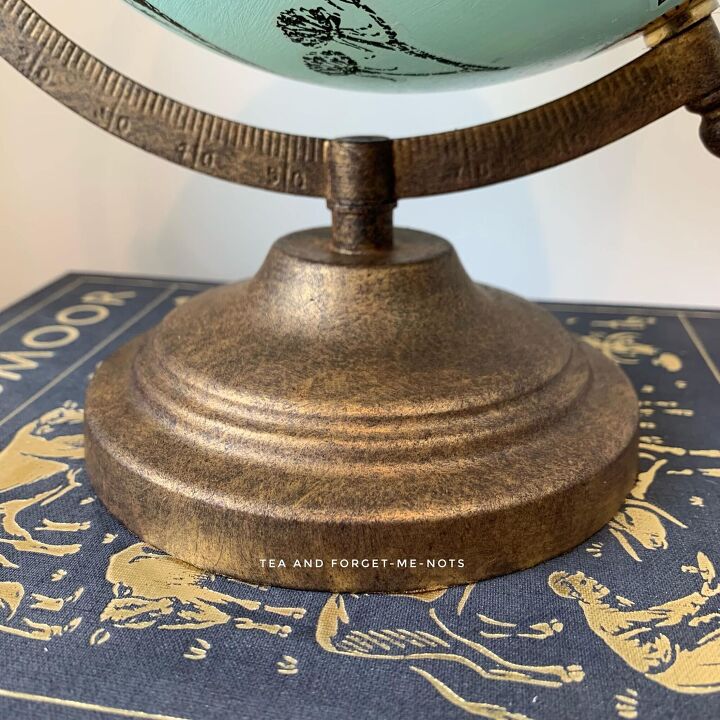
I then added Annie Sloan’s black wax on top of the gold paint and brown wax.
I just used the same wax brush as for the brown because it wouldn’t matter if there was a little brown left in the bristles.
I dabbed the black on to build up texture and used a paper towel to remove the excess.
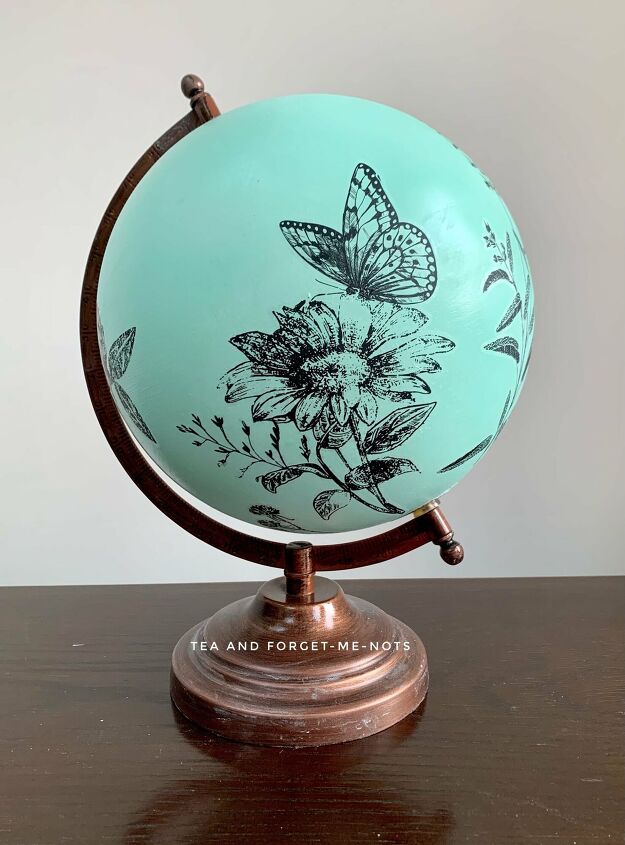
A children’s toy no longer. The globe now looks classy and unusual.

I like that you can choose which flowers to have facing you or just spin it and see where it lands.
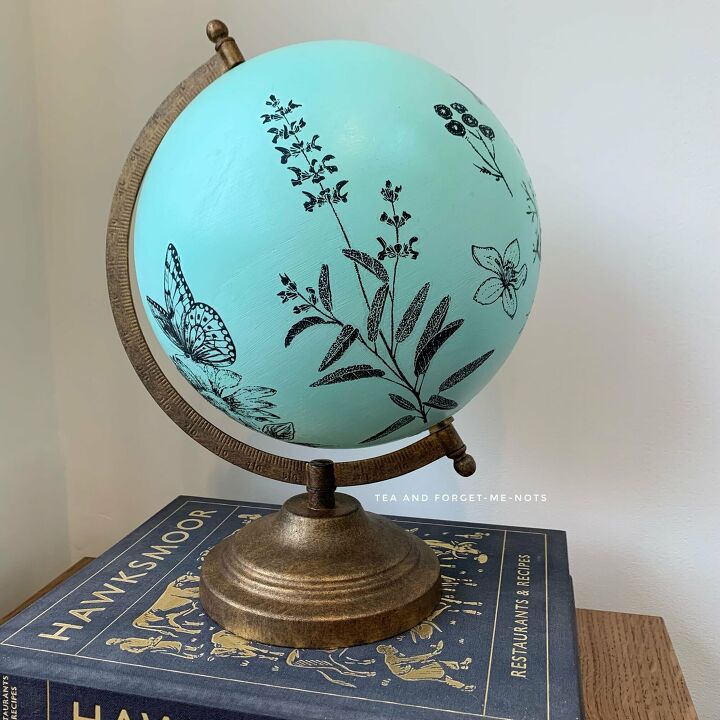
This is the largest transfer and most dramatic. I prefer the more delicate ones but it was important to try and fill the space evenly so it would look consistent when it spins.

Quite the upgrade, I think. Certainly more interesting than a chalkboard although that was at least decorative and useful.
But it’s ok to have decorative pieces without function as long as they make you smile.
Are you looking to make your upcycling and DIY life simpler?
Take a look at the 5 tools under $20 to make your life easier!
Resources for this project:
See all materials


Comments
Join the conversation
-
I would like to see about turning mine into a table lamp for my great-grand daughter maybe and then decorate it.
-
Excellent job! I'd like to do something similar to yours.


Frequently asked questions
Have a question about this project?
Was there a reason you didn’t do all the painting before you did the transfers? I just saw a globe at our thrift store! And it is supposed to light up. Could be perfect for this project