


How to Upcycle Old Ceramic Decor Into Aged Metal
In this post I’m sharing how I made over my old holiday ceramic decor with mirror paint for this beautiful aged metal look!
I love the holidays and October through December are such busy decorating months here at my house! Over the years I’ve collected quite a hodge podge of holiday knick-knacks. Ones that I used to love but now don’t ever pull out of the bins anymore. Usually it’s because my color tastes have changed. Sometimes it’s the material they’re made of.
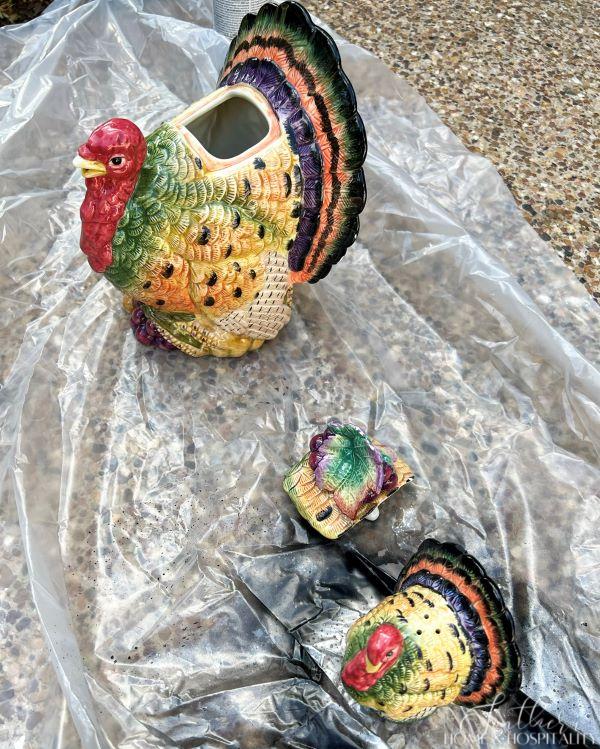
This year, as I was going through decor from the fall bins, I saw those same old ceramic pumpkins and turkeys that hadn’t seen the light of day in several years. I decided it was finally time to stop storing them for no reason. And I thought if I was going to get rid of them anyway, what was the harm with having a little craft fun and experimenting with their look?
This post contains Amazon and other affiliate links for your convenience. As an Amazon Associate I earn from qualifying purchases. If you purchase something through any link, I may receive a small commission, at no extra charge to you. I only recommend products that I love or would purchase for myself. See my full disclosure here.
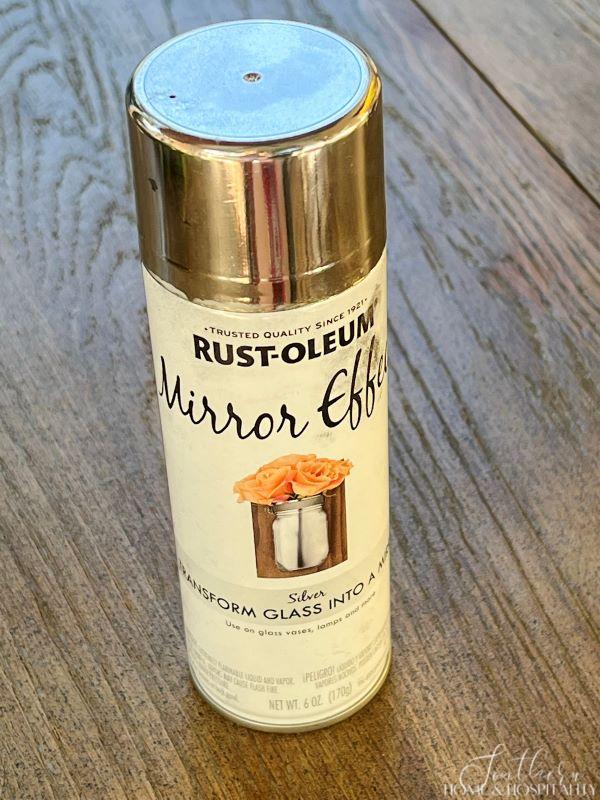
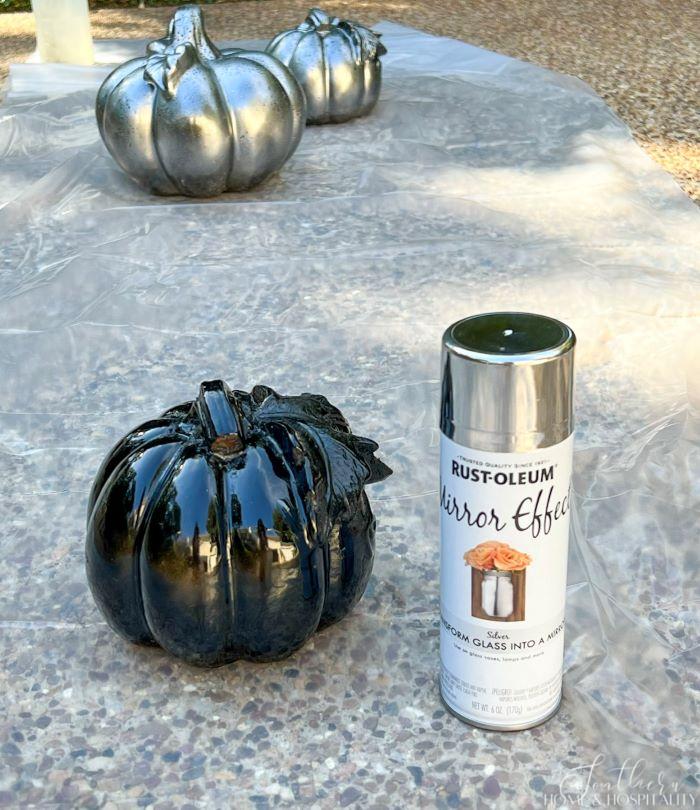
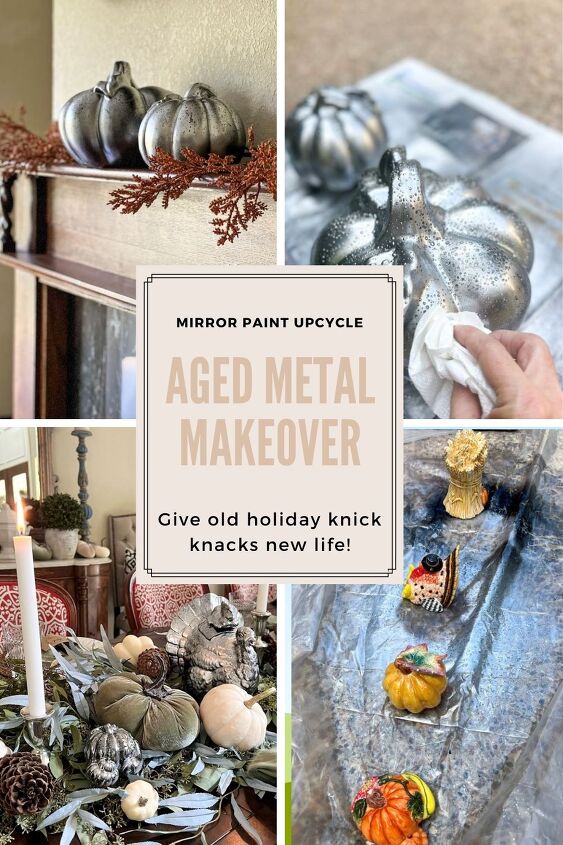
I went to my paints to decide what I wanted to do to them and I came across this mirror paint. I love to use Rustoleum Mirror Effect paint to create a mercury glass look. It’s intended to be used on the back side of glass but I was curious what it would look like on glossy ceramic. YOU CAN FIND IT HERE.
So these became my guinea pigs:
This DIY doesn’t require a lot of supplies but it does take a bit of time because of all of the drying in between.
The only supplies I needed were:
- Rustoleum Mirror Effect paint
- Black spray paint
- Paper towels
- Spray bottle
- White Vinegar
- Water
The process I used.
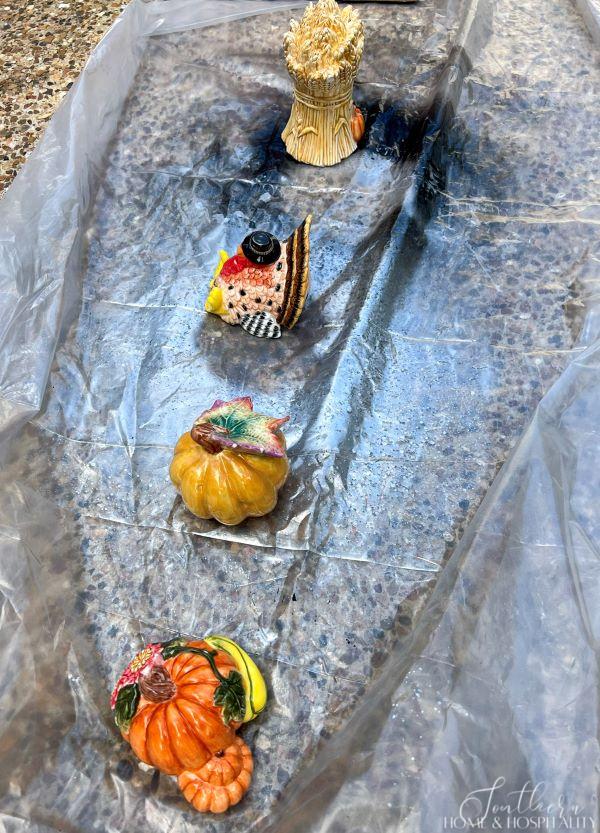
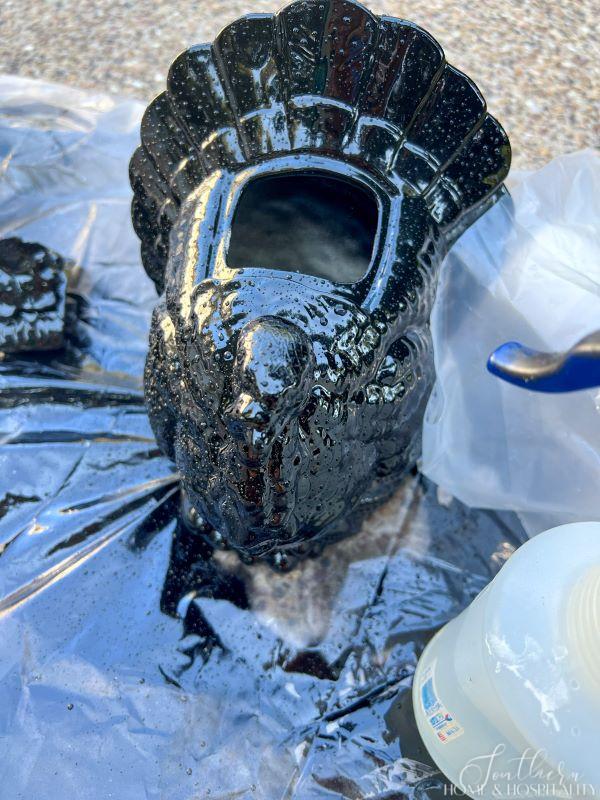
Step 1. My first step was to spray them all with a glossy black spray paint. This is what shows through when you dab off the mirror paint to get the aged effect. I could have used any sheen, but I wanted the finished product to be on the shinier side.
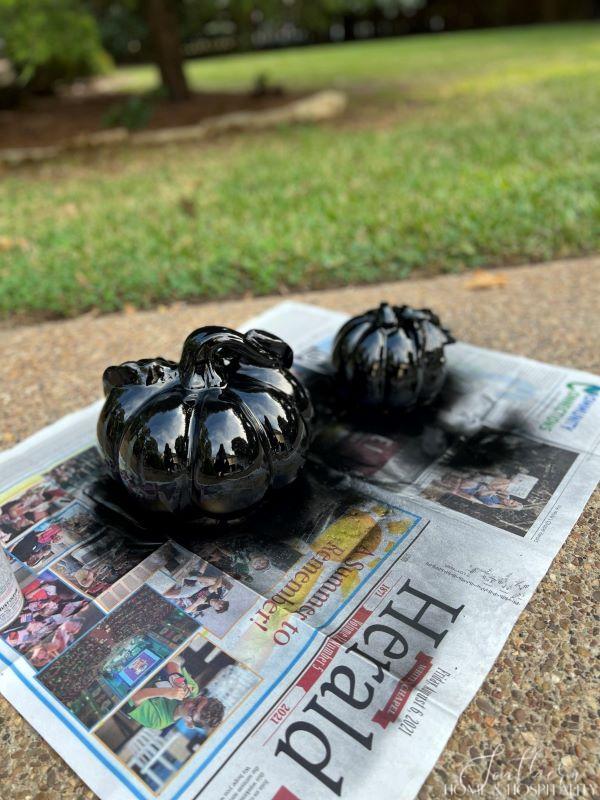
This is important…let this paint dry and cure for 24 hours, especially if you are using a gloss. Slick ceramic is not the best for holding onto paint.
Step 2. The next day, I filled my spray bottle with a 1:1 ratio of white vinegar and water. Then I spritzed the items using the mist setting. It helps if you do this from a little further away so that the drops don’t run.
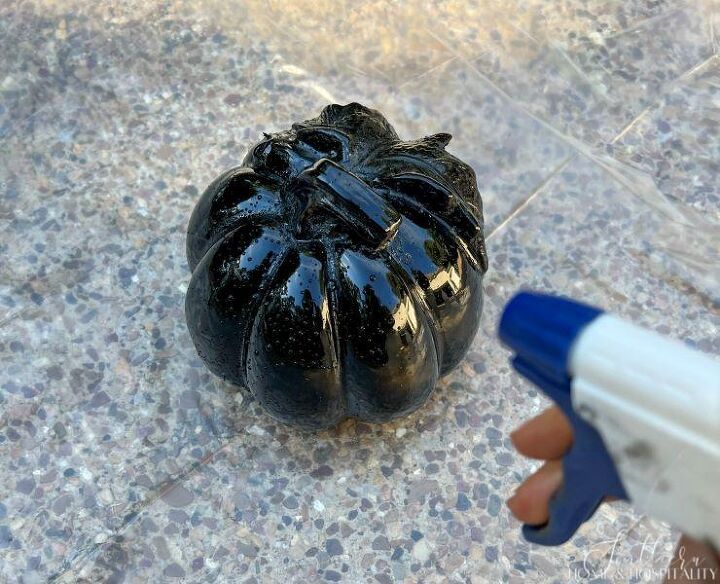
Step 3. Then I applied a VERY light coat of mirror paint, taking care not to spray too close, too heavy, or go over the same area twice. I learned the hard way on this part. It is probably because I wasn’t spraying this on glass, but this paint will bubble and crack if you go over the same area while it is wet!
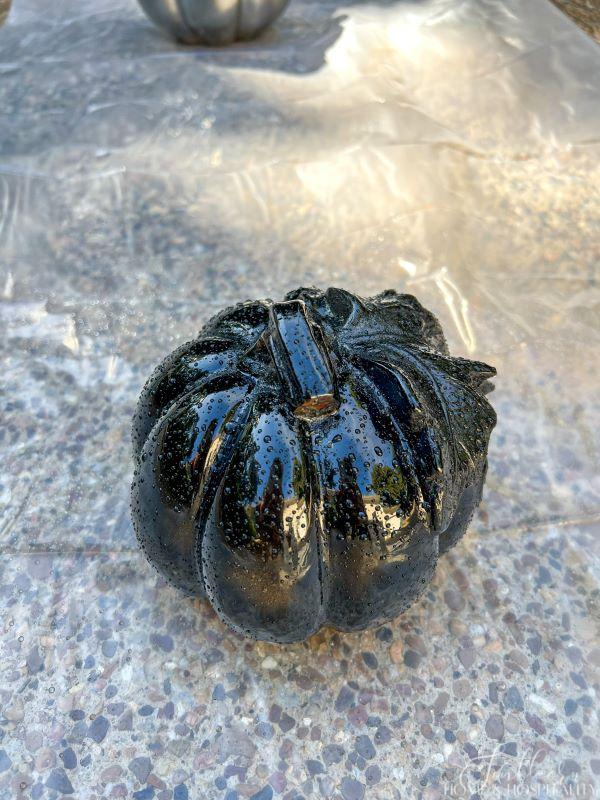
I let the paint dry for a minute or two.
The mirror paint won’t adhere where the water droplets are and they create the spotted, aged effect.
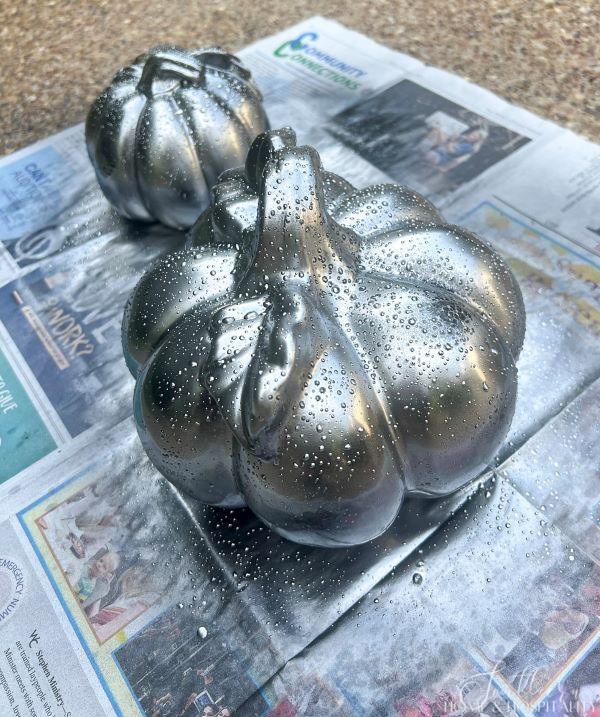
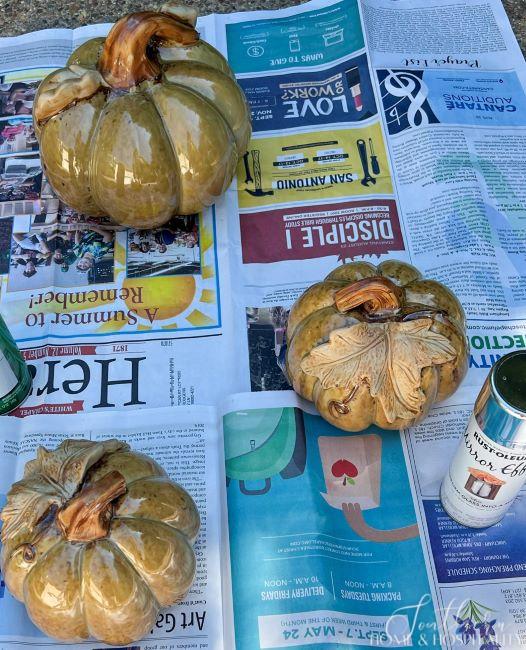
Step 4. Then with a paper towel, I carefully dabbed the water droplets to expose the dark spots.
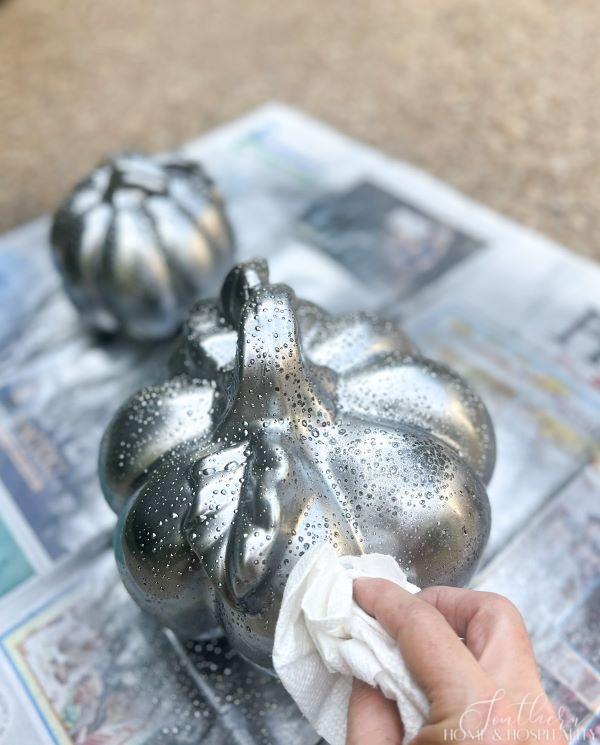
Because of the very light coat this requires, one coat was not quite enough. I let this coat dry and cure for at least an hour. Then I misted them again and applied another very light coat of mirror paint, dabbing off the droplets again after a couple of minutes. If you try this, you may need to even repeat this again, depending on your coverage and the material you are spraying.
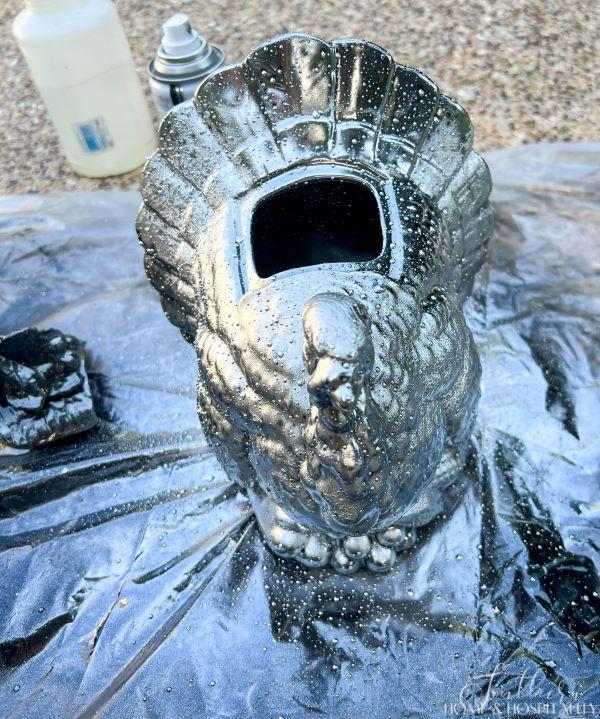
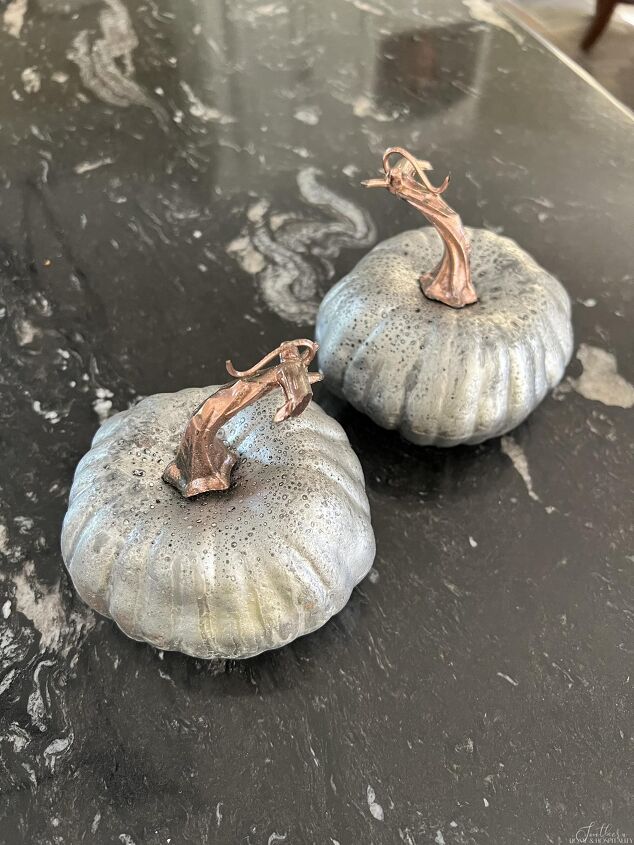
The result.
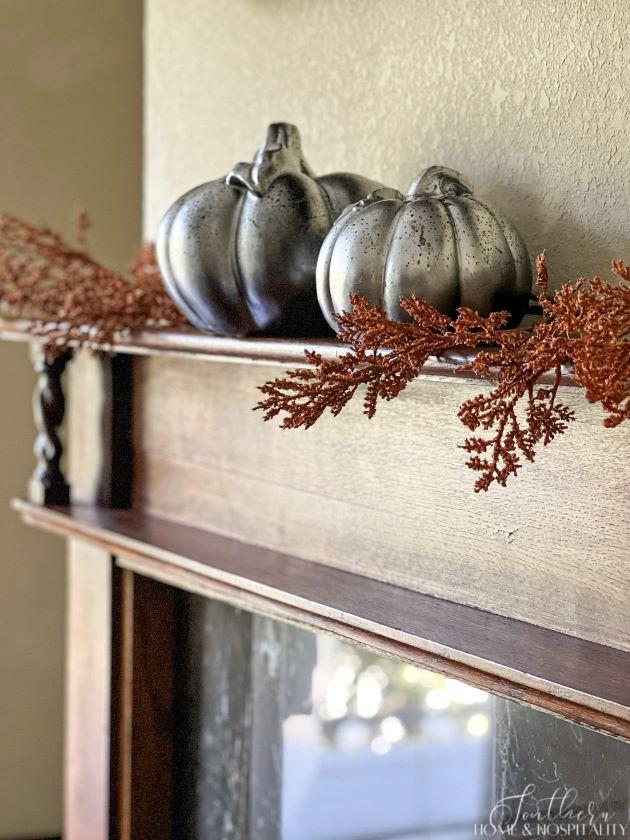
I kind of like how my little experiment turned out! Instead of becoming mirror-like as it does on glass, the mirror paint created more of a metal look on these ceramics.
I was able to use the turkeys and a couple of pumpkins in this year’s Thanksgiving tablescape…
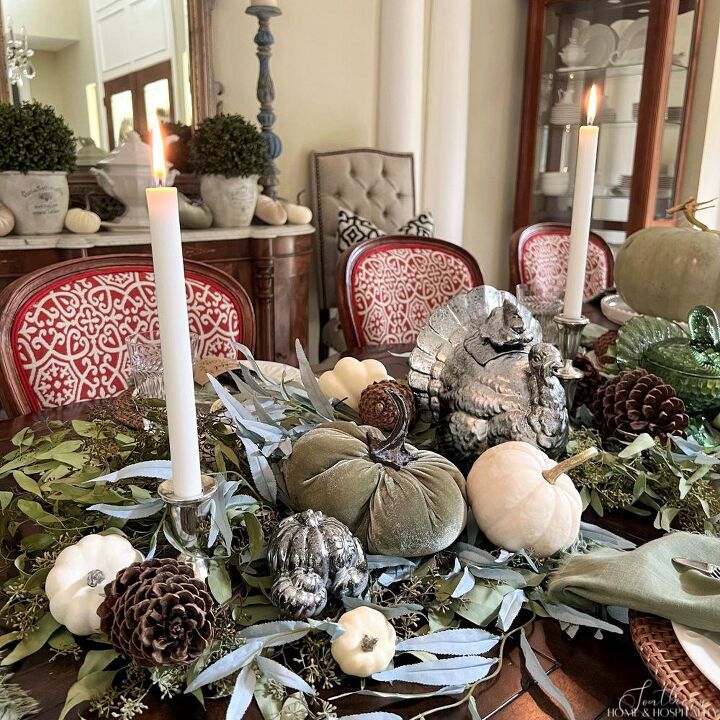
See the whole Thanksgiving tablescape here!
And this silver and more neutral makeover made it easy to tuck the pumpkins in just about any room. I just love being able to reuse things I already have in a new way!

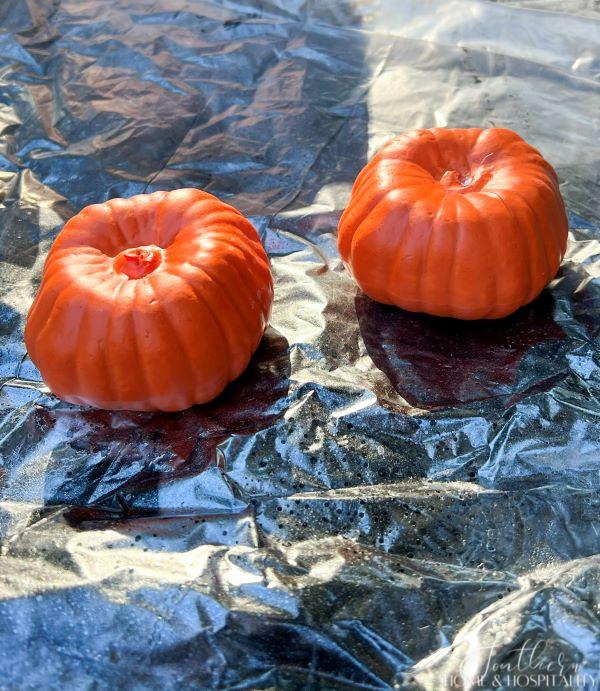
I even experimented with these cheap foam pumpkins to see how the mirror paint would look. Though the outcome is not quite as realistic looking to pass for metal, I think I might use these next year!
A few helpful hints.
- If you don’t let the first coat cure and/or spray the second too heavy, the second coat will remove all of the paint like a remover! I found the longer I let the mirror paint cure the less problem I had with bubbling.
- I actually did the bottoms of the pumpkins first following this process since I couldn’t really get to the rounded bottom part from above, taking care to dab the sides well since they were what would show. Then I turned them and repeated.
- There is also a paint from Krylon called Looking Glass. It won’t work for this type of project because it only has the mirror effect on the underside of the paint and can only be used on the inside of glass, so make sure to get the Rustoleum Mirror Effect for any projects that you are spraying the outside of.
- Remember not to do any crafts involving spray paints too close to having people over until they have time to air out the smelly fumes. Especially for use on the dining table!
If you try this let me know in the comments how it came out for you or even how you’ve made over holiday knick-knacks that you don’t love anymore!

As always, I appreciate your visit, comments, and shares here! And don’t forget to subscribe for updates to keep in touch and to follow along with me on Pinterest, Instagram, and Facebook!!
Remember to pin this to your Pinterest DIY and Craft boards to refer to later. You can FOLLOW ME ON PINTEREST and see all of my pins plus lots of other inspiring ones that I’ve found and pinned!

Comments
Join the conversation
-
Nice job 👍🏼! I did something similar, using solid matted colors, with my mom’s old chicken and rooster ceramic collection. At least now they look more updated.


Frequently asked questions
Have a question about this project?