


How to Wallpaper a Bi-fold Door to Use as a Headboard or Screen
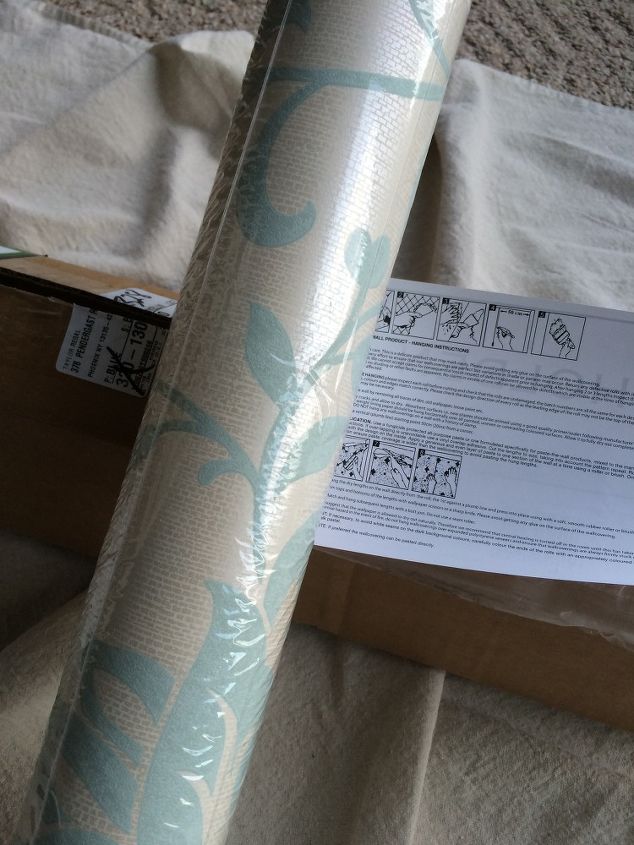
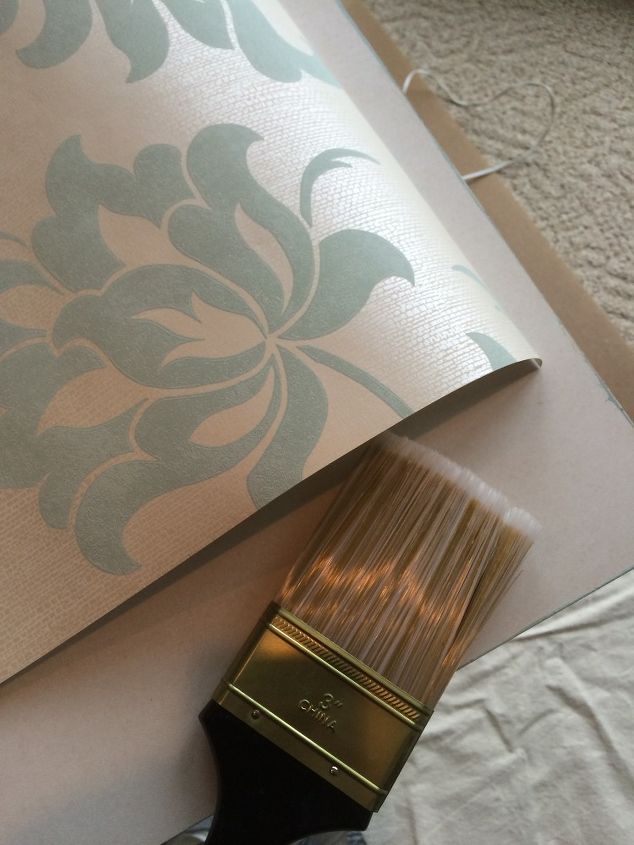
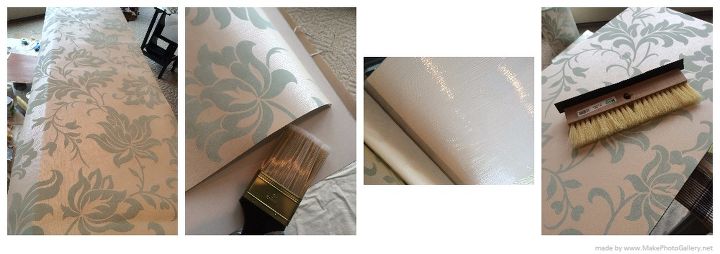
I'm writing a trilogy of sorts-a series of projects using wallpaper as an accent with the remnants from wallpaper rolls after papering a wall. I will be sharing 3 projects; a chair, a lampshade and the project in this post is a bi-fold door. I was invited to participate in a program to try a product and then share how it works and hopefully inspire others. Since I never really used wallpaper before besides lining drawers, I jumped to the challenge. We were given some choices of papers from Walls Republic, found here, http://www.wallsrepublic.com/ and I'm telling you, they have so many beautiful papers to drool over, plus, if you have trouble deciding, they will ship up to 5 samples free so you can touch and feel the actual paper before purchasing a roll....such a great option! My paper choice was Adeline in Duck Egg which is a soft pretty blue color on a creamy white background. The paper is nice and thick and had a pretty sheen when the light hit it. We haven't had any sign of Spring here in Upstate NY in March, so this wallpaper design was my way of bringing in a little Spring-
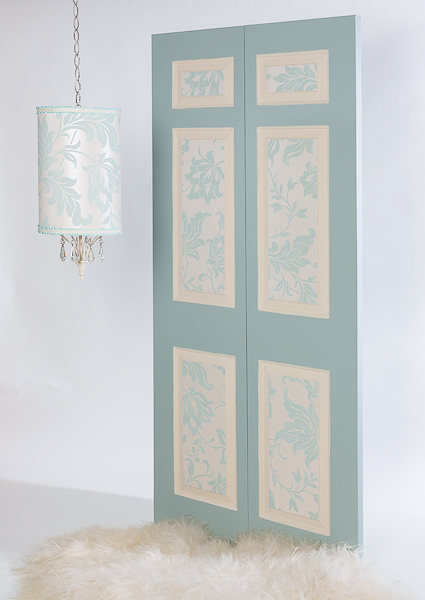
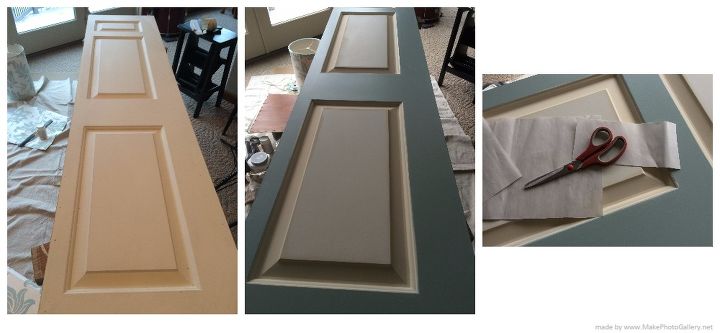
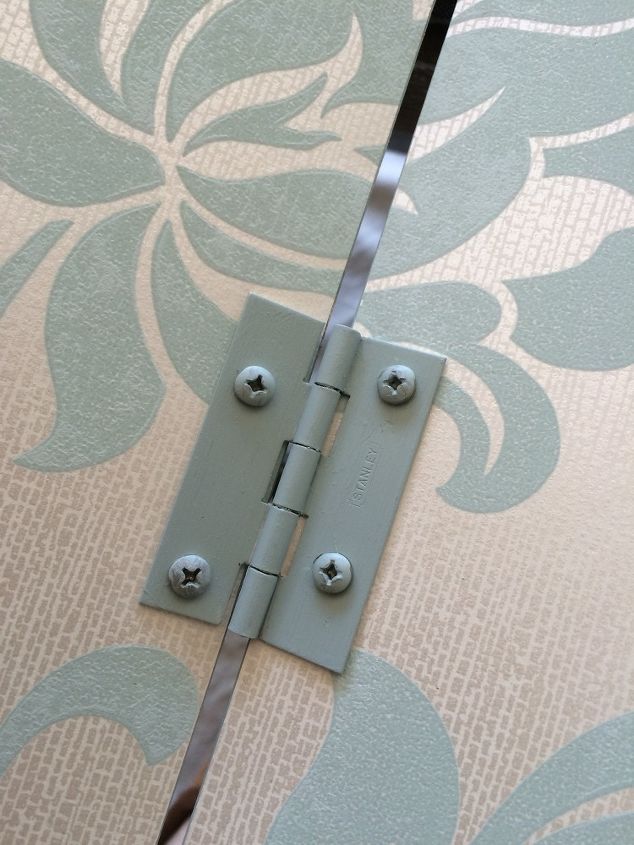
One of the projects I decided to apply wallpaper to, was half of a bi-fold door set. I decided to paint the raised panel side of the door and add wallpaper to the inside of the raised panels, and then on the other flat side I would lay a full sheet of the wallpaper. I found a lovely shade of blue paint color from Sherwin Williams, called Quietude that a great name? For the cream color in the background I chose a paint color from the Country Chic mineral chalk based line, Cheesecake, which matched the wallpaper nicely too.
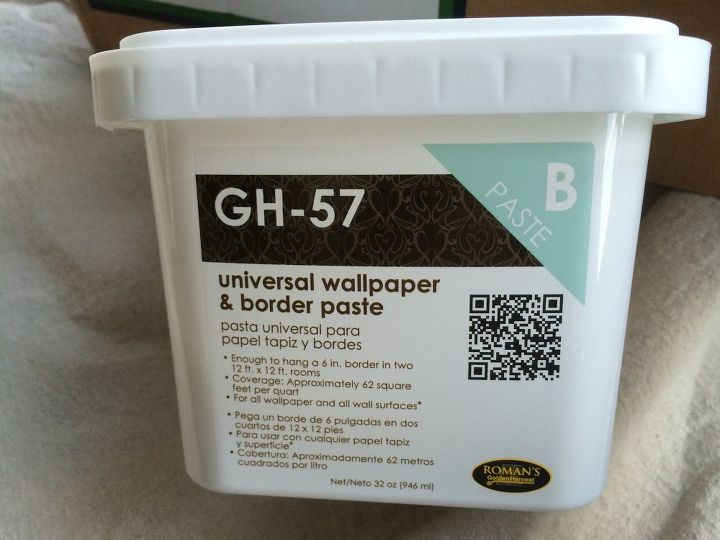
After painting the edges, I traced out on paper the inner panel sizes and cut out the shapes on the wallpaper. The other great thing about this wallpaper is they have a newer technology where you don't have to paste the back of the wallpaper, but apply the paste to the item you are papering. You can still apply the paste to the back of the paper if you want to, but with these newer papers you don't have to do that step. The adhesive paste that Walls Republic recommended is Romans and you can find it at Lowe's but any good wallpaper adhesive should work, and if you have any questions, Walls Republic has great customer service.
Also, included with the wallpaper roll, are instructions, complete with drawings, which is so helpful for me who has to have a visual to see how something is done.
Once I had all my wallpaper patterns cut out, I brushed the adhesive paste to the raised panels and lined up my paper to the edge of the panel and slowly laid down the paper, smoothing gently as I laid it down, pushing the air bubbles to the sides until smooth. I used a wallpaper brush to gently go over the top of the paper again, wiping away with a damp cloth any excess paste from the edges, trying not to get the paste on to the surface of the paper. If I did get glue on the paper, I quickly wiped it with a lightly damp cloth- And the best feature of this wallpaper? It's dry strippable, which means you peel back a corner and pull it off in one sheet- Isn't that awesome!! This feature alone, makes using wallpaper as a decorative wall option much more inviting!!
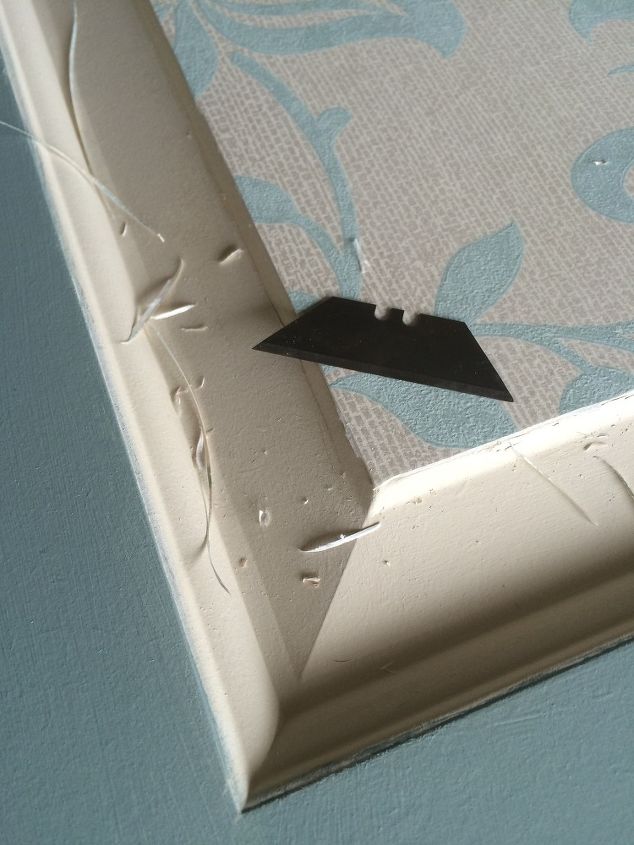
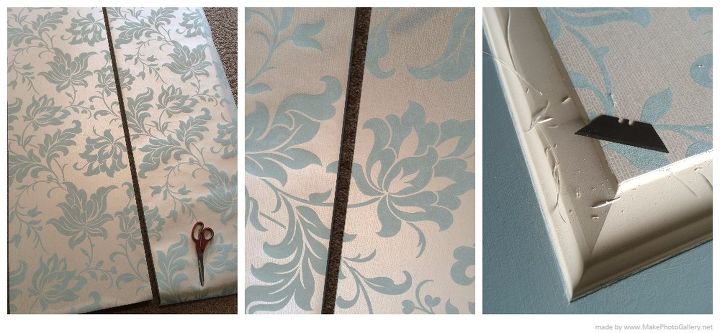
After the paper had dried, my husband trimmed off the wallpaper at the edges with a sharp razor blade. My husband is very precise which was so helpful with this project! I noticed after the paper had dried that some of the glue residue on the paint after wiped was still shiny. So I just touched up the paint on those areas and it all blended away.
I flipped the doors over and wallpapered the flat side so it looked more like a wall. I unrolled the paper so that it went beyond the ends about 3 inches and cut it. With a large brush, I generously brushed on the wallpaper paste then with the trusty aid of my husband, we held the paper at both ends and gently lined up the paper along the straight end and slowly laid it down while gently smoothing out the bubbles underneath with the wallpaper brush. Once dry, wallpaper was trimmed along the edges.
For the 2nd door, I laid it next to the other door, then unrolled another wallpaper panel lining it up against the other paper on the door so the pattern matched the other door as close as possible. Luckily, this pattern repeat is close, so there wasn't much waste.
The final step was painting the hinges and I painted them with the blue color using a q-tip to dab the color onto the screws once installed.
With the bi-fold door, depending on where it is used, I was going to add some knobs or hooks to hold scarves or jewelry; in a large bath to hang a robe near the tub, or it can it can be a headboard for a twin, or queen sized bed if you do the double doors. Lots of uses for these mobile wallpaper units as I like to call them!
You can view my other posts showing steps for Walls Republic wallpaper accents on a chair and lampshade on my other posts.

Want more details about this and other DIY projects? Check out my blog post!
Comments
Join the conversation
2 of 39 comments
-
That's great Diane! Please post pictures, I would love to see the results, I'm sure it will be lovely!!
-
Beautiful!!!!!


Frequently asked questions
Have a question about this project?