


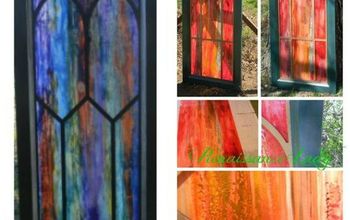
Hydro Dipping Bottle Art

Hydro dipping is an art technique that has many mediums. Some do it to their nails using nail polish and water. Except they call it water marbling. Others use nail polish and water to dip other objects on a larger scale. You can also hydro dip using acrylic paints, oil paints, and spray paint. Each paint requires slightly different approaches, but they all share the same basic technique. I used spray paint and water to create my designs.
This video will go into depth on the dos and don'ts. I walk you through my mistakes and show you the correct way to do it. I recommend watching if you're going to try this for the first time. Or keep scrolling and read the basic steps.
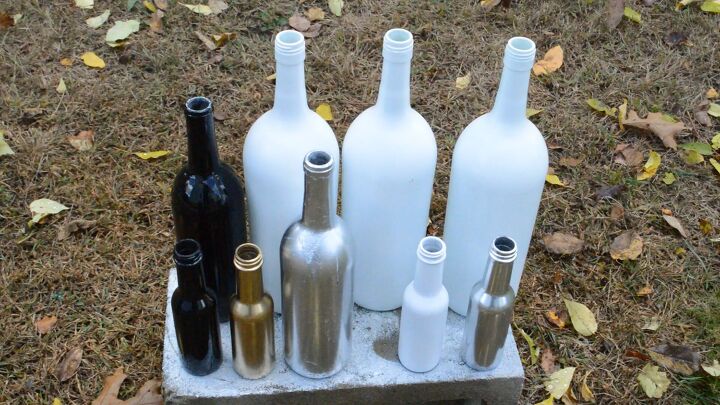
Make sure to prime your canvas. I experimented with white, black, gold, and silver. Let them fully dry.
All of these worked well.
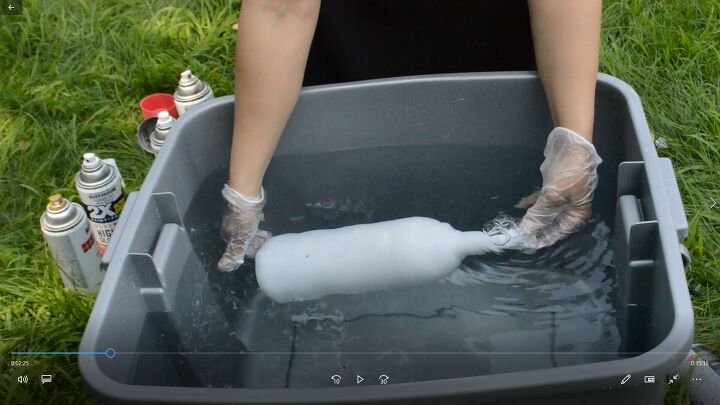
You want to fill the bottle with water before dipping it. This step will help with buoyancy. It will prevent resistance from the bottle when you're dipping it.
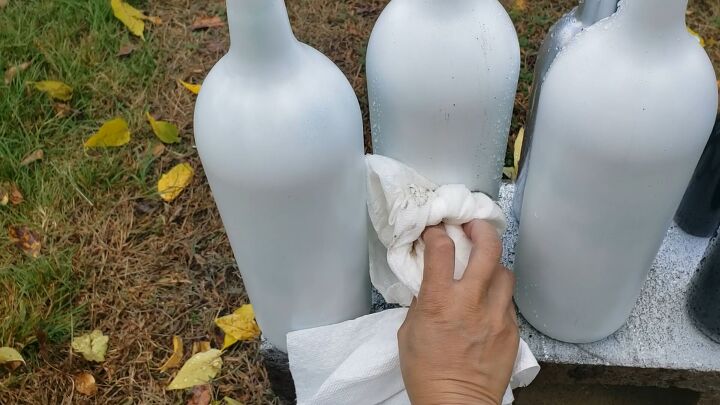
Make sure to dry off all the water droplets from the outside of the bottle, otherwise, you'll get spots on your design. This effect isn't necessarily a bad thing if it's the look you're going for. In the video, I show the amazing effect it gave one of my bottles.
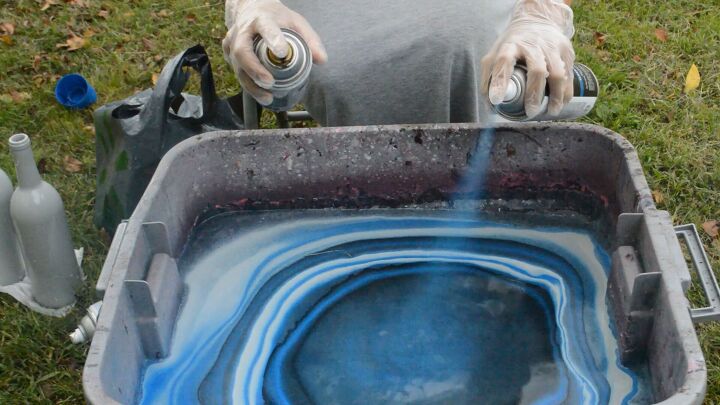
Build your bullseye with spray paint. You want to move around and not keep it centered. This action will create the marble pattern.
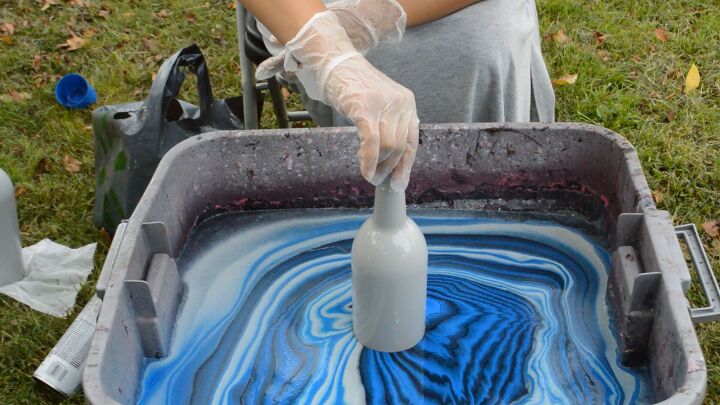
Take your bottle and dip it vertically while twisting it.

Once the bottle is fully submerged, you'll want to clear all the paint from the top of the water before taking it out.
This step is crucial.
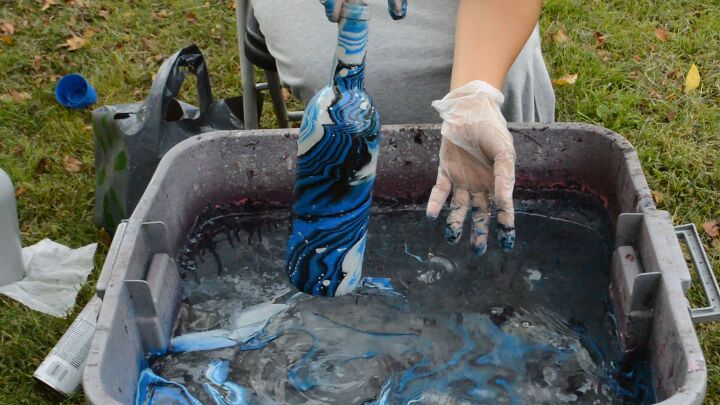
Carefully take the bottle out and make sure not to handle the sides.
Once it is dry, seal it. Any clear acrylic sealer will do.
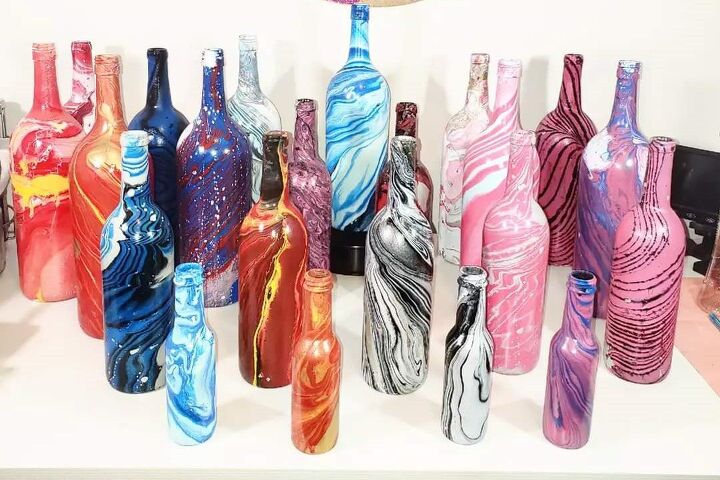
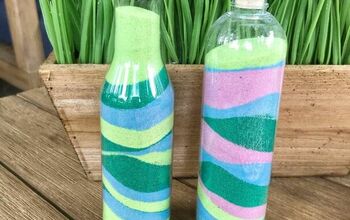
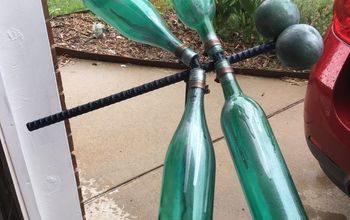
These are all the bottles I made in the video, using the hydro dipping technique. They are all from different stages of my learning process. This technique does have a learning curve, but I've worked out most of the issues for you. Follow the steps, and you should get some great dips!
I already had the spray paints in my crafting supplies, and I put this as medium difficulty simply because it has a learning curve.
It's such a fun technique! I hope you try it!
Resources for this project:
See all materials


Comments
Join the conversation
-
Fabulous!
-
Love, love, love. I am sooooooo doing this!!!!! 🍒🍒


Frequently asked questions
Have a question about this project?
love it! Definitely going to try this once they put spray paint back on the shelves :)
Would it be better to put the cork on after fillibg the bottle? That way you woul have the rim untouched
I’m wondering the whole time, what did you do with the waste water, I have a tough enough time cleaning my paint brushes in the sink and washing it down the drain, ☹️