


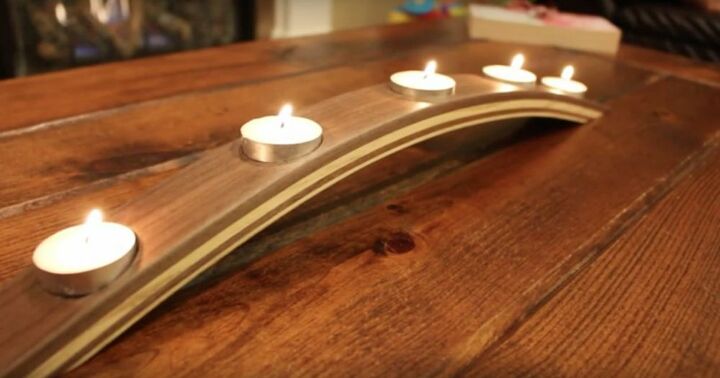
Learn How to Create a DIY Carved Wood Candelabra for Your Dining Table

When it comes to designing and styling your indoor spaces, you want a home that reflects who you are as an individual. This is something that can be difficult to achieve when you’re reliant on store-bought, mass-produced fixtures and fittings, but one way to add an element of uniqueness and originality is to craft some of your own interior accessories.
While this may sound overly complicated and as if it would require extremely strong DIY skills that you simply don’t possess, it’s often a lot easier than you think, as this gorgeous carved wood candelabra demonstrates. Constructed in just 11 simple steps, it’s an ideal project for those who want something straightforward to get them started.
Here’s how I did it for those who’d like to give it a go.
Tools and Materials
Before you can make a start on crafting your carved wood candelabra, there are a few tools and materials you’re going to need. These include:
- A hammer
- Nails
- Walnut
- Ash
- Scrap wood to use as a mold
- Cutting equipment
- A sander
- Tape
- A wood saw
- A planer
- Glue
- Vices/clamps
- A drill
- A pencil
- Wood sealant
The first step toward making your candelabra is simple: you’ll need to gather together the materials and equipment I’ve listed above, whether this means buying, borrowing, or hiring.
If you’ve ever tried your hand at a DIY project before, you’ll likely have most of the bits you require in your toolkit already, which means you probably won’t need to pick up anything besides your wood, making this a relatively cheap and cheerful project.
There are lots of places you can source this from, ranging from your local hardware store or gardening centre through to online suppliers. That being said, I’d always recommend picking it out in person to make sure you’re entirely happy with the quality and thickness of the wood (around two inches is ideal) before you make a start.
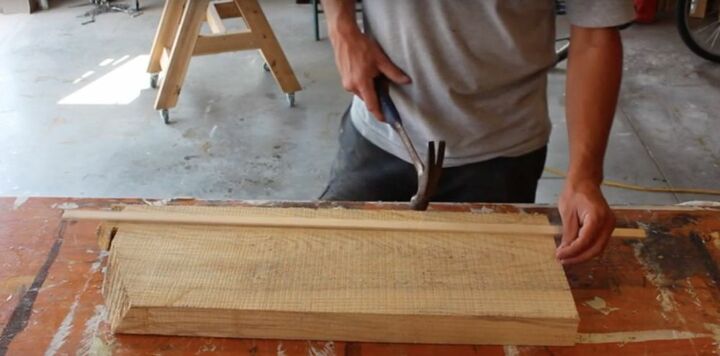
Once you have your wood, you’re all ready to begin your DIY project, and the first step is to find the curve you want. The best way to do this is by taking your soon-to-be mold and hammering a nail on either side (as demonstrated in the video).
When you’re done, place a flexible piece of scrap wood between these two points, pushing upward until you get the degree of curvature you desire. Using a pencil, you’ll want to mark this onto your would-be mold in advance of cutting.
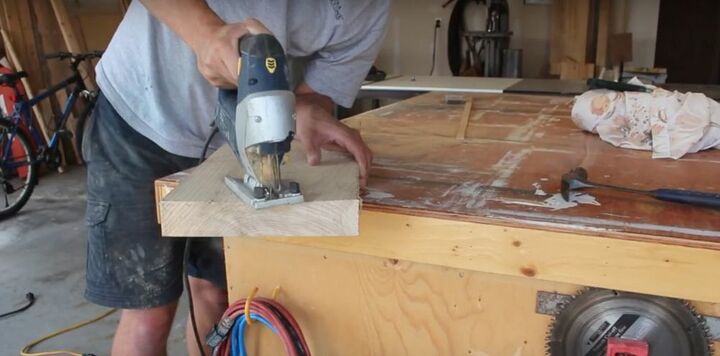
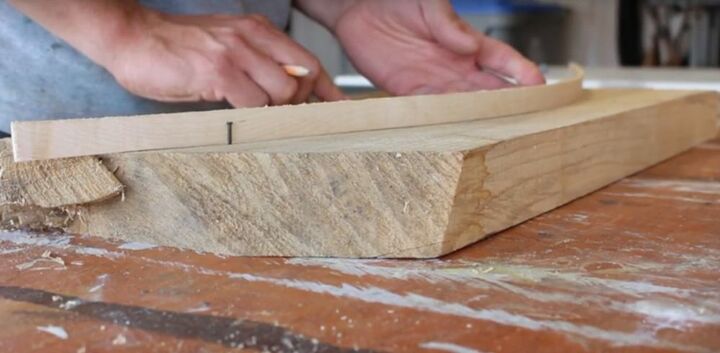
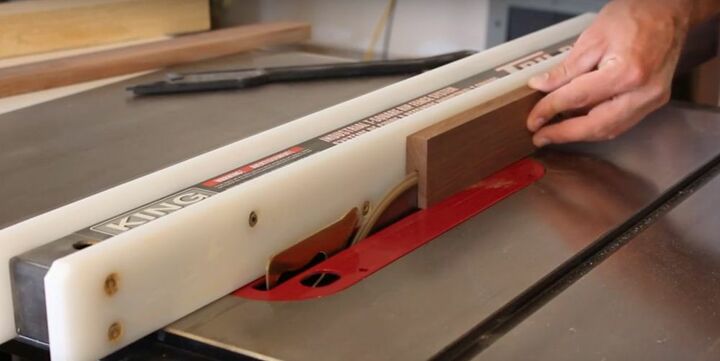
The next step is really easy: using a cutting tool, trace the pencil line you’ve drawn to cut the curve. While it’s not difficult, this part of the process does require a steady hand, so you might want to practice on a couple of spare pieces of wood before committing to the real thing. This way, it doesn’t matter if you get it wrong on the first attempt.
When you’re finished, you should be left with two distinct blocks of wood, which you’ll need to sand and smooth. When this is done, apply tape to each of these surfaces as demonstrated in the video, and place them to one side for later.
Next up, it’s time to cut yourself some strips of ash and walnut using your saw. If you want to use different types of wood, you can, but these are definitely my preferences in terms of their flexibility, appearance, and durability.
This is one of the more complicated parts of the process, so do watch the video to get a better idea of its intricacies. You’ll want to make sure each of your pieces is evenly sized and of a like length, depth, and thickness.
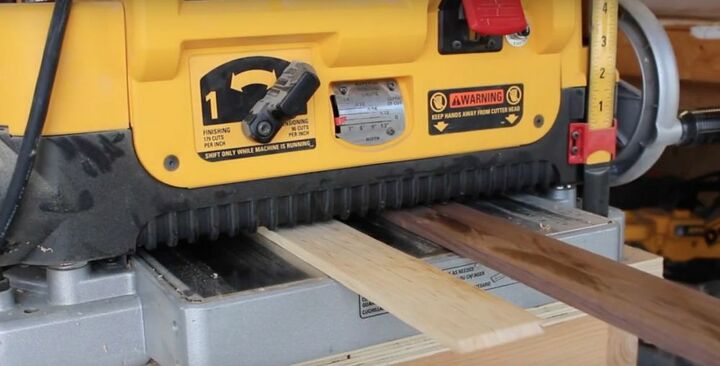
When you’re happy with the strips of wood you’ve cut (you’ll probably want around five of these), it’s time to plane them. This might sound complicated, but’s pretty much a case of feeding them through a machine until you’re happy with the finished result, so not too difficult at all. Just be sure you understand how to operate the equipment before you begin!
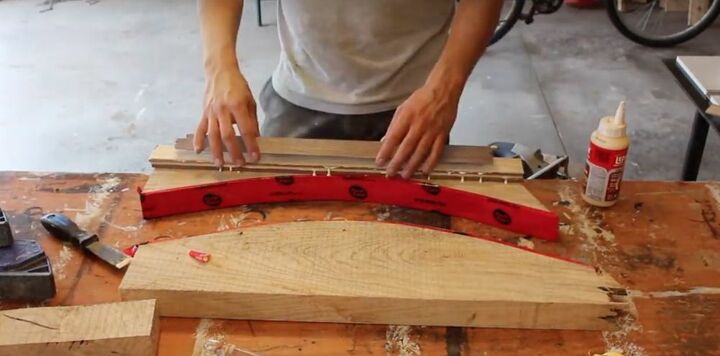
Once they’ve been sized and planed, it’s time to glue your strips together. Make sure you use a proper wood glue, and if you’ve not tried a similar project before, do your research beforehand to find a brand that comes highly recommended, as you’re going to want the result to be properly solid and durable.
This part is really easy, but do make sure that the surfaces you’re pressing together are fully covered before you proceed. It’s often best to use a paint brush to apply your glue in order to ensure an even spread.
As you cover each surface, press the next piece of wood firmly down on top of it, making certain that the finished structure is dry enough for your strips to stay in position when you place them in the DIY mold you’ve created.
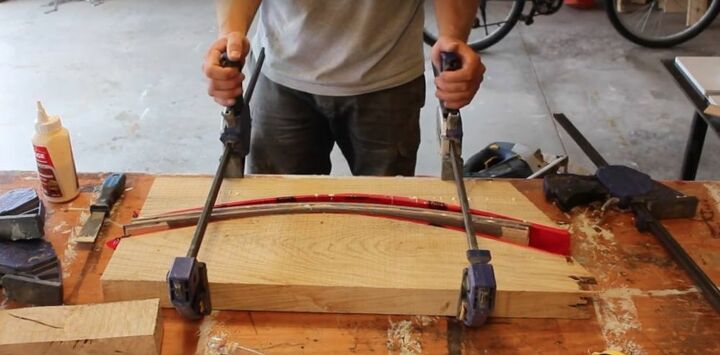
With your strips now firmly held together with glue, it’s time to place them inside the mold you made at the very beginning of this process. Only when you’re happy with your positioning should you move onto the next part: securing your wood in place.
To do this, you’ll require metal clamps similar to the ones shown in the video, which should allow you to gently pull the two parts together so your structure is bent into the position you need to create your eventual wood candelabra centerpiece.
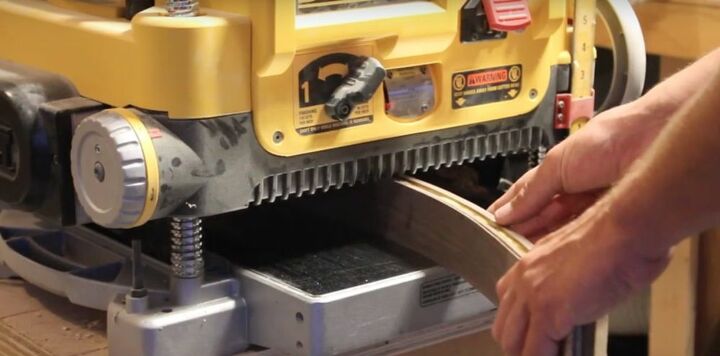
Once you’ve given the glue long enough to dry, it’s time to remove your wooden structure from its mold. You’ll need to get rid of any excess glue and rough edges, so give it a sand and then pop it through your planing machine. This shouldn’t take long at all, but will help to create a smooth and polished finish that will pay dividends once you’re done.
When you’re finished planing your carved wood candelabra, it’s time to cut the edges to create a neater aesthetic before sanding for smoothness. You can see each of these steps demonstrated in the video.
You’ll notice in the footage that I’m wearing a mask throughout, and I’d definitely advise that you do the same. That’s because this part of the process can end up being a really dusty job, with the particles having a tendency to get into your nose and mouth and cause coughs and sneezes.
When you think you’re done, be sure to run your hand over every inch of the wood, to make absolutely certain that it looks and feels smooth and nicely finished. If you notice any imperfections, take the chance to get on top of these before moving onto the next step.

The exciting news is that you’re nearly done, but first, one of the final tasks remaining is to drill holes for your candles. I’d advise using a pencil to mark where you want these to go, as free-handing often leads to uneven spacing and an amateur-looking finish.
You’ll see the best sort of machinery to use in our video, which demonstrates how to make the indentations in your wood. This is ideally explained through a visual aid, so I’ve also included an image to indicate how it should work.
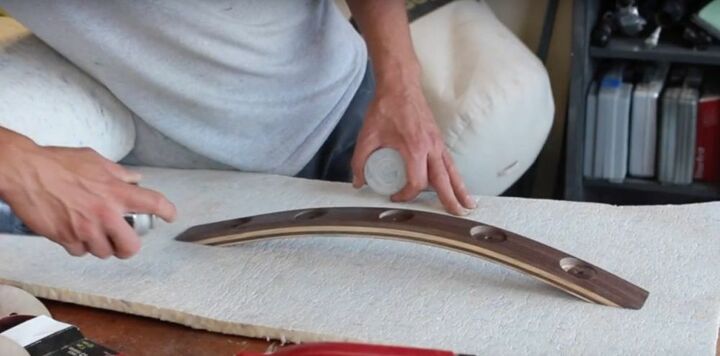
Last but not least, it’s time to apply a wood sealant. This will ‘seal’ the pores of the wood to give you a smooth and even finish and to prevent staining or marking once your candelabra is in use.
The brand you use is entirely up to you, but I’d suggest you go for an option that comes recommended by your local hardware store and/or online reviews rather than simply opting for the most economical product on the market, as a good sealant can pay dividends in the long run.
Be sure to spray this evenly across your carved wood candelabra, for long-lasting and professional-looking results.
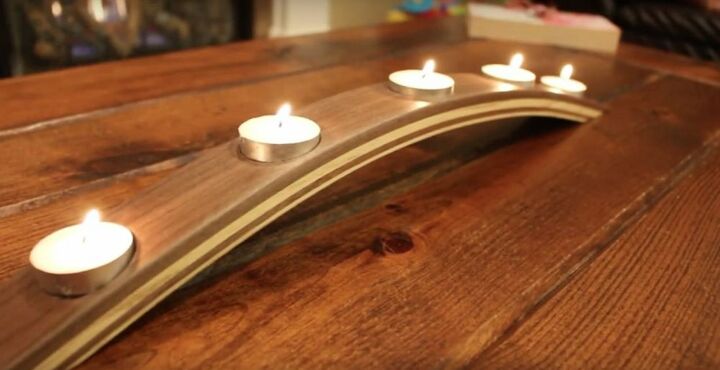
When it comes to creating a unique and original piece for your home, this wood candelabra centerpiece is just the ticket for adding a chic and stylish element to your interior. Designed to complement most aesthetics and endure for years, it has the added boon of costing almost nothing to make.
Why not try your hand at crafting your own version of it today? Don’t forget to share your results (plus pictures) in the comments, as I’d love to see how it turns out and how easy you found it to make!


Comments
Join the conversation
-
This candle arch you have made is gorgeous. A beautiful display for the dining room table or on the fireplace mantle. This is something that would make an awesome house warming gift or wedding shower gift. A great piece to be proud of making.
-
My husband does woodworking. So I know how difficult it is to do. Beautiful👏👏👏👏


Frequently asked questions
Have a question about this project?