


Magnolia Home Olive Topiary Dupe
Do you love topiaries? Well, I’m a bit obsessed with them, and today I’m going to make an olive topiary inspired by Magnolia Home!
For more DIY ideas from An Organized Season, click HERE!
I have never been to the Silos, but it’s on my bucket list!
Until that day comes I’ll just keep watching reruns of Fixer Upper!
And drooling over all the beautiful treasures at Magnolia Market’s online shop.
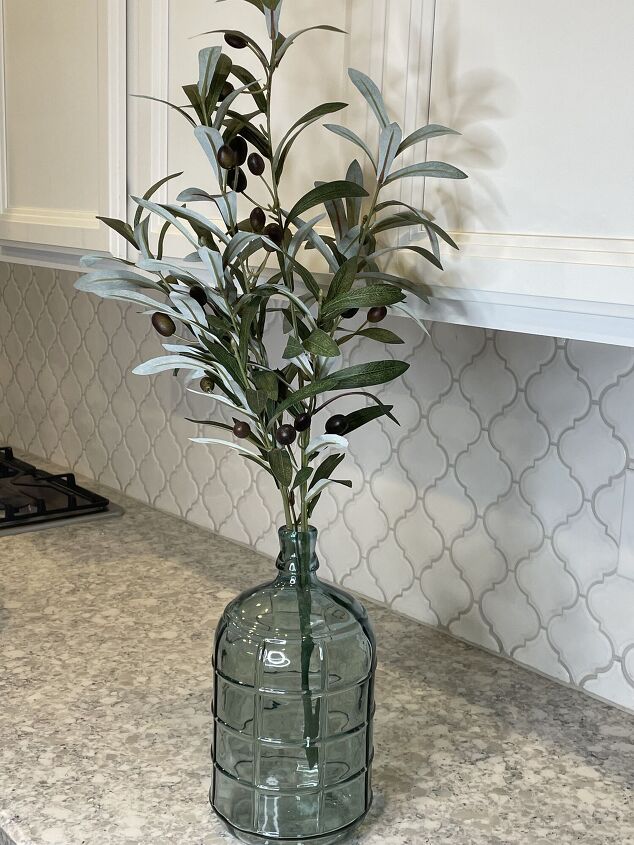
Recently, I was looking at their Spring collection and saw the most amazing olive topiary!
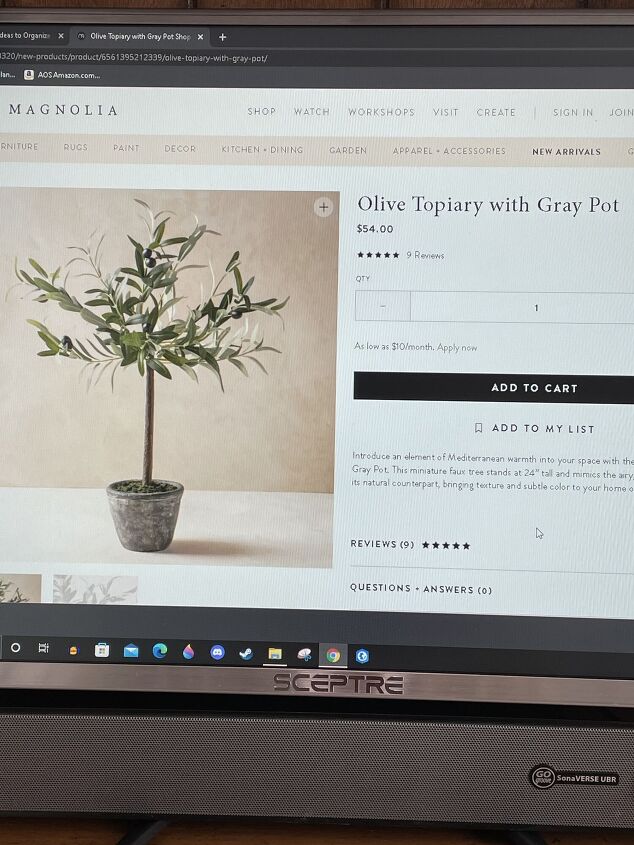
Isn’t that the cutest thing you’ve ever seen!!
I love it, but when I saw the $54.00 price tag, I knew I wouldn’t be ordering it!
Then, I remembered this…
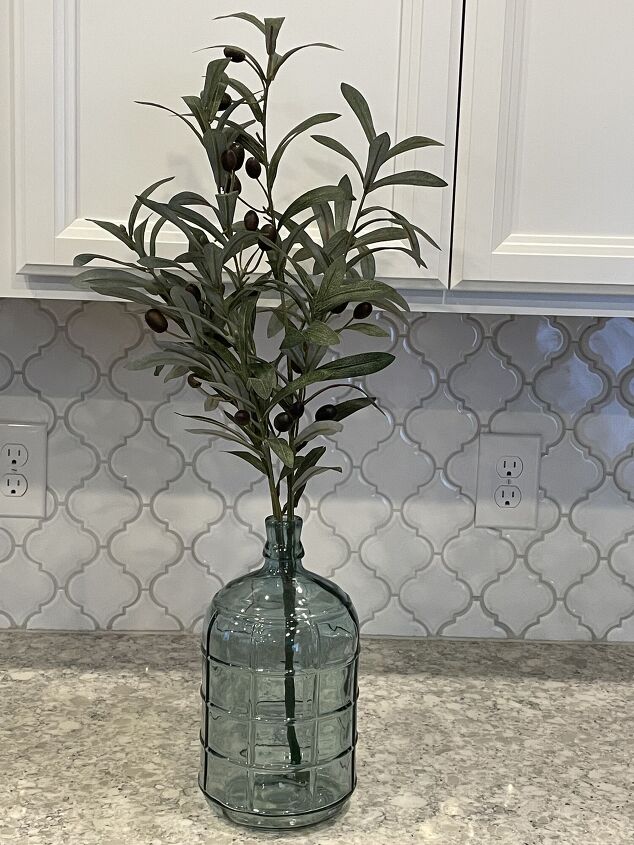
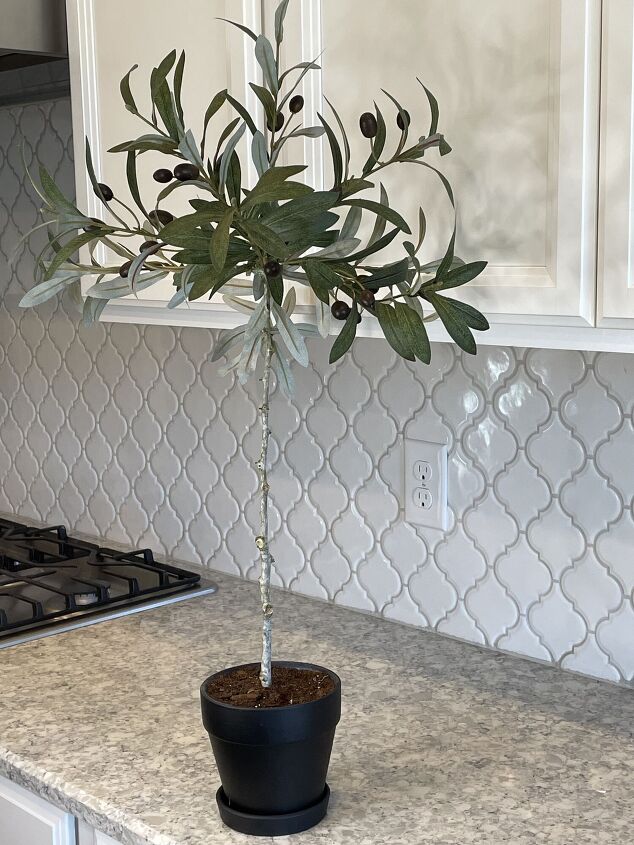
this lovely olive branch that I recently bought to put on my kitchen counter!
And it hit me!
Why can’t I make it myself??
But how in the world would I attach the limbs to the branch???
Well, my friends, I figured it out!
Want to see how I made it?
Then come on, and let’s start crafting!
GATHER
Gather the following items to make this project:
- Tree branch
- Flowerpot
- Faux olive branches-I purchased mine at Hobby Lobby for 50% off
- Styrofoam block
- Styrofoam cone
- Glue gun
- Ruler
- Wire cutters
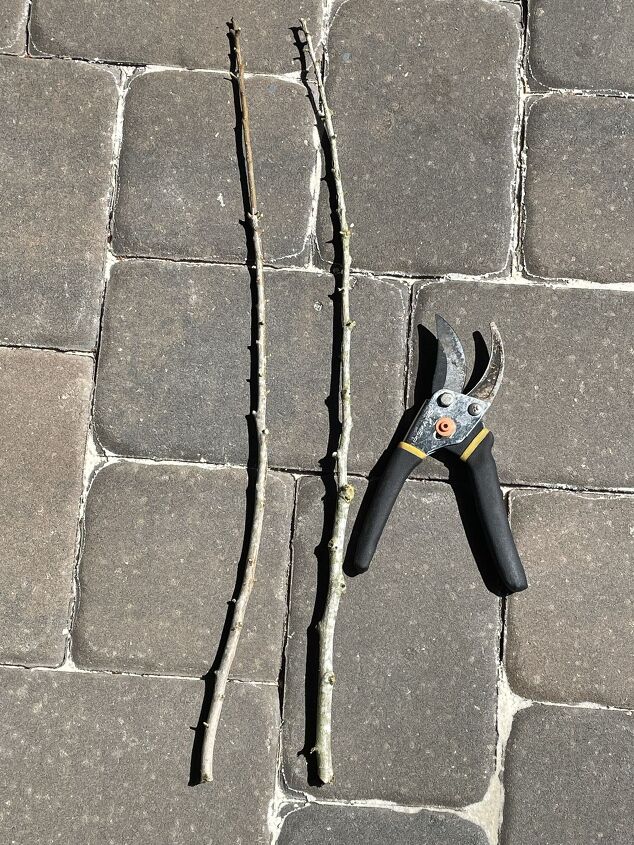
CUT A BRANCH
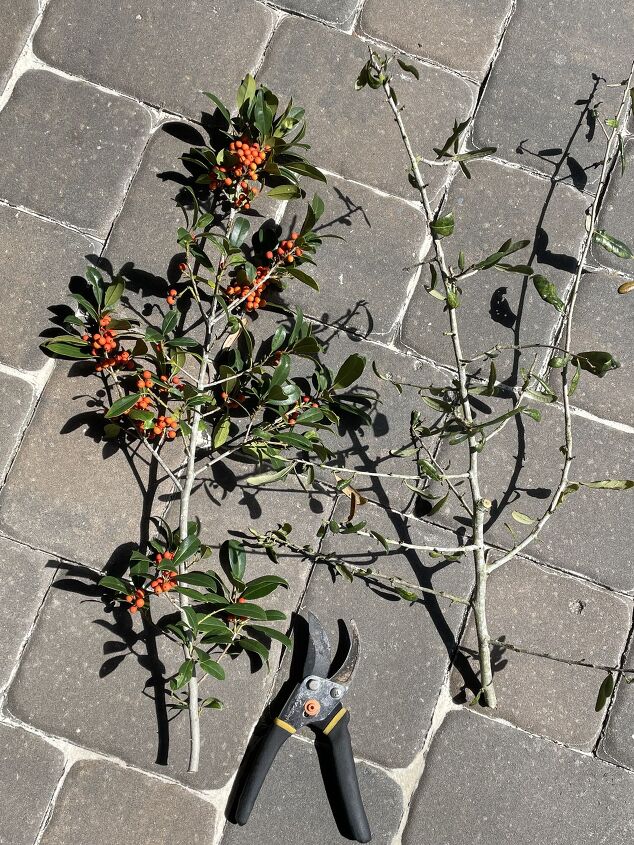
Go outside and cut a branch from a tree.
After I cut the first branch, I noticed it had a bit of a bend in it. So, I searched for a straighter branch.
FIND A POT
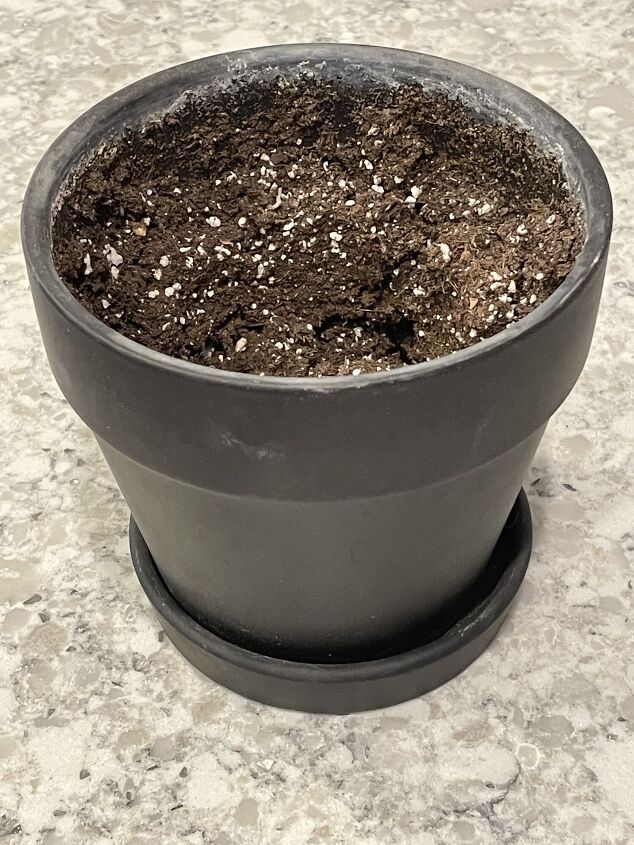
Look around your house and see if you can find a pot to use.
I found this black-painted flower pot in my garage!
PURCHASE OLIVE BRANCHES
Purchase an olive branch from your favorite craft store.
I bought mine at Hobby Lobby when the floral department was
marked 50 % off!
PREP
REMOVE STEMS
Remove the stems from your branch!
The branch on the right is straight, so that’s the one I’ll be using!!
CUT STYROFOAM CUBE
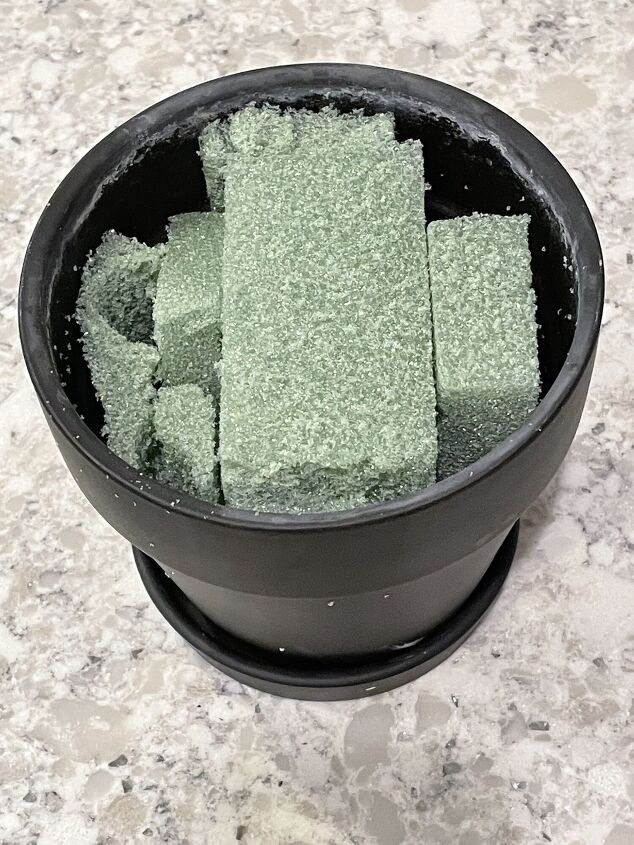
Cut your styrofoam cube and put it inside the pot.
I added smaller pieces on the sides of the cube to make sure it would not move!
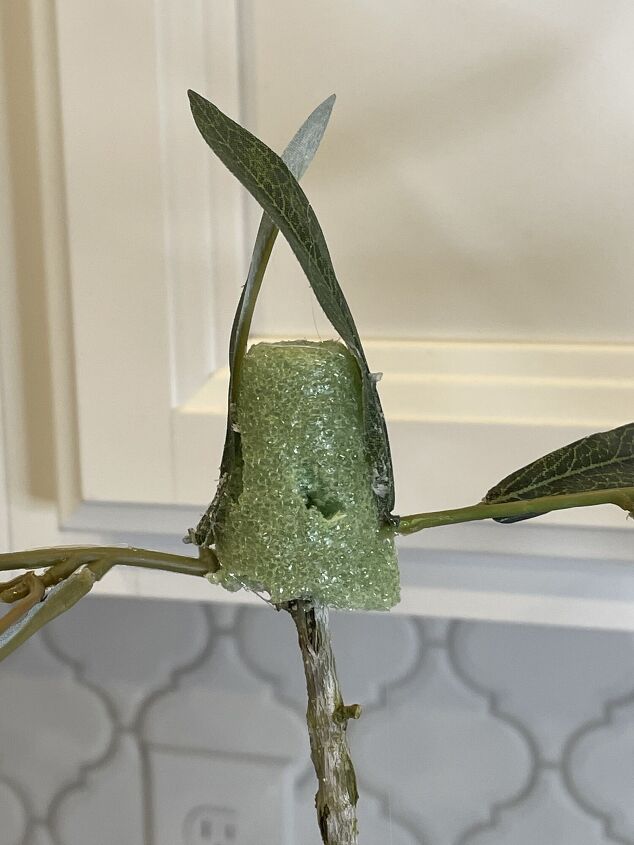
CUT STYROFOAM CONE
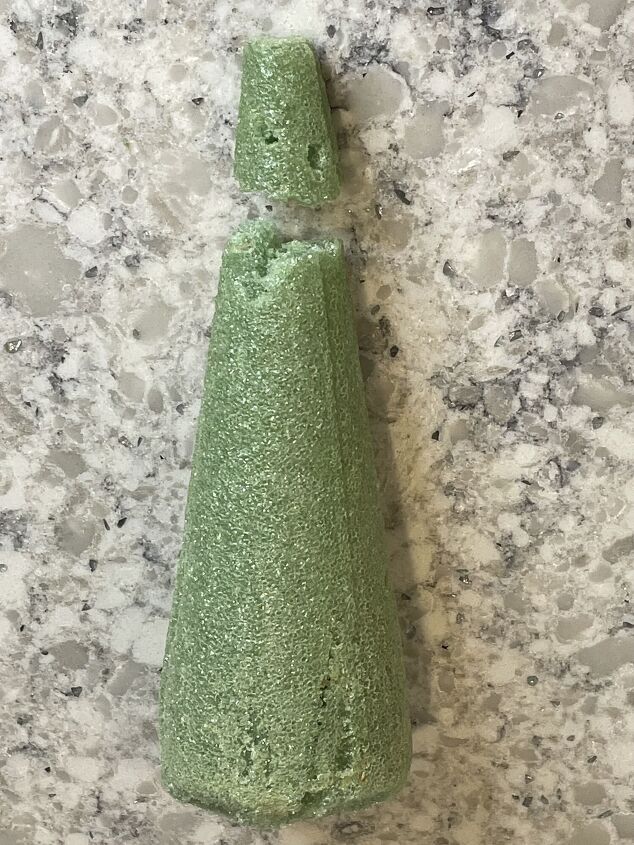
Next, cut the tip of the styrofoam cube off. You want to have a piece that measures approximately 1-1/2 inches.
REMOVE STEMS FROM OLIVE BRANCH
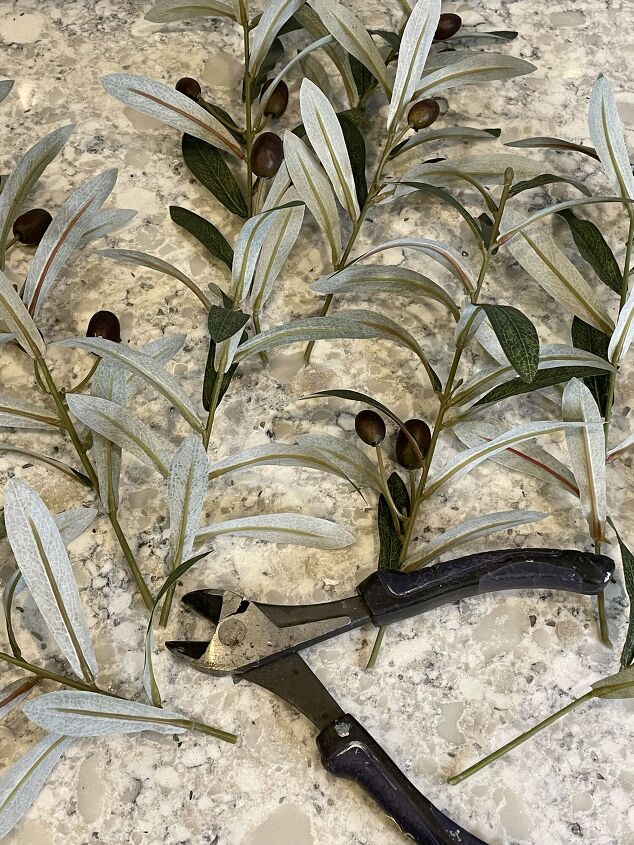
Using wire cutters, remove the individual stems from the branch.
CUT INDIVIDUAL STEMS
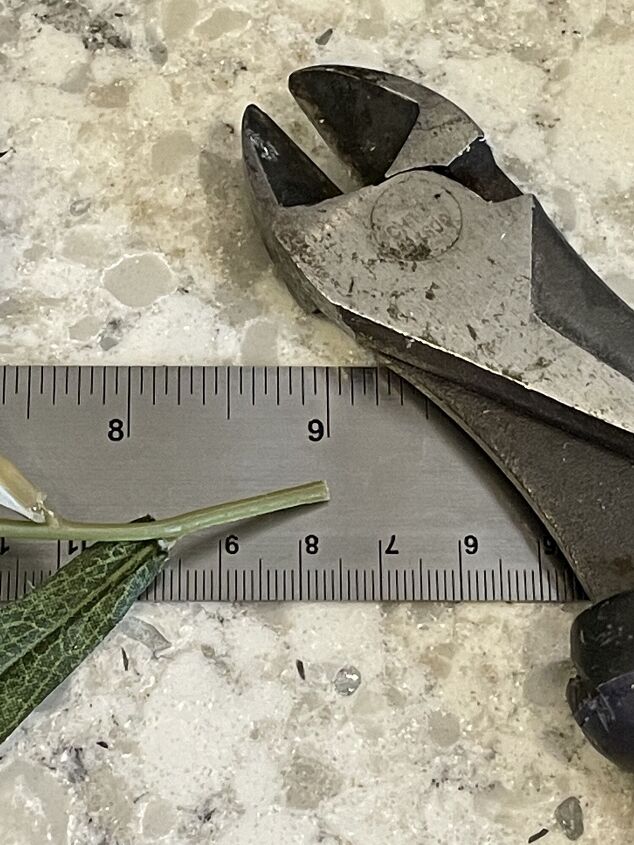
Measure the stem and cut it to 9 inches. Some of my stems were shorter than 9 inches and that’s ok!
Later in the project, you will need four individual leaves.
Remove leaves from the small pieces of stem that you just cut off.
STEPS TO MAKE AN OLIVE TOPIARY
PUSH BRANCH INTO POT
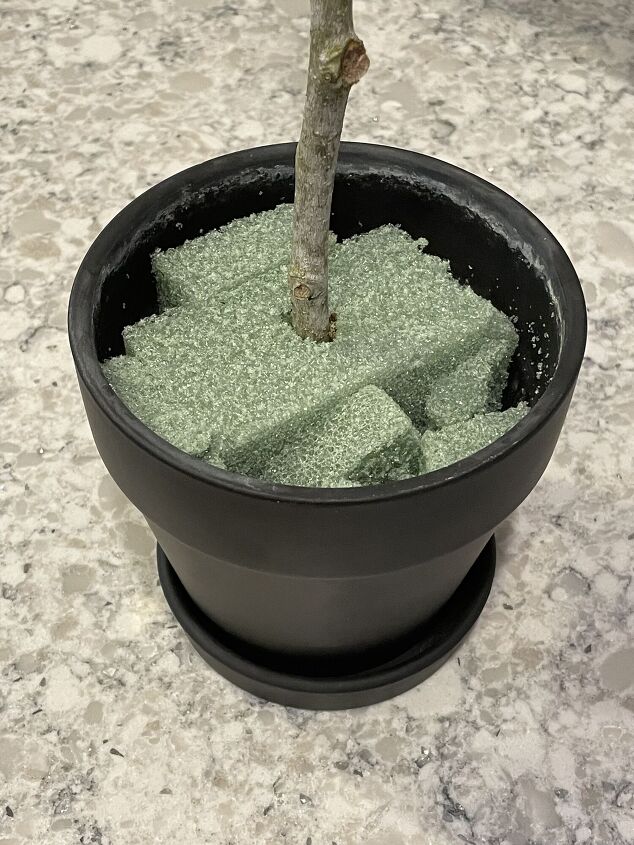
Push your branch down into the styrofoam.
ATTACH STYROFOAM CONE

Carefully push the styrofoam cone onto the branch. Remove the cone, put some hot glue in the hole, and then replace it on the branch.
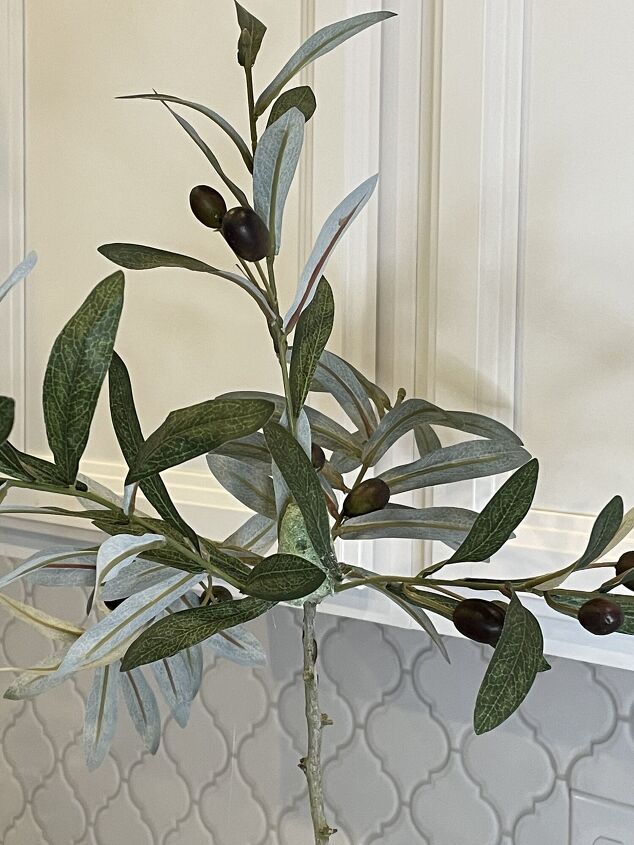
ATTACH BRANCHES
Take one of the longest branches and push it into the styrofoam.
Remove and add hot glue to the tip of the stem and halfway up the lowest leaf.
Replace the stem in the hole and press the leaf against the styrofoam cube. Do not touch the hot glue (you can use a popsicle stick) or you will get burned!
Add three more branches around the bottom.
Next, find the shortest stem and attach it to the top of the cone.
Attach the rest of the branches in between the bottom row and the branch you put on top.
GLUE LEAVES TO STYROFOAM

Some of the styrofoam will still be showing so take the four extra leaves and carefully glue them to the cone to hide the styrofoam.
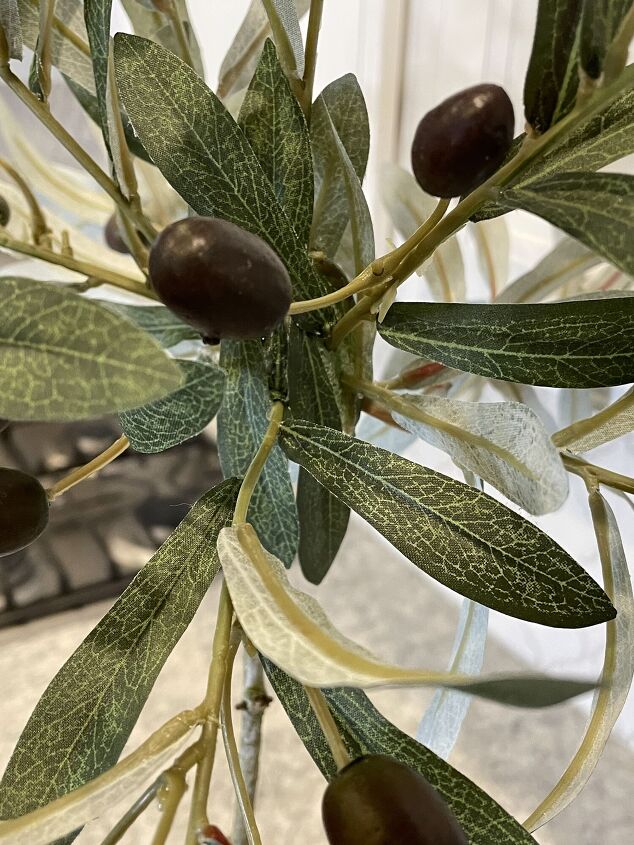
Glue some leaves up and some down.
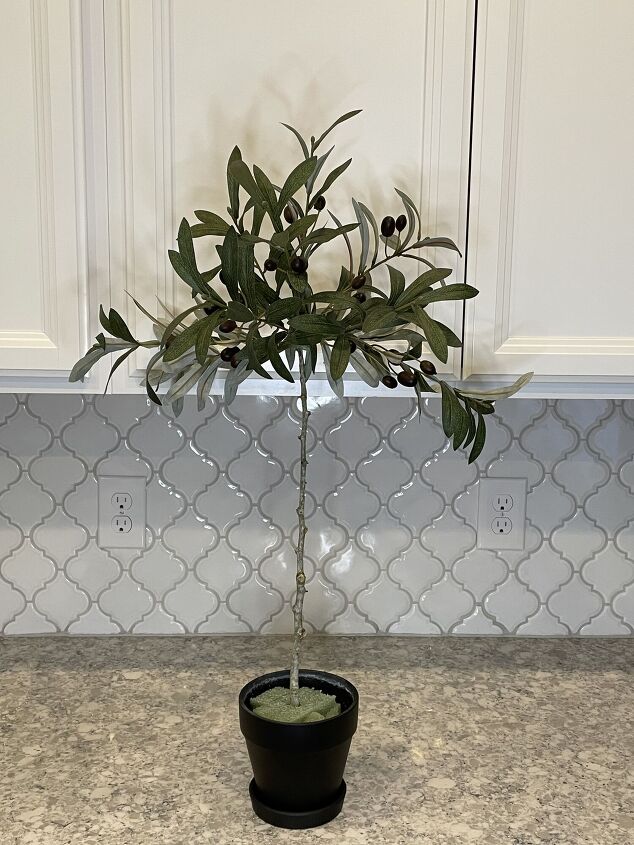
ADD FILLER TO POT
At first, I put moss in the pot to hide the styrofoam. It looked nice, but the tree looked so real, I thought adding dirt to the pot would look more realistic.
So, I removed the moss and added potting soil instead.
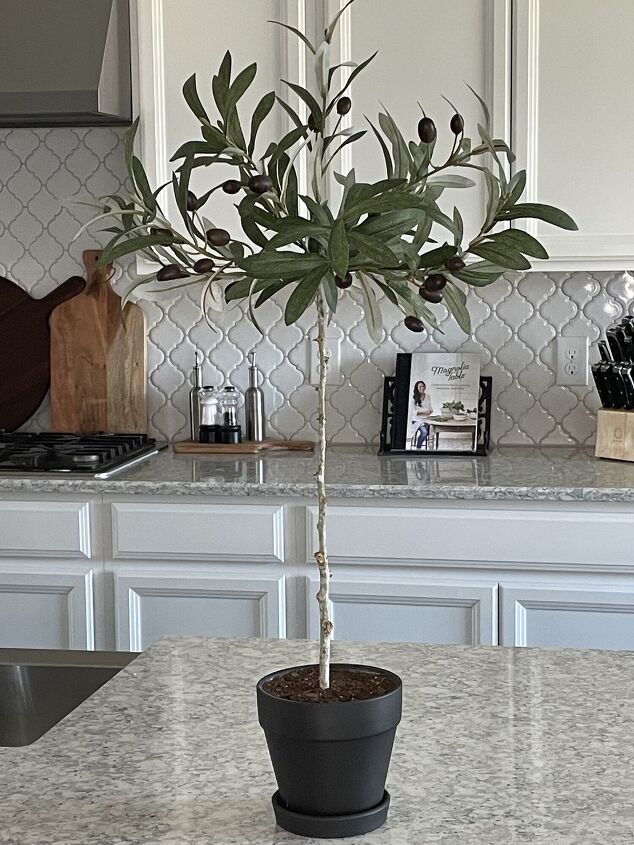
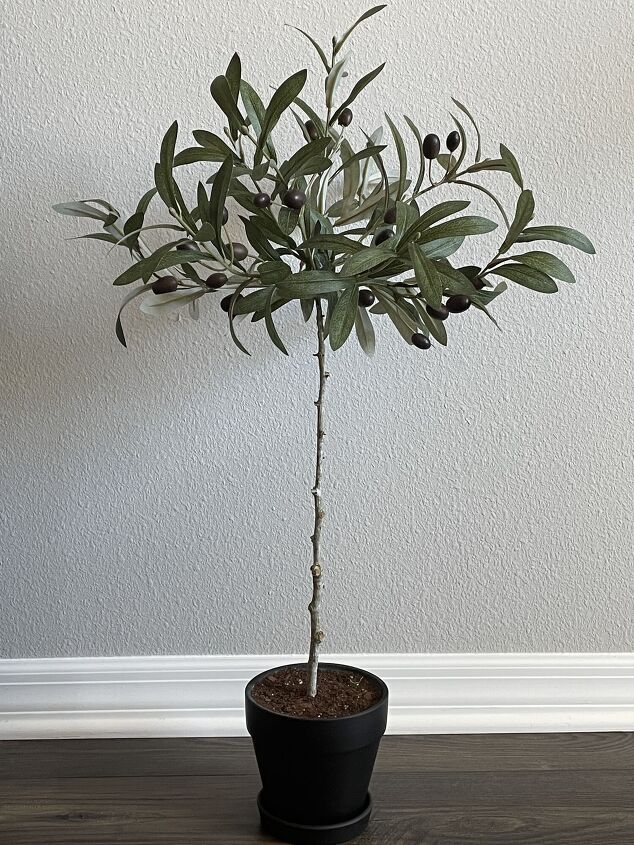
I can not get over how realistic this topiary looks!
BEND BRANCHES
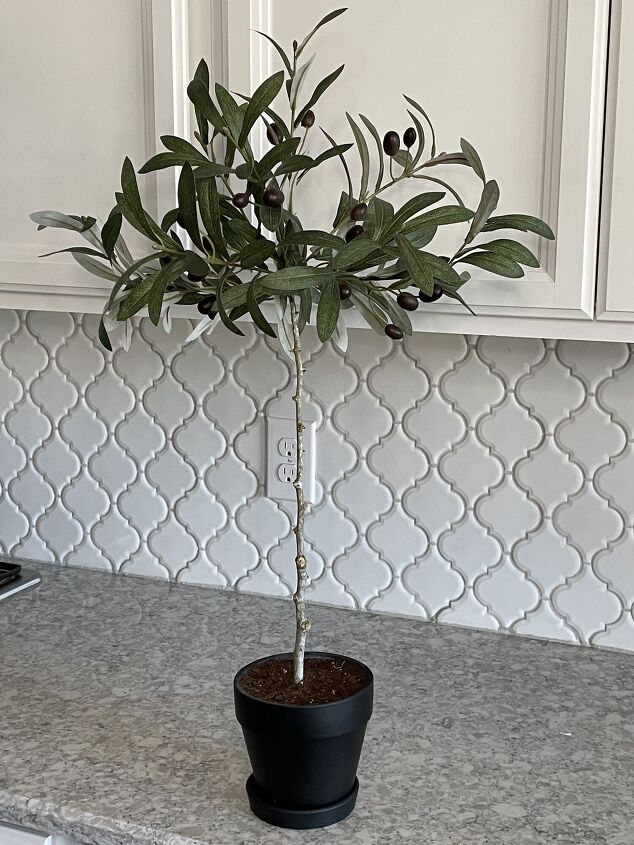
To give the tree a more rounded look, bend the bottom branches up slightly.
MAGNOLIA VS. MINE
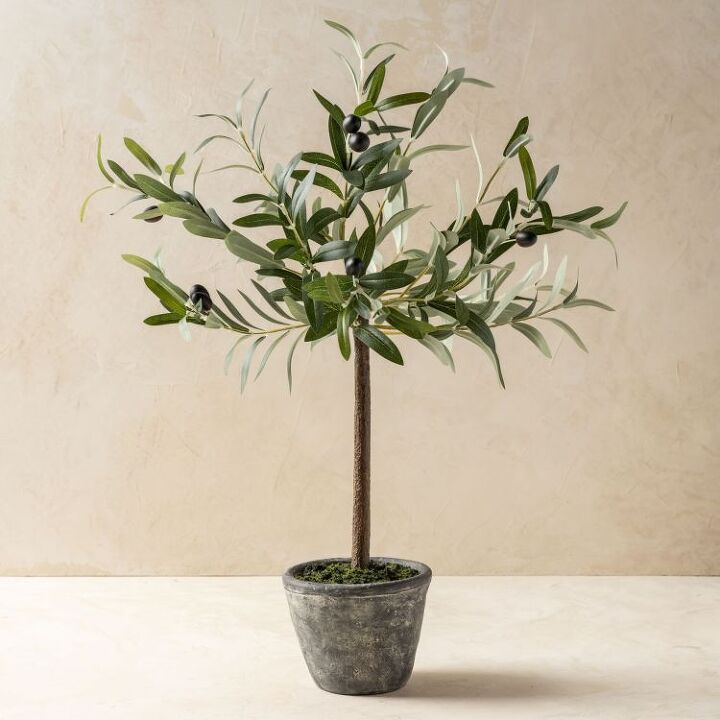
Well, what do you think?
Would you spend $54.00 on their topiary or make one yourself? Let me know in the comments below!
HOW TO STYLE AN OLIVE TOPIARY
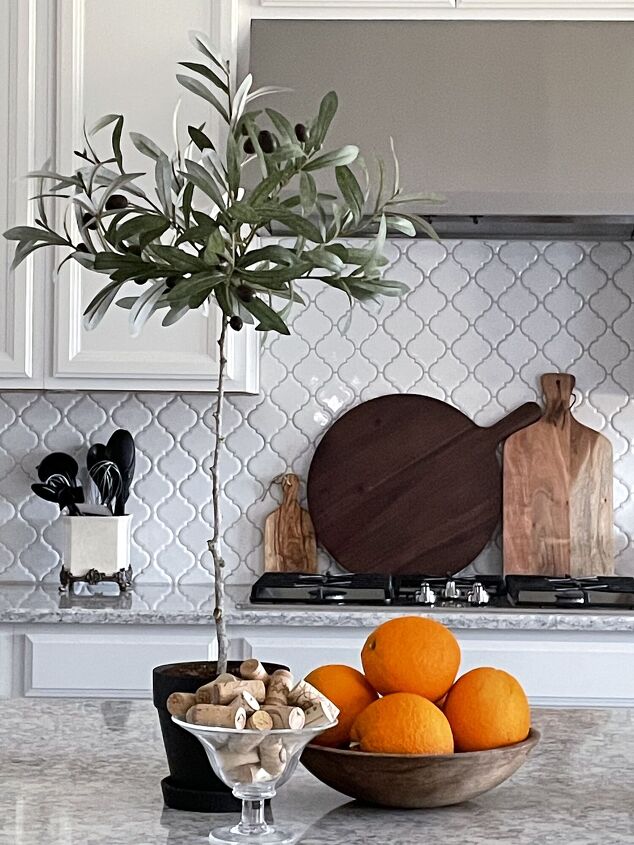
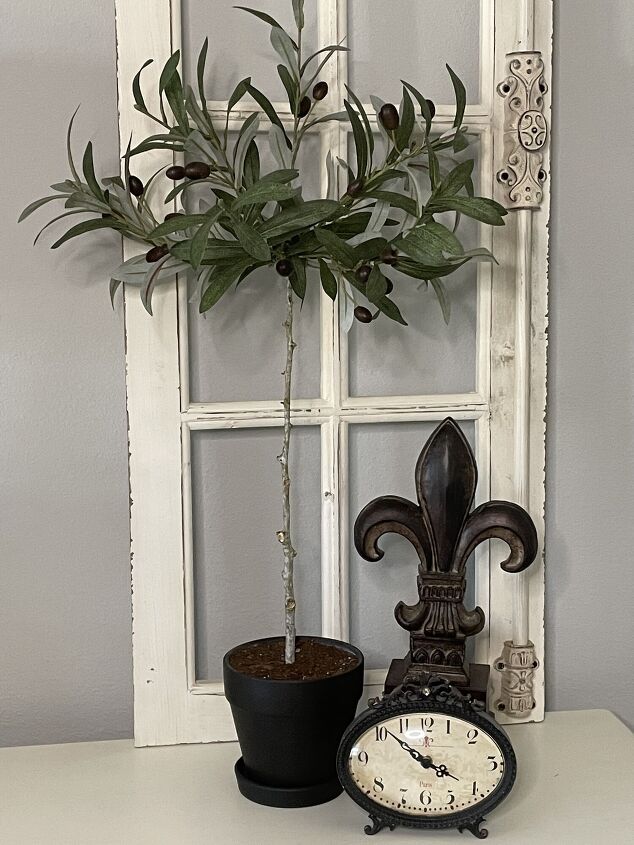
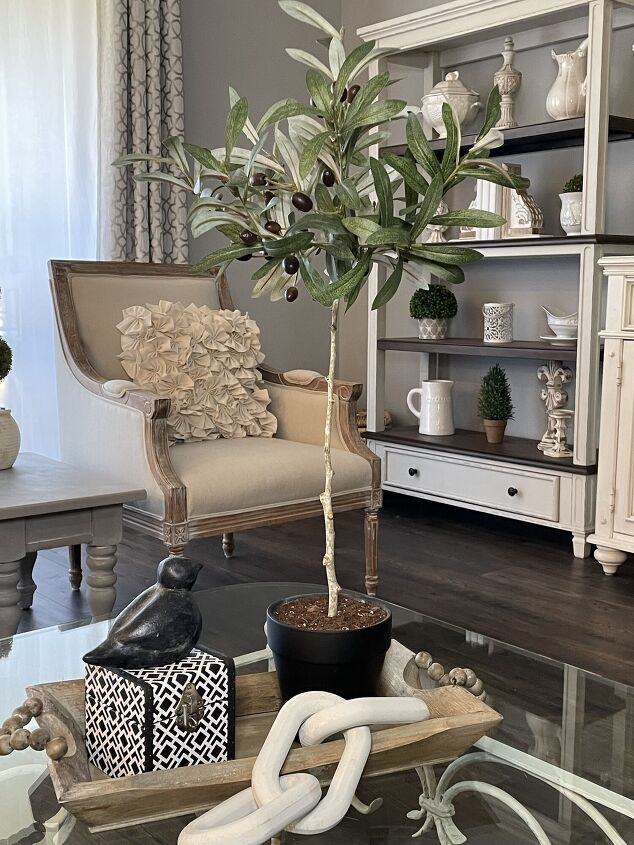
You can use a topiary like this in so many places in your home!
I can’t decide where I like it best!
KITCHEN COUNTER
NIGHTSTAND
COFFEE TABLE
Where do you like it best?
I am so happy I was able to make this olive topiary, so I might try to make some other decor items inspired by Magnolia Home.
If you are interested in learning more about home organization, seasonal decor, and more diy projects, from simple crafts to full room makeovers visit our blog AnOrganizedSeason.com
Blessings, Donna and Rich


Comments
Join the conversation
-
Yours looks so much more realistic! It's gorgeous! I'm in the mood to search for an olive branch and a stick! Thanks for posting.
BTW, how many stems did you have?
-
I'm on it! 😉


Frequently asked questions
Have a question about this project?
Why hasnt magnolia market scooped you up yet?! Your creation is so much more beautiful and realistic.
The pictures of different rooms and arangements for your tree are great. A peek into the calm elegance of a loved home.
Thank you for sharing and inspiring
MsTiff
I think your version looks better!!
This is beautiful,I like it the best.I would keep it in the kitchen,it gives it a pop of color and looks good there,looks bright and sunny and would make me smile everytime I would go in there.Good job keep it up.