


Make a Spooktacular Skull for Halloween
Do you want to add something wickedly awesome to your Halloween decorations? Well then we've got just thing for you. This boootiful skull candle holder is really easy to make and it's guaranteed to send shivers down your spine.
To make the skull all you need is some black and white Acrylic paint, wood glue, a tube of Burnt Umber Oil paint and a polystyrene skull. You should be able to get one at any self respecting craft store.

Paint the entire skull with black Acrylic paint and let it dry. Then brush a layer of wood glue all over the black paint. The glue seals the skull and is the best way I've found to create realistic looking cracks and spooky skulls need cracks, right?
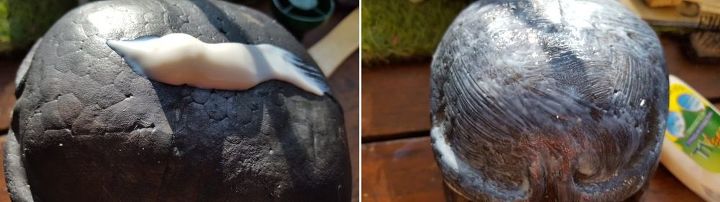
While the glue is still tacky brush on the white Acrylic paint, avoiding the eye sockets and nose area.
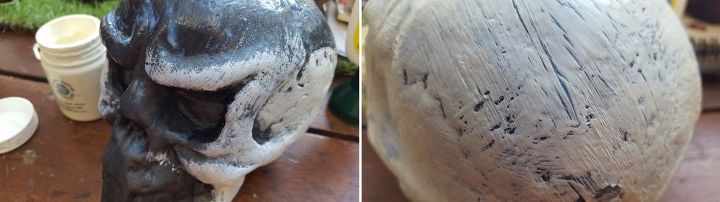
Once the gluey paint is completely dry, mix some burnt umber and turpentine and use a rag to wipe the mixture all over the skull. I love using burnt umber to create a grungy, aged effect.
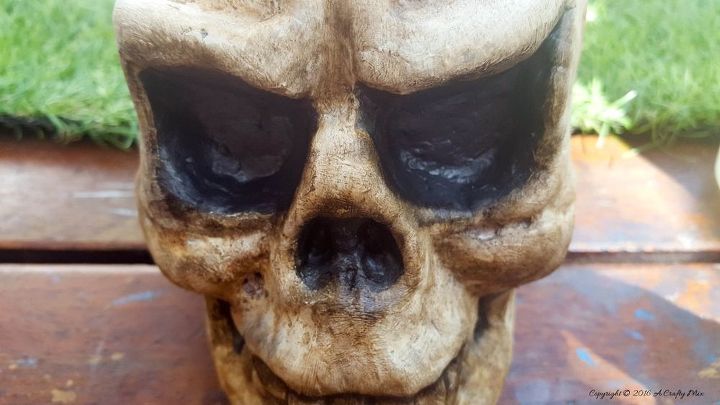
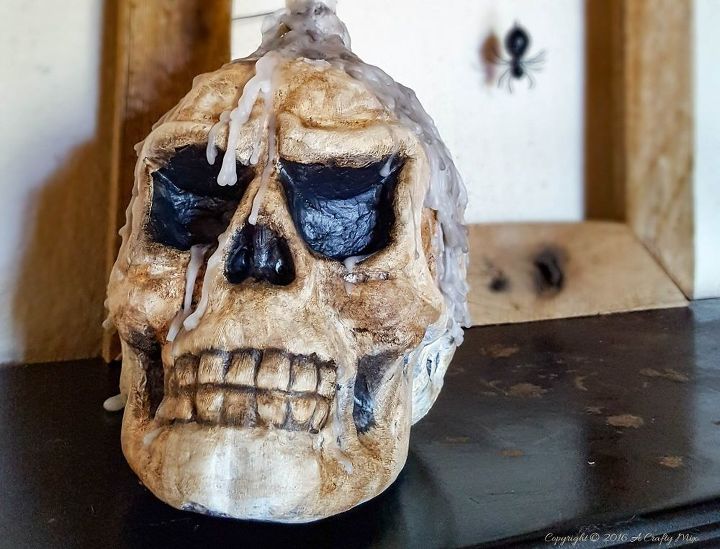
Finally seal the skull with shellac and added a candle on top.
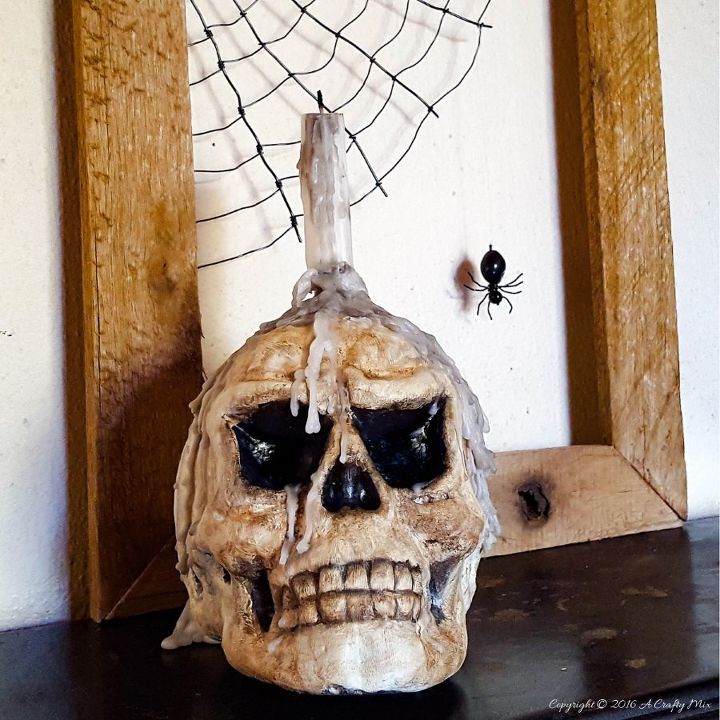
Our spooktacular skull keeps Matilda the spider company on our mantle and they've become really good friends. We can hear them whispering at night. I'm not sure what they're plotting but it's going to be something really terrifying ;-)
For the full tutorial, come say hi on the blog, we'd love to feed, oops I meant to introduce, you to Matilda

Comments
Join the conversation
-
This looks so cool, and so realistic!!
-
Thank you Brenda. We had a friend stay over the other day and he put a towel over the skull so it wouldn't give him nightmares :D


Frequently asked questions
Have a question about this project?