


Making a Game Board With Tumbling Tower Blocks

After seeing so many people on YouTube making coasters with the Tumbling Tower Blocks from Dollar Tree, I thought I'd like to make some for myself.
However, what started out as coasters quickly morphed into something much larger.
You'll see that I classified this project as "easy," however it is a bit time-consuming.

Supplies used:
- red and black craft paint
- 24 wood slices the approximate size of a checker
- 2-tone tumbling tower blocks (enough to make 16 coasters)
- wood glue
- Minwax Polycrylic
the Dollar Tree in my area don't stock the larger packages of Tumbling Tower Blocks. If you can get you hands on a few packages of those, this project will cost less.
I was able to average 3 coasters from a box of 36.
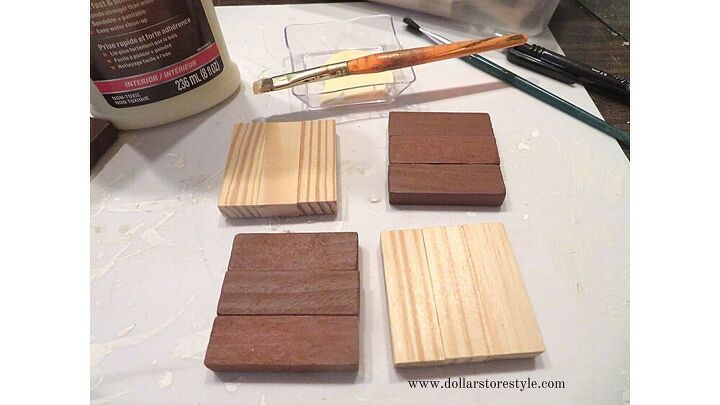
I started in the usual way by using wood glue to put together four sets of three blocks and glueing them together to make one coaster.
After I'd done that a couple of times, I began to see a pattern. Because I was using the two-toned tower blocks, it didn't take me long to wonder if I couldn't make something larger if I made enough "coasters."
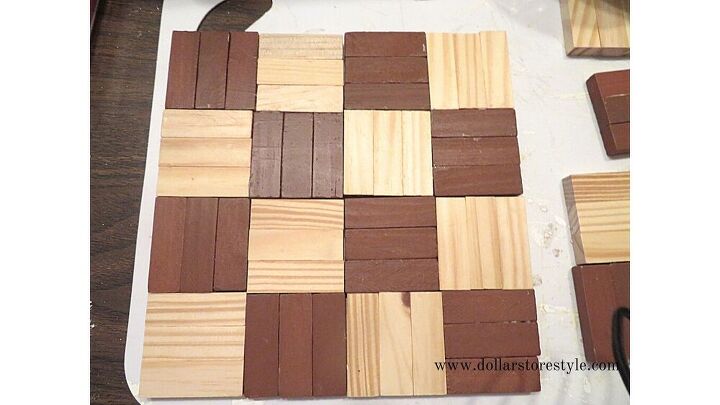
See what I mean about the pattern? By making sure that the coasters were placed so that the light and dark squares alternated, something like a checkerboard starts to take shape.
These aren't glued together, but I wanted to show how you could also make a wood trivet with these blocks by gluing four coasters together and coating them with a protective finish.
I carried on making 16 coasters, as a checkerboard has 64 squares.
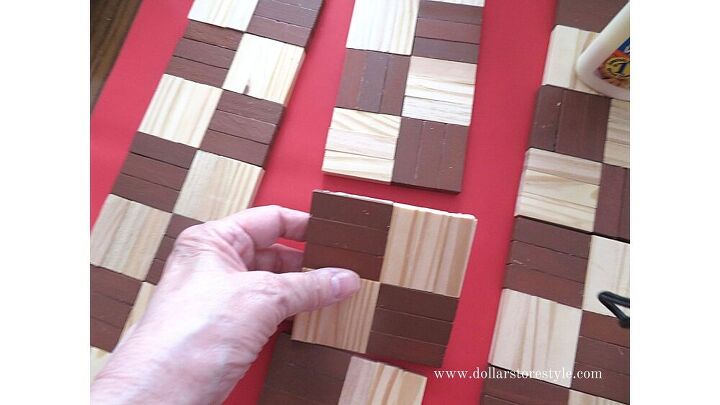
After the glue had dried on each coaster, I started to assemble my game board by making four lengthwise rows of four coasters, glued as shown.
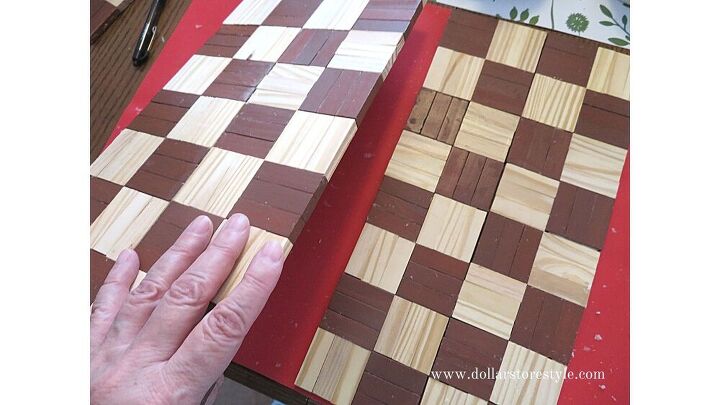
When the glue on the four rows were sufficiently dry, I attached two rows together times two. (Hope that makes sense!) Now, I've got two halves of a checkerboard.
The next step, of course, was to join the two halves.
To make the actual checker pieces, I used 24 wood slices. Now, if you want to make this game board, you could probably go to a toy store and buy checker pieces separately.
In order to get enough "checkers" that were roughly the right size, I had to buy five extra bags of wood slices to add to the bag I already had on hand. It might be cheaper just to buy checkers. However, I wanted the entire piece to look like it belonged in a cabin in the woods.
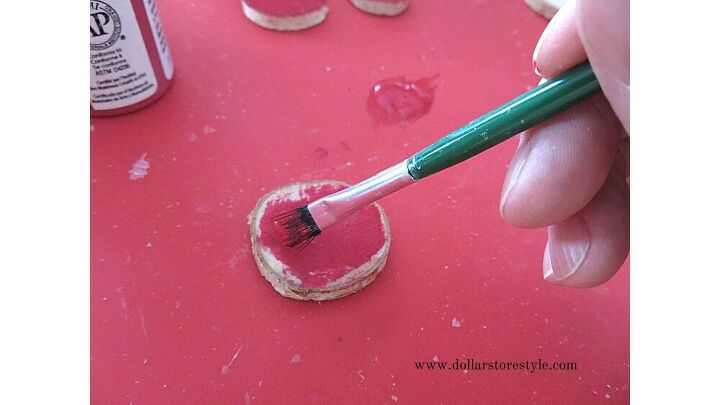
Don't do like I did and wait until you've started painting to realize you should sand down the wood slices! The birch pieces are especially prone to flaking.
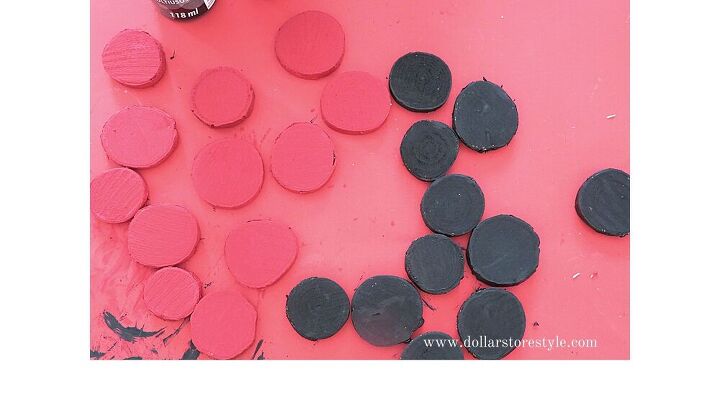
I painted 12 wood slices red and 12 black to make the game pieces. The red pieces took two coats of acrylic paint, while the black ones were covered in just one coat of paint.
I wanted to add some pattern to the checkers on one side and a crown on the other side but, so far I haven't been able to figure out how to do that without a lot of fuss and bother. Who needs fuss and bother?
I thought of using Mod Podge over stickers, but so far I haven't been able to find any flat stickers that suit.
Let me know if you have any ideas!
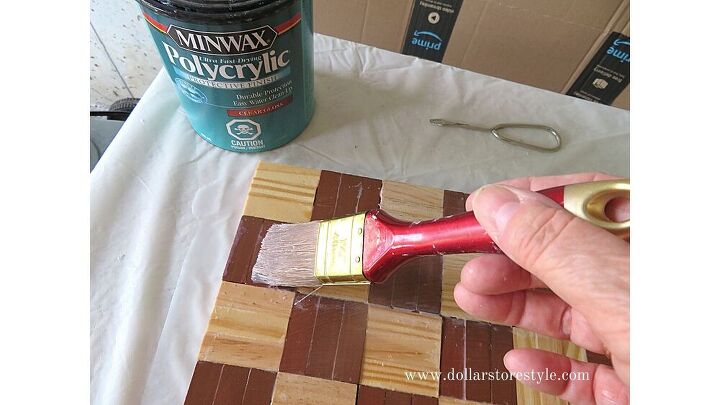
After sanding down the game board to remove any excess glue, etc., I sealed the top and sides with the polycrylic. I may add a piece of foam board cut to size to cover the back of the board, but it's not essential.

And here's the finished checkerboard! It's not perfect, but I choose to believe that that just adds to its charm.  It's a good sturdy gameboard that will stand the test of time and bring a hint of whimsy to your home or cottage.
And, who knows, you may be able to lure the kids away from the computer once in a while!
Resources for this project:
See all materials


Frequently asked questions
Have a question about this project?