


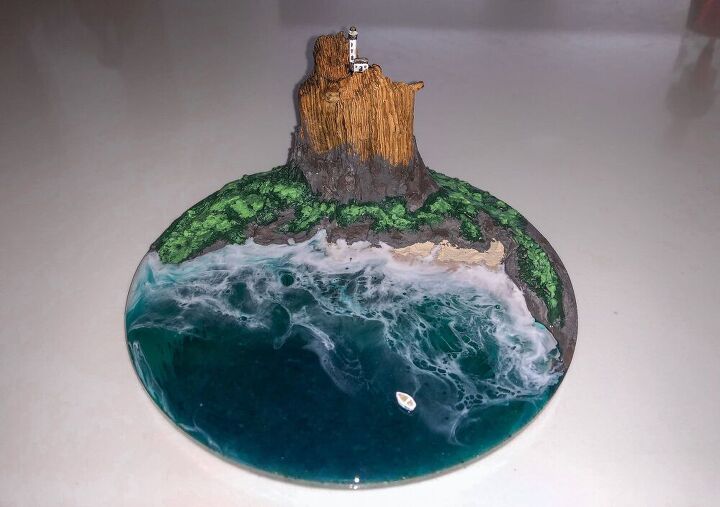
Modeling Paste Seascape Sculpture

Hello everyone!
Today's project is one I love for so many reasons! It combines many of my interests and passions into one:
- Making use of trinkets/souvenirs from vacations
- Resin
- And my new obsession - Modeling paste!
I've made a very small sculpture today because of the piece of driftwood I wanted to use but there's really no limit on how big you can go if you wanted to, so bear that in mind!
This whole project is up on my YouTube channel too if you prefer to watch your tutorials. Details and link below 👍🏻
WHAT YOU'LL NEED
- A piece of driftwood/a pretty shell/something beachy
- Resin - I use Rockstar Resin's products - use that link and my code HANNAH for 10% off their resin. They also do free shipping!
- Baking soda
- School glue/PVA/Elmers/Mod Podge (any will work)
- Acrylic paint
- Silicone mold
- Sand
- Colourants
- Painters tape/liquid latex
- Heat gun/blow torch
If you don't want to use resin then I've offered suggestions in STEP 6 of alternative methods to making a resin-free version!
Always use protective wear and follow appropriate safety measures when handling resin.
STEP 1 - SIT BACK AND WATCH YOUTUBE
As I mentioned above, if you prefer to watch tutorials instead of read them then I have a YouTube channel where this exact project is up and available to view now. Just click the video link above.
Please also consider subscribing to my channel for future crafty tutorials. I upload videos for most of my Hometalk projects plus loads more! 👍🏻

STEP 2 - PREPARE YOUR TRINKET
Because my piece of driftwood is an odd shape and won't stand up on it's own, I strap it to a ruler and craft stick with elastic bands so that when I place it in my silicone mold, it sits at the exact angle I want it to.
I make sure my driftwood is sitting right before I mix the resin in case there's lots of tweaking and adjusting to be done with the rubber bands which I don't want to be doing whilst dunking it in and out of resin.
I'm using a piece of driftwood my husband gave me as a little side present for our 5th year wedding anniversary. He picked it up when we road tripped down the west coast so I wanted a cute way to preserve this. For you it may be a shell or something else special that you've collected that you want to preserve so when I refer to the 'driftwood' going forward, that's just because that's what I used. You can use whatever you like!
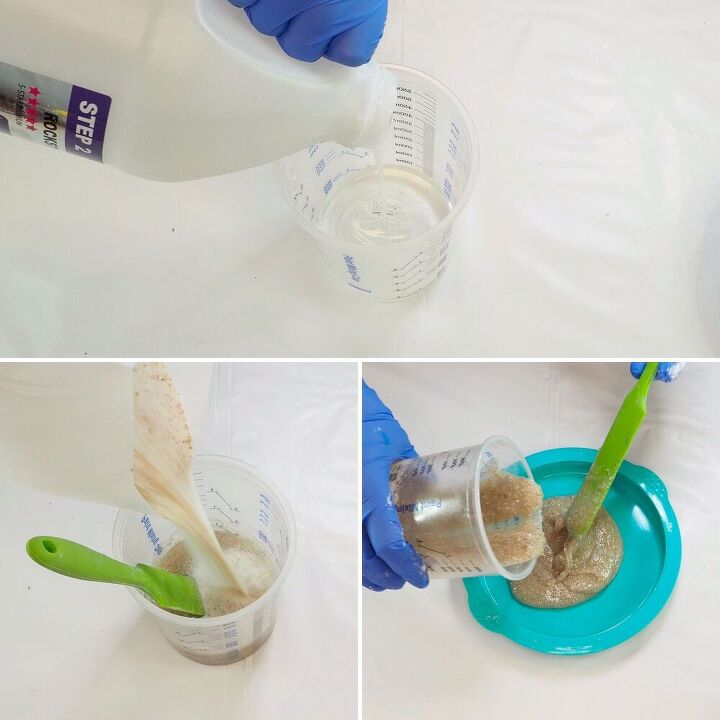
STEP 3 - MIX SOME RESIN
I mix together roughly 100mls of resin (50mls of hardener with 50mls of resin) before adding in roughly 100mls of sand. This brought the volume to about 200mls. My mold is 6 inches in diameter so 200mls would be about what I needed to create a solid sandy base.
If you have different sized molds, I can try and assist you with what volumes to use if you're unsure. I'm also happy to try and advise what resins to use for different steps/projects if you're using Rockstar Resin's products because I've worked with most of them now.
I add the sandy mix to my silicone mold and let it level out.
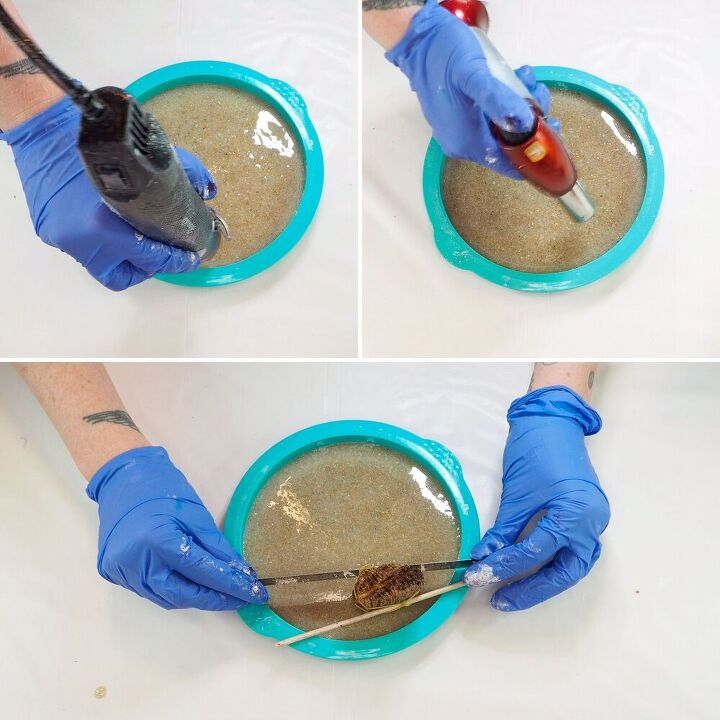
Using a heat gun and blow torch, I pop any bubbles that have formed before resting my piece of driftwood in the sandy resin.
I then leave this to cure fully. I used Rockstar Resin's 5 Star 1:1 Thin Coat resin for a super quick cure on this step.
This formula usually gives me a few bubbles when I use it for anything other than doing top coats because of it's high viscosity, but because I mixed it with sand, I don't need the resin to be bubble-free. It's super handy because it cures in 6 hours!
STEP 4 - CREATING THE PASTE
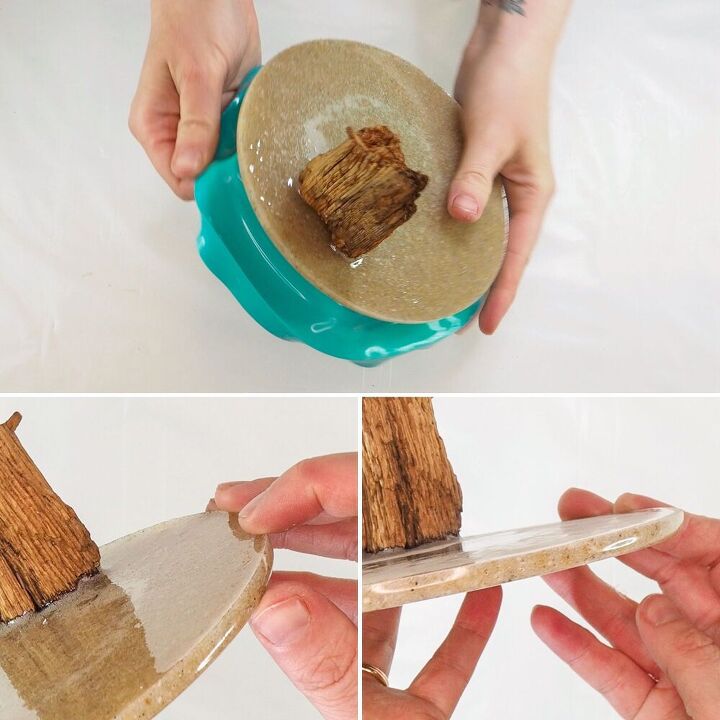
Just six hours later and I demold my sand base.
I sand the lip off the top edge. This usually forms when resin cures in a mold. I sand it off so that when I pour my resin waves later, they can flow over the edges naturally rather than getting caught and bunching up.
Now it's time to make the modeling paste!
I know so many artists on instagram that buy this stuff pre-made when it's sooooo easy and cheap to make at home. I'm only sad I didn't learn how to make it earlier because since learning how, I've had so much fun creating 3D art.
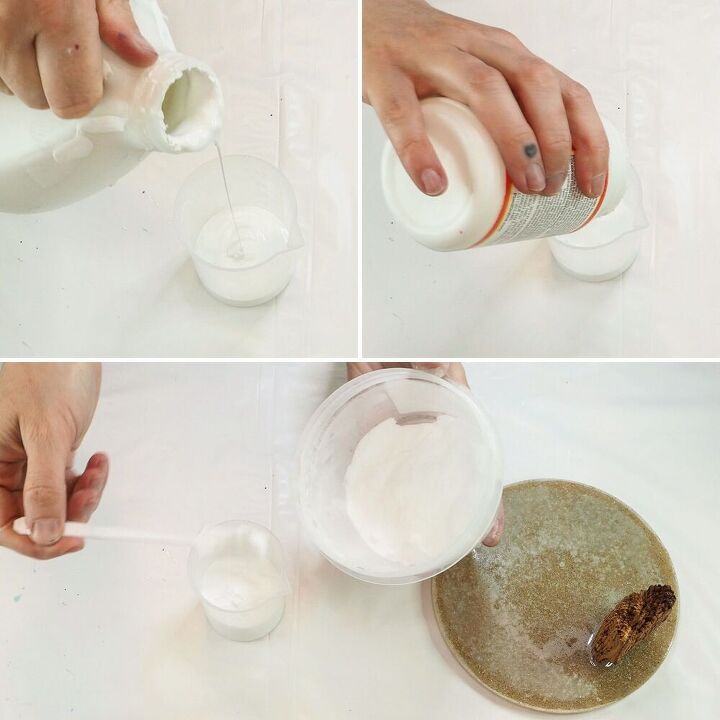
After playing around with a few recipes, I came up with one that works best for me:
- 1 part glue
- 1 part white acrylic paint
- 3ish parts baking soda (basically keep adding until stiff)
So easy! I advise making your 'parts' small to begin with or you may find you've mixed a lot more than you need by the end. You can always add more of any ingredient as you go if needed. It's very hard to go wrong!
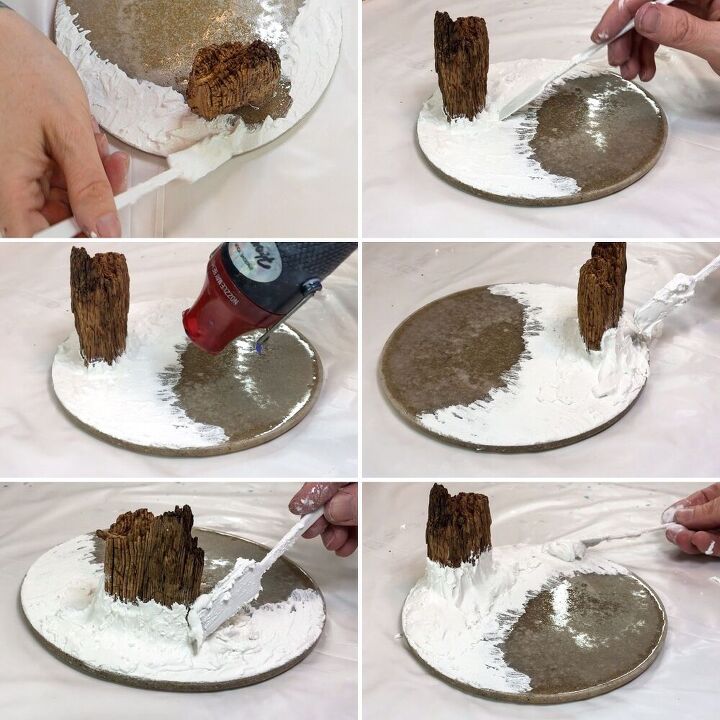
With a smooth frosting-like paste, I start plastering this onto my sand base. I build the paste up like a rocky formation and bring it part way up my driftwood piece so that the wood becomes part of the composition.
I use my heat gun intermittently to dry out the paste making it easier to layer up.
I create a definite sea/land divide then once I'm happy with the overall look of the piece, I let the paste dry out fully.
STEP 5 - PAINTING
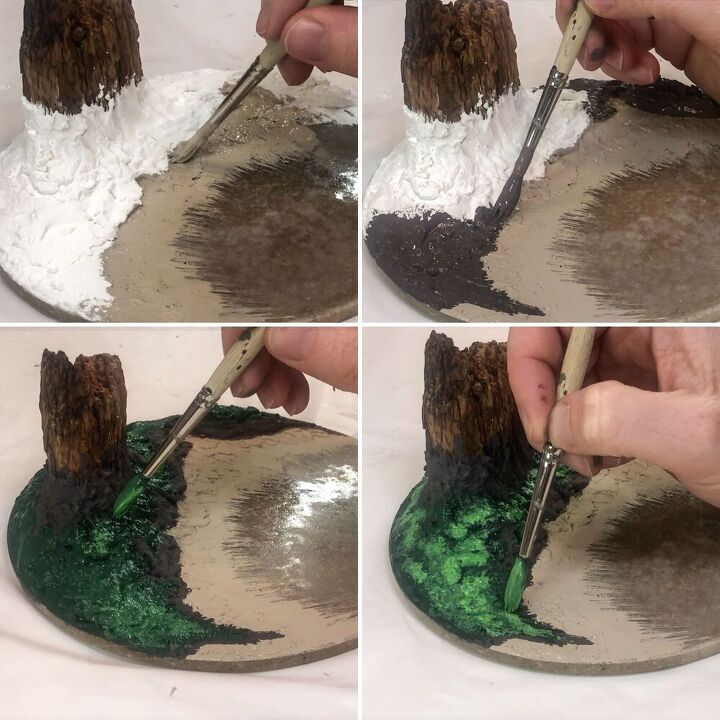
Once the paste is dry, I paint my rocks, trees, grass and sand with acrylic paints.
I start by painting the rocks a greyish-brown before adding a dark green to where I want the grassy/tree areas. I then stipple lighter greens on top of this so that the colours goes from dark to light the higher the 'altitude'. This helps add depth to the piece rather than having just one flat shade.
I leave the majority of the sand base unpainted because I don't mind if this shows through under the resin later, it is sand after all 😂
I paint the shore line though as I think the shiny sand base and the matte rocks would look strange next to each other.
STEP 6 - ADDING THE WAVES
As I mentioned earlier, if you don't have or don't want to use resin, then just know there are creative ways around making this entire project without using any.
- The base could be a wood round
- You could encase your driftwood in the modeling paste landscape and prop it up whilst it dries
- The ocean could be more modeling paste sculpted to look like waves and then painted with blues and greens etc
In fact, I think that would look awesome!
However, I love resin and any chance I get to use it I will 😂
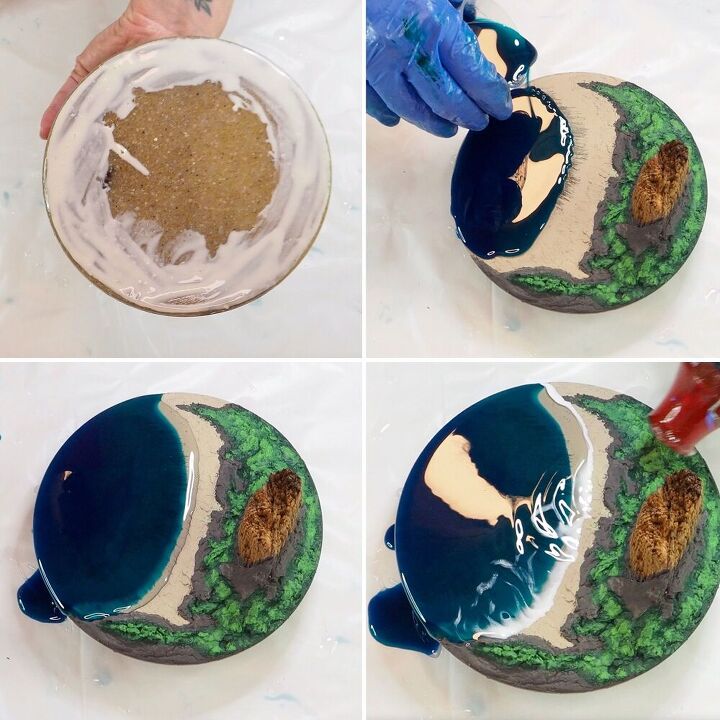
So I add liquid latex to the underside edge to protect it from resin drips and allow this to dry. Whilst it's drying I mix together a small amount of resin, only about 100mls, and split this between 4 small containers. I colour 1 portion dark blue, 1 portion light blue, I keep 1 portion clear and colour the last portion white.
Now that the latex is dry, I add an arc of dark blue resin to the bare sand base followed by a light blue arc above the dark blue one. I add a thin line of clear resin to the outside of the light blue resin and then a line of white resin to the outside of the clear resin. Basically, the closer to the shore line I get, the 'rainbow' of colours go in this order - dark blue, light blue, clear, white.
Using a heat gun, I blow the white resin into the rest of the resin rainbow to create the waves (it can take a few seconds for the resin to warm up enough to start moving so be patient).
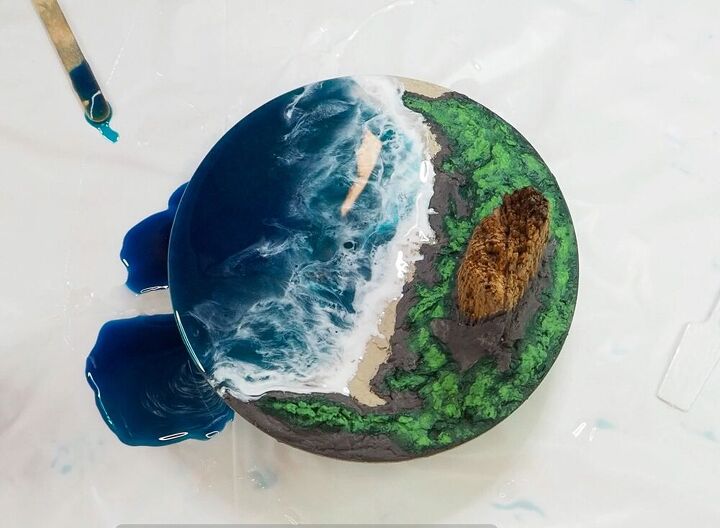
Allow to cure again before finishing up the last few steps.
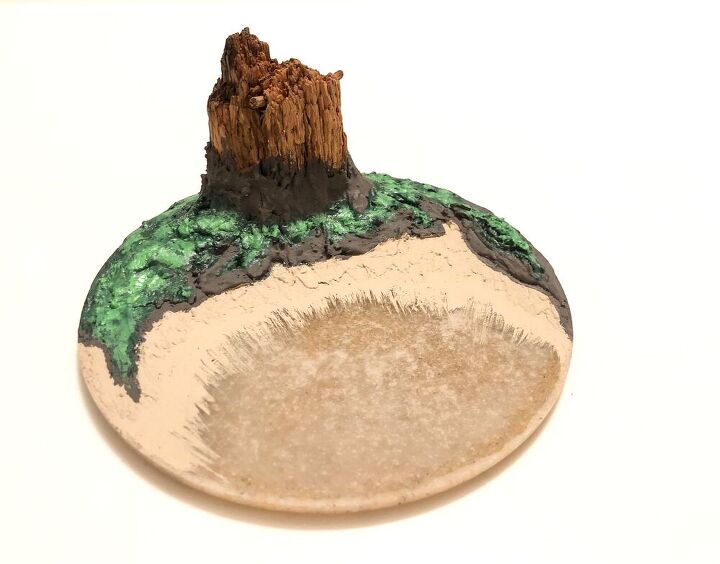
I mentioned earlier you could do this on any scale, and you really can. Mine is only mini because of my driftwood focal point.
STEP 7 - FINISHING UP
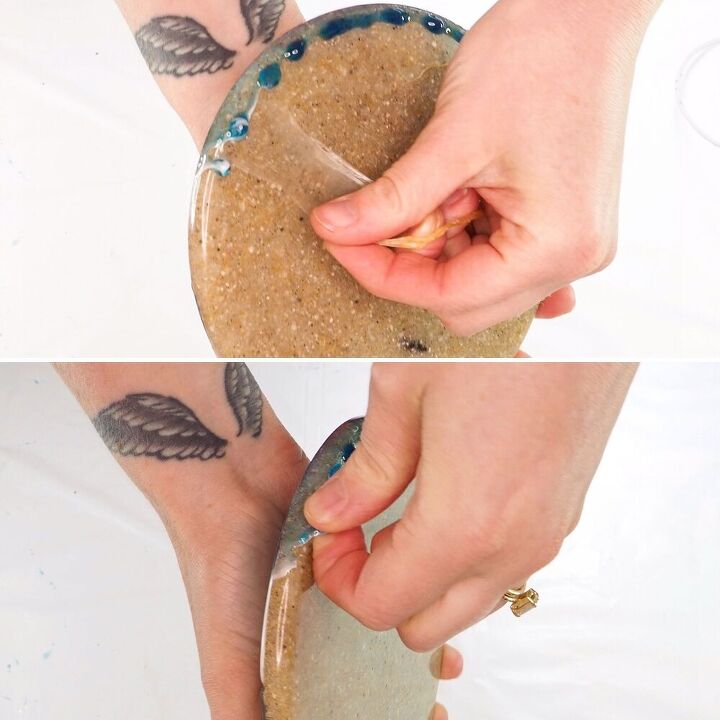
Once cured, peel the latex off the back and pick off any little resin drips. Sand around the edge to get rid of any rough bits and then your little seascape is done.
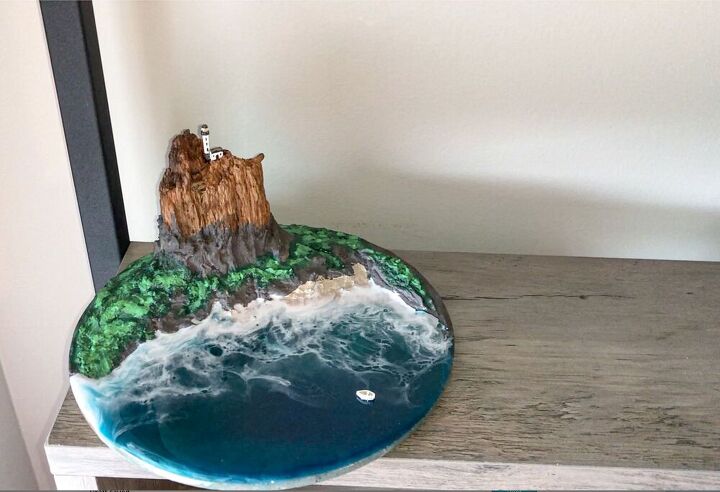
You'll see that I added a teeny tiny lighthouse and boat to mine. They were wonderfully fun to make but I thought they were also a little niche so won't include them in this tutorial. However, if you do happen to be interested in how I made them then I have a video dedicated to this on my YouTube channel 👍🏻
Thanks so much for taking the time to check out my project today! I hope you enjoyed it.
Please feel free to drop any questions or comments down below and I'll happily get back to you.
I sell lots of handmade goodies in my Etsy store if you're interested in having a browse. Just click that link to visit.
Until next time, happy crafting! x

Comments
Join the conversation
-
Lovely. I particularly love the way you have the waves and foam, so realistic.
-
Love it; a piece of the ocean as my very own😻


Frequently asked questions
Have a question about this project?