


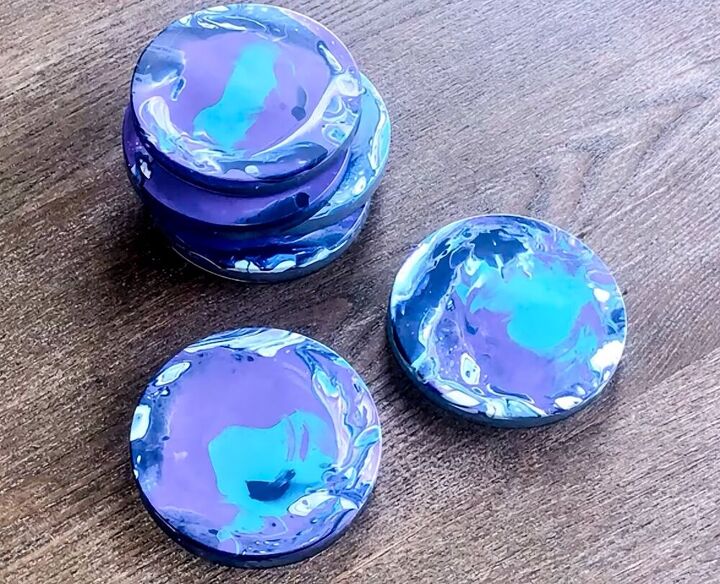
Paint Skin & Resin Coasters

Thanks for checking out my project today. This is a great 'part 2' to my 'Mini Flip-Cup Acrylic Pour Coasters' project which is also here on Hometalk as I show you what I do with my left over paint.
Either way, if you have left over paint or fresh paint, this is a great little trick to make unique looking home decor.
These coasters also make really easy DIY gifts and this technique can be applied in lots of different fun ways.
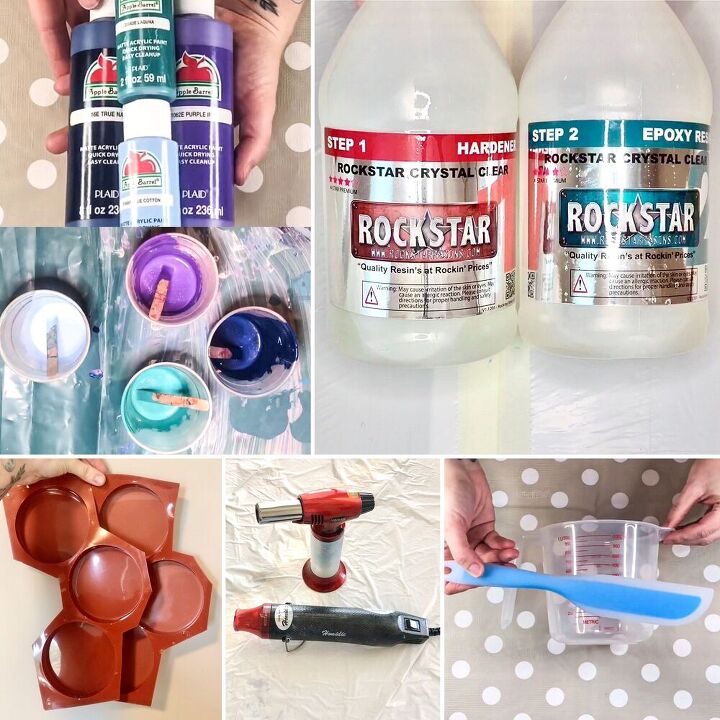
WHAT YOU'LL NEED
- Acrylic paints
- Coaster molds
- Resin - I recommend using RockStar Resins via this link and if you use my code HANNAH at checkout you will get 10% off your order
- Mixing containers and sticks
- Heat gun/blow torch
- Protective wear
YOUTUBE
For a really easy to follow video of this exact project, click the link above to view.
Please be sure to check out the rest of my YouTube Channel too and consider subscribing for future crafty tutorials 
STEP 1 - POURING THE PAINT
As I mentioned above, I use the left over paint from my earlier project 'Mini Flip-Cup Acrylic Pour Coasters' where I mixed 4 different coloured paints and a white paint.
For your project, if starting from scratch, you can use normal acrylic paint colours mixed with a small amount of water until you reach a warm honey-like texture.
Alternatively, like I did, you can mix together an acrylic pour mixture based on my recipe of:
- 1 part paint
- 1 part floetrol
- A splash of water
- A squirt of silicone
Both methods will provide perfectly workable results. I personally just like to add the silicone for guaranteed cells and the floetrol so that I'm not using up as much of my paints.
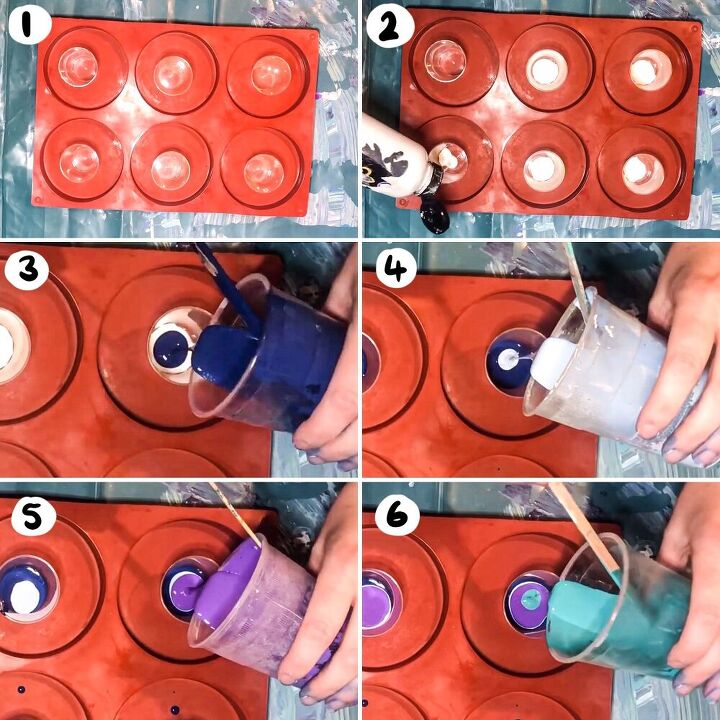
After mixing you colours and achieving the warm honey-like texture, add a small amount of each, including the white, to 6 small plastic containers (or however many coasters you're making).
It doesn't matter which order you add your colours into the containers but I usually like to start with the white. After the white, I add the colours in a random order, just make sure you can get a bit of each colour in all 6 containers.
Once each container is full enough so that the paint could cover the bottom of the mold base, quickly tip them upside down into each of the coaster cavities, capturing the paint inside the up-turned container.
Once the paint has had a chance to settle at the bottom of the container, lift it away to reveal the lovely mix of colour this process has left behind.
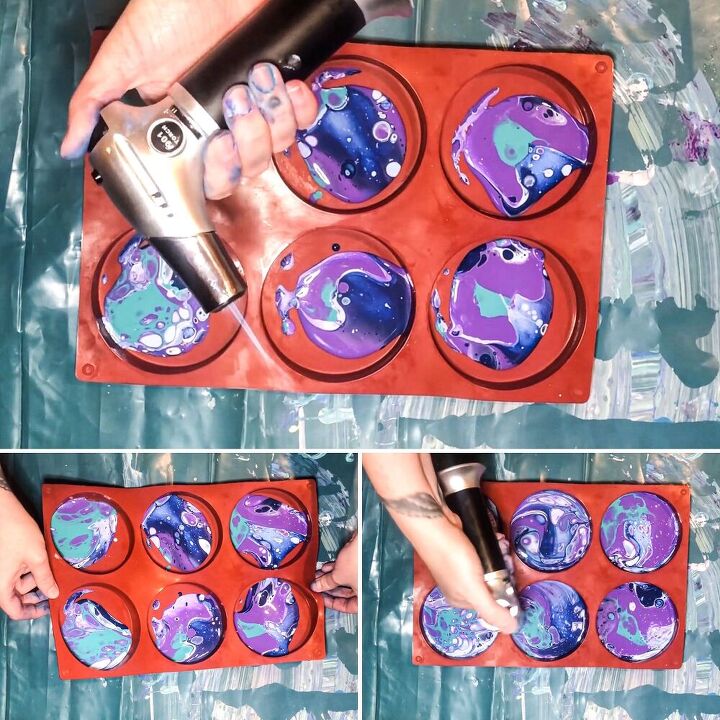
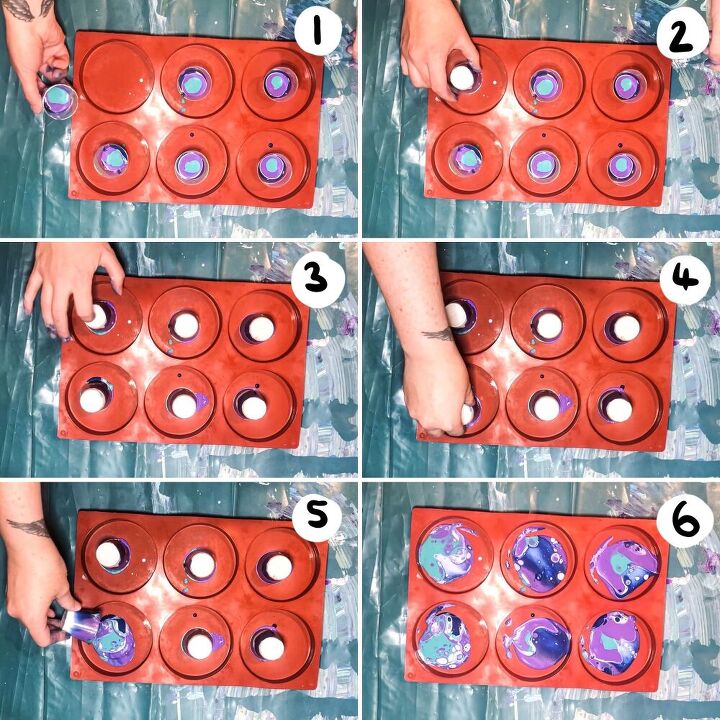
STEP 2 - TILT & POP
Once you've lifted away each little container, take a heat gun or blow torch and pop any little bubbles that have formed to reveal the layers of colour within the pour.
Pick the whole mold up and tilt it from side to side to make sure that the paint covers all the bases before leaving to thoroughly dry out.
The time it takes for the paint to dry will depend on how much is in the molds but I advise leaving for at least 24 hours.
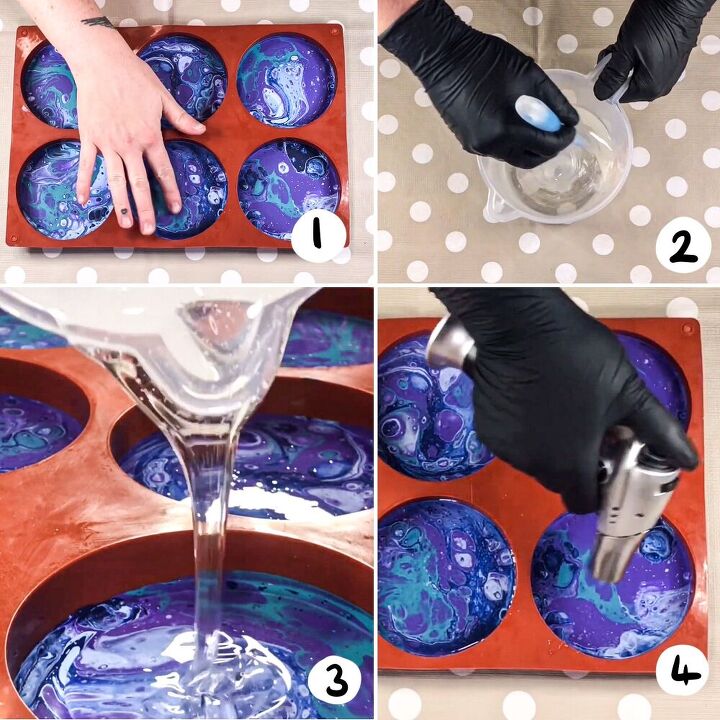
STEP 3 - ADDING THE RESIN
Mix up enough resin to cover each mold base and to make the coasters as thick as you'd like.
Pour the resin in on top of each dried paint skin base and pop any little bubbles that form using a heat gun and blow torch.
Leave the resin to cure depending on the resin's cure time. Most 1:1 formulas are around 24 hours.
Remember to make the most of the discount code that I get with Rockstar Resins if you're on the look out for a new batch. I recommend their 1:1 4 Star Coating Resin or their 2:1 5 Star Coating Resin for this project.
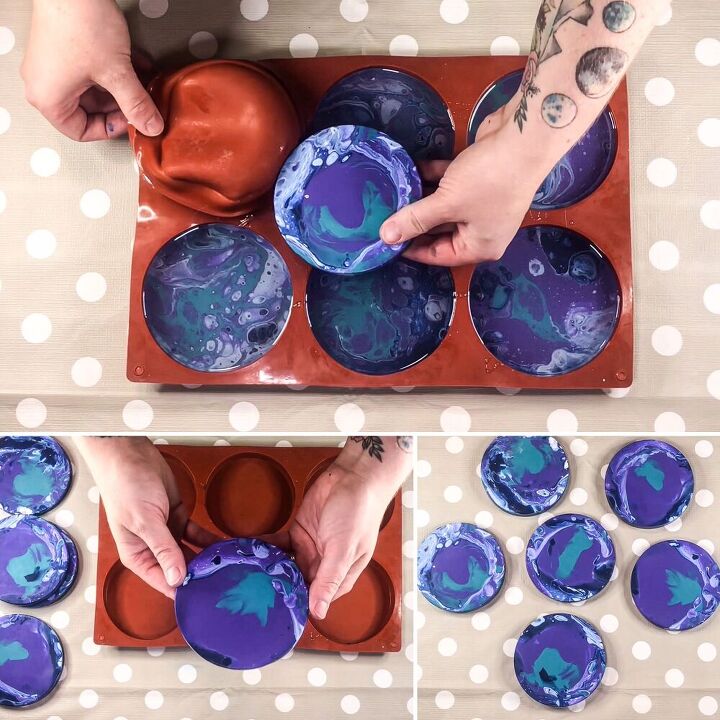
STEP 4 - DEMOLD
Once the resin has fully cured, demold your coasters and check out the fun patterns that the pour created underneath.
If the edges are a bit rough then just give them a quick sand with sand paper. There is no need to coat the top with resin or a protective layer, you can leave them matte and they're ready to go.
I hope you enjoyed today's easy project and I hope it gives you some ideas of how else to use this technique. I made a clock with this technique by pouring the paint into a much larger mold to begin with, so it can be used for much more than just coasters.
I don't have these coasters for sale anymore but I have plenty of others and lots of handmade goodies available in my Etsy store. Click this link to take a look if you get a chance.
Please also remember to take a look at my YouTube channel and consider subscribing.
Thanks so much for taking the time to view my project!
Happy crafting!

Comments
Join the conversation
-
Very retro. Reminds me of summer camp when I was 12.
-
Love these!
Nice gifts😀


Frequently asked questions
Have a question about this project?