


Paper, Glue, Scissors & Crayons = Homemade Happy Birthday 🎈

5 Materials
$1
20 Minutes
Easy
Need a rainy day project? Try this idea...We are blessed to live in a small, tight-knit town. One of the ladies in our hometown is preparing to celebrate her 96th birthday soon. Her daughter asked her Facebook friends to send her mom a birthday card, so she can be surprised on her birthday with a plethora of birthday cards. This made me remember when I was a little girl, we always enjoyed making cards for our family and friends. My sisters and I would pull out our crayons, scissors, glue and paper and work together to create cards filled with care and love. As our giggles and voices filled the room, sweet memories were made that will last a lifetime. It is those sweet memories, that presented me with the idea to create a homemade card for this dear lady, instead of just picking up one at a store. Times were different years ago, my how they have changed! In our fast-paced times, I pray I always take time to care for others.
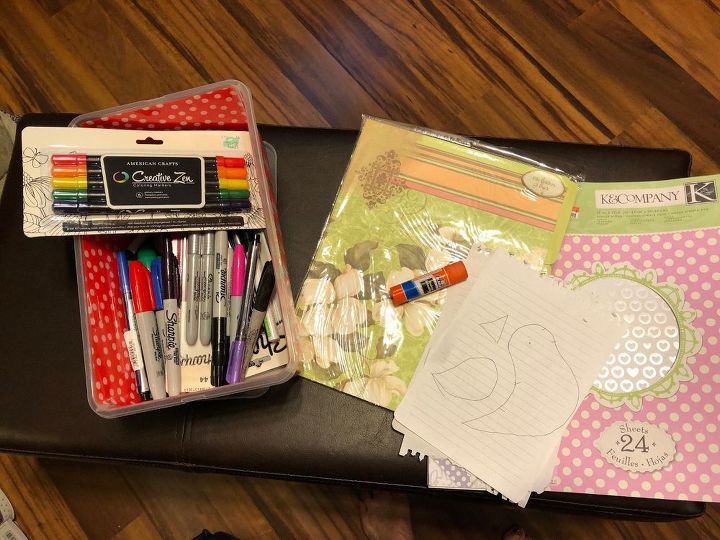
Supplies
First, I gathered the supplies I needed. I used Sharpies, a glue stick, pencil, scrap booking paper, craft scissors, regular scissors, a ruler and a decorative folder.
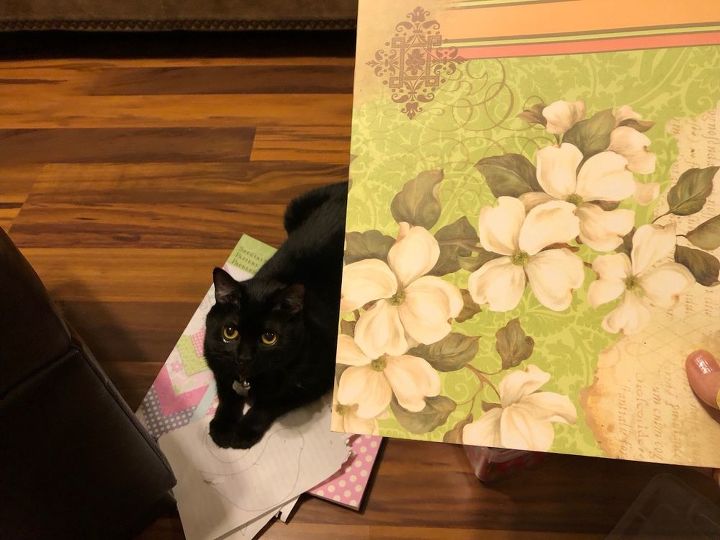
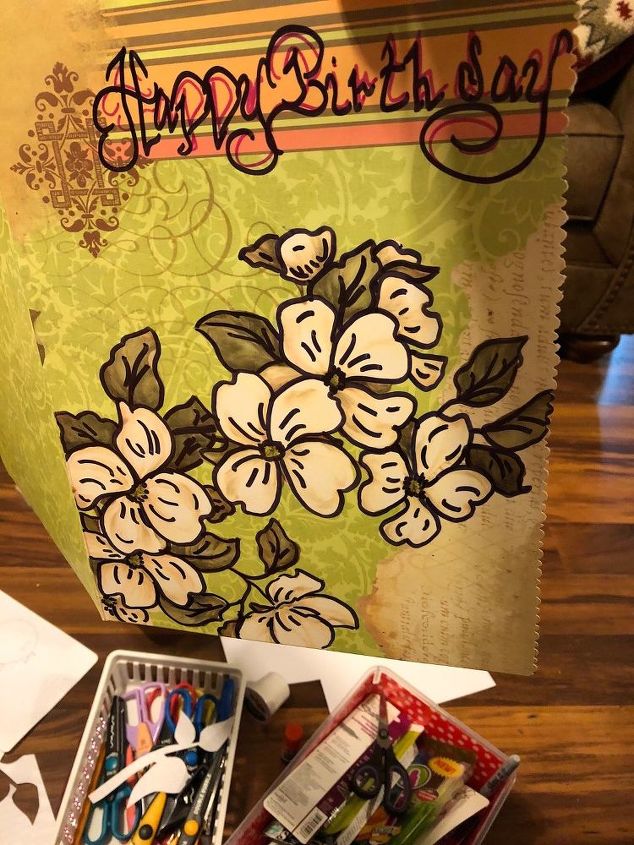
Since, I did not have any construction paper or colored poster board I used a decorative folder as the card. My assistant, Silvey is always close by.
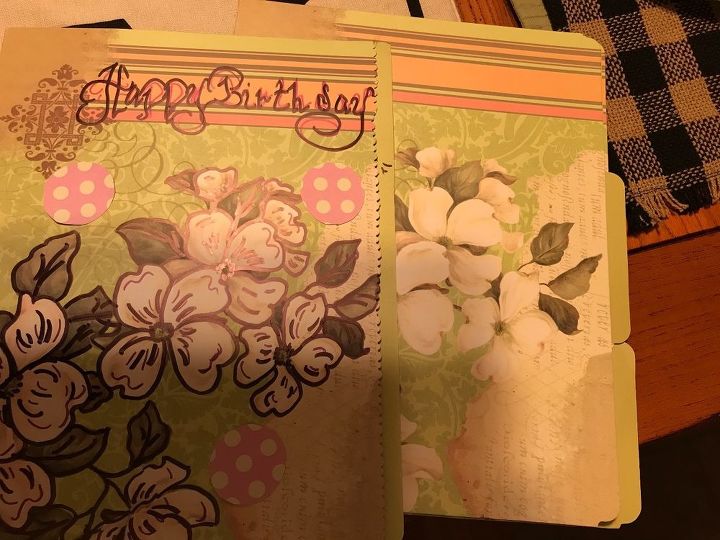
Next, with a ruler, I drew a line on the edge of the folder to remove the tab. I used craft scissors to cut the edge and add a special flare to the front edge of the card.
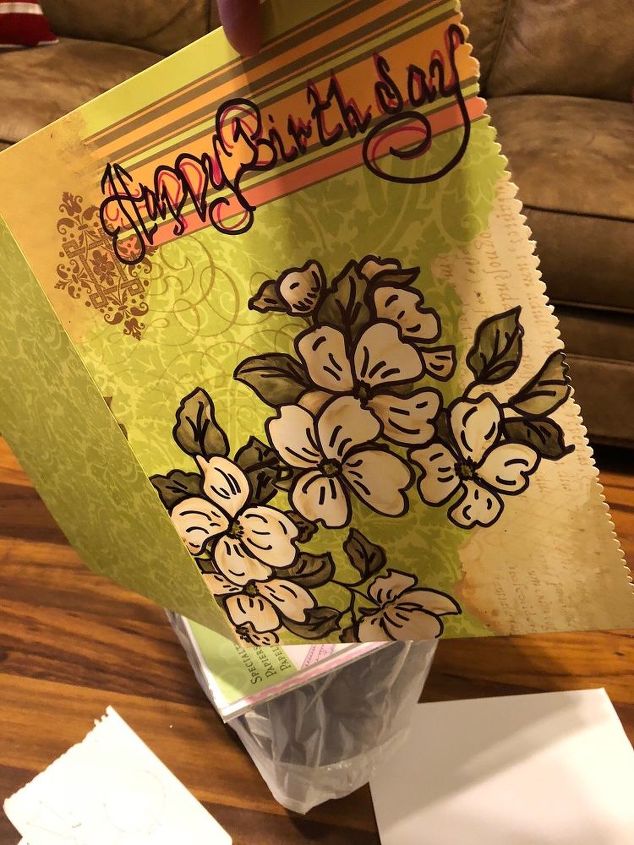
Outlining to enhance
To enhance the front of the card, I outlined the flowers and leaves in black Sharpie. I also wrote Happy Birthday at the top of the card.
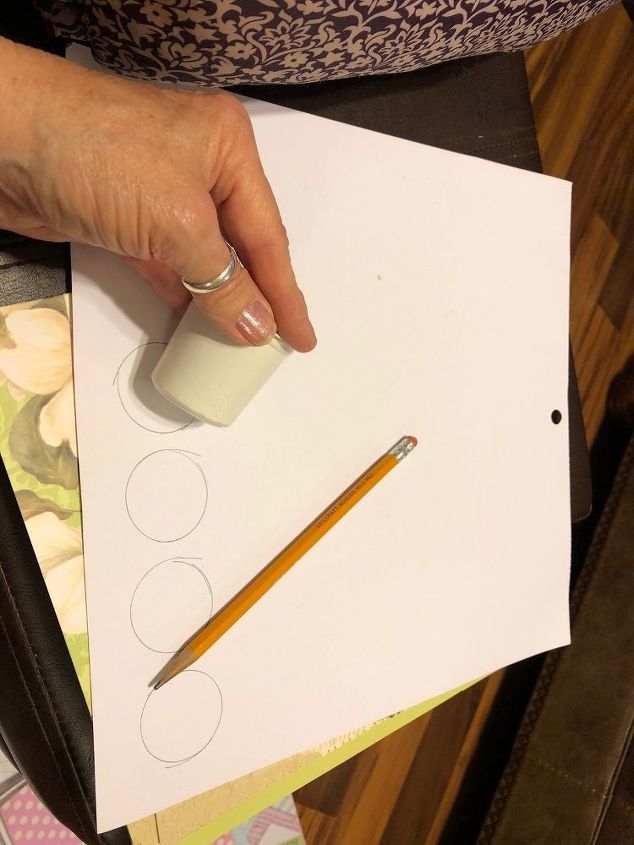
Then, I chose a pink polka dot paper for circles. I flipped the paper over and traced around the bottom of a coffee pod to make circles. One circle will be used for a flower on the inside of the card. The other circles will be glued to the front of the card to pull the designs together.
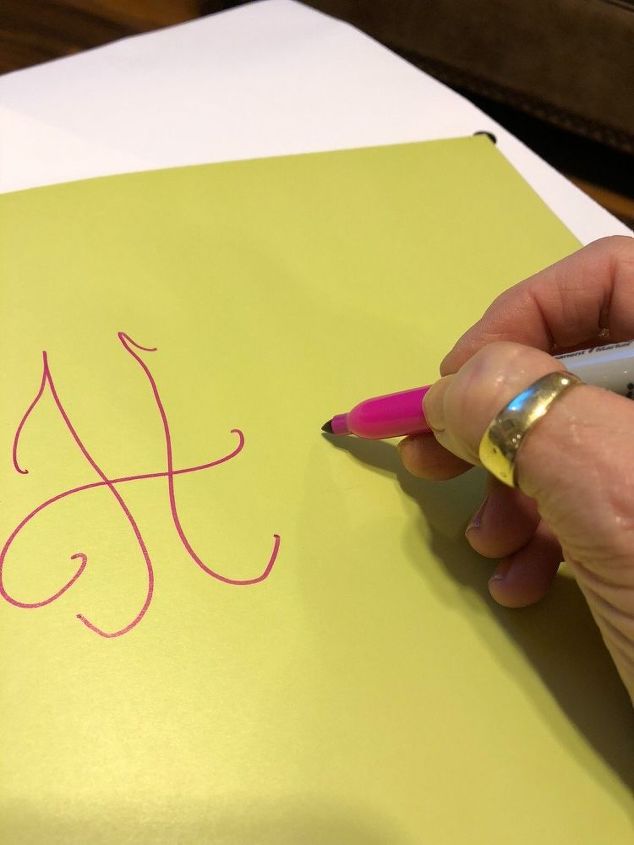
Next, I used a pink Sharpie to write Happy Birthday on the inside of the card.
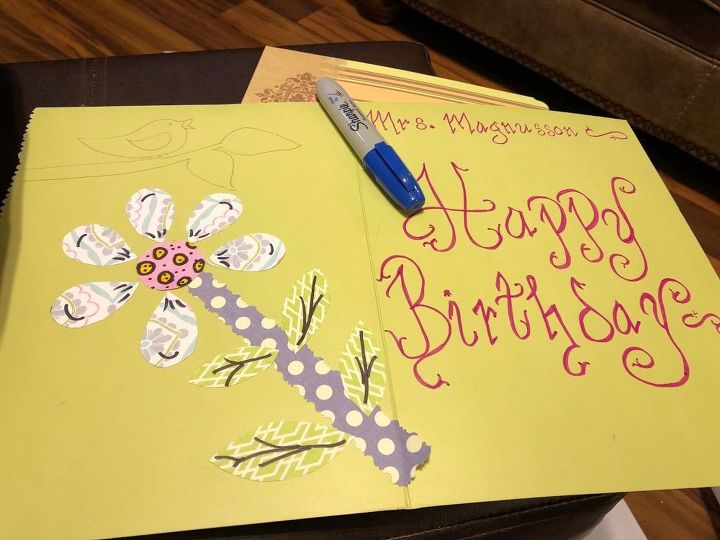
Then, I used more scrapbooking paper and drew a single flower with a stem and leaves and glued it to the inside of the card. I also drew a branch with a bird sitting on the top singing Happy Birthday.
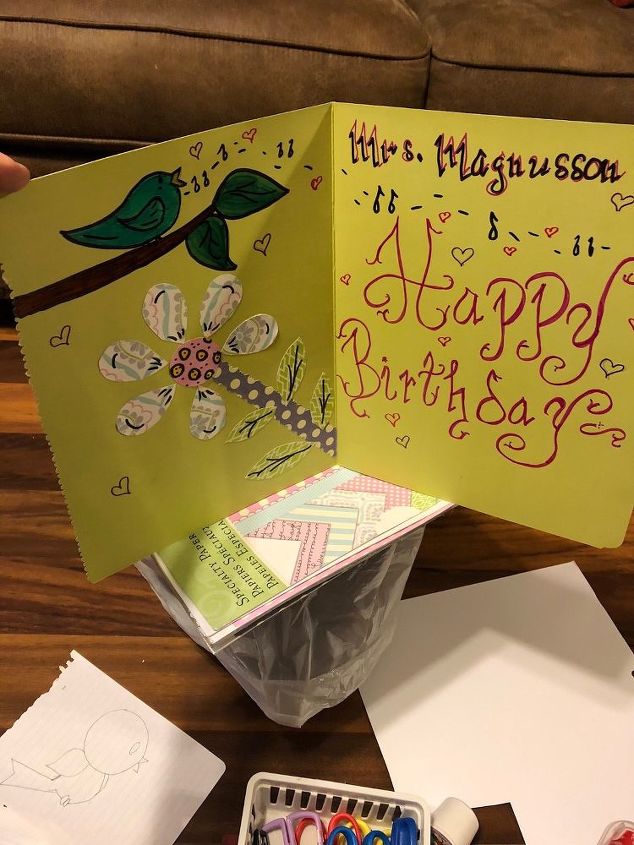
To finish, I used Sharpies to color in the bird, branch and tree leaves. Then I added musical notes and hearts to illustrate that the bird is serenading the birthday lady with love and a happy birthday song.
Need A Rainy Day Project?
This is a great rainy day project. Make several cards to have on hand. Ask your friends, children and or grandchildren to help. Showing you care will never go out of style. Use your imagination and make someone’s day! As long as we live, there will always be birthdays. Who can you share a special birthday card with or maybe a “just because card”? 💞
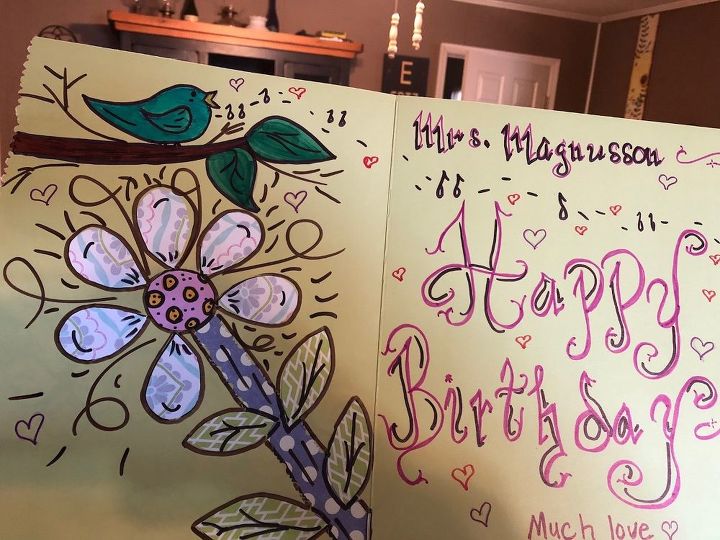
The flower needed something extra, so I used a black Sharpie to add a few curls and lines to around the outside.
Resources for this project:
See all materials


Any price and availability information displayed on [relevant Amazon Site(s), as applicable] at the time of purchase will apply to the purchase of this product.
Hometalk may collect a small share of sales from the links on this page.More info


Frequently asked questions
Have a question about this project?